Shaker Rocker
Jigs and story sticks ensure accurate joinery.
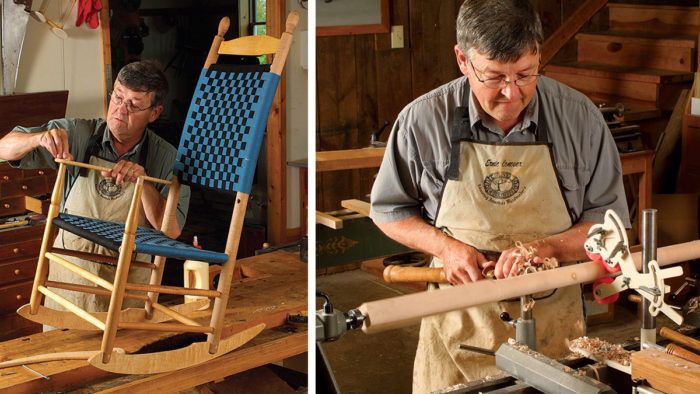
Synopsis: This Shaker rocker project is an ideal introduction for the woodworker interested in learning or perfecting spindle turning, steam bending, and other hand-tool techniques. All the parts, except for the arms, rockers, and curved back slat, are turned on the lathe. The back posts, back slat, and back rails are steam-bent using a shopmade steambox and forms. Shopmade jigs also help align the parts for accurate mortise-and-tenon joinery. The seat and back are woven with Shaker tape.
The Shaker rocker is one of the most recognized rocking-chair designs, and rightfully so. It has simple and attractive lines, it is economical to build, and, if designed properly, it can be very comfortable.
This chair also is a wonderful project in my woodworking classes because it introduces students to spindle turning, steambending, and a few important hand-tool techniques. The plans I use in class are an amalgamation of an early brethren’s rocker, which is detailed in John Kassay’s The Book of Shaker Furniture, and the rocking chairs made later at the famous Shaker production shop at Mount Lebanon in New York state.
I made a number of modifications to improve the strength of the chair, taking into account modern-day physiques. The original 13⁄8-in.-thick back posts are beefed up to 19⁄16 in. thick, and all of the seat rails and stretchers are about 1⁄8 in. larger in diameter than those on classic examples of the chair.
I also took some historical liberties with its design, incorporating features from various chairs produced by different Shaker communities. The arms and rockers are 1⁄2 in. thick and book-matched from the same figured maple board. The front arm posts have a ginger-jar profile and attach to the arms with a through-tenon and a mushroom cap. Finally, the back is woven with one curved back splat above.
Turn all of the spindles
Turning the various chair parts is fairly straightforward, but there are a few tips and tricks that will make it go easier. To begin, mill all of the stock for the rails, stretchers, and posts to length but just oversize in thickness so that you have some room for error when turning the delicate stretchers and rails to their final diameters.
This project requires you to be diligent and organized in the way that you mill and dimension the turning billets. Because there are so many parts that are nearly identical, varying only slightly in length and diameter, it’s wise to mark each piece as it’s made.
Steady rest prevents chatter—The long back posts require a lathe with 43 in. between centers. To accommodate that distance, I attached a bed extension to my Nova dVr 3000 lathe. a turning of this length also requires the use of a steady rest, which supports the post at the center to keep it from chattering. Steady rests are available commercially or can be made in the shop (see FWW #161, p. 34 and FWW #143, p. 14, respectively).
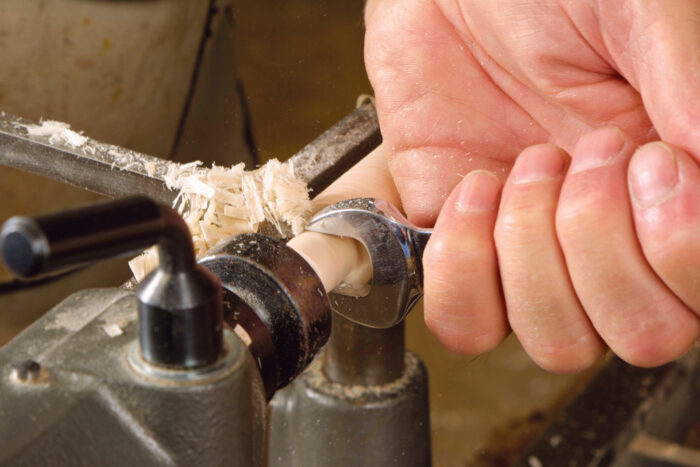
Size tenons with a wrench—Another turning trick helps produce consistent and perfectly sized round tenons, which will ensure a good glue bond when they are joined to the round mortises.
From Fine Woodworking #177
For the full article, download the PDF below:
Fine Woodworking Recommended Products

Bessey EKH Trigger Clamps

Blackwing Pencils



Log in or create an account to post a comment.
Sign up Log in