How To Build a Pie Safe
A 19th-century cook's companion adapts well to modern storage
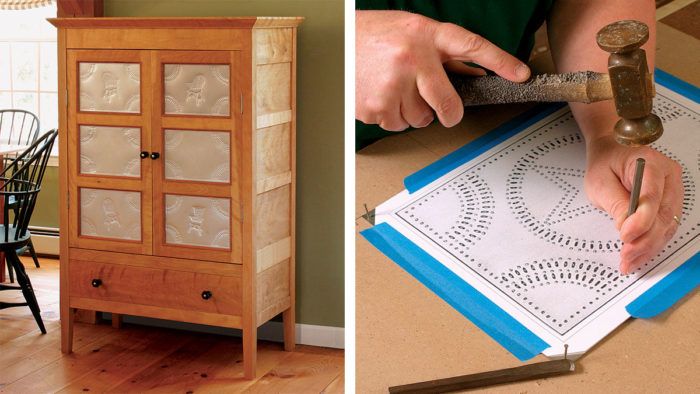
Synopsis: Because they were pieces of utilitarian kitchen furniture, most pie safes found in 19th-century kitchens were simple in design, usually made at home from local softwoods such as pine or yellow poplar and finished with paint. But there were some elegant hardwood pieces made in cabinet shops for families who could afford the very best. Michael Dunbar’s pie safe takes its inspiration from both types: He kept the simple design of the originals but made it a showpiece by using figured yellow birch. The joinery is uncomplicated but ambitious, with 48 mortise-and-tenon joints, most of which can be cut with power tools. The top features crown molding that you can make on the tablesaw, and the tin panels in front are hand-punched.
When my wife and I decided recently that we needed more room for her holiday dishes and large servingware, we agreed that an attractive way to store them would be in a hardwood pie safe. Although the first pie safes were built to protect cheese and baked goods in 19th-century kitchens, their simple design adapts comfortably to today’s more modern and more formal surroundings.
Being pieces of utilitarian kitchen furniture, most of the early pie safes were quite simple, sometimes downright crude. The average piece was made at home from local softwoods such as pine or yellow poplar and finished with paint. Still, some very sophisticated and elegant hardwood pie safes were made in cabinet shops for those families who could afford the very best.
This pie safe was inspired by the more formal examples. I kept the simple design of the originals but made it more of a showpiece by using figured hardwood— yellow birch with a flame figure.
The carcase is a large frame
Most of the joinery for the case can be tackled on the mortiser and tablesaw. The challenge is in staying organized while cutting the 48 mortise-and-tenon joints the piece requires. Make the mortises in the posts first. Because all the posts are identical, confusing them is a real possibility. Mark each with its location in the frame. Then identify the surfaces to be mortised. Finally, lay out the mortises. Check your work one last time before cutting. With the mortises cut, it is possible to cut and fit test tenons on a piece of scrapwood until you reach a setup that gives you a smooth, easy fit. Cut the rail tenons and dry-fit the frame under clamps so that you can check it for square.
For the side panels, I chose a birch board with a pattern of circles that resembled a string of pearls running up the center. It is a pattern I do not recall seeing before. Lay out the order of your panels in the board you choose and cut them to dimension. Identify the front surfaces and cut the rabbets. At the same time, cut the rabbets on the large pine panels for the back.
From Fine Woodworking #182
For the full article, download the PDF below:
Fine Woodworking Recommended Products

Dividers

Drafting Tools

Compass


Log in or create an account to post a comment.
Sign up Log in