Speedy Freehand Sharpening
Basic tips to maintain a bevel angle and cut your honing time in half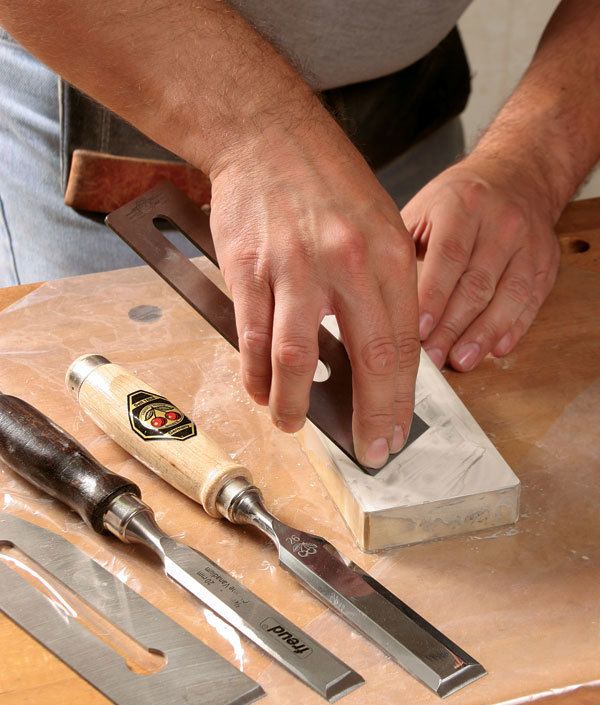
How to Sharpen a Chisel or Plane Iron Freehand
If it weren’t for commercial honing guides, many a modern woodworker would have a tool chest full of dull chisels and plane irons. Those little clamp-and-roller devices make it easy to hone a blade by holding it at a consistent angle while it’s pushed across a flat sharpening stone. The trouble is, honing guides add time to the sharpening process. And even though sharpening is time well spent, it’s also time not spent woodworking. That’s why I hone my chisels and plane irons freehand.
By setting aside the “training wheels” of a honing guide, I can work my way quickly through a half-dozen chisels and three or four plane irons in a single session. Working freehand allows me to move from the bevel side to the flat side of each tool—or to switch tools entirely—without setting up or removing a guide. In the same fashion, I can move from one grit to the next without slowing down.
The key to successful honing is maintaining a consistent angle so you can be sure each successive stone is reaching the very tip of the tool. A few basic techniques will help you maintain that angle without the help of a jig, cutting your sharpening time in half.
Choose a thick iron or a wide chisel for your first effort
|
|
| Flat back. New chisel blades should be dead flat on the back for at least the last inch or so before the tip; plane irons should be flat and smooth near the cutting edge. |
At any given bevel angle, a thicker blade will have a longer bevel than a thinner one. This makes a thick blade much easier to balance during freehand honing. I suggest practicing at first with larger chisels, say 1 in. wide, and thicker plane irons. Once you perfect the techniques, move on to smaller chisels (say, 1/4 in.) and thinner plane irons.
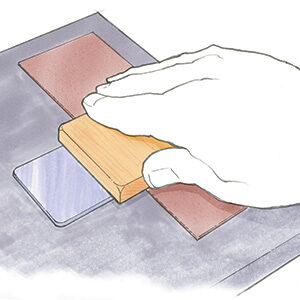
If you’re sharpening a new chisel or plane iron, your first step should be to lap the back of the tool flat using medium and fine-grit waterstones.
After hollow-grinding the bevel on a chisel or plane iron (a crucial step, see sidebar below), it’s time to hone. I use aggressive Norton waterstones, but oilstones or sandpaper on glass or granite also works. I start with a 1,000-grit stone, followed by 4,000 and 8,000 grits. Make sure the stones are flat before you start. I flatten stones by rubbing them against a 220-grit waterstone that I flatten on glass with silicon carbide powder.
Secret of Success: Hollow Grinding |
|
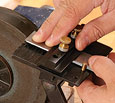
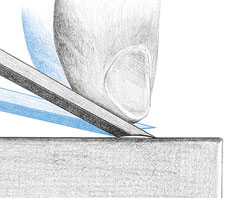
| In my experience, a hollow grind on a blade’s bevel is critical for honing freehand. A flat bevel rocks too easily, forming a convex shape that is nearly impossible to hold consistently against the stone. In contrast, a concave bevel has two contact points, so it is easy to maintain the correct angle (see image below).
When honing freehand, the grinding and honing are done at the same angle. I prefer a 30° angle for most of my plane blades and chisels. I use a slow-speed, wet-wheel grinder and a tool rest that adjusts easily to the proper angle. The smaller the wheel, the deeper the hollow. I like the 6-in. wheel on my grinder. If you use a dry grinder, work with a light touch and pause often to cool the tip. (If the steel overheats and discolors, it won’t hold an edge.) Continue to grind until the fresh surface reaches the whole bevel. |
 |
Hone the primary bevel on the pull stroke
Place the bevel on the far side of the sharpening surface, heel down. Rock the bevel forward until you feel the tip touch as well. The hollow grind creates a concave surface that has two contact points on the stone: tip and heel. So it is easy to feel when the blade is sitting properly.
|
|
| The hollow creates a stable platform. Start by resting the bevel’s heel on the stone, then rock forward until the tip makes contact as well. |
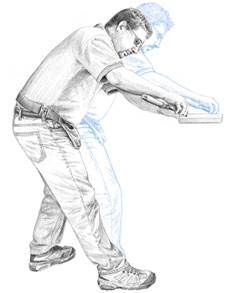
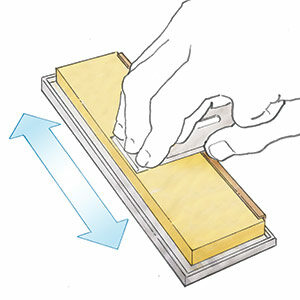
For best support, hold the blade with one or more fingers directly above the bevel area on the flat side. Also, hold the blade at an angle to the stone’s long dimension—as much as 45°. This increases the contact area’s footprint in the direction of travel, making it far easier to balance as you pull the tool. When pulling the blade toward you, concentrate on locking your wrist, elbow, and shoulder in one position. Changing any of these angles during the stroke is likely to pull one contact point of the tool (usually the heel) off the surface. Instead, pull the tool toward you by leaning back with your upper body and shifting your weight in the process from your front foot to your rear foot.
|
|
| The motion is all in the legs. Keep your grip and upper body locked. Pull the tool by shifting your weight from your front foot to your back foot. |
Also, be sure to come to a complete stop on the stone before lifting the tool off the surface. Lifting the tool while still moving is a sure way to create a convex tip.
Use all of the stone to keep it from wearing unevenly. Take one stroke on the far left side, one in the middle, one on the right, and so forth. After a few strokes (usually only three to five with my waterstones), take a close look at the bevel. You may see a few remaining burrs on the tip if you removed much metal while grinding; don’t worry about these. The key is that you should see a narrow band of flattened, polished metal at both the heel and tip of the bevel. The breadth of these bands is less important than making sure that the honed area reaches the edge. If in doubt, take a few more strokes. Avoid removing more metal than necessary, though; the goal is an edge that can be honed several times before you need to hollow-grind the tool again.
Don’t forget to hone the back
Before moving to the next grit, hone the flat back of the tool. This time, start at the near side of the stone and push the tool away from you.
|
|
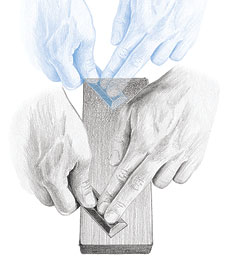
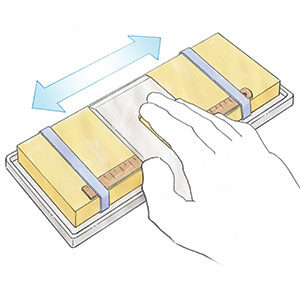
| Hone the back on the push stroke. Again the tool is skewed to the direction of the stroke. This helps prevent the trailing edge of the tool from lifting off the stone. |
On the push stroke, any burrs created by grinding and honing the bevel side are forced under the tool, cutting them off with just a few passes. In contrast, pulling the tool toward you folds these burrs back onto the bevel side, and you’ll need more strokes to remove them. There’s no need to lock your upper body as you did when honing the bevel; it is relatively easy to keep the blade’s back flat on the stone, especially if you hold the blade on an angle to the path of travel. Holding the blade perpendicular to the long dimension of the stone can result in rocking, which leads to a convex back.
Also, avoid lifting the flat side of the blade off the stone while it’s still moving. Doing so puts a microbevel on the blade’s tip. This won’t stop the blade from cutting, but it will effectively halt the process of honing the back. In future honings, you’ll assume the tip is touching the stone on the back when it is, in fact, above the stone’s surface.
|
|
| Come to a complete stop. Don’t lift the tool from the stone until you’re done pushing forward. Otherwise you risk creating a microbevel that will complicate further honing. |
To prevent this error, first come to a complete stop at the end of each stroke. Then lever the blade off of the surface by pushing down on the portion of the tool that’s hanging off the edge of the stone. When I’m honing the flat side of a chisel, you’ll hear the handle tap on the table next to the stone as I do this.
After a few strokes, feel the back with your finger, rubbing toward the tip to check whether the burr from honing the bevel side is gone. Once there are no remaining burrs on the back, you’re ready to move to the next grit.
I then repeat this short process on my 4,000-grit stone, honing both bevel and back to reach an acceptable level of sharpness for most work. Repeating on 8,000-grit will bring the cutting edge to razor sharpness that will shave hair off your arm. Save this for plane irons and for working end grain with any tool.
Back to the grind
|
|
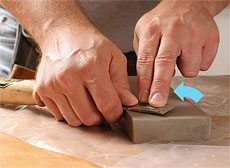
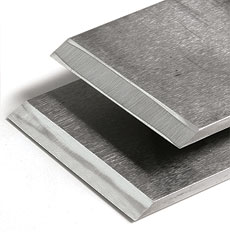
| A fresh edge is tops. The iron on top is freshly hollow-ground and honed, ready for use. The iron underneath has been honed repeatedly until the hollow grind has all but disappeared. It is ready to be reground. |
When your tool’s edge gets dull, you’ll begin to see small nicks or a tip that reflects light at its very edge (meaning it is slightly rounded). To get a fresh edge, repeat the above steps without the hollow grinding. At some point, though, you’ll need to return to the grinder. This is because each time you hone a tool, you expand the polished, flattened surfaces at both the tip and the heel, filling in the hollow between them and leaving too much metal for your finest stones to handle.
Narrow chisels and thinner plane irons will need hollow grinding more often as the shiny areas at tip and heel will meet after fewer honings, but some of my larger blades can be honed many times in between grinding sessions. As long as some of the original hollow grind is left, I keep honing without regrinding. But once the two shiny areas meet, it’s time to go back to the grinder and establish a new hollow.
Excerpt from Cut Your Honing Time in Half from FWW #199.
Photos: Steve Scott; drawings: John Tetreault
More from FineWoodworking.com:
- Sharpening Machines
- Sharpen Your Spokeshave
- Sharpen Your Own Backsaw
- Sharpen a Card Scraper
- Sharpen a Scrub Plane Blade
- Sharpen a Molding Plane
- Sharpen a Router Plane Blade
Fine Woodworking Recommended Products
Norton Water Stones

Wen Diamond Grinding Wheel

Honing Compound





Log in or create an account to post a comment.
Sign up Log in