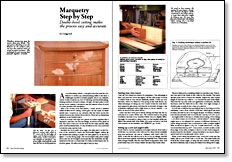
Marquetry Step by Step
Double-bevel cutting makes the process easy and accurate
Synopsis: After a lot of trial, error, and advice, Gregg Zall came across a method of marquetry called double-bevel cutting, which gives small, accurate details and no distracting gluelines. He explains how to do it, from cutting your own veneer to setting up a saw and angled table, designing the inlay, overlaying and piercing, shading with sand, and finishing. You’ll need no clamps or tape for this method, and photographs clearly show each step.
At woodworking school, I was given the time and the confidence to stretch my cabinetmaking skills to the limit. I challenged myself to include graphic arts in my cabinets, which would combine my love of drawing and furnituremaking. Painting surfaces seemed a shame, though, because paint covers up the wood. Instead, I decided to use the natural colors of wood to create pictures with marquetry.
After a lot of trial, error and advice, I came across a method called double-bevel cutting, which gave me the small, accurate details that I wanted on my cabinets, like the birds across the drawer fronts in the cabinet shown above. There are no distracting gluelines in the finished piece.
How is it done? First tape two pieces of veneer together like a sandwich, and then cut out your design, as shown in the photo at left. The trick is that you cut the hole for the inlay and the inlay piece itself simultaneously, so any deviation in the cut is mirrored in both the inlay and the hole.
Because the cut is made at an angle, the inlay piece on the bottom of the sandwich comes out fractionally bigger, taking up the sawkerf and making a perfect fit when glued in, as shown in figure 1 on the facing page. The bevel-edged inlay piece snugs down into the bevel-edged cutout just like the underside of a fiathead screw fits into a countersink. It’s really not that hard to do. So if you’re game, I’ll walk you through it step by step.
Sawing your own veneer
I use my own hand-cut veneers for marquetry. One advantage is that I can pick the wood and figure. All the odd scraps of wood I couldn’t bear to toss out are suddenly usable. I have my own favorites, which I’ve listed by color group in the chart above. Another advantage of cutting my own veneer is that the extra thickness makes the glue joints, and thus the work itself, stronger. I use a bandsaw equipped with a high fence to cut my veneers in. thick, as shown in the photo above.
I joint one face of the stock before sawing and then use the veneer just as it comes off the saw. The veneers need to be pretty consistent. Because every bandsaw blade cuts at a slightly different angle, it’s essential to clamp a fence to the bandsaw table parallel to the natural drift of the blade.
From Fine Woodworking #112
For the full article, download the PDF below:
Fine Woodworking Recommended Products

Whiteside 9500 Solid Brass Router Inlay Router Bit Set

Bahco 6-Inch Card Scraper


Log in or create an account to post a comment.
Sign up Log in