Finishing Walnut
Dyes and glazing bring out the best in this traditional hardwood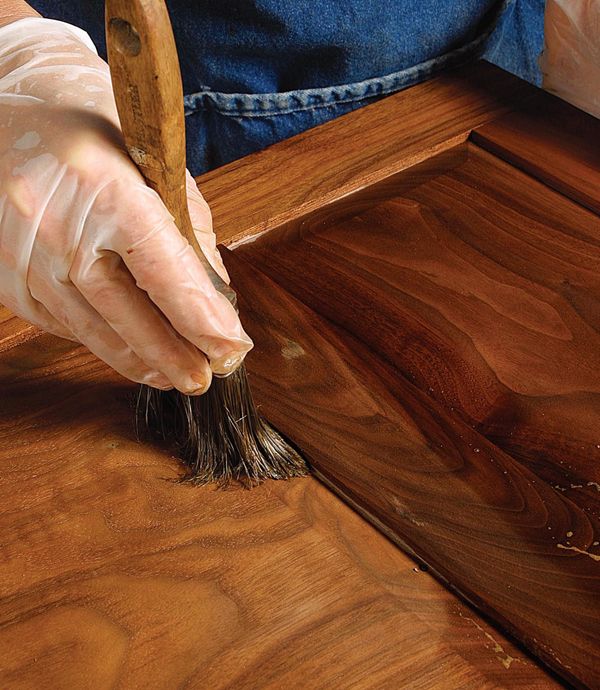
Synopsis: Black walnut has a lot going for it: It cuts and sands well, accepts stains without blotching, and often has attractive figure. But it can be frustrating to finish, because the creamy colored sapwood contrasts with the dark heartwood. Commercial kiln-drying aims to fix the problem, but ends up stripping the heartwood of its rich color. Finishing expert Jeff Jewitt demonstrates how he uses dye to blend the contrasting sections and to give the wood a rich, deep color. Included are tips on how to tell what the wood will look like with a clear finish, how to conceal the sapwood, how to add age and depth to the piece by using a glaze, and how to seal in the color with topcoat when you are done.
It’s no mystery why so many antiques are made of domestic black walnut: It cuts and sands well, accepts stains without blotching, and can have attractive figure. However, there are two reasons why today’s woodworkers sometimes are frustrated with walnut’s appearance. Harvesting of smaller trees means that a greater number of boards incorporate sapwood, whose creamy color contrasts with the dark heartwood. Most commercial walnut is steamed and then kiln-dried, which darkens the sapwood but robs walnut of the richer colors seen in air-dried lumber.
To eliminate these problems, I apply dye to blend the sapwood into the heartwood and to give the whole piece a warmer tone. The first dye is sealed, then a second coat of dye provides a rich, deep color. The piece can be finished with a clear topcoat.
Warmer, more uniform color
If you wipe bare walnut with mineral spirits or alcohol, you can see what it will look like with a clear finish. Kiln-dried walnut, either solid or veneer, likely has a grayish color. You also may notice that different boards have contrasting color tones. Linseed oil, varnish, and shellac, because of their natural amber color, mitigate the first problem, but a better way to achieve tonal uniformity is to stain the entire piece.
Apply the base stain—The best way to start making different boards (or a combination of solid lumber and veneer) look more uniform is to apply a base stain to the piece. You can spray a non-grain-raising (NGR) or alcohol-based stain and save application and drying time. A water-based dye applied by hand dries more slowly, but it reduces the chance of streaking.
If you had to blend in the sapwood (see the story on p. 35), wait until that dye has dried and then apply a base stain of golden brown to the entire piece. Dilute the dye to the desired strength. In this case, I used 1⁄2 oz. dye to 1 quart water. As when applying dye to the sapwood, use a small piece of cloth to color the large areas and an artist’s brush for crevices and corners. To force the dye onto the parts of raised panels within the frame, use compressed air. Using this method will prevent a strip of pale wood from appearing when the panel shrinks seasonally.
From Fine Woodworking #176
For the full article, download the PDF below:
Fine Woodworking Recommended Products
Foam Brushes
Waterlox Original




Log in or create an account to post a comment.
Sign up Log in