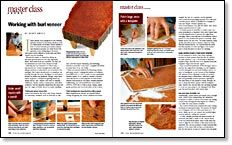
Working with Burl Veneer
A difficult material requires special handling to achieve its potential
Synopsis: Custom furniture maker Scott Grove explains how he flattens burl veneer sheets and patches imperfections with a veneer punch or a hand-made template. He also details the intricacies of joining sheets with wavy, almost invisible seams. Sanding and finishing are the final steps.
I have always been intrigued by the swirling patterns in burl-wood veneer. Each is a oneof-a-kind mural by Mother Nature herself. If burl wood is selected, processed, seamed, and finished properly, no other wood will generate such striking figure. However, burl veneer can be difficult to work with and often requires special handling.
Burl-wood veneer is created by slicing an abnormal growth mass in a tree into paper-thin sheets. Man-made burls are available, but they are reconstituted and dyed from cheaper woods.
Selecting the best material is a critical step. I buy most of my veneer through mail order and always purchase an extra leaf to use as backup or for patching. The veneer should arrive in sequence. As you flip through the stack, the figure on each piece should be similar but gradually change. Label each leaf in sequence to keep from getting mixed up during layout. Also, inspect each leaf for flatness, brittleness, checks, surface compression, and other inclusions. Cull the imperfect sheets from the stack and tape the edges of brittle sheets for easier handling.
Flatten and patch veneer first
Veneer first must be flat to be used. Some veneers are inherently wrinkled, such as olive ash or oak burl, and will require flattening and softening. However, most that come from a supplier should be no more than 1⁄2 in. out of flat.
There are several methods for flattening veneer, and many involve soaking the sheets in a solution (see FWW #167, p. 120). I prefer to buy a premixed product called GF-20, made by Borden. It doesn’t cause the leaves to stick together as some homebrewed concoctions do. For minor, isolated instances of flattening, use a household iron set at about 150°F to 212°F dry or with a steam setting. Apply gentle pressure and iron both sides of the veneer.
From Fine Woodworking #177
For the full article, download the PDF below:
Fine Woodworking Recommended Products

DeWalt 735X Planer

AnchorSeal Log and Lumber End-Grain Sealer

Ridgid R4331 Planer


Log in or create an account to post a comment.
Sign up Log in