Machine Dovetails by Eye
Cut perfect pins on a simple tablesaw jig; finish up with a bandsaw
Synopsis: Jeff Miller uses his tablesaw and bandsaw to make dovetails that look hand-cut. He made a tablesaw jig that is fast to set up and helps him cut dovetails of any size and spacing, and it works well in a limited production setting. He explains how to cut the pins with the jig and how to set the width. Then he explains how to use the bandsaw to cut the tails. There are tips on what to do if the joint is loose and how to cover your tracks.
From Fine Woodworking #120
I like cutting dovetails by hand, but the nature of my business doesn’t let me stay in practice. And I admit, I tend to lose a little accuracy when I’m out of shape. I’ve tried router jigs, but I’ve never found one I like. I find them fussy to set up, and to my eye, router-cut dovetails never look as good as those cut by hand.
Some years ago, a friend showed me a way to use my tablesaw and bandsaw to make dovetails that look hand-cut. The jig is surprisingly fast to set up, and it lets me cut dovetails of any size and spacing. It’s not a production jig, but it’s fast enough to use in a professional shop, and it works well in limited production situations. Disadvantages? The quality of the fit will depend on your ability to cut accurately to a line. But I like that; I find it far more satisfying than using a dovetail jig. In some ways, this is still a hand-cut procedure (I can hear the traditionalists howl). The finished joint certainly looks as if it’s been hand-cut.
A simple jig cuts the pins
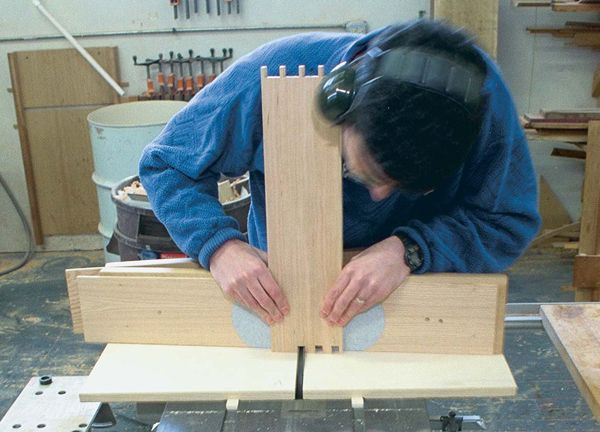
The key to this method is a tablesaw jig for cutting the pins. Two fences angled to a narrow V-shape are mounted on a sled that runs in the miter-gauge slots of my tablesaw. I make the pins in two passes over a 1⁄2-in. dado cutter. With the first pass, I cut one side of each pin. Then I rotate the sled and cut the other side. I use the pins to mark the tails before cutting them on the bandsaw.
The base of the sled is made of 3⁄4-in. plywood, 18 in. wide by 30 in. long (see the drawing). The runners for the miter slots are glued into shallow dadoes on the bottom of the sled. To ensure the dadoes are parallel to one another, I run the same edge against the fence while cutting each dado.
The fences are set at 6° off a line drawn perpendicular to the blade, which gives a pin angle of 6°. This is a 9:1 ratio. I picked that angle simply because I think it looks best. I recently discovered the jig I had been using for years had one fence set at 6°, the other at 8°. I never noticed until I measured it for drawings. The lesson: Don’t worry too much about the angle.
From Fine Woodworking #120
For the full article, download the PDF below:
Fine Woodworking Recommended Products

Marking knife: Hock Double-Bevel Violin Knife, 3/4 in.

Festool DF 500 Q-Set Domino Joiner

Suizan Japanese Pull Saw


Log in or create an account to post a comment.
Sign up Log in