Federal-Style Stringing and Banding
Embellish a Federal card table in the traditional style.
Synopsis: In this Master Class, Steve Latta describes how to veneer the feet of the Federal-Style Card table; how to add banding to the apron and the feet; and how to inlay black-and white stringing in the apron and the legs. Detail photos illustrate each step. The article concludes with sources of supply for routing accessories, veneer, and inlays.
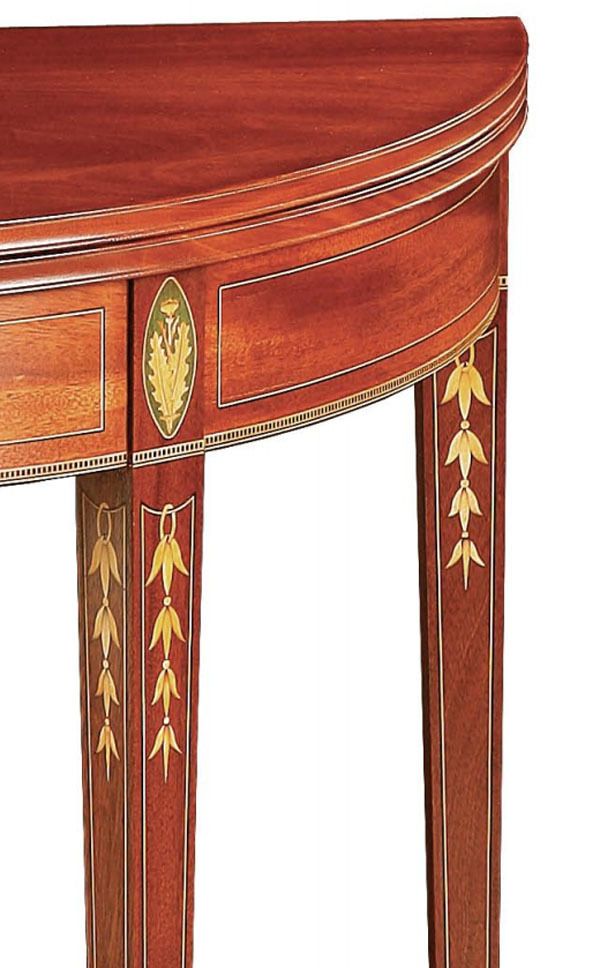
The card-table project in this issue (pp. 54-63) contains many of the finest motifs from Baltimore Federal-style furniture. In this Master Class I’ll describe how to veneer the feet of the table; how to add banding to the apron and the feet; and how to inlay black-and-white stringing in the apron and the legs. In the next Master Class (FWW #182, February 2006), I’ll guide you through inlaying the bellflowers and the thistle oval paterae that adorn the pilasters of the legs.
You can inlay the lower part of the legs before or after you fit them to the apron. But you must fit the legs before you add the banding and the oval paterae, because their location will be determined by the location of the leg in conjunction with the apron. For more on creating the oval thistles, see “Federal-Style Oval Inlays” (FWW #138, pp. 70-75).
Banding and stringing adorn the apron
Before creating the relief for the waist banding along the lower edge of the apron, I run a scoring line with my slicing gauge to prevent tearout. I then use a Dremel fitted with a purfling roller that comes with the Stewart MacDonald router base (see Sources of Supply, p. 106).
I make my own banding using similar methods to those shown in FWW #166, pp. 116-120, but you can buy it readymade. To secure the banding, apply glue, tape it in place, and then use a caul made from a strip of 1⁄8-in. bending ply or a thin steel ruler covered with clear packing tape. Use several spring clamps spaced closely together. When the glue is dry, carefully scrape and sand the banding flush with the apron.
Match the leg banding to the apron—Slide on the leg. Referencing off the bottom of the apron, carry the lines for the banding across the sides and face of each leg. Remove the leg, score the outside lines with an X-Acto knife, pare away most of the recess with a narrow chisel, and use a router plane to take the channel to a final, uniform depth.
When fitting the leg banding, take your time and keep the pattern consistent. I miter the corners using a plane iron referenced off a 45° wooden block. Cut the long section that runs across the face and then add the two short returns. Put a thin film of glue in the channel and hold the banding in place with clear tape. After the glue has dried, level the banding flush to the surface of the leg.
Grooving the apron panels—Although I typically use hand tools to cut grooves for stringing, the width of this particular black-and-white stringing caused me to change gears. I again used my Dremel fitted with the router base and a shopmade concave base. Made from 3⁄8-in.-thick medium-density fiberboard (MDF), the base doesn’t have to match the arc of the apron perfectly; just so that it rides on each end and doesn’t rock. I used a specially designed 1⁄16-in. spiral end mill with a very short cutting length to reduce chatter. I applied a fence to this base for the horizontal sections and then rode an auxiliary fence clamped to the apron for the vertical elements.
Creating the two-tone stringing—This is made by laminating 1⁄32-in.-thick layers of holly and ebonized pearwood veneer. Spread yellow or white glue with a paint roller and clamp firmly. I joint an edge on the jointer or with a block plane, and then slice off pieces of stringing using a shopmade jig and slicing gauge. The jig is simply a piece of 1⁄2-in.-thick MDF with a fence glued to one side that stands a little proud of the surface. This lip serves as a stop for the veneers.
Because the two-ply veneer often is erratic in thickness, I draw the stringing through a shopmade thicknessing tool. This consists of a block of maple with about a 1⁄2-in.-deep sawkerf cut in the top. I rout a shoulder about 1⁄8 in. deep and 5⁄8 in. wide and insert a piece of scraper blade. This has two sets of oblong slots to make it adjustable and a 45° bevel returning back from the face. The thickness of the stringing is set by adjusting the blade in relation to the kerf.
The stringing is pulled through the slot and scraped to an even thickness on the edge of the steel. Once sized, the stringing fits easily into the groove.
Fitting the stringing—Because the stringing is two-tone, all corners must be mitered. Use a glue syringe to apply a fine film to each side of the recess and press the stringing into the channel. Be careful not to press the stringing below the surface of the apron. When the glue is dry, take a card scraper and scrape the inlay close to the surface.
Leg inlay ends at cuffed feet
Apply the stringing in the legs in the same way as the apron. Ride a fence along the outside edge of the leg to cut the straight grooves. A pattern is used for the arch at the top of the column. Simply extend the bit out from the base and use the shank riding along the pattern to guide the cut.
The stringing for the arch is made from individual pieces of black-and-white veneer, sliced to width and glued up around a curved form. Insert the arched inlay first, mitering the ends, then cut and insert the long sections. Scrape the stringing nearly flush with the leg and pare the inlaid arch with a sharp chisel.
To avoid surface undulations, I don’t do the final sanding until all the inlay in a particular section is in place.

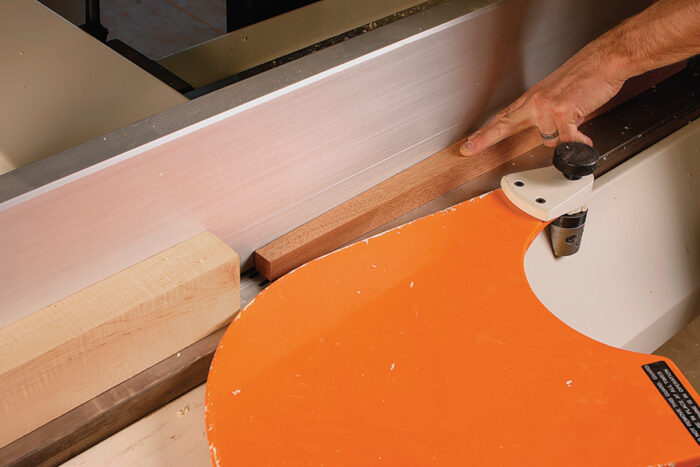
Veneer the black feet—Beginning with the rear of the leg, set the jointer to the thickness of the ebonized veneer. Remove the arc left by the cutterhead with a chisel, and glue and clamp the veneer. When dry, cut the veneer flush to the sides of the leg with a veneer saw or knife, and repeat the process on the sides of the leg. Finish by facing the front of the leg. You can afford to be a little sloppy at the top because the cuff banding will cover the transition. Bevel the veneer at the base of the leg to reduce the risk of it catching on the floor.
Add the cuff banding—When laying out the cuff, use a bevel gauge but remember that all of the faces aren’t tapered, so register off the end of the leg to avoid misalignment. Once you’ve recessed all four sides, miter the cuff segments, keeping the pattern continuous. Place a joint at the back of the leg in case the pattern doesn’t quite line up.
From Fine Woodworking #180
For the full article, download the PDF below:
Fine Woodworking Recommended Products

Drafting Tools

Circle Guide

Dividers


Log in or create an account to post a comment.
Sign up Log in