Tenoning Strategies
Gary Rogowski offers a number of methods to cut a tenon with hand or power tools.

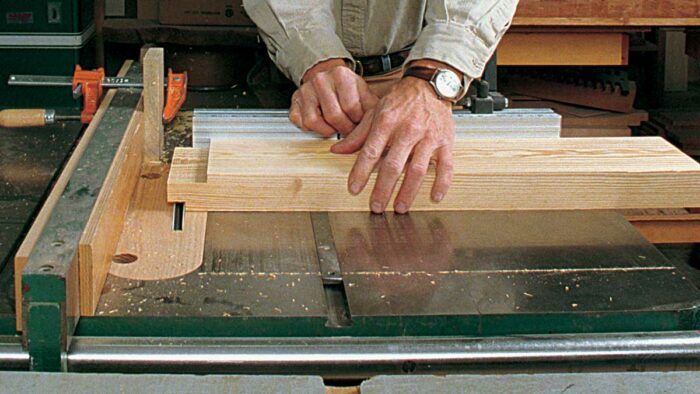
Synopsis: Gary Rogowski offers an introductory look at tenons, detailing six variations of the ubiquitous joint, and offers a number of methods to cut a tenon with hand or power tools. If you have a limited number to cut, use his quick lesson on cutting a tenon with hand tools – you’ll need a marking gauge, backsaw, shoulder plane, and chisel. If you have to cut a number of tenons try one of his power tool methods, using a bandsaw, a radial-arm saw, a tablesaw, or a router.
The mortise-and-tenon joint might be the most relied-upon joint in furniture making. After all, a well-fitted tenon can mean the difference between a sturdy table and an embarrassingly wobbly project. Cutting tenons can be approached from a dozen different directions, and the approach you take depends on your tools and how you like to use them. Some folks love the precision and power of their saw or router; others prefer the more contemplative whoosh of a backsaw and hand plane. The method you choose will determine your speed and the risk factor.
A tenon should fit tightly in a mortise—snug, like a good shoe put on with a shoehorn— not like a ragged old sneaker that you can flip off and across the room as you’re sitting down. Regardless of the cutting method you choose, aim for a joint that is loose enough to put together by hand but tight enough that it takes a few mallet taps to get it apart. Leave room for a little bit of glue in the joint, and always cut tenons just shy of the depth of the mortise so there’s a gap at the bottom of the joint for excess glue.
Remember that accuracy comes from the patient hands of the builder and that precise joinery depends upon accurate millwork. If your millwork is sloppy—if your stock cups, warps or doesn’t have parallel faces—you’ll have trouble cutting accurate tenons, no matter what method you choose.
Also, I never cut mortises or tenons without first planning ahead on paper, even if it’s just a quick sketch. It’s better to risk a few simple eraser smudges on paper than to waste precious wood. A sketch will help you locate the joint for the most strength and best look. For strength, a tenon should be at least one-third the thickness of the stock to ensure there is enough material to support the joint.
Cutting tenons by hand
In these days of machines, it may seem a waste of time to cut a tenon by hand, but if you have only a few tenons to cut, you may be surprised by how much set-up time you can waste with some machines. When I have to cut only a few simple joints, I’ll often reach for a backsaw and a shoulder plane.
Hand-cut tenons require careful setup and layout. Your method may involve using a marking gauge and square, a mortising gauge or a pencil and square. But whatever your method, be consistent with your approach and always be dead-on accurate. Even if you are using machines to cut tenons, If it takes more than hand pressure or a few light taps with a mallet, the fit of the tenon is too tight. And if there’s too much slop, you’re expecting too much of the glue you use. To ensure that the glue adheres well, make sure all faces are clean and smooth. Cut tenons just shy of the mortise depth to allow for excess glue. Whether you’re building a chair or a desk or fitting together a frame-and-panel door, chances are there’s a tenon designed to solve your joinery problems. the same guidelines for marking out hold true.
For a few simple joints, cut tenons by handIf you’re cutting only a few small tenons, it can be faster (and quieter) to cut them by hand rather than to set up machines. No matter what method you use, careful layout is key.   
|
Use a marking gauge to mark the length of the tenon across its shoulders. Then establish the thickness of the joint by marking out the position and thickness of the tenon. If you cut a in.-thick mortise in the center of a door stile, for example, lay out a in.-thick tenon centered in the thickness of the door rail. Offset or unequal shoulders become necessary when two tenons meet inside a leg.
 From Fine Woodworking #142
To view the entire article, please click the View PDF button below.
Fine Woodworking Recommended Products

Pfiel Chip Carving Knife

Leigh Super 18 Jig

Veritas Standard Wheel Marking Gauge


Log in or create an account to post a comment.
Sign up Log in