How to Fix Damaged Finishes
Scrapes, scratches, water marks, dents and dull finishes are not fatal
Synopsis: Finisher Jeff Jewitt explains in this article how to test the finish on your damaged piece to how to begin fixing it. He details different repairs for different types of damage, including scrapes and scratches, gouges and dents, water and heat marks, and dull and dirty finishes. He even advises what to do if you’re leery of making the repairs at all.
Different wood finishes vary greatly in how well they protect furniture and in how long they last, but they are all subject to the forces of light, moisture, air and general wear and tear. Sunlight, heat and water remain the biggest enemies of finishes, but moving companies, puppies and feisty 2-year-olds contribute their share of damage as well.
To repair an injured finish, you first need to identify which type of finish you’re dealing with. Evaporative finishes, such as nitrocellulose lacquer and shellac, are the easiest to repair because any new finish will melt right into the old finish. Reactive finishes, such as varnish, are more difficult because new topcoats don’t blend in with the existing ones.
You can identify an old finish with a two-step test using different solvents. Find an inconspicuous spot and dab a little denatured alcohol on the finish. After 30 seconds, press against the dampened area with some tissue paper. If the tissue sticks to the finish, it is shellac. If the alcohol doesn’t affect the finish, try the same test with a little lacquer thinner. If the tissue still doesn’t stick, the finish is probably an oil-based varnish, a polyurethane or a newer catalyzed finish. Once you know the type of finish and how it was damaged, you can decide what to do to fix it.
A final note: If you think a piece of furniture is valuable, you may want to consult a professional; or you can simply wax it to avoid the possibility of permanent damage to an old patina that may add value to the furniture.
Scrapes, areas of finish and color removed from edges, are generally easier to repair than scratches, which occur in the center of a side or top and must be stripped and refinished. The first step is to determine if it’s only the finish that’s damaged or if part of the color is gone, too. Wet the damaged area with naphtha. If the wet surface blends in with the rest of the finish, you only have to repair the finish.
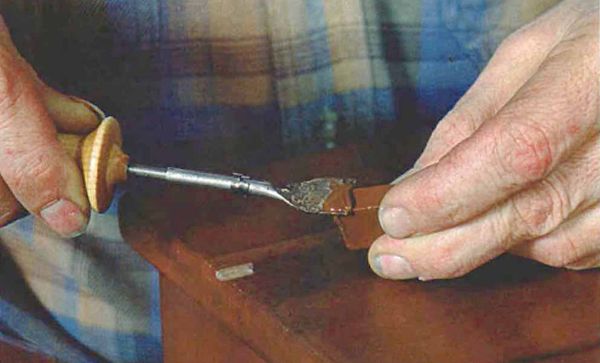
If both color and finish are missing, the naphtha will make the scrape appear lighter than the rest of the finish. In this case, you’ll need to replace the original color first, then apply finish. The easiest way to replace color is to use a felt-tipped repair pen. The color selection is limited, but you can apply several different colors to achieve a match. A more difficult method is to mix some dry pigment with shellac and paint it in with a fine artist’s brush.
From Fine Woodworking #149
For the full article, download the PDF below:
Fine Woodworking Recommended Products

Odie's Oil

Starrett 12-in. combination square


Log in or create an account to post a comment.
Sign up Log in