How to Cut Flawless Curves on the Bandsaw
Learn some tricks and tips for making surprisingly smooth bandsaw cuts.
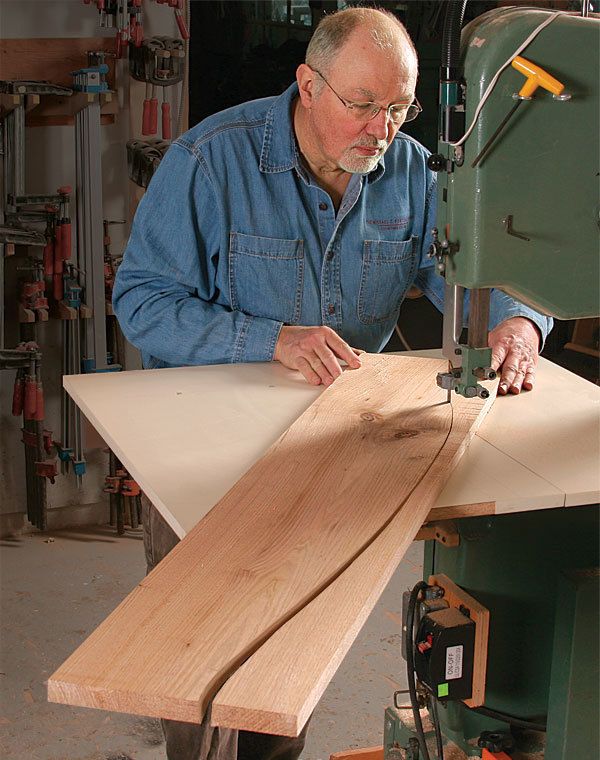
Synopsis: Learn how to cut curves on the bandsaw so smooth and flawless that they require very little smoothing and sanding afterward. Michael Fortune gathers his top tips for cutting curves, from choosing the right bandsaw blade to setting the tension and guides correctly. One of his neatest tricks is a method for slightly twisting the workpiece so that you can make a smooth cut and stay exactly to the line, every time. Tips for cutting compound curves and for flawless smoothing are also included.
I have exhibited my work for many years and have noticed that people respond to curves. They’ll stop, look, and then run their hands along the curved edges of a piece. Square furniture rarely invites this personal interaction.
I use all manner of curves in my work, from irregular, free-form curves to regular curves with exact radii. All of them must be free of irregularities that could catch the light unevenly or be easily detected when you pass your hand along the edge. The fastest way to cut curves is on the bandsaw. The bandsaw is a crude machine, however, and the results can be rough, with major smoothing and sanding required. I will show you how to cut curves on the bandsaw so smooth and close to the line that they require very little cleanup afterward.
The first step to cutting attractive curves, whether true arcs with a single radius or irregular, flowing curves, is knowing how to draw them. I cover that in Fundamentals on pp. 24-28.
Success starts with setup
Match the blade to the curve
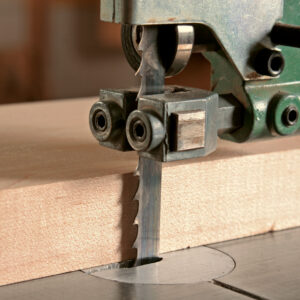
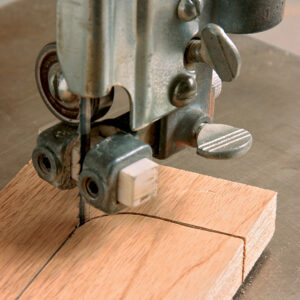
A coarse blade for a smooth cut. For all bandsaw cuts, including curves, a coarse blade like this 1/2-in., 3-tpi model will run cool and track a line more effectively than a fine blade. The finer blade will run hotter and will clog with sawdust quickly, making it wander.
 |
 |
Tighter curves require narrower blades. For example, a 1/2-in.-wide blade won’t make it around a 1-in. radius.
Start with the blade and guides
A 14-in. bandsaw is a good size for cutting curved furniture parts. The key to great performance is picking the right blade for the job and setting up the saw properly.
Pick the right blade—It might seem counterintuitive, but a coarse blade (3 tpi to 4 tpi, skip tooth) will make very clean cuts. A finer blade, with too many teeth and small gullets in between, will clog with sawdust pretty quickly, causing it to overheat and dull prematurely. The blade will also tend to dodge left or right as it works to avoid the compressed sawdust, resulting in a wobbly cut line.
Be sure to match the blade width to the radius you are cutting (see chart, above). In general, tighter curves require narrower blades. Finally, be sure the blade is sharp and clean. A dull blade will always seek the path of least resistance, and it is rarely in the direction you want to cut. You can tell a blade is getting dull when it takes extra pressure to cut the stock. A dull blade also runs hotter, and the end of the kerf will be dark where the teeth were in contact with the wood. You may also notice that the sawdust appears slightly toasted.
Set the tension and guides—Once you have the proper blade in hand, it’s critical that you set the tension and guides to ensure good results.
With the guides pulled away from the blade, adjust the tension and track the blade so that it’s centered on the upper wheel (for details on setting up the bandsaw, see “Five Tips for Better Bandsawing,” FWW #173). I do not overtension bandsaw blades. In fact, I lean toward undertensioning them. For example, my 1⁄2-in. blades will be tensioned only to the 3⁄8-in. mark on the blade tension scale. The lower tension works because the coarse blades I use cut flawlessly and are easy to steer along a pencil line. The lower tension also saves wear and tear on the bandsaw tires and doesn’t overstress the frame of the bandsaw. Overtensioning a narrow blade, such as the 1⁄8-in., 3⁄16-in., and 1⁄4-in. sizes, risks having the blade create a groove in the tires. Once that happens, any blade will become almost impossible to track.
Next, adjust the guides and the thrust bearing to ensure sufficient blade support for the curved cuts. Finally, check that the table is square to the blade, lower the upper guide to within 1⁄2 in. of the workpiece—enough to block your fingers from passing under—and you’re ready to cut.
Bring the guides close to the blade
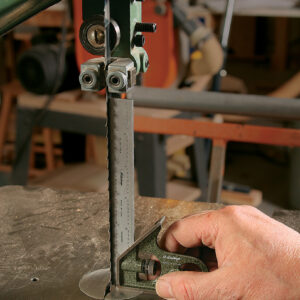
To keep the blade from twisting excessively during a curved cut, it’s critical that you keep the guides and thrust bearing close to the blade.
Cutting close to the line means less cleanup later
An essential woodworking skill is being able to cut to a curved line on the bandsaw. I see a lot of students and beginning woodworkers struggle with this task. I’ll show you the secrets to making smooth cuts within 1⁄32 in. of any cut line, without the need for fancy jigs.
Let the blade do its job—When cutting, don’t push too hard. Feed the workpiece slowly and steadily. With a sharp blade, the work should practically feed itself. Trying to make the blade cut too fast will create a rough surface and a wandering cut.
It’s also helpful to have good task lighting focused on the cutting area so the pencil line is clearly visible. As you cut, always be aware of where your hands and fingers are. It’s easy to lose track of them as you navigate the curves.
Plan the sequence of any curved cut so that it is not necessary to back out along the curved kerf. Backing out can be problematic, especially if the kerf has closed up, and you risk inadvertently pulling the blade off the bandsaw wheels.
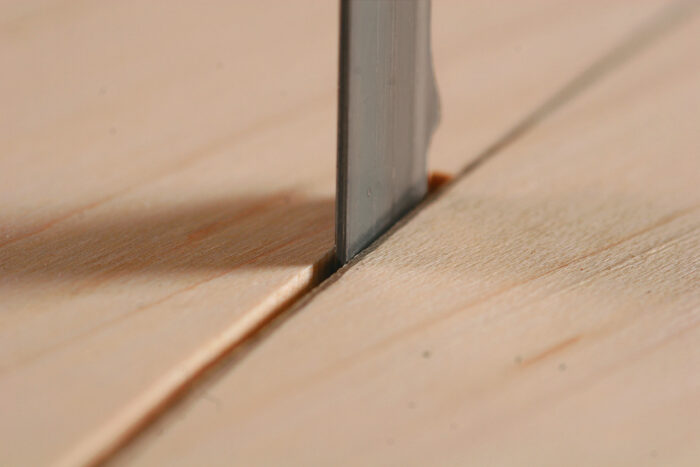
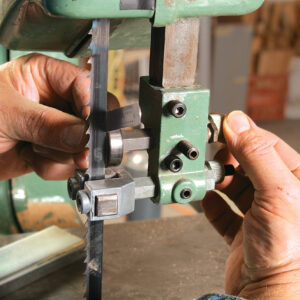
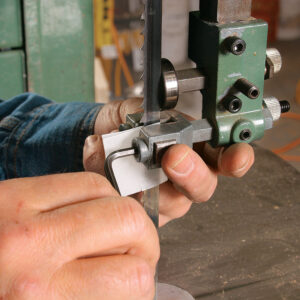
A really twisted trick—The most common problem encountered when cutting a freehand curve is that the cut is wavy and not always precisely parallel with the line you want to follow. The set on the blade’s teeth (the distance the teeth project from the sides of the blade) allows the wood to move from side to side until it encounters the flat sides of the blade.
I found a way to overcome this problem by slightly twisting the wood during the cut so that one side of the kerf remains in contact with the back edge of the blade (see photos, facing page). In essence, the back of the blade serves as a steady rest, eliminating the side-to-side wobble and allowing you to control the cut with precision. The technique certainly takes some practice (you may want to try it with a wider blade at first), but you’ll be shocked at the results.
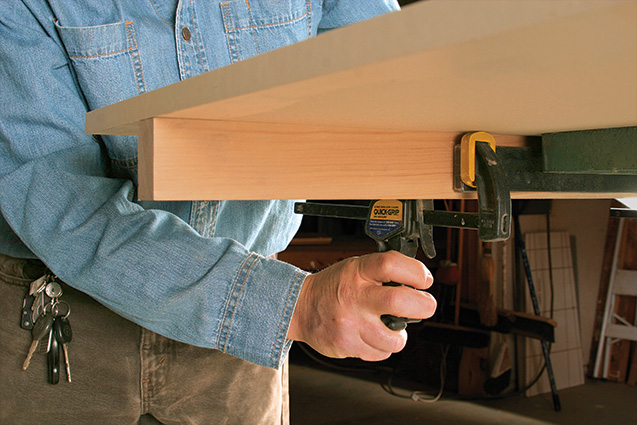
Offer support where needed—If you’re cutting a large piece, the small table of the bandsaw may not provide enough support. Also, the workpiece or the offcut will tilt slightly and snag on the edge of the bandsaw table as it is swung around. To avoid this problem and make the cut safer, use either an outfeed support or a large auxiliary table that’s clamped to the bandsaw table, or both.
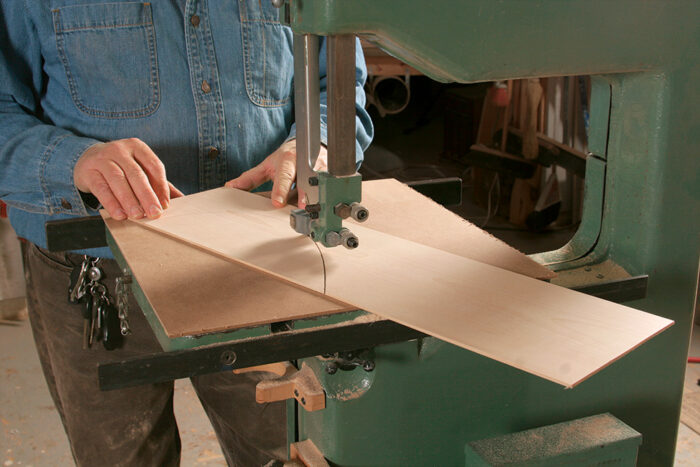
When bandsawing thin stock, tearout is often a problem. To prevent tearout on the bottom of a thin workpiece, back up the cut using a thin sheet of hardboard taped to the bandsaw table. With this method you can make splinter-free cuts in stock as thin as 1⁄16 in. By the way, the rough blade still works in thin stock.
Tricks for compound curves—There are cases where it is not possible to have the wood always in contact with the bandsaw table. Cutting a compound curve can require that the part be lifted off the table at various points. This is not safe, because the cutting action can slam the wood onto the table, drawing your fingers in or pinching them underneath. One common method of supporting the workpiece is to tape the offcuts to the blank after each side is cut. This is a typical procedure for making cabriole legs, but it works for any leg that is shaped on multiple sides.
Another method is to use a block under the concave area of a workpiece, a technique especially useful when you’re cutting a curved apron or drawer front. Be sure to orient the workpiece with the show face on top.
Smooth cuts guaranteed
A little twist makes all the difference
Customize your bandsaw table
A simple auxiliary table can help support large workpieces and can prevent tearout on thin stock.
Make a bigger work surface
Use a zero-clearance table for thin stock
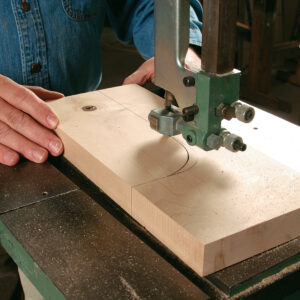
Use relief cuts to cheat
 |
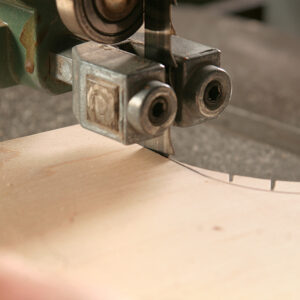 |
How to bandsaw a radius tighter than a blade will allow. First remove the bulk of the waste (left). Next, make the relief cuts perpendicular to the cut line. The number of relief cuts you make depends on the severity of the curve. Now you’ll be able to remove the rest of the waste along the line, steadying the workpiece against the back of the blade (right).
Straight cuts in curved work
 |
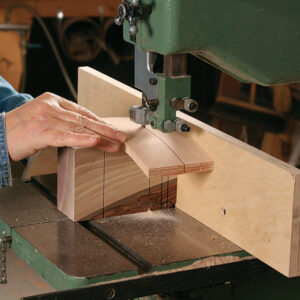 |
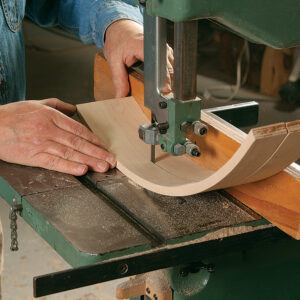
Bandsaw cuts are rougher on the bottom side. So, when ripping a curved panel, such as a table apron or drawer front, be sure the show side is face up. If the concave side is the show face, cut it against a fence (left). If the show side is the convex face, support the cut with a block screwed to a fence (right). Locate screws where the blade won’t hit them.
Simple methods to remove sawmarks
Any cuts made on the bandsaw, no matter how skillfully done, will need to be cleaned up to remove the sawmarks. Curves can be smoothed using hand tools or sandpaper. Whatever your approach, the goal is to create a flawless surface that’s easy on the eyes and fingers.
When working with solid wood, I always look first at using a compass plane or spokeshave to smooth or fair a curve.
I use custom sanding blocks made to match the curve. I often make these blocks from the offcuts or trace the pattern onto a separate blank. The closer the sanding block is to the shape you’re after, the better you will be able to smooth the curve. If the workpiece is convex, the sanding block is concave; a concave workpiece gets a convex sanding block. Serpentine curves or curves made from variable radii may require several sanding blocks.
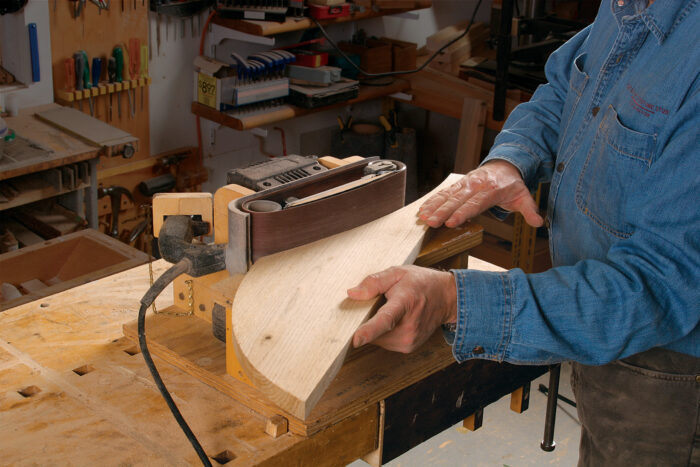
I also fair curves using a belt sander fitted with a curved wooden block mounted to the sander’s platen. I mount my sander to a custom table so that I have more control over the workpiece (see drawing, below) and I keep the platens for future jobs.
Remember, once a surface has been sanded, by hand or by machine, grit will invariably be left behind. Any hand-tool work or routing should be done first; otherwise, the embedded grit will destroy your cutting edges.
Flawless smoothing
Here are four great options for polishing off your carefully cut curves.
Plane or shave
 |
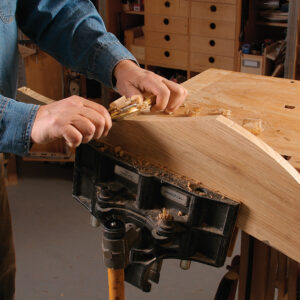 |
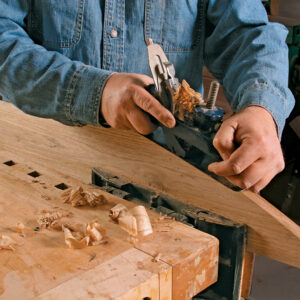
Follow the grain when planing. On a curved piece, the grain changes direction. So if you use a compass plane (left) or spokeshave (right) to refine the shape, pay attention to the grain to avoid tearout.
Sanding blocks
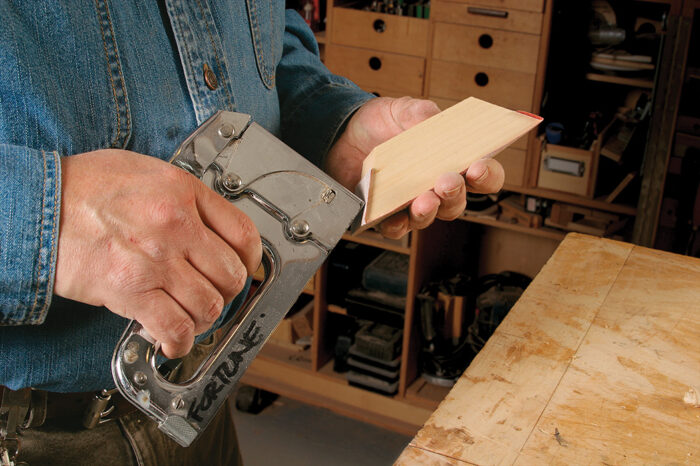
Make curved sanding blocks that match the profile. Staple sandpaper to the bottom of the block. For a concave block, it’s better to use spray adhesive. If you have problems with the paper tearing, reinforce the back of the sheet with duct tape.
Precise belt-sanding
Soup up your sander. Fortune mounts curved wooden blocks on the metal platen of his belt sander. He mounts the sander in a shopmade table to add even more precision.
To see more of Michael Fortune’s work, go to www.michaelfortune.com.
From Fine Woodworking #199
For the full article, download the PDF below:
Fine Woodworking Recommended Products
JessEm Mite-R Excel II Miter Gauge
Ridgid EB4424 Oscillating Spindle/Belt Sander

Stanley Powerlock 16-ft. tape measure




Log in or create an account to post a comment.
Sign up Log in