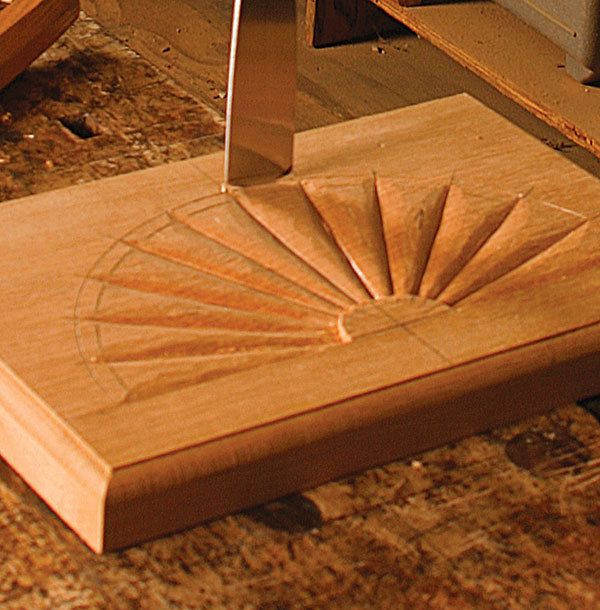
Carve a Decorative Fan
Use a handful of gouges and chisels to make this Queen Anne relief carving
Synopsis: The visual centerpiece of Phil Lowe’s Queen Anne lowboy is this carved fan, which decorates the bottom center drawer. This motif was a popular element for this period, and is a fairly simple relief carving to master.
From Fine Woodworking #201
Cabriole legs may give a Queen Anne lowboy its signature grace, but the fan is its visual centerpiece.
The fan, which decorates the bottom center drawer of the lowboy (see pp. 62-69), was a popular element in Queen Anne furniture. It is a fairly simple relief carving that requires a handful of gouges and chisels.
I begin with the drawer front cut to size and its edge detail shaped. To lay out the fan, draw a baseline 1 1⁄4 in. from the bottom of the drawer front. From the center point of this line, draw a perpendicular line. Where these lines intersect, place the compass point and draw a half-circle the radius of the fan, a second one 1⁄4 in. smaller, and a third circle with a 3⁄4-in. radius.
Next, divide the semicircle into 12 equal pie-slice segments. You can use a protractor to mark the 15° segments, or you can use 45° and 30°-60°-90° drafting triangles anchored to a straightedge held parallel to the baseline. Make certain the scribe marks extend inside the smallest circle and beyond the largest one.
Broad strokes set the background: To begin carving, match a carving gouge to the radius of the inner hub. Use a mallet to drive overlapping vertical cuts about 1⁄4 in. deep. Also deepen the baseline on either side of the hub, using a straight chisel for cuts that are shallow at the outer arc but 1⁄4 in. deep at the hub.
The fan’s illusion of depth comes in part from the fact that the rays are recessed at the fan’s hub and flush with the surface near the outer radius, so they project forward as they radiate outward. To achieve this, use a wide, flat gouge (I like a #3 or #5 sweep, 20 mm wide) to make a series of cuts from the outer area of the fan to the hub. These cuts should deepen to about 1⁄4 in. deep at the inner circle. This series of cuts removes most of the layout lines. But because you drew them long, you can re-establish them before moving on to define the individual rays.
Define and shape the rays: Begin this task by using a V-tool to cut a sharp trench along the segment lines that separate each ray (see p. 94). Next, use a back-bent gouge to round over the tops of the rays into the trenches you just cut. When making these cuts, particularly on the center rays, you’ll be working at an angle across end grain that you exposed previously with the V-tool. To prevent tearout, cut in a direction that ensures that the fibers are supported from behind. This means working in opposite directions on opposing sides of each V-groove—toward the center on the top of each ray, away from the center on the bottom. You’ll likely need a second pass to refine the shapes further and make the rays stand out in appropriate relief.
For the full article, download the PDF below:


Log in or create an account to post a comment.
Sign up Log in