Boulle Marquetry: Two Panels for the Price of One
How to choose a design, cut out the parts, create the panels, and finish them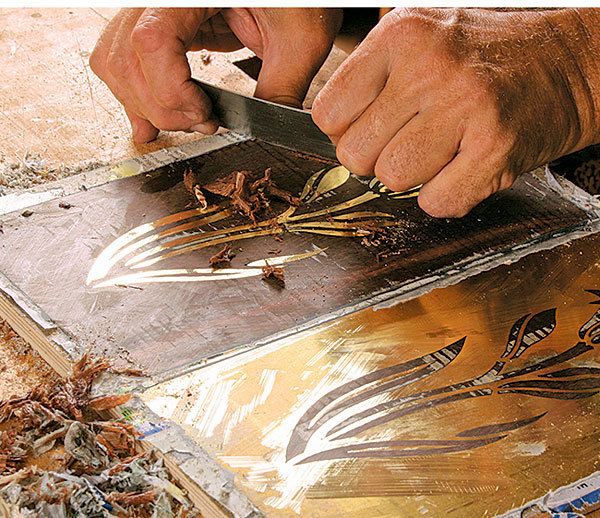
Synopsis: With most inlay or marquetry, you create one panel at a time. With boulle work, you stack two contrasting materials together, cut a design in them on the scrollsaw, and then interchange the parts. The lighter parts go into the darker background, the darker parts go into the lighter background, and you get two panels from one cutting. Silas Kopf is a master at this work, and here he shares his knowledge on how to choose a design, cut out the parts, create the panels, and finish them. He makes it look easy, and with his knowledge behind you, so will you.
Get Kopf’s step-by-step technique for boulle work an excerpt from his DVD, Master Techniques of Marquetry.
From Fine Woodworking #203
With most inlay or marquetry, you create one panel at a time. With boulle work, you stack two contrasting materials together, cut a design in them on the scrollsaw, and then interchange the parts. The lighter parts go into the darker background, the darker parts go into the lighter background, and the thin sawkerf between the pieces is filled by dark glue. In the end, you get two panels from one cutting.
The process is named after André Charles Boulle, cabinetmaker to Louis XIV of France. He didn’t invent the technique, but he popularized it 300 years ago by building very elaborate pieces for his aristocratic clientele. Boulle would often completely cover the surface of a piece with a dazzling interplay of light and dark material. But the technique also can be used in a more limited way to embellish a cabinet door or the back splat of a chair. These stylized flower panels could be used in a checkerboard pattern.
Create a design and prepare the materials: A successful boulle design will clearly emphasize the shape of the pieces to maximize the contrast with the bordering part.
Once a design is made, you need to select the contrasting materials. Traditionally, a light-colored metal such as brass or pewter and a dark wood such as ebony were favored. However, you also could use light and dark woods. In this case, I used brass (www.onlinemetals.com) and katalox, a dark Mexican wood.
The standard metal thickness is either 0.032 in. or 0.040 in., but in either case the wood should be resawn slightly thicker. That way, when leveling the final panels, the softer wood is brought down to the harder metal and not the reverse, which would be much more work. First, cut the brass and wood panels to the same width and length. The wood parts of the design may have short grain that can shatter or fall apart during cutting. To hold it together, brush hide glue (hot or liquid) on one side of the wood and stick a piece of newsprint to it. Then, use an old hacksaw blade to rough up one side of the brass for a better glue bond.
Now prepare the package of wood and metal for scrollsawing (see facing page). On the drill press, make an entry hole into each section of the design to allow the sawblade access. The holes will be visible in the final product, so make them 1⁄32 in. to 3⁄64 in. diameter—only slightly larger than the blade—and placed on the line where they’ll be least obvious, such as at a point.
For the full article, download the PDF below:
Fine Woodworking Recommended Products

Bahco 6-Inch Card Scraper
Whiteside 9500 Solid Brass Router Inlay Router Bit Set






Log in or create an account to post a comment.
Sign up Log in