Beautiful Border Frames a Sunburst Tabletop
The border around the veneered center of a tabletop can have a strong voice, or it can serve its purpose with a whisper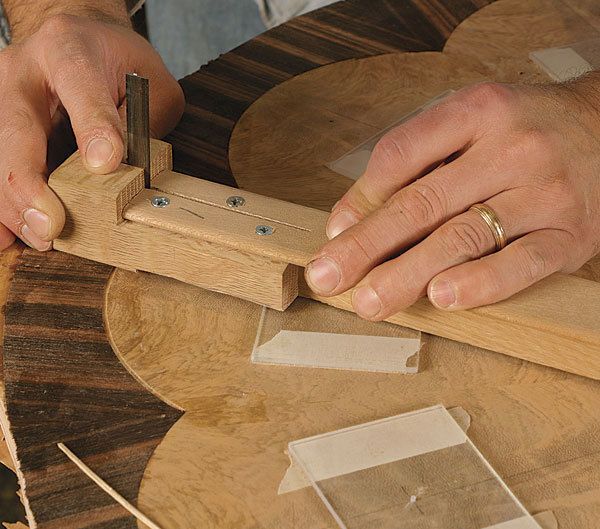
Synopsis: You can increase the “wow” factor of a sunburst tabletop by cutting the border with a scalloped edge, as shown in this Master Class. Mark Arnold shows how to decide on an attractive radius for the scallops, lay it out, and install the border. This is a companion piece to “How to Veneer a Sunburst.”
From Fine Woodworking #206
Depending on the design, the border around the veneered center of a tabletop can have a strong voice, or it can serve its purpose with a whisper.
I’ll illustrate how you can use contrasting veneer to increase the “wow” factor of even a piece as dramatic as a sunburst tabletop (see “How to Veneer a sunburst,” pp. 72-79). By cutting the border, also known as crossbanding, with either a concave or convex curve where it meets the sunburst, you can produce two very different looks: A concave edge produces a floral motif, while a convex curve creates the look of a spider web.
I’ll describe how to make the floral motif in this Master Class, but you can learn how to create the spiderweb border at FineWoodworking.com/ extras. Each method uses the radial seams in the sunburst pattern as the terminal points for each section of the border veneer.
Cut the design in the sunburst: To make the concave border, start by cutting a convex arc on the end of each segment of the sunburst. The radius of the arc is determined by several factors, but the most important is appearance. Here’s a simple approach that produces an attractive curve. First, locate the pivot points of each segment by dividing the width of the segment at the table edge in half and then adding 1 in. This is the radius of the arc. Add an inch to the radius, measure this distance from the table edge to the center of each segment, and mark this point.
Because you’ll use a trammel twice on each segment of the sunburst, temporarily apply pivot blocks to each segment. Use a piece of 1⁄8-in.-thick clear plastic with a 3⁄64-in.-dia. hole drilled in the center. The clear plastic allows you to center the hole directly over the pivot point; the hole receives the trammel point without damaging the veneer.
Set up a router with a 3⁄4-in.-dia. mortising bit and secure it to a trammel. Attach pieces of clear plastic to the underside of the trammel on both sides of the bit to keep the ends of the trammel level. Drill a hole in the trammel the same distance from the inside edge of the router bit as the design’s radius. Extend a drywall screw through that hole until the trammel sits securely in the pivot point. You can now swing the router from this fixed point and excavate the veneer from the sunburst segment. After cutting the initial groove using each pivot point, retract the pivot screw and rout the rest of the waste freehand toward the edge of the tabletop. The trammel will keep the router level. Use a 1⁄2-in. bench chisel to clean up the inside corners where the arcs meet.
For the full article, download the PDF below:
Fine Woodworking Recommended Products
Whiteside 9500 Solid Brass Router Inlay Router Bit Set

Bahco 6-Inch Card Scraper






Log in or create an account to post a comment.
Sign up Log in