Build a Plane From a Kit
Two editors find the labor intensive but rewarding
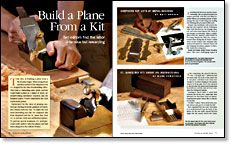
Synopsis: Ever dreamed about planing wafer-thin wood shavings with a handplane you built yourself? Two editors, intrigued by a planemaker’s sales pitch, set out to do just that: build handplanes from a kit of parts. To make it interesting, they each built a plane from a different company — one from Shepherd Tool and the other from St. James Bay Tool Co. This is their story.
The idea of building a plane from a kit of parts began when Doug Evans and Ben Knebel of the Shepherd Tool Co. stopped by the Fine Woodworking office. They had a compelling sales pitch: Anyone could build a plane in a matter of hours, no metalworking experience required, and the finished planes would outperform the best ready-made planes.
Intoxicated by the idea of planing seethrough shavings from the gnarliest of boards, two editors took the bait. To make the test more interesting and fair, we compared kits from Shepherd and the St. James Bay Tool Co. in Arizona. Both also sell finished planes. To prevent special treatment, we used personal credit cards to order the planes and had them shipped to the editors’ homes.
Shepherd Kit: Lots of Mental Bashing
Assembling this kit was an exercise in metalworking. The 20-odd pieces had to be shaped precisely with files and fitted together with an ear-numbing amount of hammering. The only woodworking was sanding and finishing the pre-shaped infill parts.
Despite this, familiarity with metalworking was not required. All the techniques were well described in the 30-page manual, and none were beyond the reach of the average woodworker. What I couldn’t glean from the manual I often found by browsing Shepherd’s Web site, where I turned often during the 40 hours I toiled away on the project (the company estimates you’ll need 8 to 10 hours). If you call the company for advice, prepare to wait a few weeks for a response.
St. James Bay Kit: Short on Instructions
After comparing the parts for the two kits, I thought that I definitely had the easier task: The body of this plane was in one piece and there were some nice chunks of cocobolo waiting to be customshaped to fit my grip. But I was annoyed to discover that the instruction booklet had been left out, and the only aid was a template for cutting the handle.
Getting to know Bob—I called Bob Howard, the owner of St. James Bay, who informed me that there were no instructions because many buyers like to customize the kits.
“So Bob,” I asked, “what about mere mortals whose only goal is to build the kit?”
Bob explained that the basic procedure is to work forward from the back of the plane: Fit the rear infill; extend the bed angle; file the mouth and fit the blade.
From Fine Woodworking #181
For the full article, download the PDF below:
Fine Woodworking Recommended Products

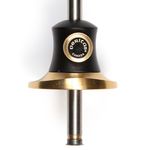
Veritas Micro-Adjust Wheel Marking Gauge

Marking knife: Hock Double-Bevel Violin Knife, 3/4 in.

Veritas Precision Square


Log in or create an account to post a comment.
Sign up Log in