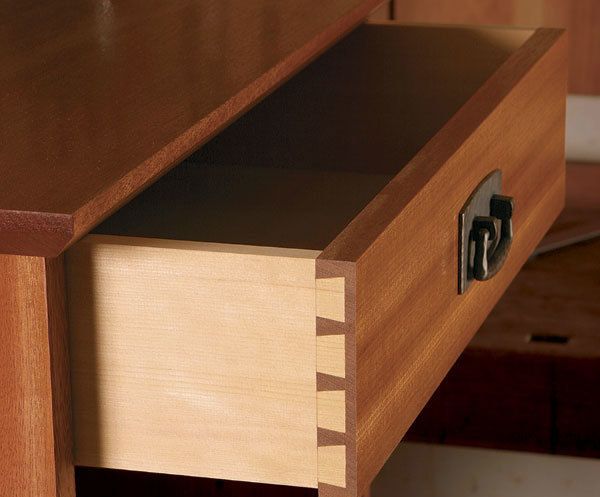
Synopsis: The handsome half-blind dovetail is easy to find — it is often used to join drawer fronts to drawer sides. When made with contrasting woods, the result can be especially striking. Many a woodworker uses a router and jig to cut snug half-blind dovetails with relative ease. But Carl Swensson believes in cutting the joint efficiently by hand. Swensson demonstrates how, with careful attention to sawing and chiseling techniques, he can cut a snug pair of half-blinds in about an hour.
Atightly fitting half-blind dovetail is easy to find and easy to admire. Locating one can be as simple as opening the nearest drawer, because the technique most often is used to join drawer fronts to drawer sides. When made with contrasting woods, the hand-cut joint, with its narrow pins and variable spacing, is especially attractive.
Many a woodworker uses a router and jig to cut snug half-blind dovetails with relative ease. But the joint also can be cut efficiently by hand. In fact, with careful attention to sawing and chiseling techniques, I can cut a snug pair of half-blinds in about an hour. Here’s how I do it.
Start with the tails
Cutting the tails first helps me to lay out the pins accurately and get a tight-fitting joint. The finished tails act as a template that is traced easily onto the pin board.
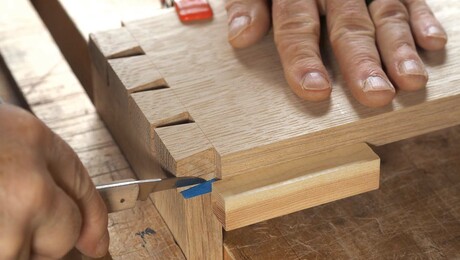
Start the layout with a marking gauge, using one setting to scribe the length of the tails on the end grain of the drawer front and on the drawer side.
Before continuing with the tail layout, reset the gauge to about 1⁄32 in. wider than the thickness of the drawer side. Scribe a line on the inside face of the drawer front, marking the length of the pins. The extra 1⁄32 in. lets the pins stand slightly proud of the assembled joint, so that they can be planed flush.
I allow for this excess material in advance, because I will be cutting stock for my drawer fronts to fit the drawer openings.
Next, lay out the angled sides of the tails using a pencil and a bevel gauge. I like to set the angle at a 1:8 ratio, or about 7°. Slightly smaller or larger angles will work, but I find this one offers a good balance between visual effect and structural strength. Finally, use a square to continue the layout lines across the end grain.
For all of this work, keep your pencil extremely sharp. I sharpen mine to a chisel edge by pressing the point flat on a sanding block and working it vigorously back and forth. Others prefer marking with a knife for accuracy, but I’ve learned I can cut just as precisely to a pencil line, and I can see it much more easily.
Next, begin to saw the tail cheeks. My goal is to produce a finished surface directly from the saw. I use a Japanese ripsaw that cuts on the pull stroke. Its thin blade requires less cutting effort than a Western saw. Its long handle helps minimize steering errors, which are easier to correct because of the blade’s flexibility.
From Fine Woodworking #185
For the full article, download the PDF below:
Fine Woodworking Recommended Products

Veritas Micro-Adjust Wheel Marking Gauge
Leigh Super 18 Jig
Veritas Wheel Marking Gauge





Log in or create an account to post a comment.
Sign up Log in