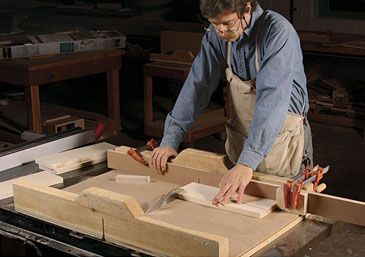
Soup Up Your Crosscut Sled
Fresh faces and smart stops make a big difference
Synopsis: Crosscutting furniture parts to length seems like an easy job, but small inaccuracies can lead to complications like openings that aren’t square or joints that won’t close. Most furniture makers make their critical crosscuts on the tablesaw, using either a miter gauge or a crosscut sled. This Fundamentals is all about the crosscut sled. A well-made sled is more than just a safe way to crosscut on the tablesaw. It carries the workpiece and controls tearout. It can handle much larger workpieces. And with a variety of stop blocks, it’s also great for producing matching multiple pieces.
From Fine Woodworking #219
Crosscutting furniture parts to length seems like an easy job, but—as with the entire milling process— small inaccuracies can lead to complications like openings that aren’t square or joints that won’t close. Most furniture makers make their critical crosscuts on the tablesaw, using either a miter gauge or a crosscut sled. I showed how to get more from your miter gauge in FWW #205, but the best tool for precise crosscuts is the sled. A wellmade crosscut sled carries the workpiece and controls tearout. It can handle much larger workpieces. And with a variety of stop blocks, it’s also great for producing matching multiple pieces.
Once you’ve built a sled (see my version in Rules of Thumb: “Tablesaw carriage jigs,” FWW #160), you’ll be on your way to making clean, accurate crosscuts. But there is more to the story.
How to tame tearout For any crosscut you make on the sled, there are a couple of steps you can take to reduce tearout dramatically. Because of the way the blade spins, tearout happens on the rear and bottom faces of the workpiece. So you need to ensure that the blade opening in the sled’s deck and rear fence fits snugly around the blade that you are using. If the blade opening is worn at all, or if you’ve switched to a narrower blade, attach a rear auxiliary fence made of 3⁄4-in. MDF and a new deck made of 1⁄8-in. or 1⁄4-in. MDF or plywood. I attach and replace these auxiliary pieces as needed to ensure the best cut. Cut a fresh kerf through them and the sled will virtually eliminate tearout. But just to be safe, try to position workpieces so that the most important surface is on top. For example, cut drawer fronts face up.
Cutting a single piece to length When crosscutting a single piece, I follow one of two strategies to locate the cut. If the kerf slot on the sled’s auxiliary fence still closely fits the blade I’m using, I’ll use the slot as a reference point for the cut. After squaring one end of the stock, make a pencil mark on the top back edge of the workpiece and line it up with the edge of the kerf slot. After any crosscut, slide the workpiece away from the blade before pulling the sled back to you.
If the kerf slot is worn, I often make what I call a “sliding cut.” After squaring an end, mark the length on the lower front edge of the stock where the blade will make first contact. Start the cut to the waste side of the line and make a shallow cut with the carbide tooth tips so that you can just see stock being removed. With the teeth still in the cut, slide the stock until the cut lines up with your mark; then complete the crosscut.
For the full article, download the PDF below:


Log in or create an account to post a comment.
Sign up Log in