Conquering Crown Molding
Accurate measurements, careful cuts, and the right tools make this method fast and flawless
Synopsis: Finish carpenter Gary M. Katz will tell you that there’s no great mystery to cutting crown molding on a miter saw, especially if you know the right techniques. Using a mantelpiece as illustration, Katz gives a step-by-step tutorial on his method for cutting crown molding perfectly each time, from the technique of cutting “upside down and backward,” to the modifications you must make to your saw, to the rules you need to follow to make sure your finished corners fit together perfectly.
I see a lot of woodworkers standing at their miter saws with eyes closed, holding two pieces of crown molding overhead. I know exactly what they’re doing because for years I did the same thing: I tried to visualize which way to miter the crown for each corner. Believe me, cutting crown is a lot easier with your eyes open.
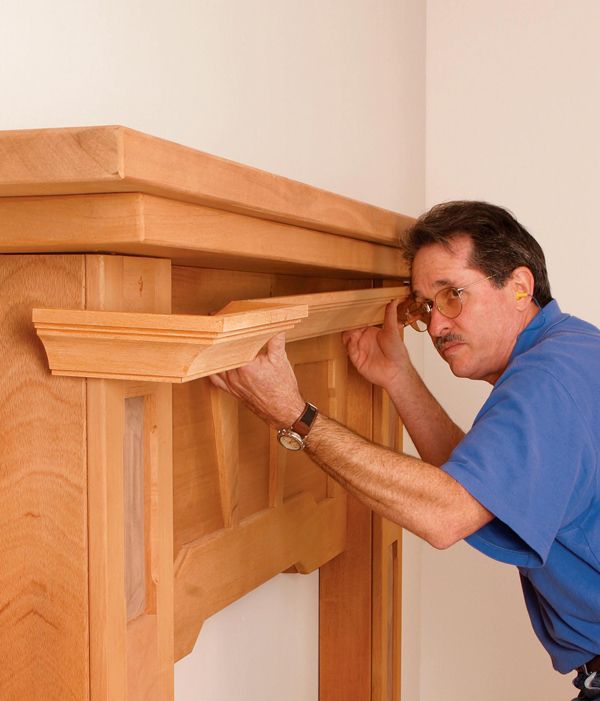
I’m not a “fine woodworker,” but as a finish carpenter, I install thousands of feet of crown molding every year. I’ve heard it said that cutting crown is a test of a carpenter’s skill. That’s hooey. There are basic techniques that take the mystery out of installing crown. To demonstrate, I installed it on a mantelpiece, but this method works as well on kitchen cabinets or even a Federal-style armoire.
Create a cutlist and set up the saw
Rather than visualize each corner, I make a cutlist of all the pieces. I measure the mounting surface and record the length of each piece of molding at its base. On either side of the number I write the type of cut required. I indicate inside corners with a “V,” for outside corners I write “OC,” and for 90° cuts I write a “B” (butt joint).
I know the corners on this mantelpiece are perfectly square because I built it myself, but I often check the corners, especially on walls and commercial cabinets, with a protractor. If the corner is more than 2° out of square, I make a note on my cutlist and compensate while cutting each miter. For a corner that reads 88º, for example, I cut each miter at 44º.
Cut upside down and backward—Crown molding can be cut “in position,” leaning against the miter saw’s fence, or “on-theflat,” lying on the saw’s table. I prefer the former, because you only need a saw that makes side-to-side miter cuts, not one that can flop over to cut bevel angles. Besides, many miter saws have an upright cutting capacity of 4 in., which accommodates most crown moldings, and cutting in position is faster, easier, and more accurate.
Cutting crown in position doesn’t mean you place it on the saw exactly the way it’s positioned when installed, leaning away from the saw’s fence. If you tried that, the material would move all over the place as soon as the blade touched it.
From Fine Woodworking #178
For the full article, download the PDF below:
Fine Woodworking Recommended Products

Estwing Dead-Blow Mallet

Starrett 12-in. combination square

Bessey EKH Trigger Clamps


Log in or create an account to post a comment.
Sign up Log in