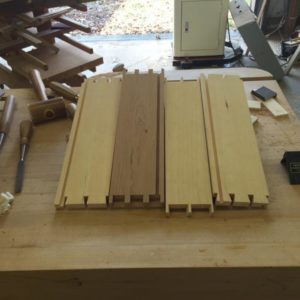
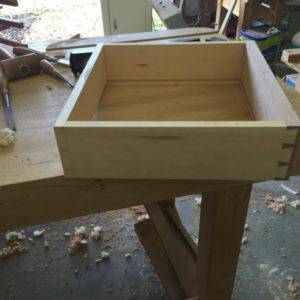
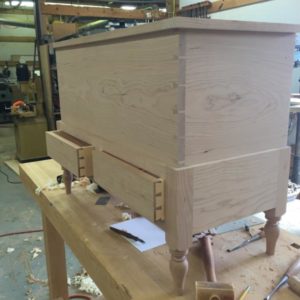
I’ve built a lot of dovetailed drawers. Clamping and glue up has always been a pain. positioning the clamps, making and positioning cauls and keeping everything square. Several years ago it dawned on me, my joinery is accurate square and very snug. After knocking the assembly together, it stays put. So why clamp at all? I now dry fit the parts, take apart and fit the face to the opening using a bevel up block plane. When the drawer is properly dry fitted, I paint the joints with glue, knock it together, wipe the excess with a wet rag, wrap the corners with wax paper and shove it into the opening, aligning the front with the face frame. No clamps, cauls or hassle, and because the carcass is used as a form, the face of the drawer will be perfectly aligned and require no further fitting. Hope this helps some of you out there.
Discussion Forum
Get It All!
UNLIMITED Membership is like taking a master class in woodworking for less than $10 a month.
Start Your Free TrialCategories
Discussion Forum
Digital Plans Library
Member exclusive! – Plans for everyone – from beginners to experts – right at your fingertips.
Highlights
-
Shape Your Skills
when you sign up for our emails
This site is protected by reCAPTCHA and the Google Privacy Policy and Terms of Service apply. -
 Shop Talk Live Podcast
 -
 Our favorite articles and videos
 -
E-Learning Courses from Fine Woodworking
-
-
 Fine Woodworking New England Event
 -


Replies
That’s the way I do it.
I've experimented with not clamping the drawers, but never thought to put them in the drawer hole itself. I usually plane the drawerfronts to fit a little snug before making the drawer, than plane after for a final fit. I'm wondering if you've had any instances where the sides of the drawers wind up not fully square to the front and have difficulty pulling them out all the way. That would be my worry.
I have found trimming the parts to fit before glue up works best for me. I cut everything full or slightly oversize to start. The dry assembled drawer is placed or tried in the opening then taken apart and the individual parts adjusted as needed, this is repeated until the fit is just right. I find it much more efficient and precise to work the individual parts vs trying to plane bits and pieces after glue up.
I do my trimming with two low angle block planes. For end grain at the drawer face, a standard 25 degree bevel on one of them. For the long edges of the face I use a 45 degree secondary bevel for an included cutting angle of right at 60 degrees. I work a lot in Cherry, most of my drawer fronts are figured. I have found the large cutting angle allows for tearout free planing without regard to grain direction or figured and interlocking grain.
I only clamp if I need to, but most of the time the dovetails hold everything g together just fine without them. But I never can put them in the case, as they are slightly oversize, and have to be planed for a final fit.
That's a very interesting technique. It seems to go against the convention that clamping is required not just to keep the parts in alignment as the glue dries but also to force the glue into the cells of the adjoining faces being glued together.
On the other hand, rubbed joints stick quite well without clamps, as the rubbing seems to create some sort of suck or grab that effectively acts as a self-clamping mechanism albeit a relatively weak one.
If the dovetails and pins are very well-fitted - tight enough to require knocking home - the swelling of the wood at the glued faces presumably supplies enough pressure to ensure that the glue works as intended, rather than as just a gap-filler?
Personally I like to cramp-up the dovetailed assemblies anyway, to provide a means to ensure the assembly remains square via cramp-tweak. But I can see how putting the glued-up drawer into the drawer hole could do that with some designs.
But I also prefer to make drawers with the NK method. This keeps the drawer sides free of rub on the carcass sides, except for the drawer bottom edges on the drawer runners. Piston fit drawers a la Alan Peters are very impressive but too prone to jamming with moisture changes, I feel.
Lataxe
What is the NK method?
https://www.finewoodworking.com/2001/08/01/a-better-way-to-build-drawers.
Lataxe
I think I could have done a better job describing my methods in my original post and should clarify. After I apply glue and tap the joints into position, I do check the drawer for square. I don’t undercut the bottom inside edge at the pins and tails, but pare them dead square. So, when the parts are tapped into place it will typically square itself. If it needs a slight adjustment it is simply tweaked by hand with little effort, not being under tension with clamps it will stay put.
At this point I slide it in place in it’s opening. I mortise small stops into the drawer blade underneath to register the backside of the drawer face (photo attached) and align to the carcass. Normally the drawer will align properly with the stops. At this point it can be left in place or carefully removed and placed on a bench to cure. If something is out a bit, it can be pressed against the stops and secured in place to dry using the carcass as a form but I rarely have to do this.
I keep meaning to submit this idea to FWW. I took 1/2 inck square aluminum rod about 8 inches long remaining from a friends project.I carefully drilled 1/8 inch holes along one side 3/8 inch apart.When glueing up i place a plastic Rockler shelf pin in the hole opposite the pin or tail,one for each side.clamp the bar driving the joint home,do the other direction,and you are done
Perhaps after you submit it and FW draws it I will understand it. Right now I do not.
This forum post is now archived. Commenting has been disabled