I am finishing my first circular/oval table with 2 leaves and was wondering what was the recommended highest grit that you use when you are sanding out a tabletop? I read that David Marks likes to go out to 320 to bring out the clarity of the grain. In the past I have always just gone up to 220 grit but I am interested in what you feel?
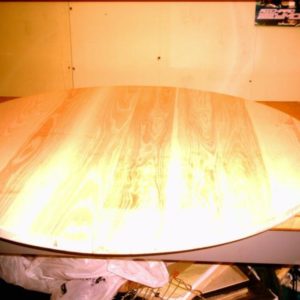
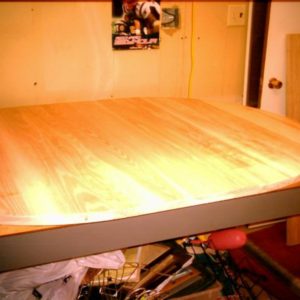
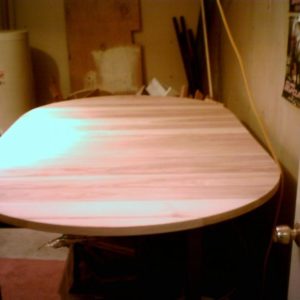
Here is the tabletop so far in it’s 3 different sizes. I also created curved aprons for this table that are not shown here. Will use wooden extension slides as well.
Sorry for the bad photos but these were taken inside in a room adjacent to my shop. I will post better pictures when it is complete.
Regards,
Buzzsaw
“Don’t ask yourself what the world needs. Ask yourself what makes you come alive, and go do that, because what the world needs is people who have come alive.” Gil Bailie


Replies
The first question is what type of finish are you applying? It makes a difference. Keep in mind that the goal of sanding is to level the surface. If you apply any finish that builds a film, then you don't actually feel anything of the wood when you get done but rather, how much you sanded/rubbed the film affects the tactile result.
Only if I am applying an oil like danish that absords into the wood would I go over 220.
"100 Years" -- scribbled on the wall by a woodworker to remind him to do his best and as a warranty on his work -- "If anything I make fails in the first hundred years, bring it back, and I'll take care of it. After that, there will be a small charge. (Original purchaser only)"
Edited 6/12/2006 11:39 am by zombeerose
Bartley's Gel Varnish - 5-6 coats.Regards,
Buzzsaw
"Don't ask yourself what the world needs. Ask yourself what makes you come alive, and go do that, because what the world needs is people who have come alive." Gil Bailie
Buzzsaw,
I think the last time this was discussed the answer appeared to be relative to the wood's grain and the pores. That sanding oak, for instance, beyond 180 would be of little use because only the high areas would be touched.
Is your table top Ash?
Yes. White Ash...ThanksRegards,
Buzzsaw
"Don't ask yourself what the world needs. Ask yourself what makes you come alive, and go do that, because what the world needs is people who have come alive." Gil Bailie
If you aren't staining it, you won't need 320 and may not need 220. The only exception may be the end grain, where you might see some sanding marks if you start with a grit that's too coarse.
"I cut this piece four times and it's still too short."
Here is something that may help.
Sanding wood--hard or soft--beyond 220 does little more than burnish the wood making staining difficult. This is particularly true if you are using a pigment stain which sits on the surface and relies on "nooks and crannies" to impart color. Softer more porous woods can be sanded to to 220 but harder less absorbent woods may stain best if only sanded to 150.
A number of years ago a shop I was involved with did series of adhesion tests with various finishes and sealers. As part of this test we explored adhesion based on sanding grit. We found about the same adhesion up to 180 - 220. Beyond 220 adhesion dropped off due to burnishing of the underlying wood particularly when non-linear machine sanders were used. This was tested on birch panels. We also found that the resulting smoothness of the first coat of finish was not materially affected by the smoothnes of the underlying wood for sandpaper grits between 150 - 220.. The smoothest surface substrate for final finishes was obtained by sanding lightly after the first coat of finish was applied and dry. Which makes the case for a thinned first coat of finish.
So our conclusion was that sanding beyond 180-220 was not necessary and could be actually detrimental.
But, most important was that there was a big appearance affect if the surface was not HAND sanded in the direction of the grain using the highest grit used on the sanding machine. A flat pad sander produced a much flatter surface than a ROS. However, both required final hand sanding with the grain for optimum appearence. If not hand sanded, swirl scratches would show. Final hand sanding using a sanding pad in the direction of the grain is a must.
To carry it one step further, sanding at 320-400 grit after the first coat and subsequent coats was the optimum. No improved appearence was noticed by between coat sanding beyond 400 for varnish. 400 was the sweet spot for thinner finishes. Between coat sanding was always done by hand whether for flattening or for adhesion.
I think you will find similar thoughts in the popular finishing books but YMMV.
Howie,
This is great information. I just finished 150 grit with my ROS. Do you recommend leaving out the 220 with the ROS and just hand sanding at 220 with a sanding block? Or should I use the ROS at 220 and then do a final hand sanding with 220?Regards,
Buzzsaw
"Don't ask yourself what the world needs. Ask yourself what makes you come alive, and go do that, because what the world needs is people who have come alive." Gil Bailie
As I said, 180 grit is the general mid-point for the upper limit for sanding. You can go to 220 if you are using a dye stain or using a clear finish but 180 grit is enough. For hard, closed pore hardwoods like maple and birch, 150 grit is best so that the pigment has a place to lodge.
The process is to machine sand to whatever you plan as the highest grit. Then, hand sand at the same grit moving in the direction of the grain with the sandpaper on a sanding block.
Let me make this following point. The reason for thinning your first clear coat 25-30% is to allow it to penetrate deeper and to dry faster. Now is the time to get the surface truly smooth. All finishes--not just waterborne--raise little wood fibers. It's not really the grain raising. The first coat of finish stiffins these raised fibers and allows them to be sanded off. That's the reason the first coat and subsequent sanding with 320 is so important. Getting a smooth finish a function of sanding the finish, not from sanding the wood.Howie.........
Howie, I have a question for ya and don't want to steal the thread. Please see the hickory work bench in the shop items. thanks Pat
Howard, while I don't doubt the value of hand-sanding, and admit I have an incredible (almost overwhelming) amount to learn about finishing, I would like to know how long ago "a number of years" is. Mainly with regard to your experience with random orbital sanders leaving swirls. Have they not improved a great deal over the years? It's pretty unusual for me to have a problem with swirls, but then I don't build things day-in and day-out either.forestgirl -- you can take the girl out of the forest, but you can't take the forest out of the girl ;-)
The time, was in the early 990's. ROS were still fairly new and I am sure they have improved. However, sandpaper has probably changed even more.
As it turns out, I did not own a ROS until the past year. I tended to use belt sanders and 1/2 sheet obital sanders. They were what I had and I think the orbital sander tends to keep the surface flatter.
In our shop, the finisher(s) were responsible for the final sanding. That way they couldn't bitch at the builders when preparation errors showed up after finishing.
When we did the testing, we compared pigment stained maple or birch surfaces that were overcoated with a clear lacquer. We prepared the boards with one section machine sanded with either a ROS or obital sander with 180 or 220 grit and the other section final sanded by hand with the same grits. Maple and birch tend to show up sanding marks to a significant degree when pigment stained and clear coated. We then judged whether sanding swirls were apparent. In almost all cases, swirls were apparent when the hand sanding in the direction of the grain was omitted.
I should mention, that we had a couple of straightline air driven sanders which were used by the finishers for flat surfaces. These worked as well as simply hand sanding.Howie.........
In my very limited experience, swirls are caused by low-grade sandpaper (not consistently sized grit), or gunk or grit on the paper or surface. I've never used an older ROS, just the DeWalt that I bought about 3 years ago.forestgirl -- you can take the girl out of the forest, but you can't take the forest out of the girl ;-)
Got some scrap wood from the table? If so, use them as test pieces, sanding one of them up to 320, and one to 220. Finish them as you would the table. If you don't see a difference in the two pieces, you know the 320 step isn't needed. If you see a difference...
Asking others for their opinions is easy, but to be a better finisher, you should develop the habit of doing test finishes to get the information you need about how a finish or how sanding will affect your particular work.
I understand what you are saying but I think it is extremely valuable to ask others for their opinions. This forum has helped me and other woodworkers learn from the more experienced. What you are saying is good advice. Without asking the question I wouldn't have heard from you. I will try what you suggest and thanks so much for posting. Just wondering, do you go out to 320 grit?Regards,
Buzzsaw
"Don't ask yourself what the world needs. Ask yourself what makes you come alive, and go do that, because what the world needs is people who have come alive." Gil Bailie
Leaving turned objects out of the equation, it is rare, if ever, that you need to sand above 220, whichever standard of grit you use. Papers above that are wet or dry for a purpose: they are meant to be used with a lubricant on a finish. Generally paint or lacquer, but I find that when I use an oil finish, I will bring the grade of paper up to 400. If you are polishing up lacquer, and the gloss you want is really high, you can boost it to 600 or 1000. Teri Masachi talks about using very fine Mirka abrasives in a screen, on finishes, not on bare wood.I will generally sand to 180, then damp sponge, sand again with 180 to get rid of the raised fibers, then sand at 220 to get rid of the 180 scratches, which are, if yoou've done your job, slight. When working with something like maple, you have to know the wood to decide whether you should even go to 220, as the surface burnishes easily.
I read Howard's very detailed response, and it confirmed what I've more or less arrived at without methodical testing. We usually sand up to 180 grit prior to finishing. The first coat of finish gets done with 240, subsequent ones are done with 320 grit. When it's all fully dried, we lightly sand with old worn 1500 grit paper.
DR
talk about a loaded question...
i personally feel that you have to judge how to sand on a case by case basis...it really depends on the wood, not just the species of wood, but sometimes on that particular piece of wood...
I've made projects out of very soft fruitwoods where 220 was still leaving very visable sanding marks and it didn't start to get really smooth until after 320...
I just did a project with jatoba...i started sanding with 100 and found out that it wasn't even scratching it...i had to start with 50 on my DA to get the machine marks out then progressed to 80 & 100 on my RO and finished with hand sanding at 100...anything further did absolutely nothing but burnish the wood...
but on average i would say that most projects rarely dictate to go beyond 150-180 before the first coat of finish...i'll usually go 220 or 320 between finsh coats depending on the finish material...
you really just have to see what feels right...if you are using a stain, i agree with whoever made the suggestion to sand an extra board and try some stain on a part of it after each progressive sanding to see how the wood is absorbing the color...
remember woodworking is more art than science, and it is completely subjective, trust your own judgement, you'll know what feels right to you...
This forum post is now archived. Commenting has been disabled