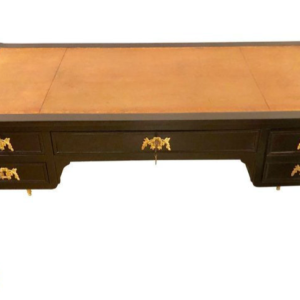
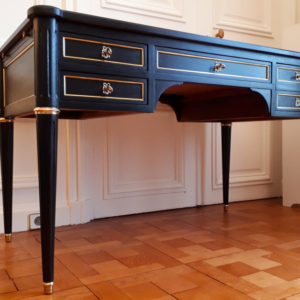
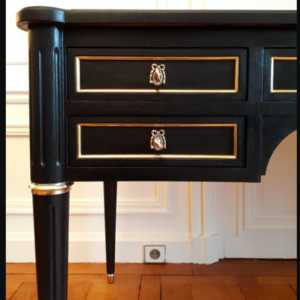
Hi, I’m trying to figure out how to join round legs of a louis XVI style desk to the apron. The plan from https://www.finewoodworking.com/membership/pdf/22518/011090074.pdf
is similar but in that example the legs don’t “wrap around” as much, meaning there is less of angle of the circle protruding and therefore more wood to connect to. And the desktop doesn’t extend over the top of the table legs.
Does any one know how the legs in the pictures attached are joined to the apron in such a way that the legs wrap further around showing more of the circle? Or is it not joined to the apron with the apron and legs joined to the desk top but not to each other? And if so what kind of joint is used to connect the legs to the desktop? thanks in advance!


Replies
My guess would be that thevaprons are joined to the legs using M&T joints cut into the square blanks before the legs are turned. What can you see underneath the desk?
If the one on the left does not protrude enough you could offset the tenon.
I had a table commission a coupla years back for a table with aprons on the extreme corners. I interlocked the tenons to add enough meat. I designed it so all of the joints were identical cuts.
Perhaps the top section of the leg is not a cylinder. I expect it's separated from the lower tapered section by that metal trim piece. Maybe the top section is only round on three quadrants and the inside corner remains giving faces for the mortises. Rough sketch below.
Thanks for the replies, that was very helpful! To accomplish Dave's suggestion to round only the three corners would you just make multiple flat cuts with a table saw similar to how a large square beam can be turned into a post, but leaving the 4th corner in place? Only other thing that comes to mind would be a router bit, but seems like it would have to be awfully big do a circle that large?
For a 2 1/2 ´´ square : a 1 1/4 radius router bit , but it could easily be done with a hand plane.
I think at the time of the Kings of Louis it would certainly have been done by hand and IF (big IF) the legs were made as I suggest, they'd certainly have been done by siding the piece.
Gulfstar's router bit selection would work. I'd make the blank extra long and leave a square section on each end.
You could do the fluting on the router table, too. After "turning the three sides, bevel the corners on the remaining part of the blank so you have flats for cutting the flutes on the 45° lines. I can make a sketch if that part is confusing.
In my shop I think I would do it on my Router Boss with the 4th-Axis work holder with a spiral upcut bit. It would make it easy to turn just three corners off and then I would change out the bit for a core box bit to do the fluting.
ok that makes sense, thanks guys! if you wouldn't mind posting a sketch, that would be great
Let's see if this makes any sense. On the left is a longer blank with the rounding over done by a cutter like Gulfstar shows. The flat ends are kept so can run flat against the fence and table. You only do three sides on each blank and the ends don't need to be as long as I show.
In the center I've ripped off the corners and on the right, the thing is rolled onto the "corner" for cutting the first flute with the core box bit.
thanks again, very helpful!
This forum post is now archived. Commenting has been disabled