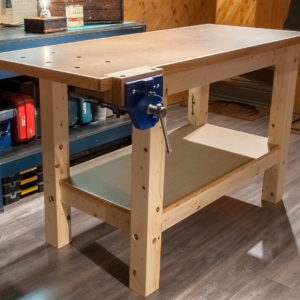
My new workbench from Getting started in Woodworking serie.
Hi everyone,
My name is Seb, and I’m from Quebec City, in Canada. This is my first post on this forum.
Quick context intro. I started to enjoy working with wood during home renovation. In the early beginning of winter I started to read and learn on woodworking and got small introduction class in a woodworking school around my city.
My first personnal project was to create a really simple workbench with my basic toolset I own.
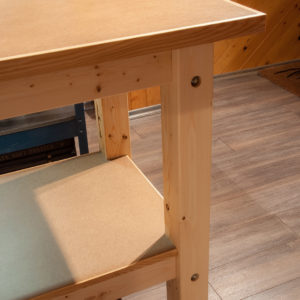
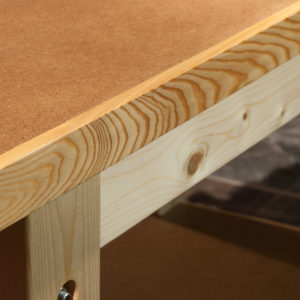
For the little story, the wood was coming from my father forest, he’s a sawer for his personnal and family need. The frame is in douglas fir and the border around the mdf is in larch. I think larch is a beautifull wood, very rustic felling.
I followed the plan and video tutorial from getting started in woodworking and went a little further in the finitions details.
The plan was made in 3D (it’s my real job) with Houdini (procedural modeling tool) and sketchup ofr 2D plan.
Happy to share my work and my new hobby with you guys.


Replies
Hi Seb,
Great job on the bench. I need to go build one, mine is aweful.
Seb, bench looks great, I set my vise up like that and it works real good.
Seb, great job! Very nice attention to detail. Happy Woodworking!!
Nice job!
I made my first woodworking bench from this same design. It got me through the first year, which was good, but I feel this design could be greatly improved if the front and back edges were flush with the stretchers and legs. As it is, clamping workpieces is extremely difficult.
The silver lining: this bench taught me what to avoid next time!
Wow! Beautiful bench! Very nicely done!
Are there any other changes you'd make? I thinking of doing an updated version of this project and would like all of the input and ideas I can get.
Tank you all for nice comments, It's always good for motivation!
Very nicely done.
@benstrano - If you made the front edge flush with the legs you could have a sort of board jack feature using dog holes up the leg or some other method; t-track with a sliding bracket, large dowel in a series of holes, etc.
@BenStrano
Thank you Ben for asking, if this can help future readers, I'll be really happy!
About the modification, not so much, out of what you saw in pictures I only changed the height to 36 for a better fit with my personal size, added cork square patches under the legs for adding more friction with the ground and applied 3 layers of natural polymerized lin oil everywhere for an average waterglue protection.
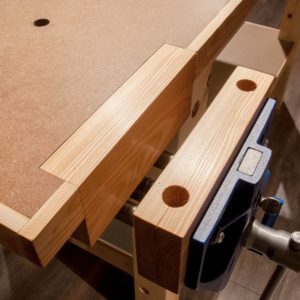
Mdf is fragile on the border, it's why I added a thin border of wood (only glued with paint tapes as clamps...) and used some new cutter blades as improvised card scrapper for a perfect level with the mdf. Other than that, I used a simple round over bit on the visible corner of stretchers and legs for breaking hard corners.
This part can interest you as well. The major issue I got during the project was the fit between the different holes for metal rodes and dowels in legs. I had bought a new drill bits set of quality for this project with new quality drill, but even with that I had a lack of precision during drilling (drill moving at start..). This resulted of couple of hours of difficult adjustments, just frustrating. It can be many factor reasons...wood too low density, experience...don't know.
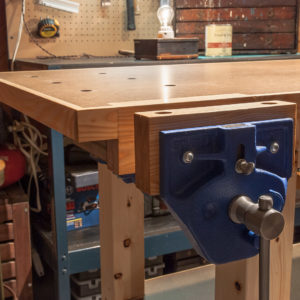
For the vise integration notch in mdf, I used my circular saw as a plunging saw with clamped guides for the interior cut, this was difficult. Whole vise fixing was a full week-end project at least, one of harder thing of the project but really rewarding.
I forgot the hardwood edging wasn't part of the original plan. I did that on mine, too, and the edge has held up well. I recommend adding that to any new design, as it adds value, and is something easy to do without a well-stocked shop.
Additionally, before drilling the dog holes, I overlaid the top with a sacrificial piece of 1/8" hardboard. It's attached with double-stick tape, and hasn't moved in four years.
Ben, the capacity of the vise is reduced quite a bit with that thick chop inside. I make a sleeve for my cast iron vise that enlarges the working jaw to the edge of my bench and also serves as a pull-up full-length dog. I mounted my vise 1/2" lower than the top to allow for it. Photos below.
This forum post is now archived. Commenting has been disabled