How to properly store partially completed project until spring?
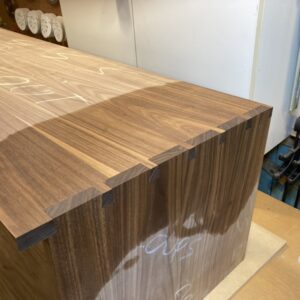
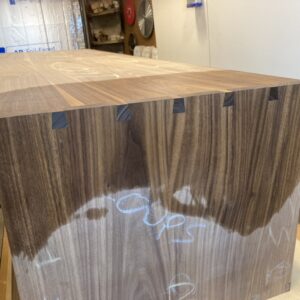
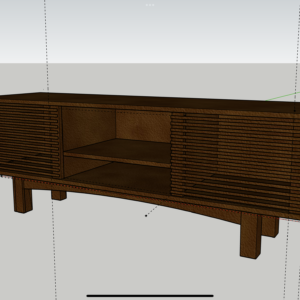
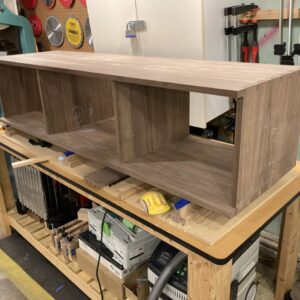
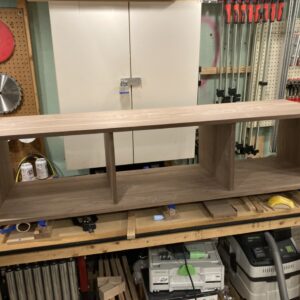
I’ve been working on this walnut tv stand all summer. I planned on finishing by winter, but it’s not gonna happen. I’m really green and really slow. I’m in Minnesota and don’t have a heated shop. The carcass and remaining wood will be stored in my house all winter. I have a whole house humidifier and do my best to keep it above 30%, but can only go so high when it’s 20 below zero.
The carcass has through dovetails on the corners and the center vertical pieces are dado’d. I’d like to store it unglued until spring if possible.
Anyway, my options to store it are—
1. dry assembled on a flat surface with or without clamps. I’m concerned it won’t come apart in the spring, although none of my joints are currently too tight.
2. stack and sticker the components on a flat surface. I’m concerned there will be a lot of movement.
3. Glue it up—I’m really trying to avoid this as I’d like to sand and pre finish as much as I can.
Any advice appreciated by this newb. I don’t see myself in a huge hurry to cut carcass dovetails again anytime soon 🙂
Thanks, Joel


Replies
There is a regular contributor to FW that is a proponent of sealing parts in plastic to keep them locked in their current state. I am not sure which author/craftsman it is but it has been mentioned a few times. As I recall it must be truly sealed.
I theory stickering would work, but you'll be waiting for the parts to arrive back where they are now in the spring, perhaps summer of next year.
That's Bob Van Dyke and I know it goes against what so many people say, but I believe he's absolutely right! Stickering allows moisture to come and go and that will allow the wood to do what it wants. Sealed away in a bag with plastic wrap keeps all of that from happening.
If gluing it up is not an option, I would vote for option one: leaving it assembled as-is until next spring, so the pieces restrain each other and stay nice and flat. I suspect the chances of difficulty disassembling the piece in the spring due to things swelling up will be quite a bit lower than the chances one or more of your loose parts cups a bit over the winter and makes it harder to reassemble without dinging things up at least a little. ..BTW, nice work.
Thank everyone. I really dove in the deep end on this project. Every step has taken me days, with multiple jig builds and dozens of test cuts. I’m glad I did it though, I’ve learned a lot. It sure is easy to design things on paper in the winter, but a whole different ballgame when you get one one shot at cutting a 64” glued up panel. Next project will be something that requires way less precision. A cabinet maker I am not.
I think I’m gonna leave it dry assembled. I like the idea of sealing the components in plastic, but I’m not sure I want to figure out how to seal up 64x20” panels. What I need is a walk-in cigar humidor to approximate my 50% relative humidity summer garage in the winter :)
First don't sell your abilities short, from what the photos show your work is first rate.
Second don't over estimate what it takes to seal the pieces in air tight plastic. All you need is a roll of shrink wrap plastic, available at Home Depot, Lowe's, U-Haul or anywhere they sell packing materials. Once you have this it's simply a matter of tightly wrapping overlapping passes over each piece. One pass across the width a second pass over the length, followed by a third pass across the width should do it.
You could just buy a bag sized to store / dispose of a mattress. Twist the end, fold and zip tie... your atmosphere is locked for the winter. Blow it up with a shop vac to check for leaks.
If you are willing to spend the money, consider getting a small climate controlled storage area for the winter. I’m also in MN and store lumber in mine with no issues.
This forum post is now archived. Commenting has been disabled