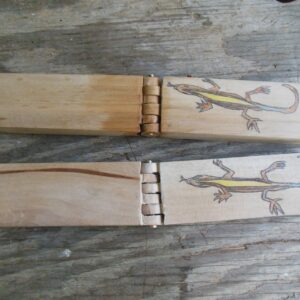
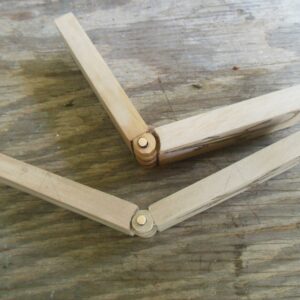
I finally completed the hinges and made simple line carvings of a constant companion on my back porch – a skink (lizard). Next, will be final assembly of the box. I’ll post another picture.
Discussion Forum
Get It All!
UNLIMITED Membership is like taking a master class in woodworking for less than $10 a month.
Start Your Free TrialCategories
Discussion Forum
Digital Plans Library
Member exclusive! – Plans for everyone – from beginners to experts – right at your fingertips.
Highlights
-
Shape Your Skills
when you sign up for our emails
This site is protected by reCAPTCHA and the Google Privacy Policy and Terms of Service apply. -
 Shop Talk Live Podcast
 -
 Our favorite articles and videos
 -
E-Learning Courses from Fine Woodworking
-
-


Replies
Keep it up - I'm keen to see what it becomes.
Thanks Rob_SS. I'm trying to figure out how to make some inserts, because my wife might use the box to put her hand sewing buttons, needles, thread spools and stuff. She said four compartments. Since the front, back, and sides are already joined by dovetails, I have to figure out how to anchor the compartments. Any ideas?
Assuming the bottom is also locked in...internal liners? That would let you add a tray on top if it works for her stuff.
Thanks _MJ_, I hadn't thought of that. Then I could insert it from the top, and figure that in when I saw the recesses for the hinges in the lid. The plan calls for 1/4" recesses for the hinges cut in the lid. I haven't glued the bottom yet. Yes, the right term would be interal liner. Or I could try to make a liner box within the box, if that is what you mean?
Have a look at Mike Pekovitch's dovetailed tea box project for internal division ideas.
https://www.finewoodworking.com/2018/05/16/dovetailed-tea-box-plan
Yes, I also want to see the final result. Seems to be an interesting idea.
Now my wife wants just three partitions. Before I glue on the bottom I'm going to saw three "V" notches on the inside of the box sides with the help of a 45 degree block as a guide. I'm going to use a 3/4" by 3/4" by 4-3/8" piece to attach the two partitions in the middle. The partitions are 3/16" thick.
Yes, I was thinking internal liner box slid in from above or below. V-grooves for the dividers is a good idea. You might not have to glue any of it... plus it's a great way to hide the edges of a bottom liner like leather or cloth.
The V-grooved liners and partitions of 3/16" ply came out okay. I dry fitted and planed down even with the top of the sides with a block plane.
It's all glued up now. My wife took pictures, but they need to be downloaded, sized to 300 mb and emailed to me before I can post them. I will make more of these when I have a shop with some power tools for sure.
So I'm gonna use a pair of calipers. And I've milled my lumber to exactly half an inch. So I'm gonna measure 1/4 inch quarter inch get a dead-center use a center punch.
Target Gift Card Balance
These are the pictures of the glued up box. My wife wants to line the inside with a paper liner she uses inside kitchen cabinets and paint a clear polyurethane finish.
This forum post is now archived. Commenting has been disabled