Dovetail Cleat for Tabletops
Use a sliding dovetail joint to secure tabletops to their bases.

Synopsis: Andrew Hunter explains why he uses the sliding dovetail joint to secure tabletops to their bases. This construction method keeps a solid-board top flat and allows for seasonal expansion and contraction. It also looks great. A taper along the length of the joint makes it tight and solid. And because glue is not used, the table can be broken down if need be. The author gives directions for using two types of sliding dovetails — shouldered and unshouldered. Either can be incorporated into the design of the piece.
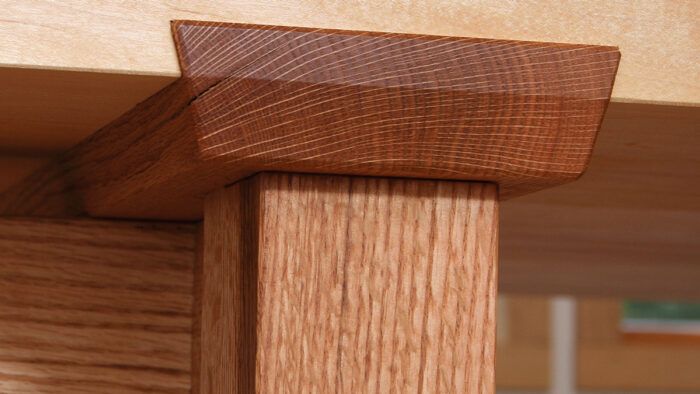
The sliding dovetail joint is not a modern invention. Examples are found in furniture dating back over 500 years, and I suspect the joint’s origins go back into ancient history. But I use this joint to secure tabletops to their bases. The dovetailed cleats keep a solid-board top flat, and they also allow for expansion and contraction. And by leaving them exposed, I make them part of the design.
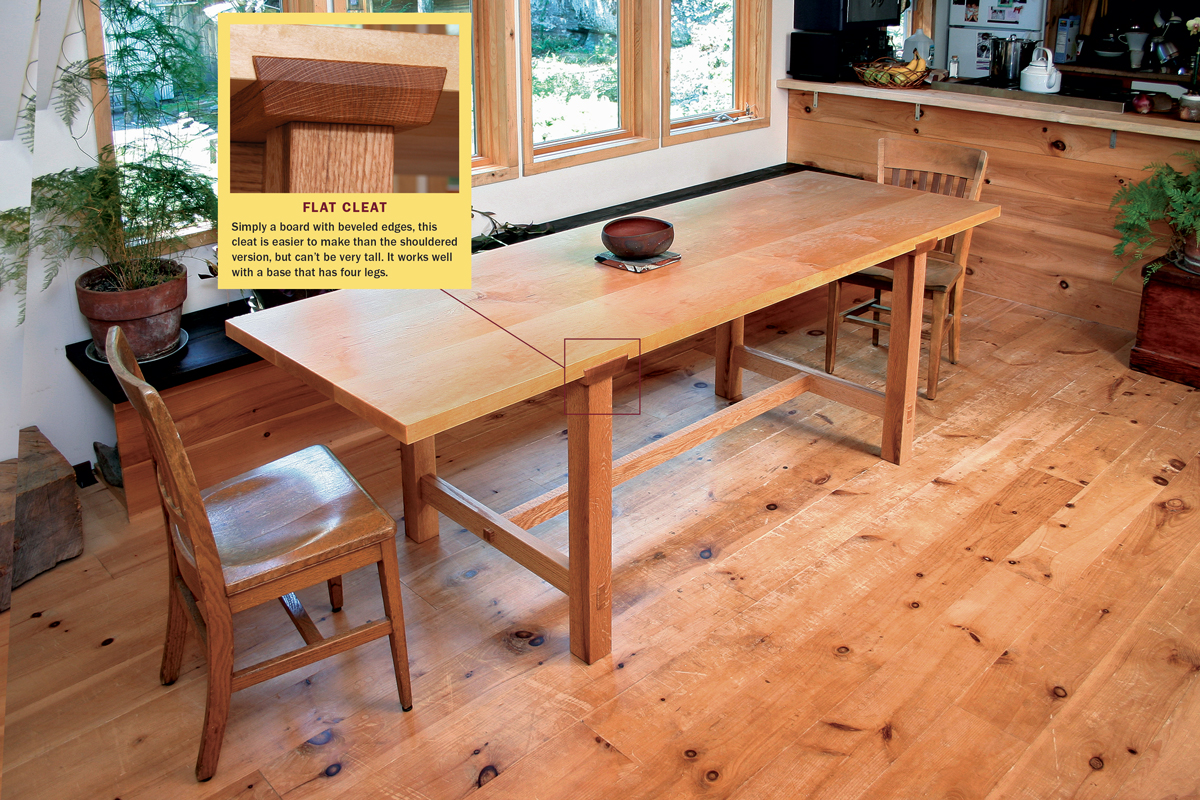
A taper along the length of the cleat and slot makes for a tightfitting joint. The farther you slide the cleat into its slot, the tighter the joint. This taper eliminates the precision needed to fit a straight cleat and the need for glue. With no glue, you can remove the base from the top if needed, and if the fit of the cleat loosens due shouldered cleat A shouldered cleat can be much taller and narrower, so it can be profiled and used as the top member of a trestle-style base. Better Way to Attach Tabletops to wood movement, you can tap it back home or remove and shim it if necessary. I’ve never had to do either because I start off with very dry wood and use quartersawn lumber for the cleat.
I prefer this joint to slotted screws or steel brackets. When you put so much time and care into the base and top, it makes sense to put that same care into joining the two, without relying on mechanical devices.

I use two types of tapered sliding dovetails to secure tabletops: shouldered and unshouldered, depending on the design. Most of the work for an unshouldered cleat is done on the tablesaw, and I make the shouldered cleats on the router table. The key to a tight-fitting joint is matching the taper of the cleat with the taper of the slot, then fine-tuning the fit with a handplane. For shouldered cleats, you typically would need a specialized dovetail plane to adjust the tapered shoulder directly, but I figured out that a piece of wood taped to the edge of the cleat lets you use a router and then a bench plane instead.
Begin by gluing up the solid-wood tabletop, making sure it is straight and true. A sliding dovetail cleat can straighten a slight cup in a top, but correcting twist is difficult.

Cut the tapered slot
It’s easiest to rout the tapered dovetail slot in the underside of the tabletop, and then create the cleat and tweak it to fit. For both shouldered and unshouldered joints, the slots are made with a handheld router and clamped straightedges. First, draw a centerline for each slot, making sure they are parallel to one another and square to the table edges. Then lay out the sides, marking the taper down the length of one edge.
Using a dovetail bit and a clamped straightedge, rout a test piece to determine the exact distance from the straightedge to the inside and outside edges of the slot. Transfer these measurements to the underside of the top, clamp the straightedge along those lines, and then rout.
How to make the cleats
To make an unshouldered cleat, begin with stock 6 in. longer than the width of the tabletop. This extra length helps when fitting the cleat to the slot. Lay out the joint on the blank, centering it in its length. With the tablesaw blade tilted to match the angle of the dovetail slot, cut the straight edge of the cleat. Then, using a simple tapering jig (above), cut the tapered edge of the cleat to match the tapered edge of the slot. Handplane the taper to get an exact fit
in the slot. After waxing, drive it home and mark and cut its finished length.
 From Fine Woodworking #213
For the full article, download the PDF below:
Fine Woodworking Recommended Products

Stanley Powerlock 16-ft. tape measure

Dubuque Clamp Works Bar Clamps - 4 pack

Jorgensen 6 inch Bar Clamp Set, 4 Pack


Comments
Simply elegant. I like this a lot and will definitely start doing this. Thanks so much! George
Does the grain direction of the shouldered dovetail cleat matter? I have a 40" long by 3" thick walnut slab that I want to use for my table. I would like to rout the dovetail along the length of the long grain. Im thinking it will be a 1" wide at the top dovetail. Thanks
How are you then attaching the base/legs to the cleat? The article ends at making the cleat . . .
Log in or create an account to post a comment.
Sign up Log in