How To Cut Dovetails on the Table Saw
Make better, faster through-dovetails, with a trick for perfect half-blinds, too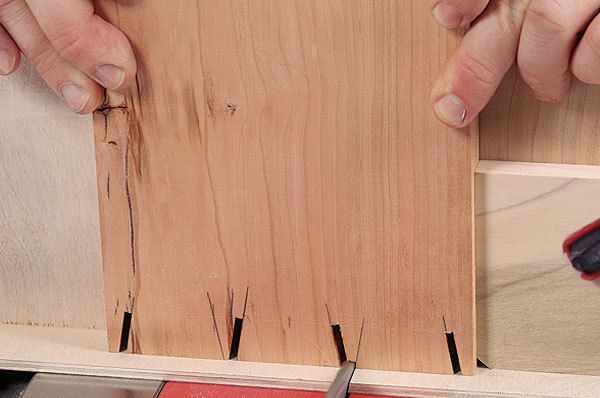
Synopsis: Get the look of hand-cut dovetails with the accuracy and ease of machinery, without a router or a dovetail jig. This method, explained by Gregory Paolini, uses the tablesaw to cut through-dovetails. When cutting the tails, the tablesaw locks in the cutting angle and allows you to make eight cuts from a single layout line using a fence and a stop block. To cut the pins, one side of every pin is cut with the miter gauge angled in one direction, and then it is angled in the other direction to cut the second side. Then use a thin board, resawn from beautiful lumber you’ve been saving for your drawer fronts, to add a false front and create the look of half-blind dovetails.
It takes an awful lot of practice to cut dovetails by hand and to do it well. Your sawcuts should be straight, at a consistent angle, and square to the board’s face. and you can’t cut into the baseline. Later, when you’re paring and attempting to make up for bad sawcuts, you can make things much worse.
There are ways to cut dovetails that bypass those challenges. With a router and jig, you’ll get straight and square tails and pins that have consistent angles. unfortunately, they won’t look as nice as hand-cut dovetails. It’s difficult to reproduce the wide tails and narrow pins that make the hand-cut version so appealing.
However, there is one power tool in your shop that excels at cutting straight and square, and can easily maintain the same angled cut for both tails and pins: the tablesaw. What’s more, because tablesaw blades are no more than 1⁄8 in. thick, you can reproduce hand-cut dovetail spacing, too.
Of course, because both the tails and the pins are cut at the tablesaw, you’re limited to through-dovetails. That’s great for case joints and the back joints on a drawer, but what about the half-blind dovetails we all use to join the drawer front to the sides?
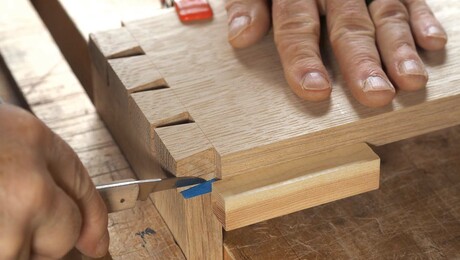
No problem. I have a trick that turns a through-dovetail into a half-blind, with added benefits you can’t get the traditional way. But let’s start with the basics.
To cut dovetails this way, you need only your stock miter gauge and a blade. I use a rip blade because these are ripcuts and because it has a flat-top grind, which leaves a flat shoulder when I cut the pins, with no paring needed. However, any standard blade will leave a bit of material between tails, so you’ll still have some paring to do.
If you’re going to cut dovetails this way all the time, get a blade with the teeth ground to match the dovetails’ slope. Any saw-sharpening service can do it. Use it for the tails and you won’t have any paring to do in the corners, either.
You also need two L-shaped fences for the miter gauge—one for the tails and one for the pins. They should be at least twice as long as the drawer sides are wide, so the sides always have support as you move them to cut the pins and tails. After the fence is attached to the gauge and a kerf is cut into it, it’s easy to align layout lines with the kerf so the blade cuts exactly where you want it to.
For the full article, download the PDF below.
Fine Woodworking Recommended Products

Veritas Precision Square
Leigh D4R Pro
Leigh Super 18 Jig





Comments
This is great system - if you have the blade!!! I am wondering why not just use a dovetail bit in a router table to cut these? I get that the base will likely be wider but I think that's OK.
True. You can also use all the expensive dovetail/box joint jigs like I own. Can even cut dovetails to some extent on the bandsaw. Greg is just showing you another technique. Can also buy a expensive saw blade from Forrest that they will grind to your angle/slope (same thing).
Log in or create an account to post a comment.
Sign up Log in