How to Use a Honing Guide
Learn how to use a honing guide and get your chisels and planes super-sharp with greater ease
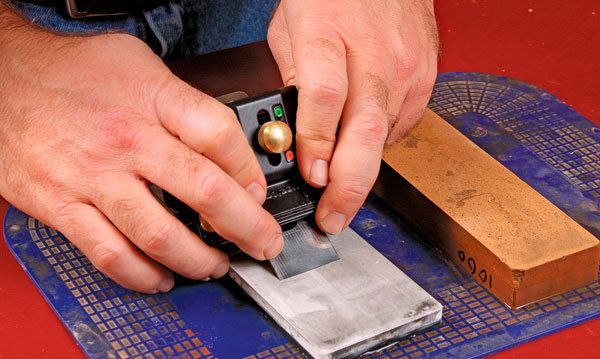
I hear from a lot of readers who struggle with sharpening, and I always pass along my two personal breakthroughs: Use a honing guide and go up to 8,000 grit. Not everyone agrees with the first part. Roughly half the teachers I know tell their students to hone by hand, balancing the tool on its bevel by feel. That’s not the best advice for hobbyists, if you ask me.
Those who advocate handheld honing are mostly professional furniture makers, who sharpen their tools every day and don’t want to waste time. I admit, with zero setup time the method is faster than a honing guide, but most hobbyists don’t sharpen their chisels and plane blades every day, or even every week, so they never develop and maintain the finely tuned muscle memory that handheld honing requires. And if you rock that edge on the stone, even a little bit, you might not be sharpening the very tip. For peace of mind, use a honing guide. You might experience true sharpness for the first time. Then you’ll know what all the hand-tool fuss is about.
Where handheld honing goes wrong
To understand why handheld honing is tricky, you need to understand the process. For starters, it works much better with a “hollow grind,” the scooped-out bevel formed by a wheel of some kind. Then you rock the tool on the sharpening stone, feeling for the little bumps that tell you the bevel is resting flat, and then try to keep at that same angle, riding those two tiny points evenly as you move the blade up and down the stone. (It’s easier on chisels, which have a longer bevel, than on plane blades, which are thinner.) But if you rock the blade at all as you move it, the system breaks down. Here’s why.
Like sanding a wood surface, you need to work your way up through the abrasive grits (grinding at a coarse grit, then usually going to a series of stones: 1,000-grit, then 4,000, then 8,000) to end up with a polished secondary bevel at the tip of the tool. Now picture what happens as you hold that blade by hand, rock it onto its bevel, and try to lock your arms and hold it at precisely the same angle while sliding it back and forth along the stone. Unless you have a good feel for this and practice frequently, you eventually will rock the bevel off its high points, rounding the tip slightly. Now you’re a goner, because you have no good way of knowing if each successive grit is getting to the very tip.
Contrast that tricky operation with the simplicity of a honing guide. You grind the bevel any way you want to. Bench grinders take a bit of skill to avoid burning the edges and softening the steel. So feel free to use your honing guide to form the primary bevel on a few sheets of sandpaper stuck on glass or granite, on a coarse diamond plate, on a motorized
sandpaper platter, or any way that is convenient. Just grind at a slightly shallower angle than you want for your secondary (honed) bevel. I grind most tools at 25°.
Now set up your honing jig to raise the tool to 27° or 28° (go higher for chisels that you will pound and chop with, and for
certain bevel-up planes), and start honing. It works for hollow- ground bevels and flat bevels alike. And the blade will never budge from its honing angle. That’s the key. You’ll know that every grit is reaching the very tip, where it matters.
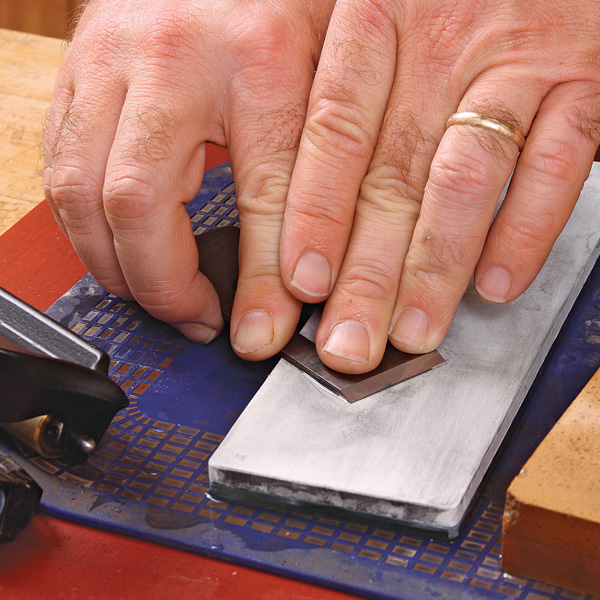 1) Start with the back. Work up through your stones so that it’s flat and highly polished. You only have to do this once, when you first get the blade. |
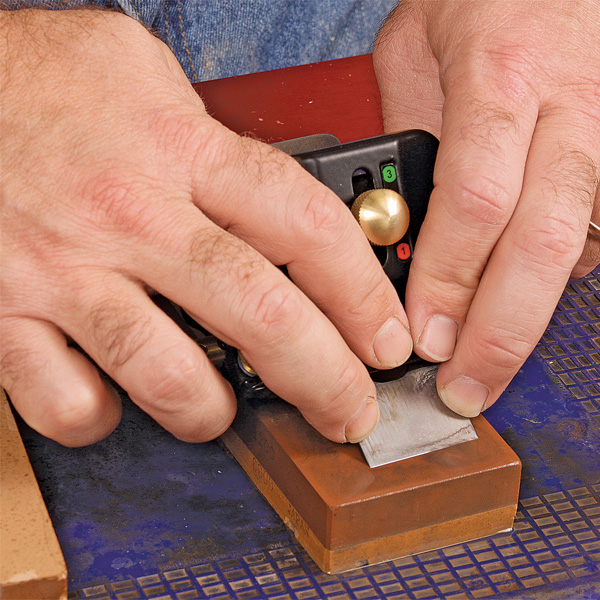 2) Now prep the secondary bevel. Grinding can leave deep scratches, so start on a 1,000-grit stone, and then use a 4,000-grit. |
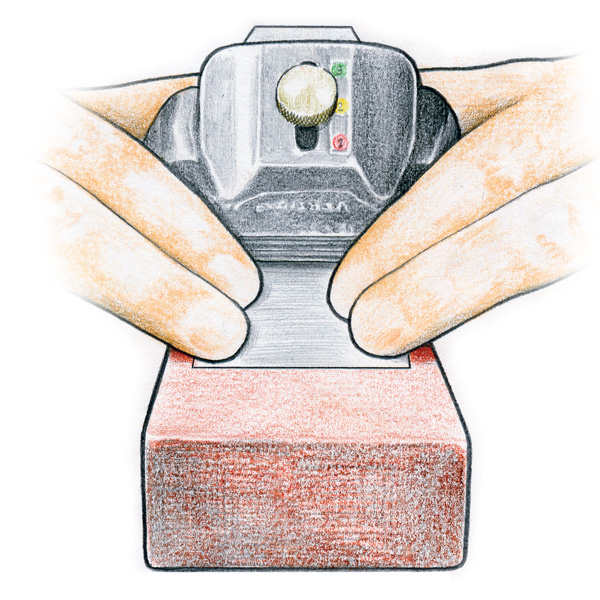 3) Keep the edge straight. Apply light pressure equally to both sides of the blade (just behind the cutting edge) to keep the edge square to the blade. |
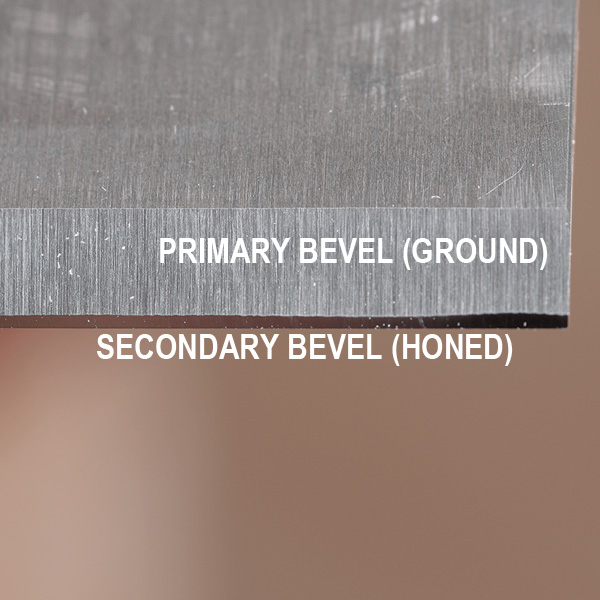 4) Primary vs. secondary bevels. The honed bevel doesn’t need to be the same thickness across the width of the blade, but it should extend from edge to edge. |
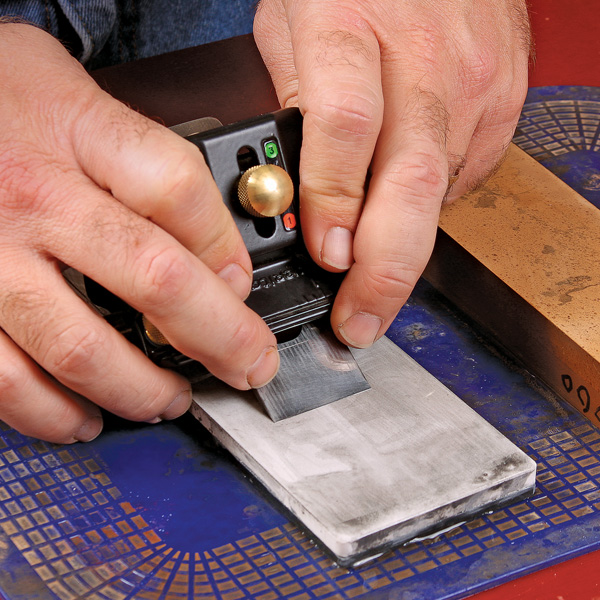 5) Hone it to perfection. Do this on your finest stone, typically 8,000-grit. |
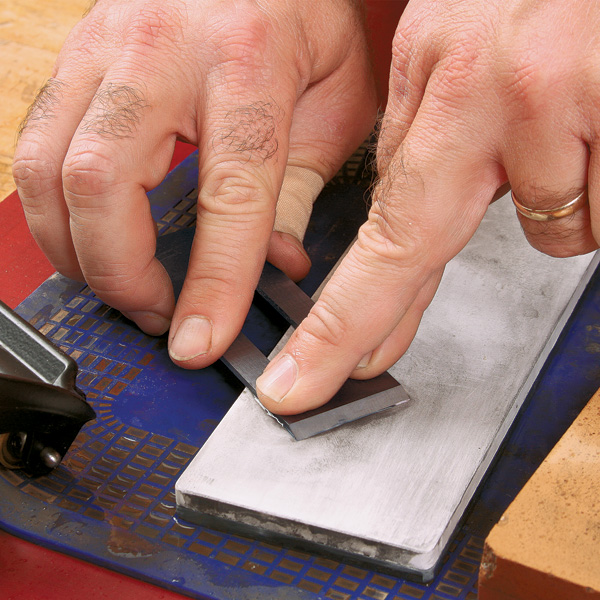 6) Back to the Back. Take the blade out of the guide and take a few quick strokes on your finest stone to remove the burr that formed there as you honed the bevel. |
Not all guides are created equal
Like most tools, there are better honing guides and worse ones. To be sure your blades are staying at the same exact angle regardless of the abrasive, you need a guide that rides on the stones, not on your workbench. Not all waterstones, for example, are the same thickness. So, if the guide’s roller(s) ride beside or behind the stone, you’ll have to re-adjust it for each new stone, and you won’t know if you are back at the same exact angle.
After that, it doesn’t much matter, but you need a quick and accurate way to set up your guide for a variety of angles.
Two good guides
One includes everything you need and clamps flat blades a bit more securely; the less-expensive version works just fine with a shopmade jig.
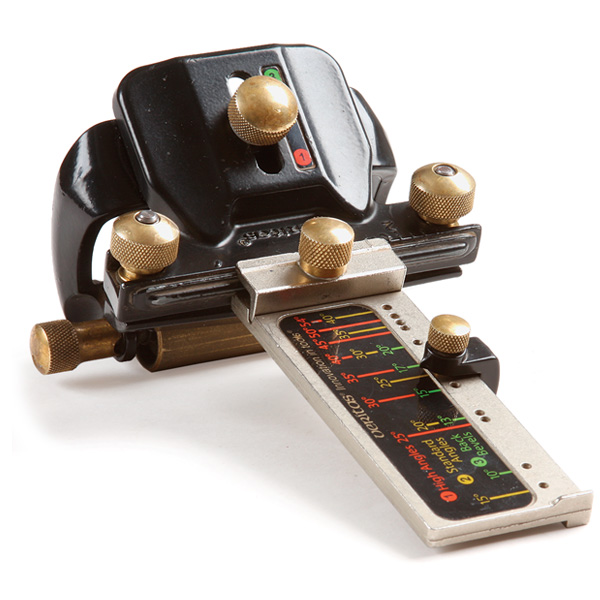 Veritas MK. II Honing Guide: Available through Lee Valley for $64.50. |
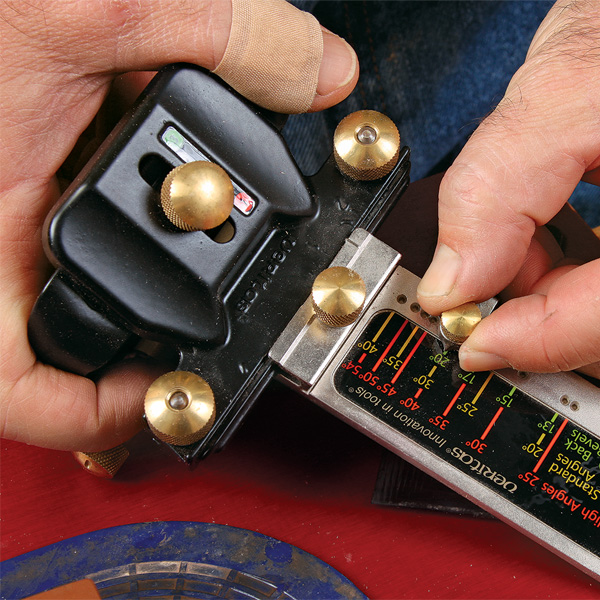 The Veritas model comes with an attachment that locks in a wide variety of bevel angles. |
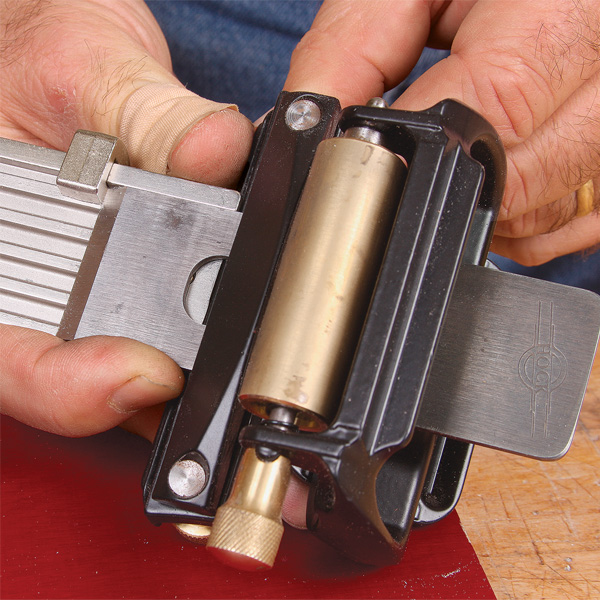 A stop sets the angle and a lip along one edge ensures that the blade is square to the jig. |
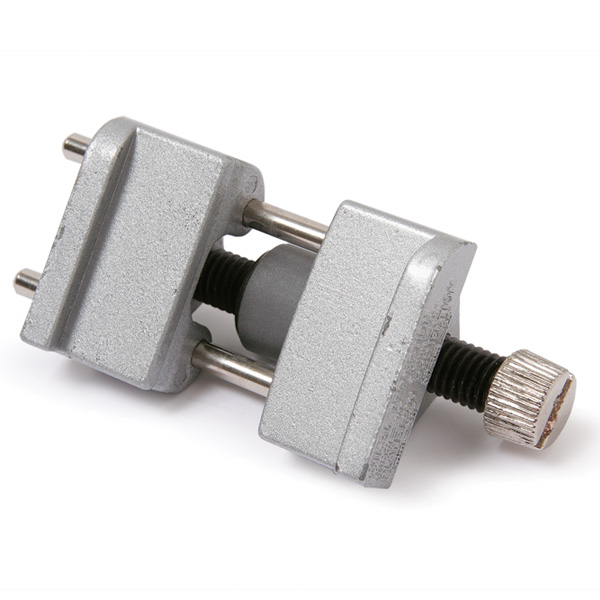 Basic Honing Guide: Guides like this, which sell for $6 to $15, work great with a set-up board, which allows you to quickly set the protrusion of the blade for common angles. |
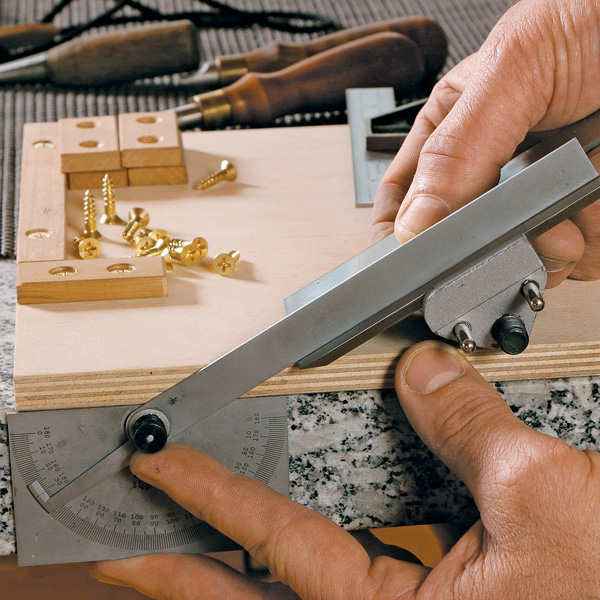 Set up the guide for a given angle using a protractor. |
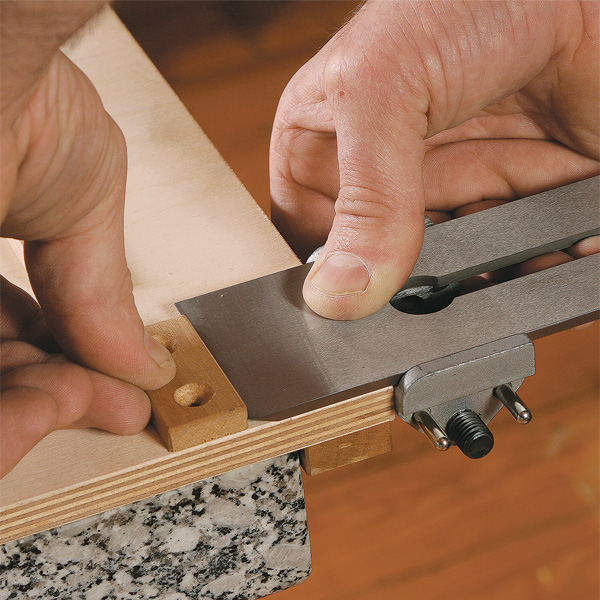 Now position a stop block so you can return the guide quickly and positively to the same angle in the future. |
Fine Woodworking Recommended Products

Honing Compound
Rockler Silicone Sharpening Stone Tray



Comments
what they don't show is how to set the tool in the guide. With the basic eclipse style, you can set the blade on top of the alignment guides or up into the slotted area that fit beveled edge chisels (under the plane iron/large chisel area); so what where do you set a mortise or square edged chisel? The height above the roller changes the angel.
Also, I already get the emails, so after I log in, (therefore you KNOW I already get them, why am I bothered by the crap below - or is it your web people don't understand web design?
Log in or create an account to post a comment.
Sign up Log in