Advanced Stringing Techniques: Part I
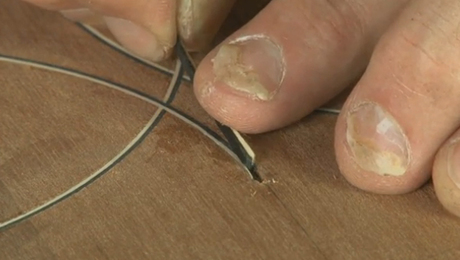
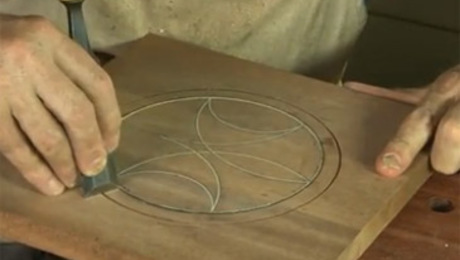
Learn stringing techniques for more complex designs. From sequencing to filling a double line inlay, these tips can be applied to many different designs.Decorative stringing is just one of the details that make period furniture stand out from the crowd. The delicate, whimsical lines that adorn fine crafted furniture crafted date back to America’s infancy and have been copied by furniture makers ever since. With the right tools, and a bit of patience however, any intermediate-level furniture maker can tackle basic stringing.
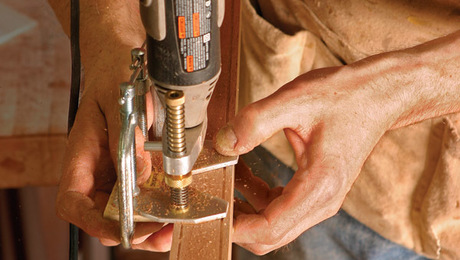
Sources of Supply: Veneer: Berkshire Veneer, Foot Pedal: Peachtree Woodworking Supply, Endmills: Drill Technology, Monoject Syringe: Amazon, Dremel Base: Stewart-MacDonald









Comments
What's the name of the stringing tool that was used in the video?
Whic tool in which video? Latta has a set of tools named after him, made by Lie-Nielson; check their website for those. Stewart-MacDonald makes the base for the Dremel. Latta also has videos for sale on the LN website.
Newbie to stringing. Problem with 1/16" maple strings splintering when doing bends. Do you ever soaking the strings in water before trying to string a curve? Does the glue itself help prevent splintering? Appreciate any advice.
Really excited building serving trays with splinter inlays.
Newbie to stringing. Problem with 1/16" maple strings splintering when doing bends. Do you ever soaking the strings in water before trying to string a curve? Does the glue itself help prevent splintering? Appreciate any advice.
Really excited building serving trays with spliter inlays.
It depends on how tight the bend is, but you might look into hot-pipe bending as a quick way of preshaping stringing.
Ben has given you the correct answer. I use a pyrography pen, have used a soldering iron as well (the pen type, not the gun type). Wetting the string will make it unmanageable I would think, and dilute the glue. Aside from that, it will start to swell the wood and then you will have problems making it fit that nice groove you sized it to minutes before.
Lardog here: just my inexperience. It's all in how you hold the string and how you start the inlay. I used firm forefinger pressure to sink the string and then just keep moving backwards with short firm finger pressure. In the beginning I was just trying to jam too much string at once. I started 5 practice trays with inexpensive wood. Made errors on all that ruined the project. But! I was learning. Then started one using walnut. Did all the inlay lines with a good Dremel tool attached to the pivot pin for the curved lines. Used the straight line attachment to make the straight lines. One 1/16 Dremel router bit did all the work. I bought several bits thinking they would break easily but that one bit did it all! All 5 serving trays turned out beautiful. One for each of my 5 kids. At first I thought this project far beyond my skill. Once you learn the techniques it IS simple but you have to have an extremely steady hand while cutting the inlays. Do some practice before you use expensive hardwood. Thanks to those who replied my initial problems
The Stew-Mac router base for the Dremel is alright but it can be finicky to set up. Veritas makes a plunge base attachment that, in my opinion, is a far superior tool. It has attachments such as an adjustable fence and two curve guides and a circle arm with three interchangeable centers. The plunge mechanism is very smooth and you don’t have to worry about messing up enter and exit wobbling. Hope this helps
Log in or create an account to post a comment.
Sign up Log in