Jointing Boards for Dead-Flat Panel Glue-Ups
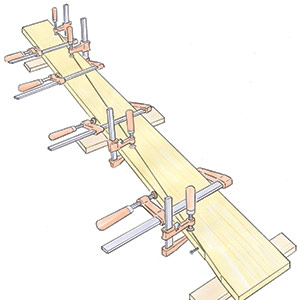
Even if your jointer fence is out of square, this simple tip will ensure perfect edge jointsThe jointer is the perfect tool for dressing the edges of boards ahead of a panel glue-up. Trouble is—if your jointer’s fence isn’t set perfectly square, you could end up with a gappy joint, or a panel that’s slightly cupped.
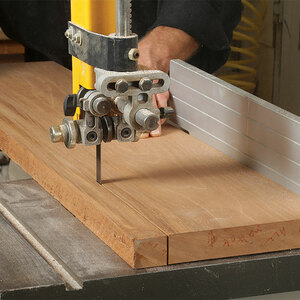
Fortunately, there’s a simple trick that will ensure dead-flat glue-ups every time—even if your jointer’s fence is slightly askew. In this short video, Fine Woodworking’s Michael Pekovich demonstrates an easy technique that cancels out any of the accidental beveling on panel edges that would normally lead to a disastrous glue-up. If you mill your own lumber, this is a technique you need to know.


Comments
Michael? This is the best video I have ever found on matching up panels for glueing. You have shown the I/O and how they work. I have been to many of sites and they never did it like you did. Good job. Would like to see more of your instructions...Michael from Nashville
When you do NOT have a joiner, what then?
May be worth mentioning getting the faces flat and parallel first.
When I don't have a joiner on site I clamp them face to face or apposing each other and put the hand plane to work.
I sometimes will do this at the joiner as well to speed up the process it the boards are manageable.
Having watched or have observed Michael in the classroom. He seemed an excellent and patient teacher. I'd sign up for one of classes in an instant, in person or online.
DrGlup, the same principle applies if you are preparing a joint with a hand plane whose blade is not set perfectly square. Clamp one board so its inside face is facing to the left when you plane; clamp the other board so its outside face is facing to the left when you plane. Any deviation from square by the plane blade cancels out. This technique may force you to plane against the grain on one board, but unless it is really bad, tearout on the edges that are joined won't matter.
Great tip - I've stacked boards together to joint producing the same effect but this is a much easier and you won't lose track of which is the I and O. Thanks!
What happens when turning one board causes chipping because you are going against the grain?
Thanks for sharing video and making lesson simple as possible I will have it imbedded in my memory for that one reason.
Of course all of the above assumes that the jointer knives are healthy. If the knives are not in good shape, they'll leave raised lines on the surface that will compromise the quality of the joint. So, change the knives on the jointer, tune them up in place with slip stones, or plane the edges with a hand plane whose blade has been freshly sharpened.
Many woodworkers will also book the pieces together in a vise and plane the edges simultaneously, which produces the same result. And, if you really want to have fun, try planing a slight hollow in to the edges, which effectively results in a slight gap in the center. When pressure is applied with a clamp in the middle of the board it will exert pressure to the ends first, then close the rest of the joint as more pressure is applied. This technique, known as a "spring joint" was routinely employed by pre machine-age craftsman, who could often glue up a panel with a single clamp!
AS already stated planning against the grain (essentially what you're doing) Is never a good idea. This leaves terrible tear out. What I do is set my jointer to the thinnest cut possible and joint very slowly and this will almost eliminate tear out. ultimately sharpening and adjusting is the best course.
Isn't that why it's called a "jointer"?
Log in or create an account to post a comment.
Sign up Log in