

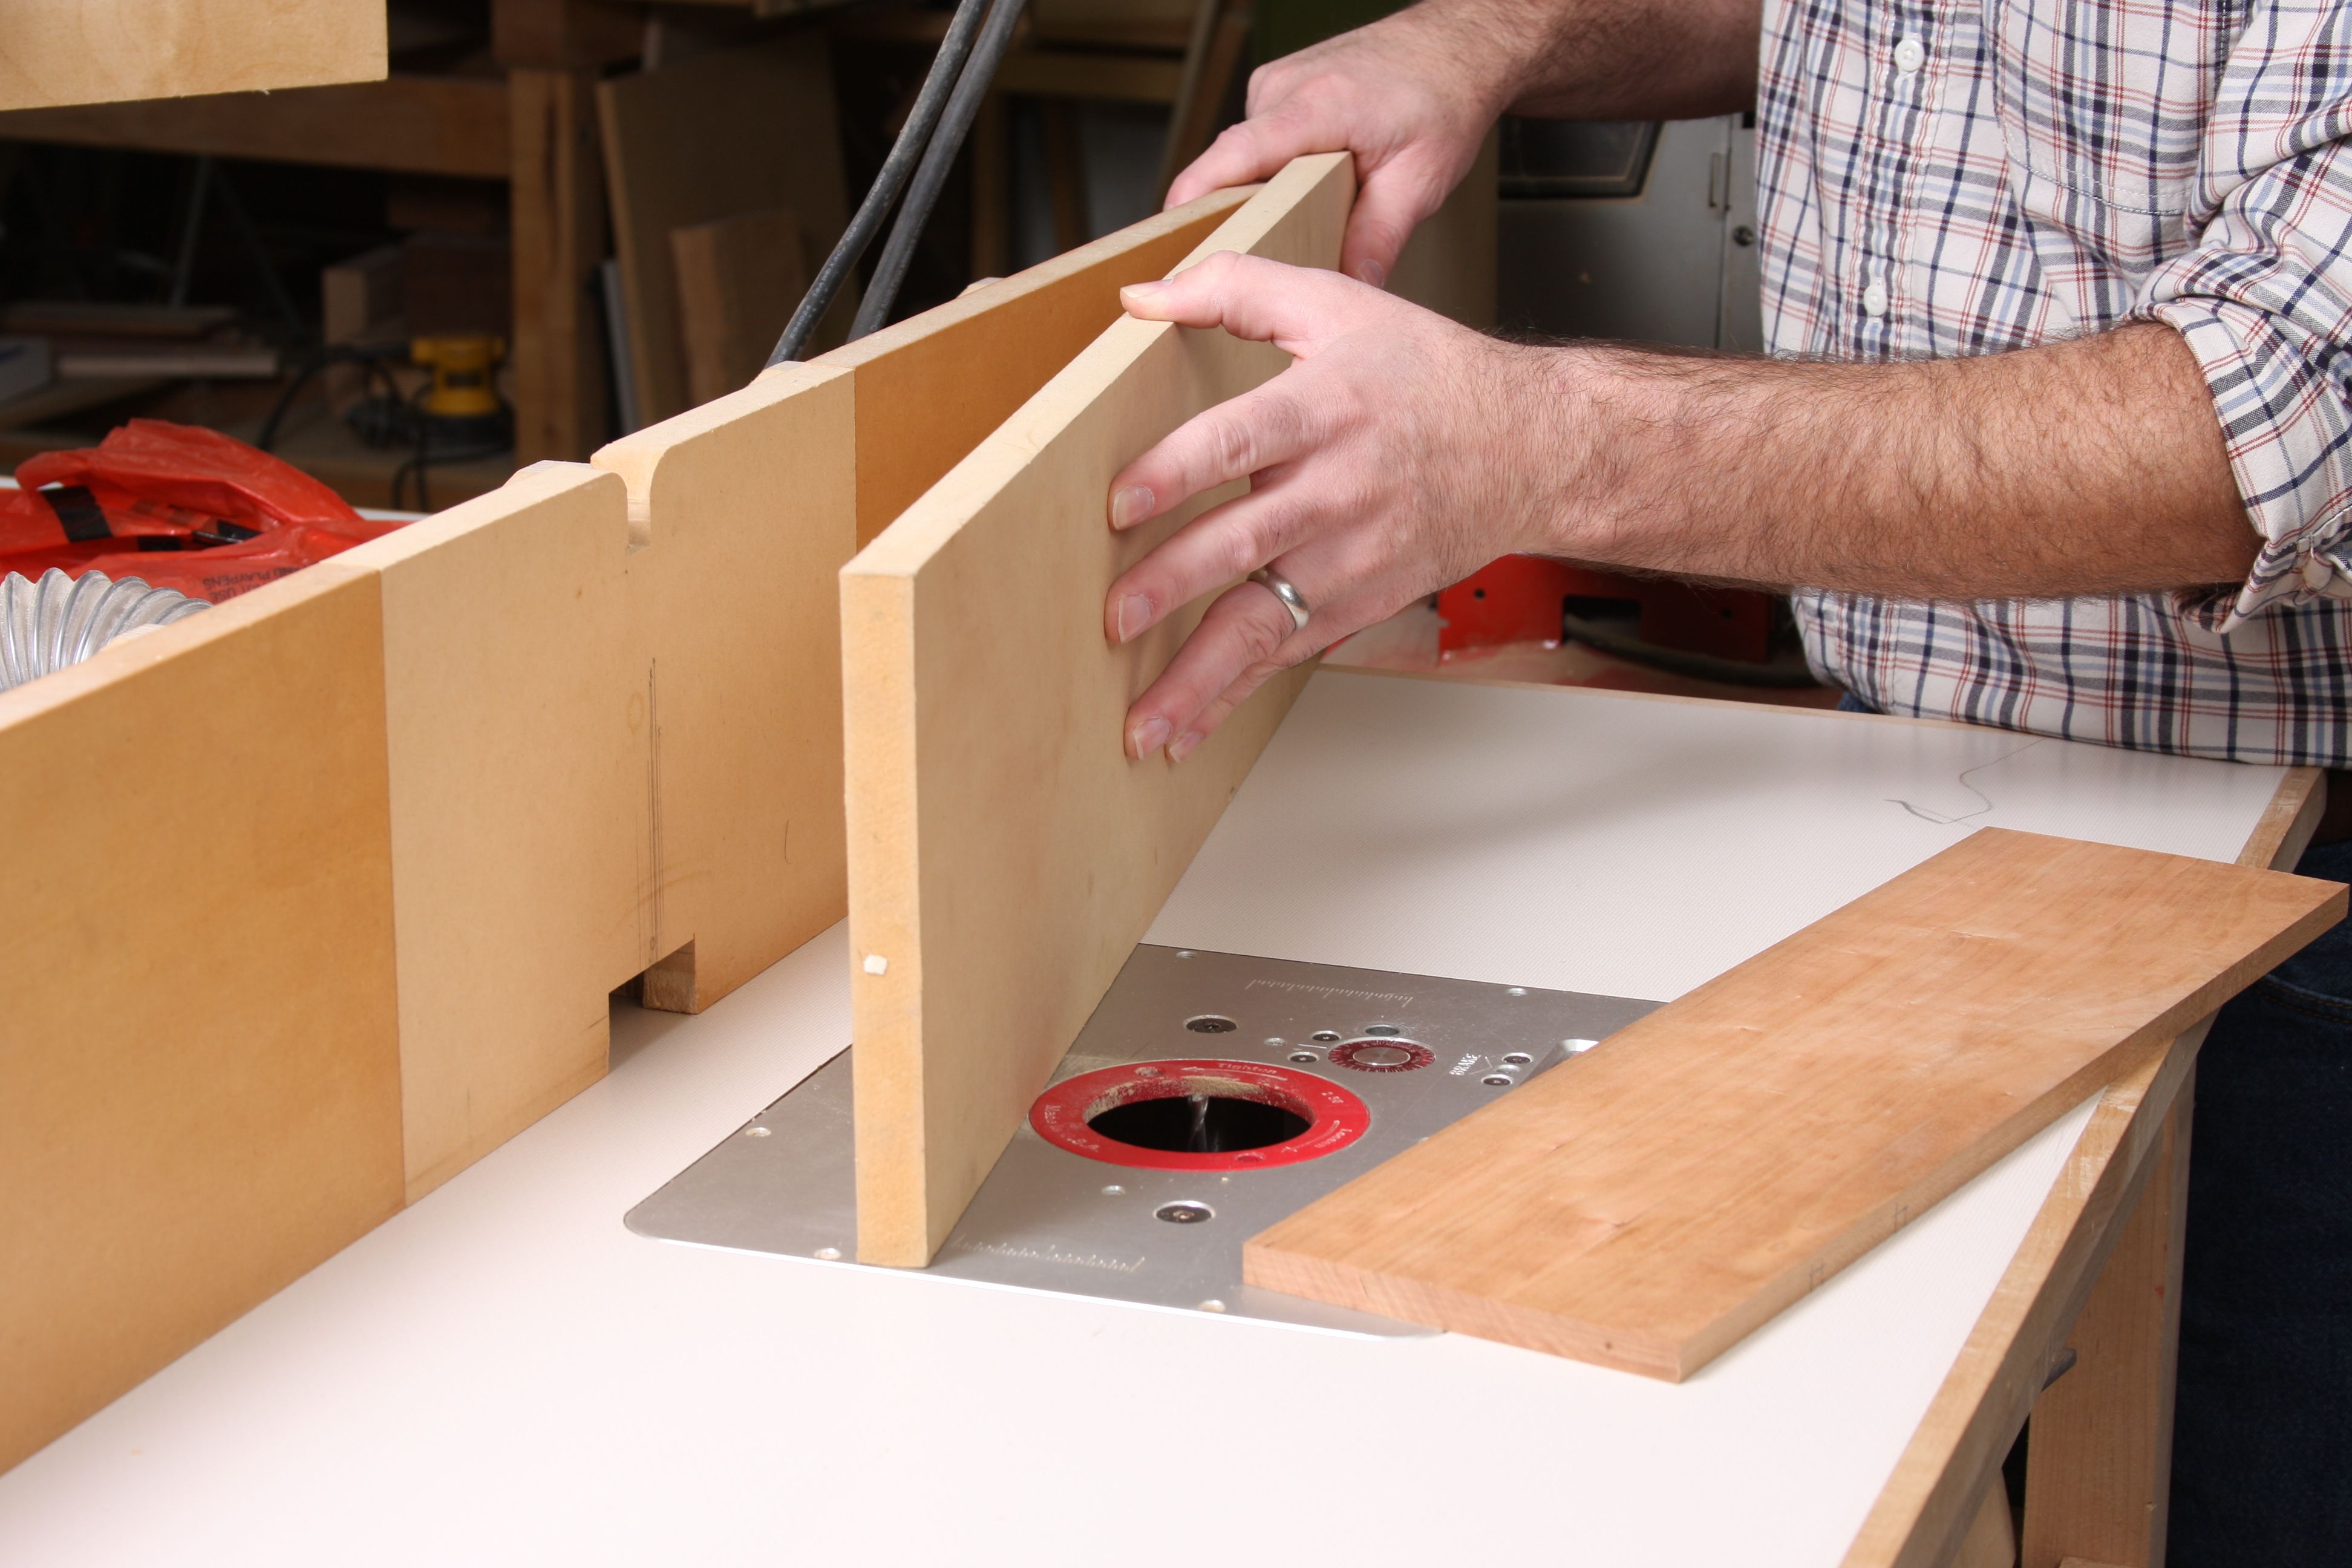
Add an auxiliary face to your fence. It serves two purposes. First, it covers up the hole in the fence, so that your workpieces don't dip into the hole and ruin the cut. Second, you'll be able to mark on the fence where the bit begins and ends. You'll see why that's important after a few more photos.
I make a lot of small cabinets with lots of drawers. That means I end up needing a lot of drawer dividers to create the pockets. Because the cabinets are small, I use solid panels for the divders, and house them in stopped dadoes cut into the cabinet sides. For a long time, I struggled with these dadoes. I used to cut them with a handheld router and a T-square style guide. I always had two problems. First, even though I laid out both dadoes in a pair at the same time, when I routed them they never came out aligned. When I put the divider into the dadoes, it would slop down toward one side of the other, and my pocket wouldn’t be square. Second, I often ended up with dadoes that weren’t sqare to the front edge of the cabinet, so the drawer divider would slope up or down as it went back. Another bad drawer pocket. I also hated how difficult it was to clamp the guide to the workpiece and the workpiece to the bench. It seemed that at least one clamp always impeded the router’s travel.
I solved those problems when I switched from a handheld router to the router table. By referencing the end of the cabinet side off of the fence for the dadoes in both sides, I am guaranteed to get dadoes that are square to the front edge and aligned with one another. The result? Wonderfully square drawer pockets, which means that it’s much easier to make and fit the drawers. (One note: In order for this technique to work, the end of the cabinet registered against the fence must be square to the edges of the side. But, really, it should be square no matter what.)
Take a look at the photos to see how I set up my router table to cut the stopped dadoes.
-
Add an auxiliary face to your fence. It serves two purposes. First, it covers up the hole in the fence, so that your workpieces don't dip into the hole and ruin the cut. Second, you'll be able to mark on the fence where the bit begins and ends. You'll see why that's important after a few more photos.
-
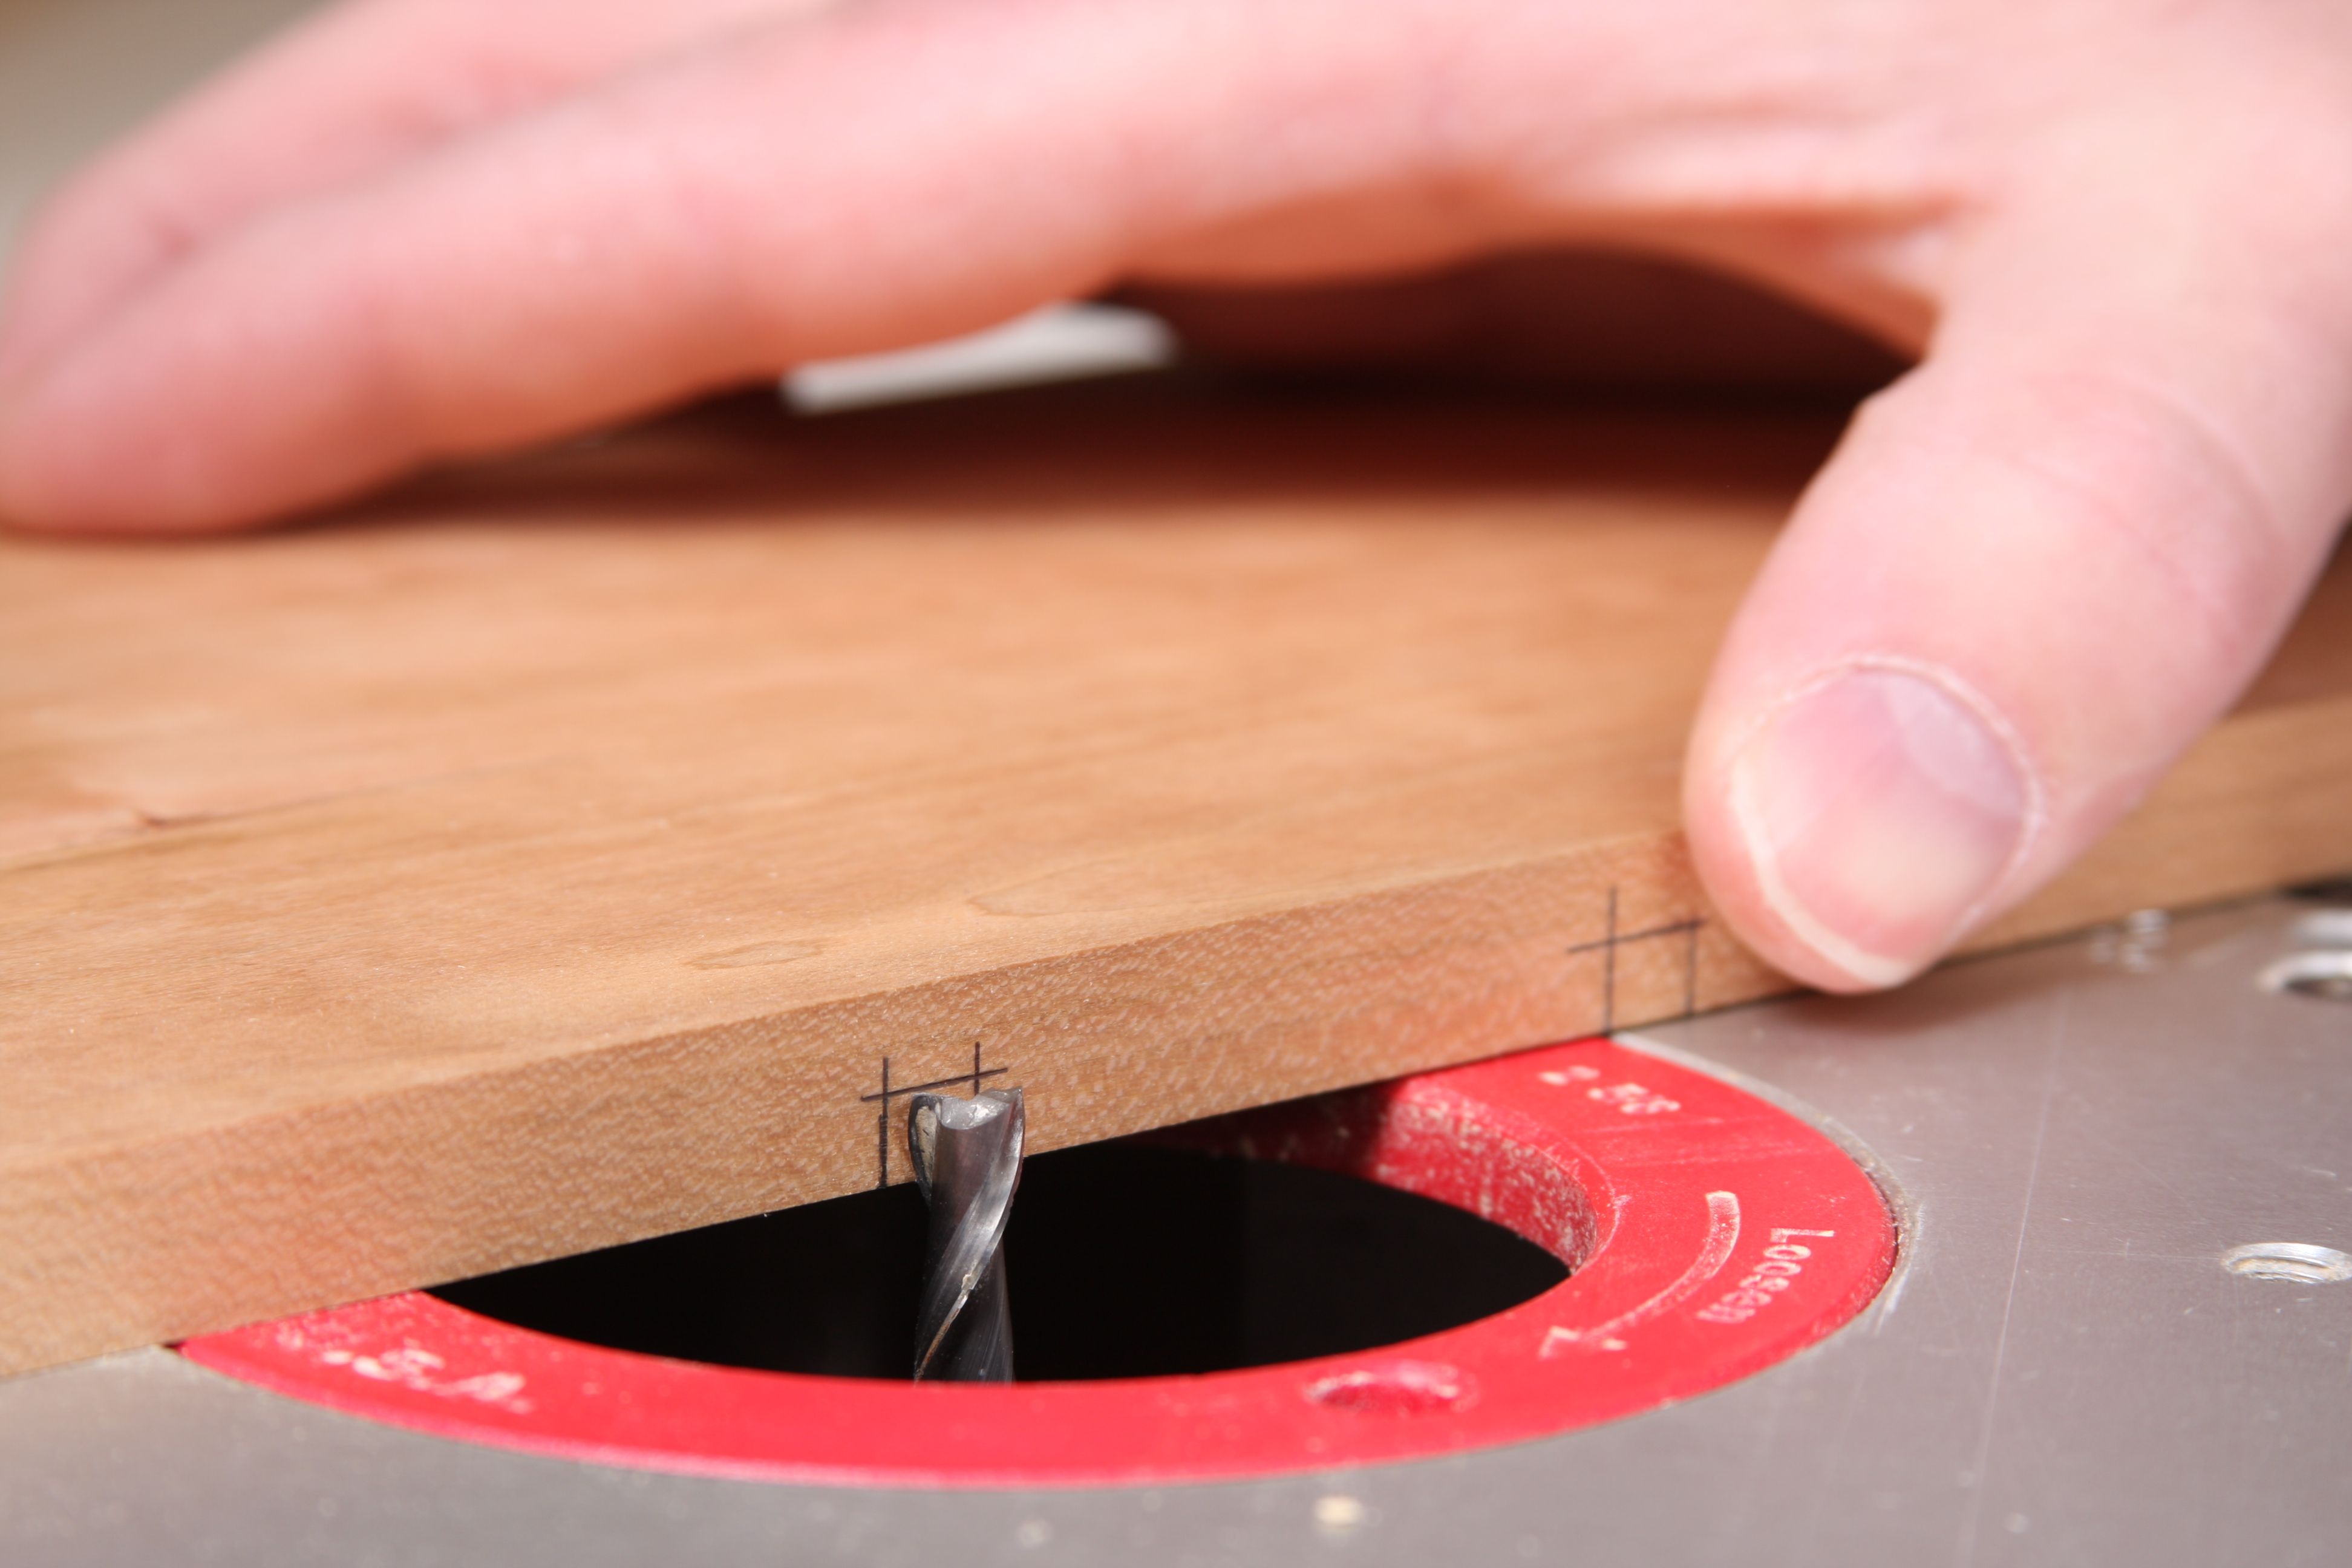
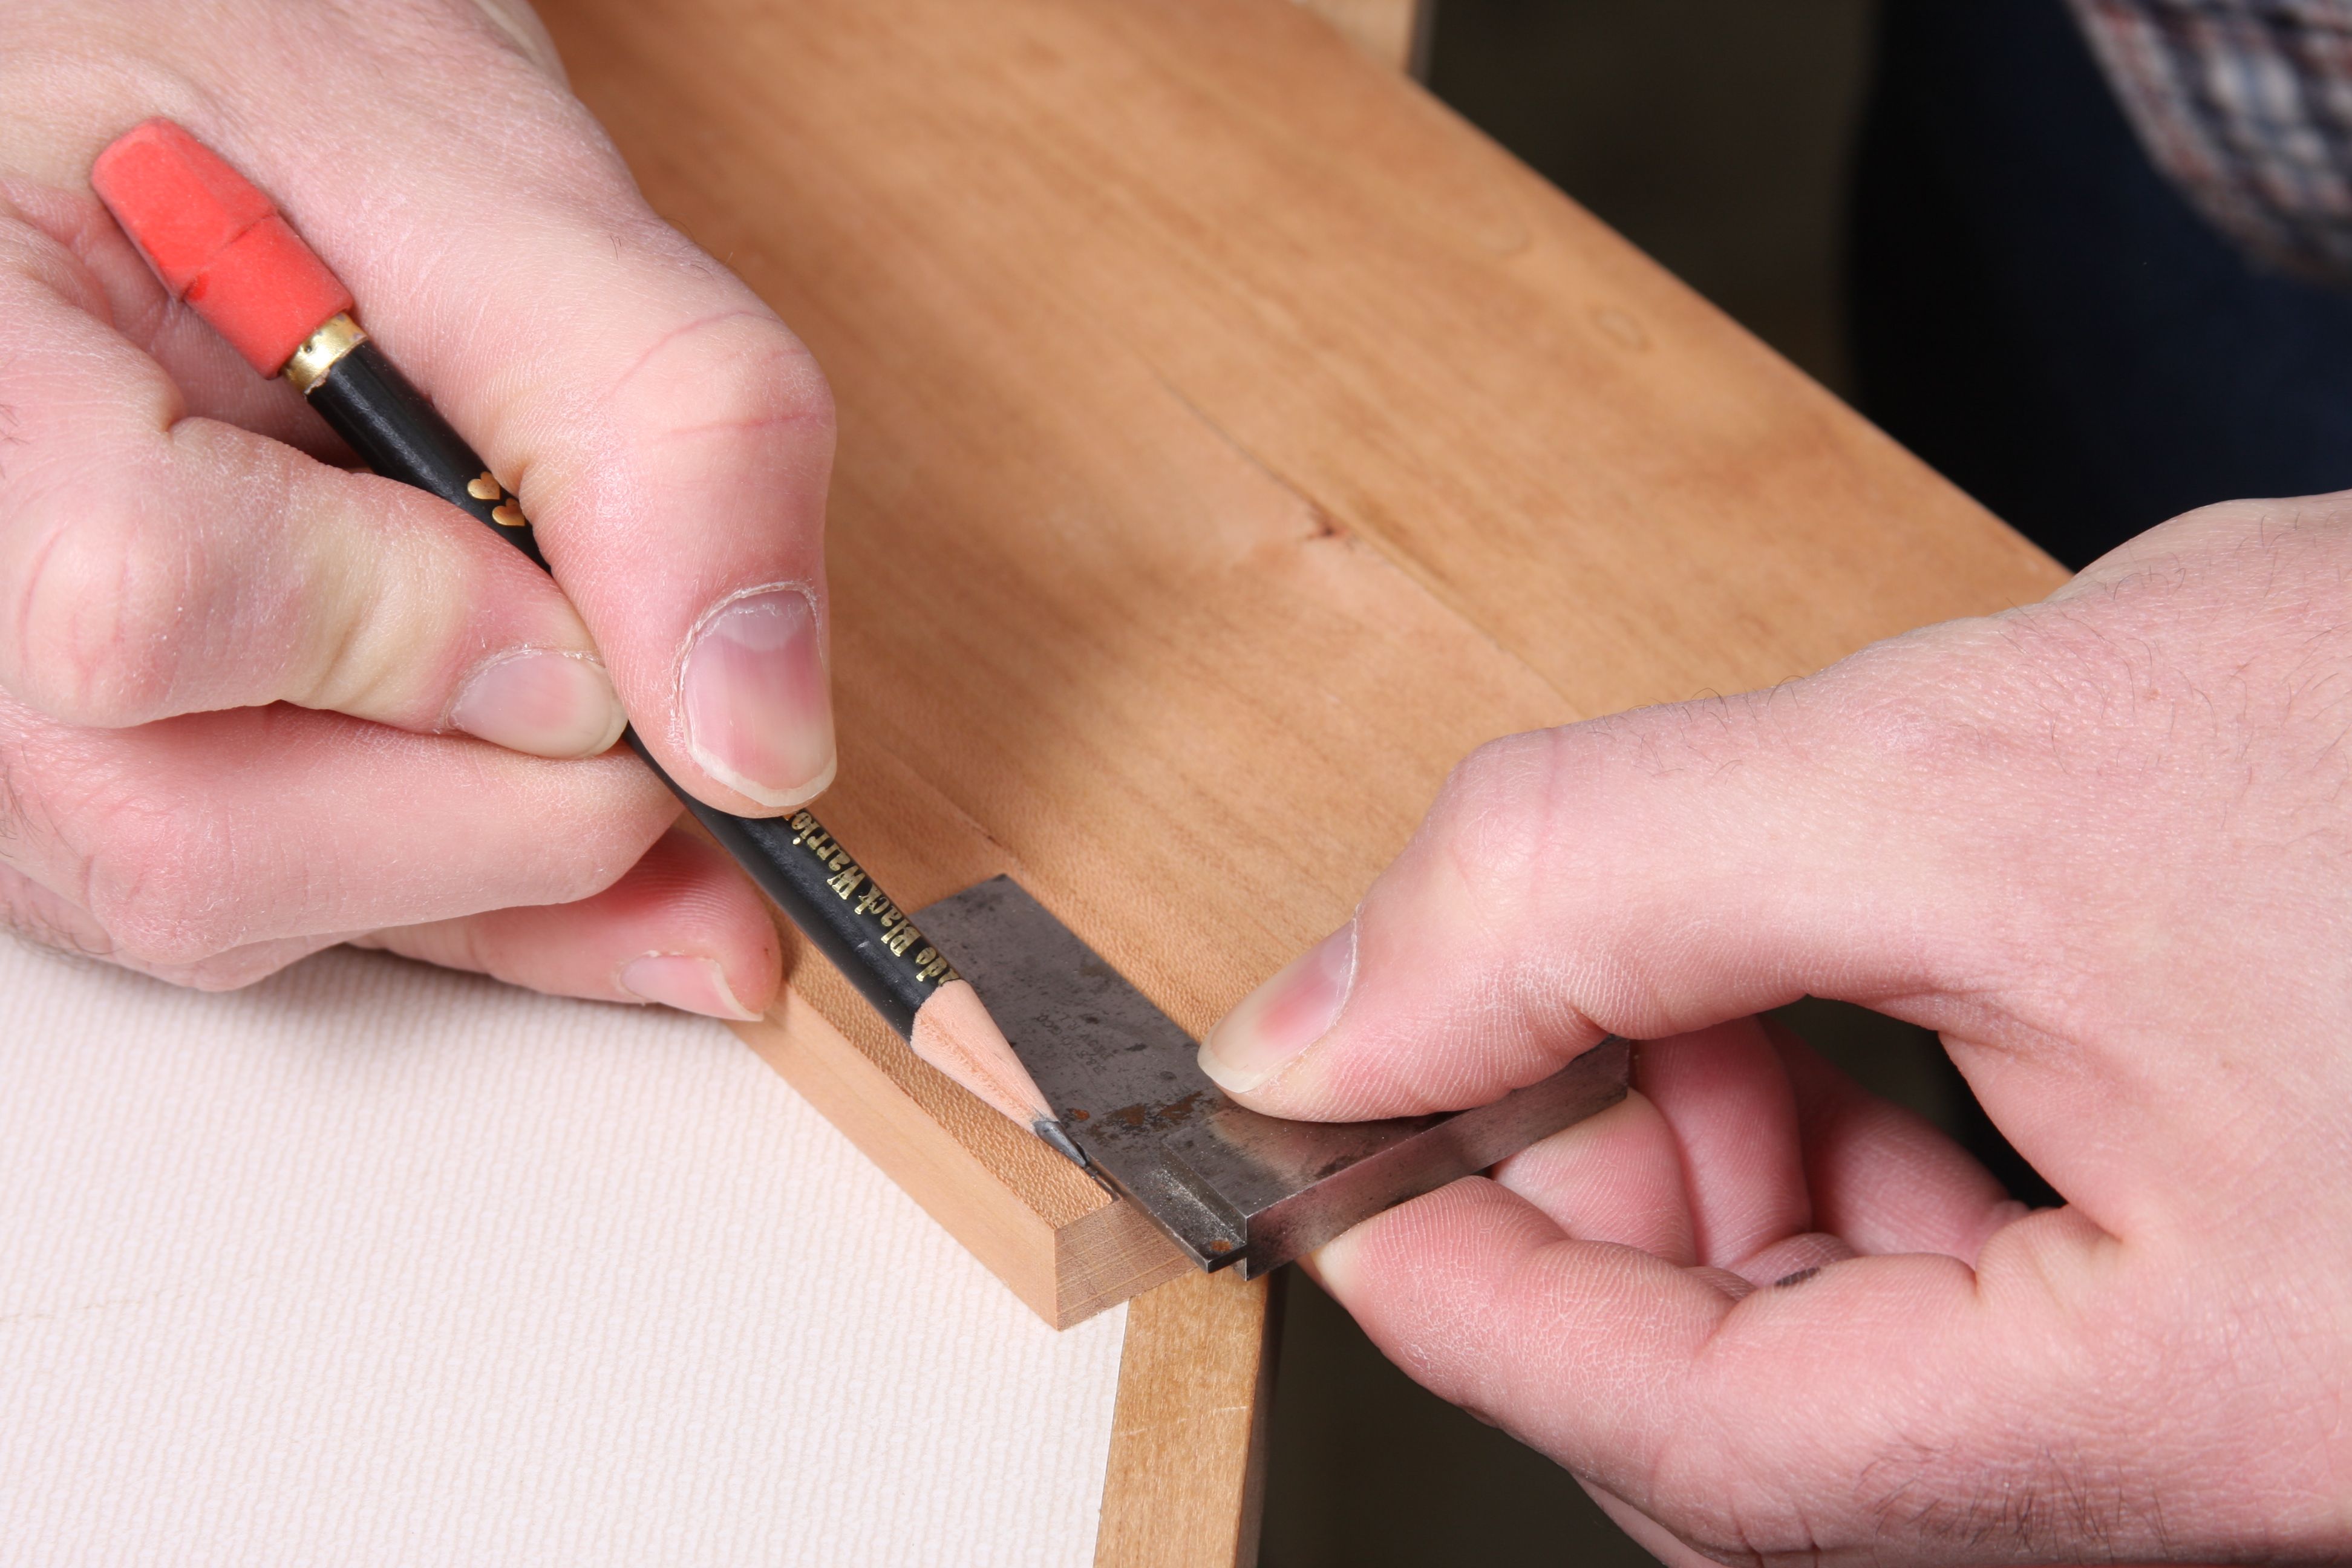
Set the bit height. You could do this with a rule or some other gizmo, but I find it just as easy to do it directly from my layout on the workpiece.
-
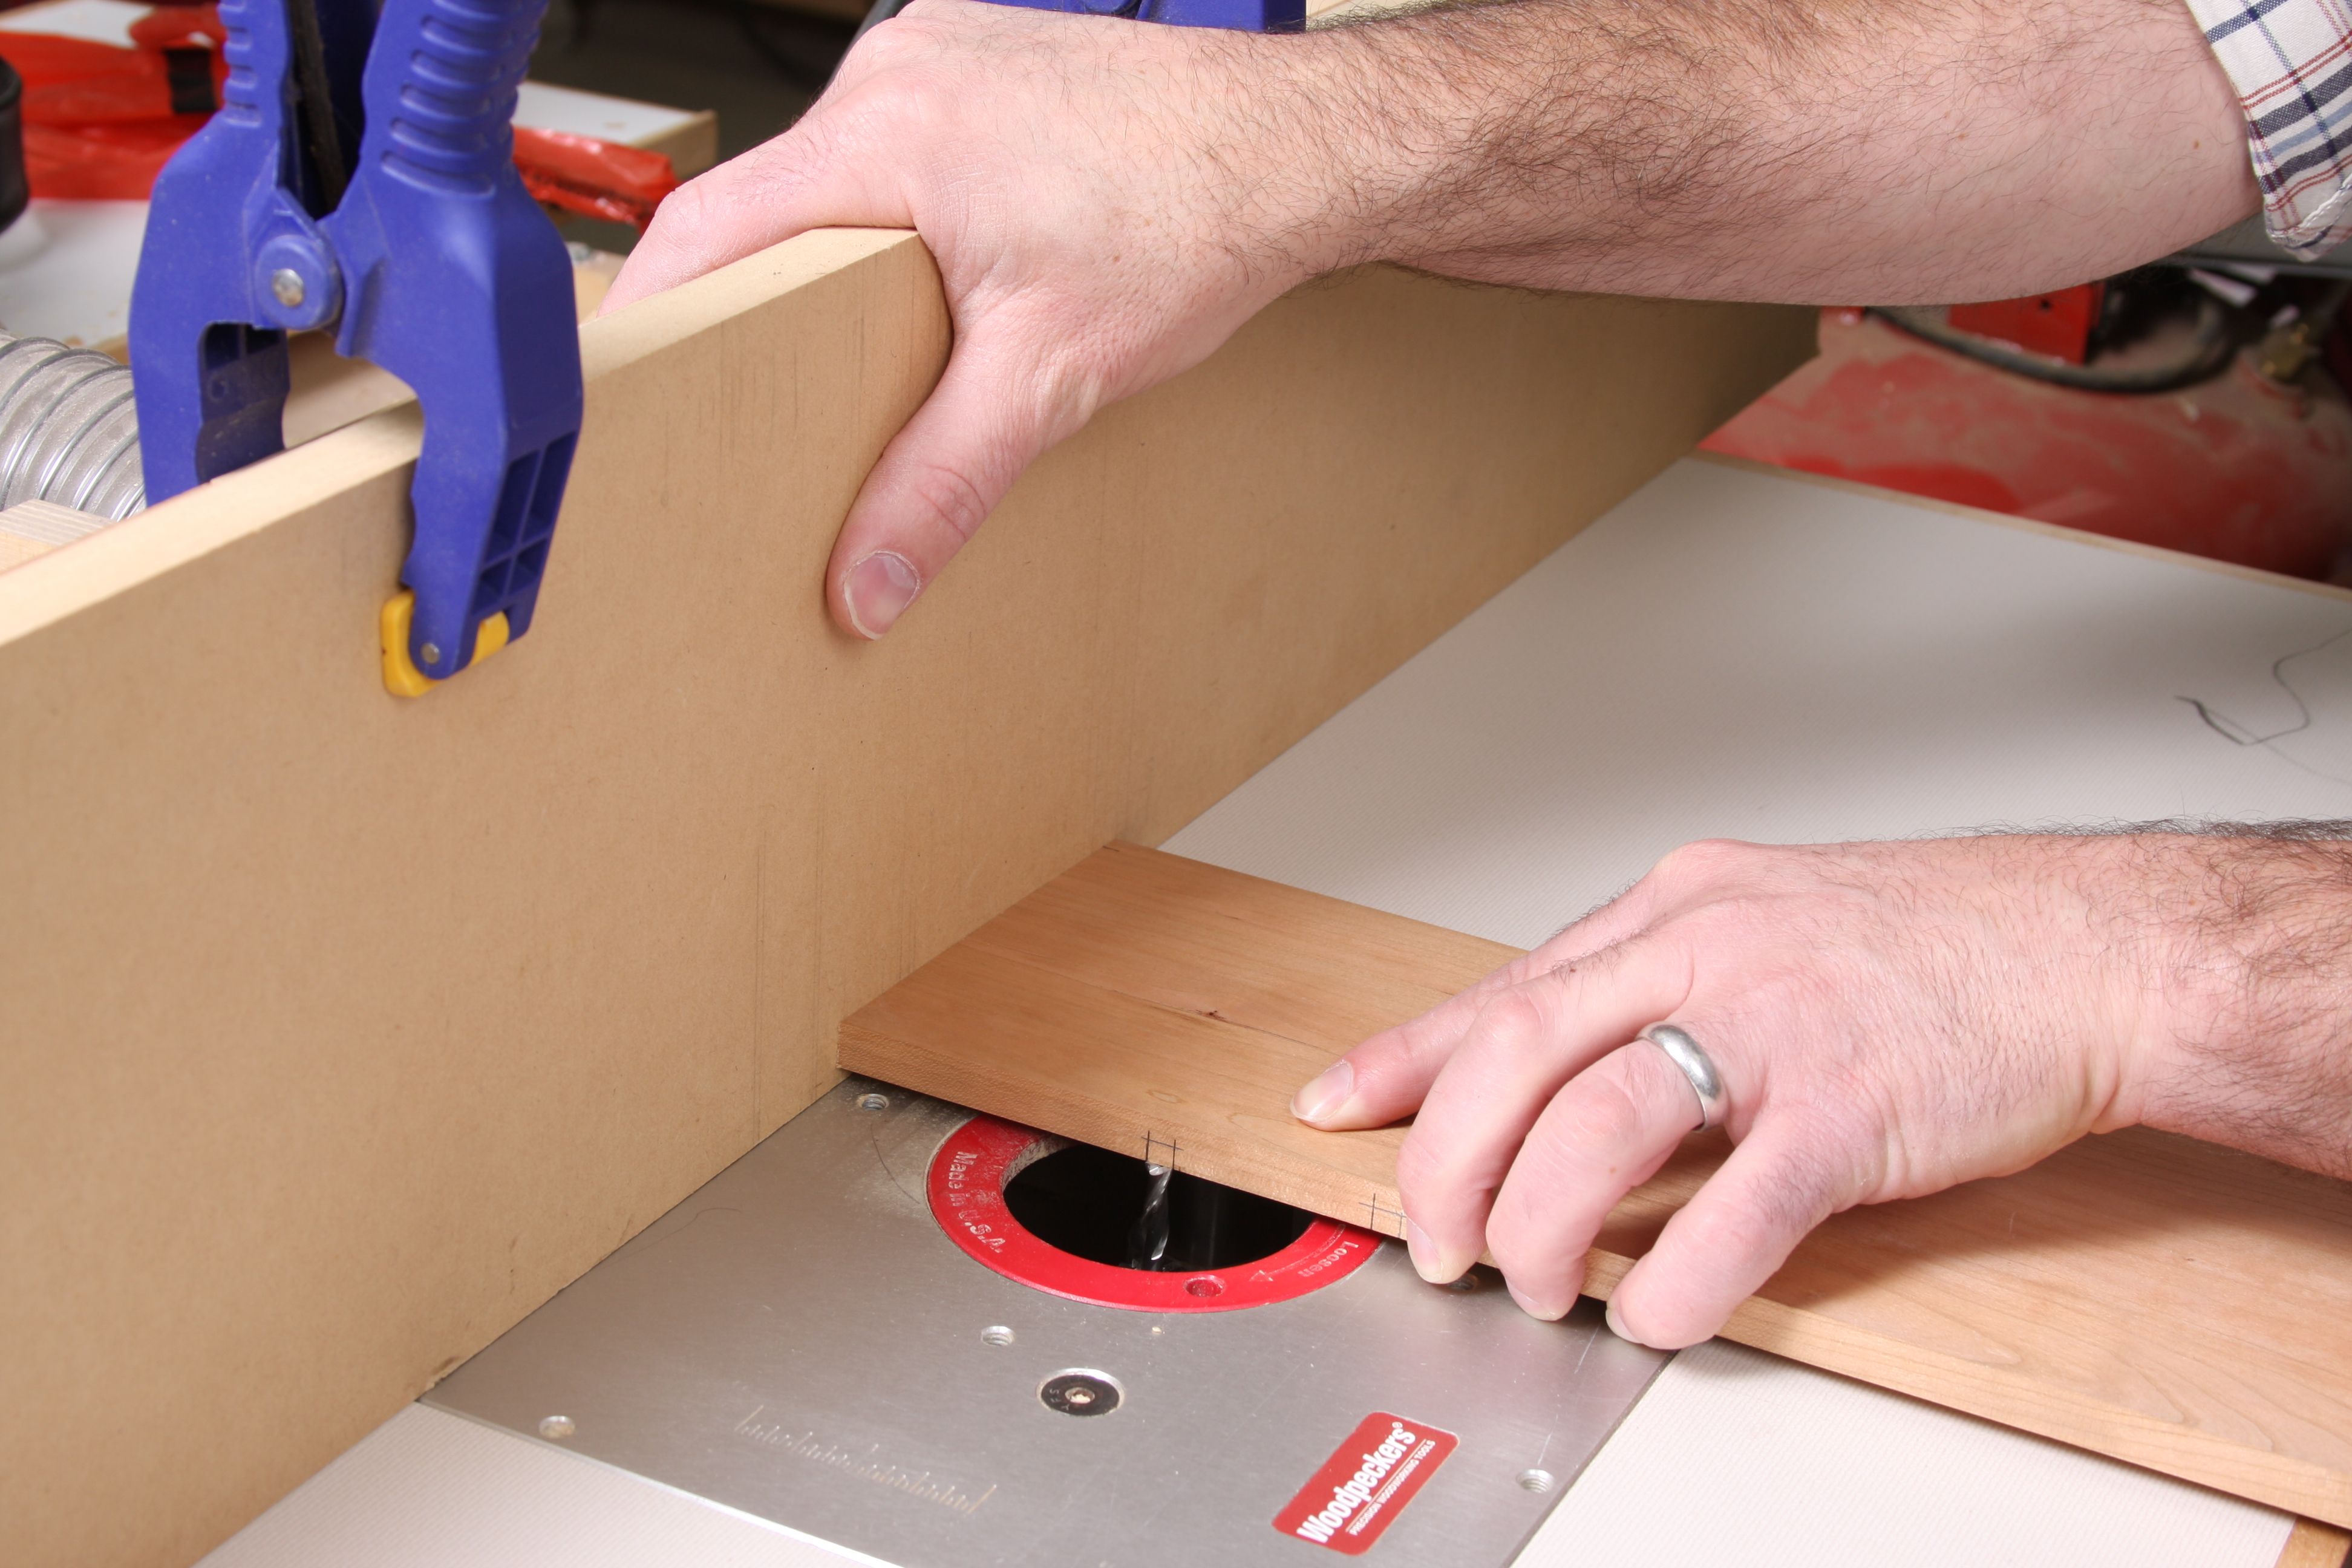
Lock the fence is place. Again working from my layout on the workpiece, I set the distance from the bit to the fence. It's critical that when you do this that the bit's cutters are perpendicular to the fence. Otherwise, the distance from the fence to perimeter of the bit's cut won't be correct.
-
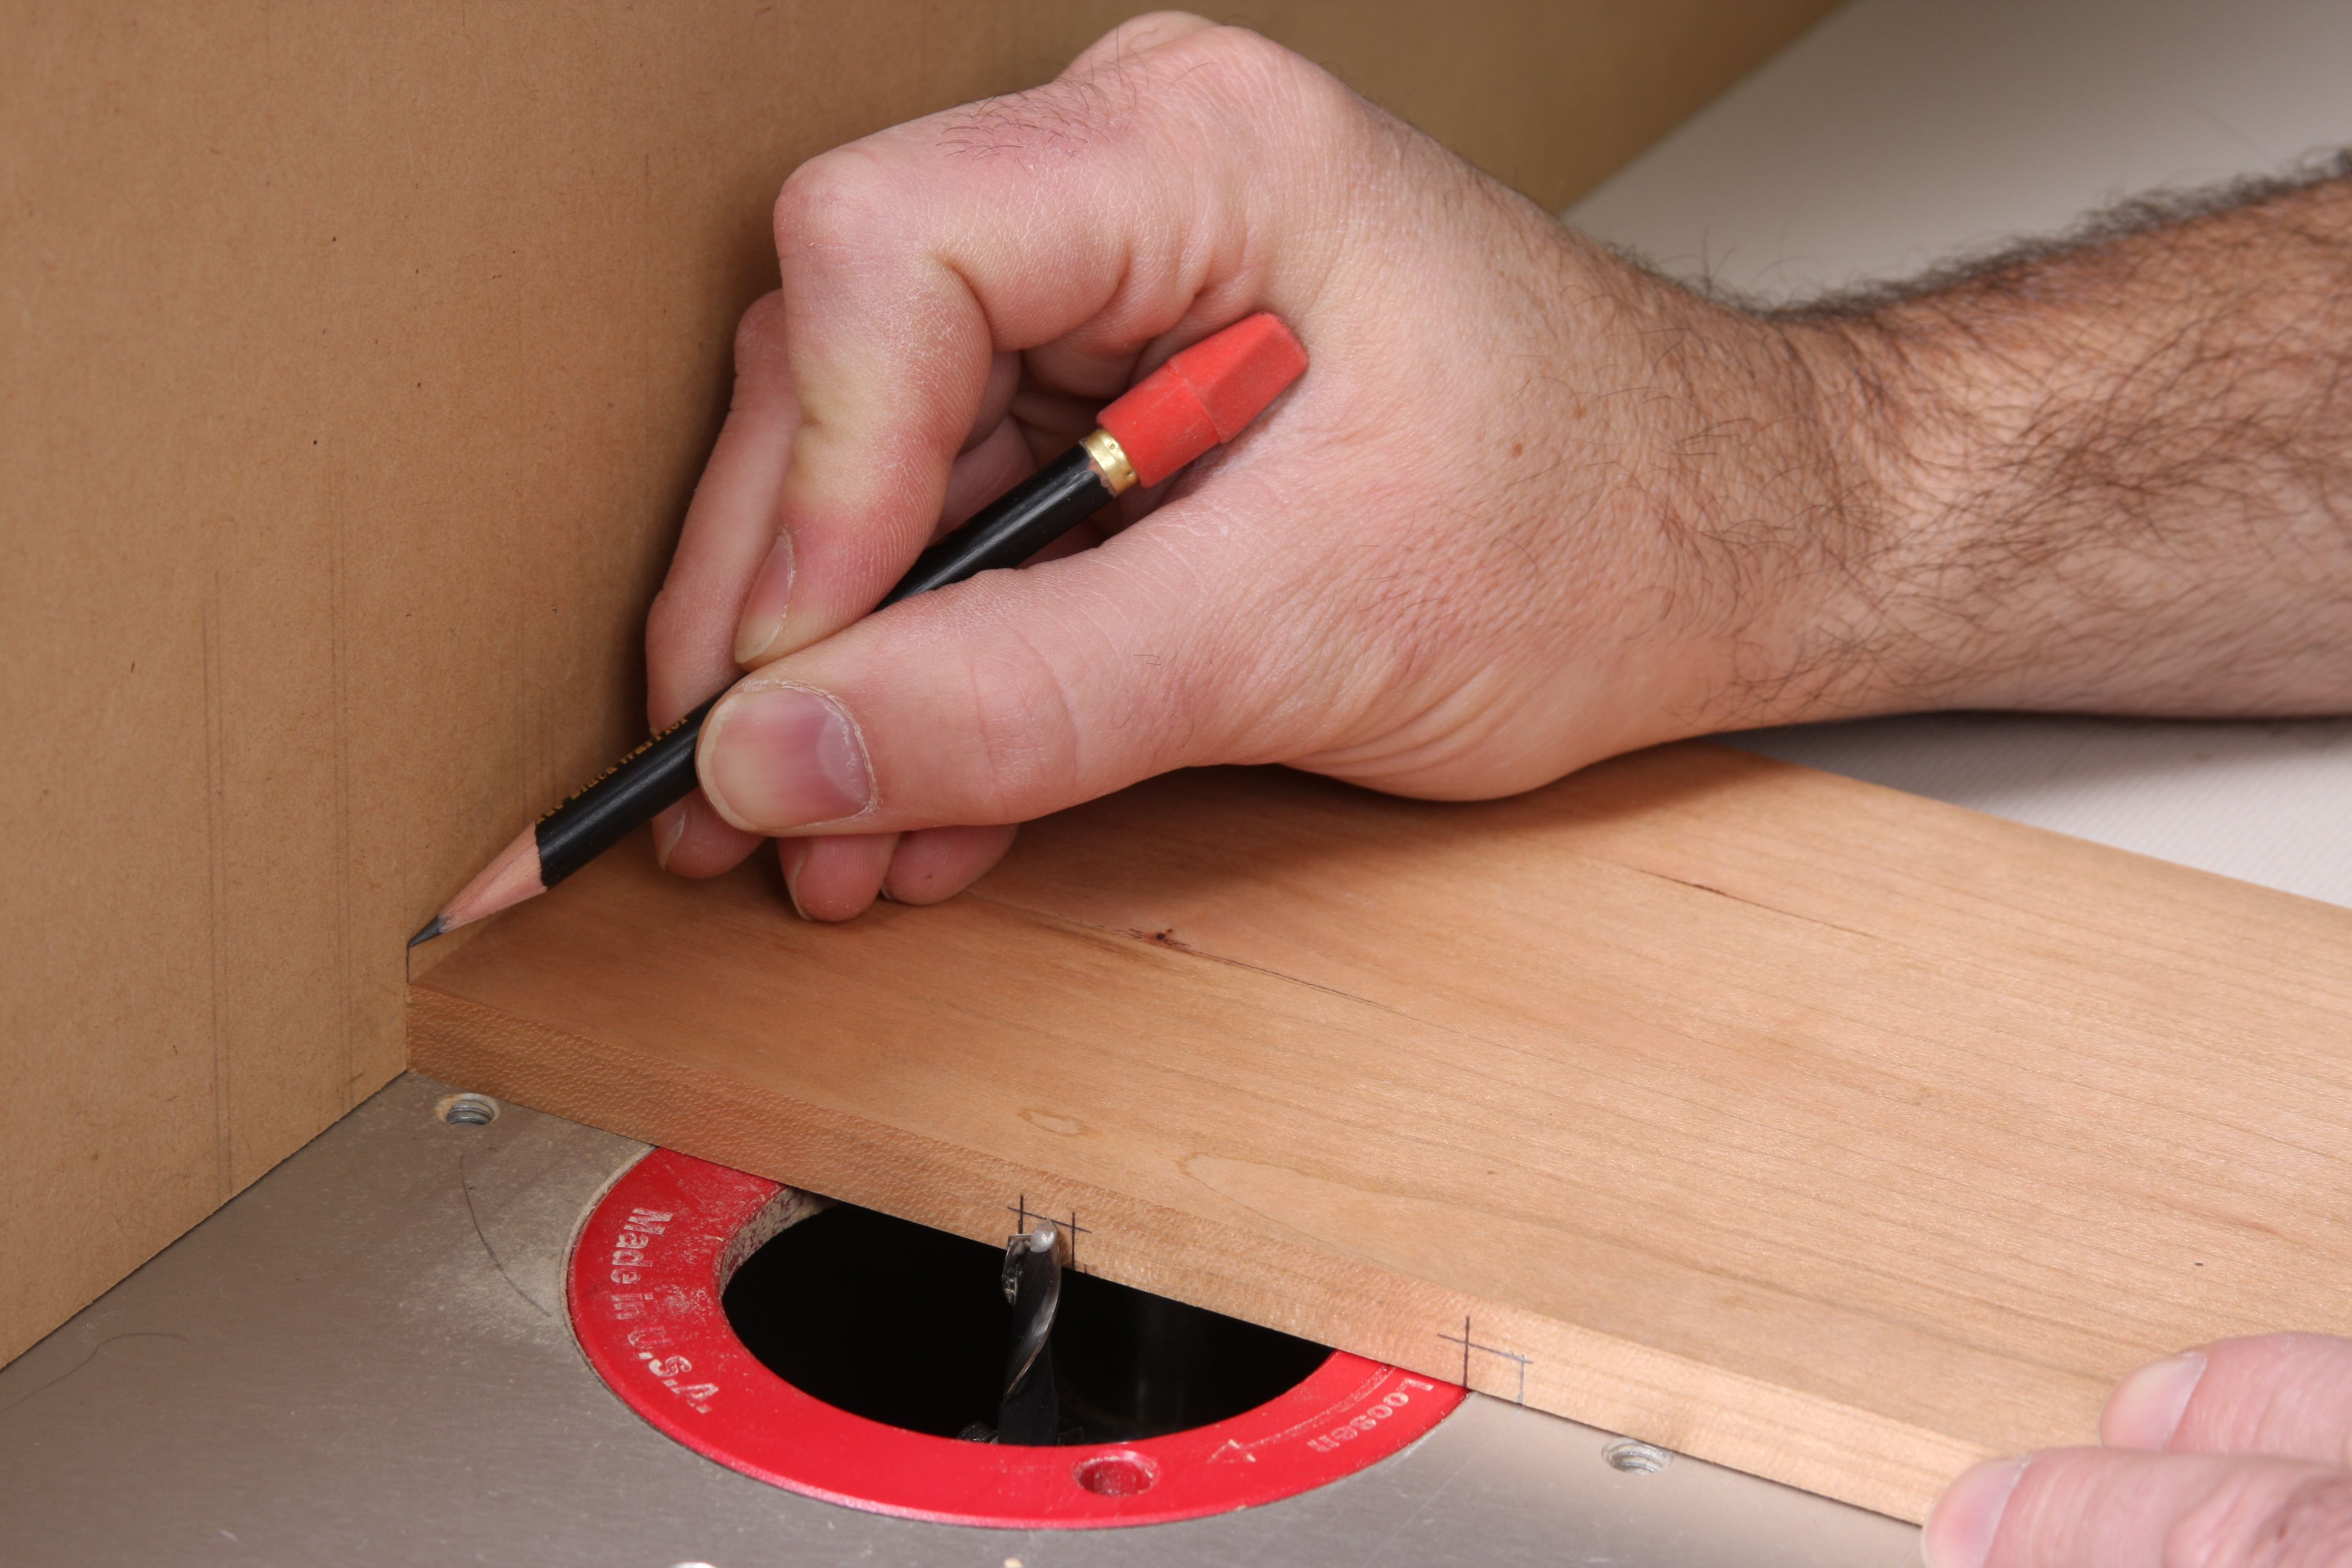
Mark the fence. After rotating the bit so that it's cutters are parallel to the fence (so that you know exactly where the bit's cut begins and ends), place the edge of your workpiece against the bit. It's end should be flush on the fence face. Mark the fence face where the edge against the bit hits it.
-
Mark the workpiece. This line shows where the dado stops.
-
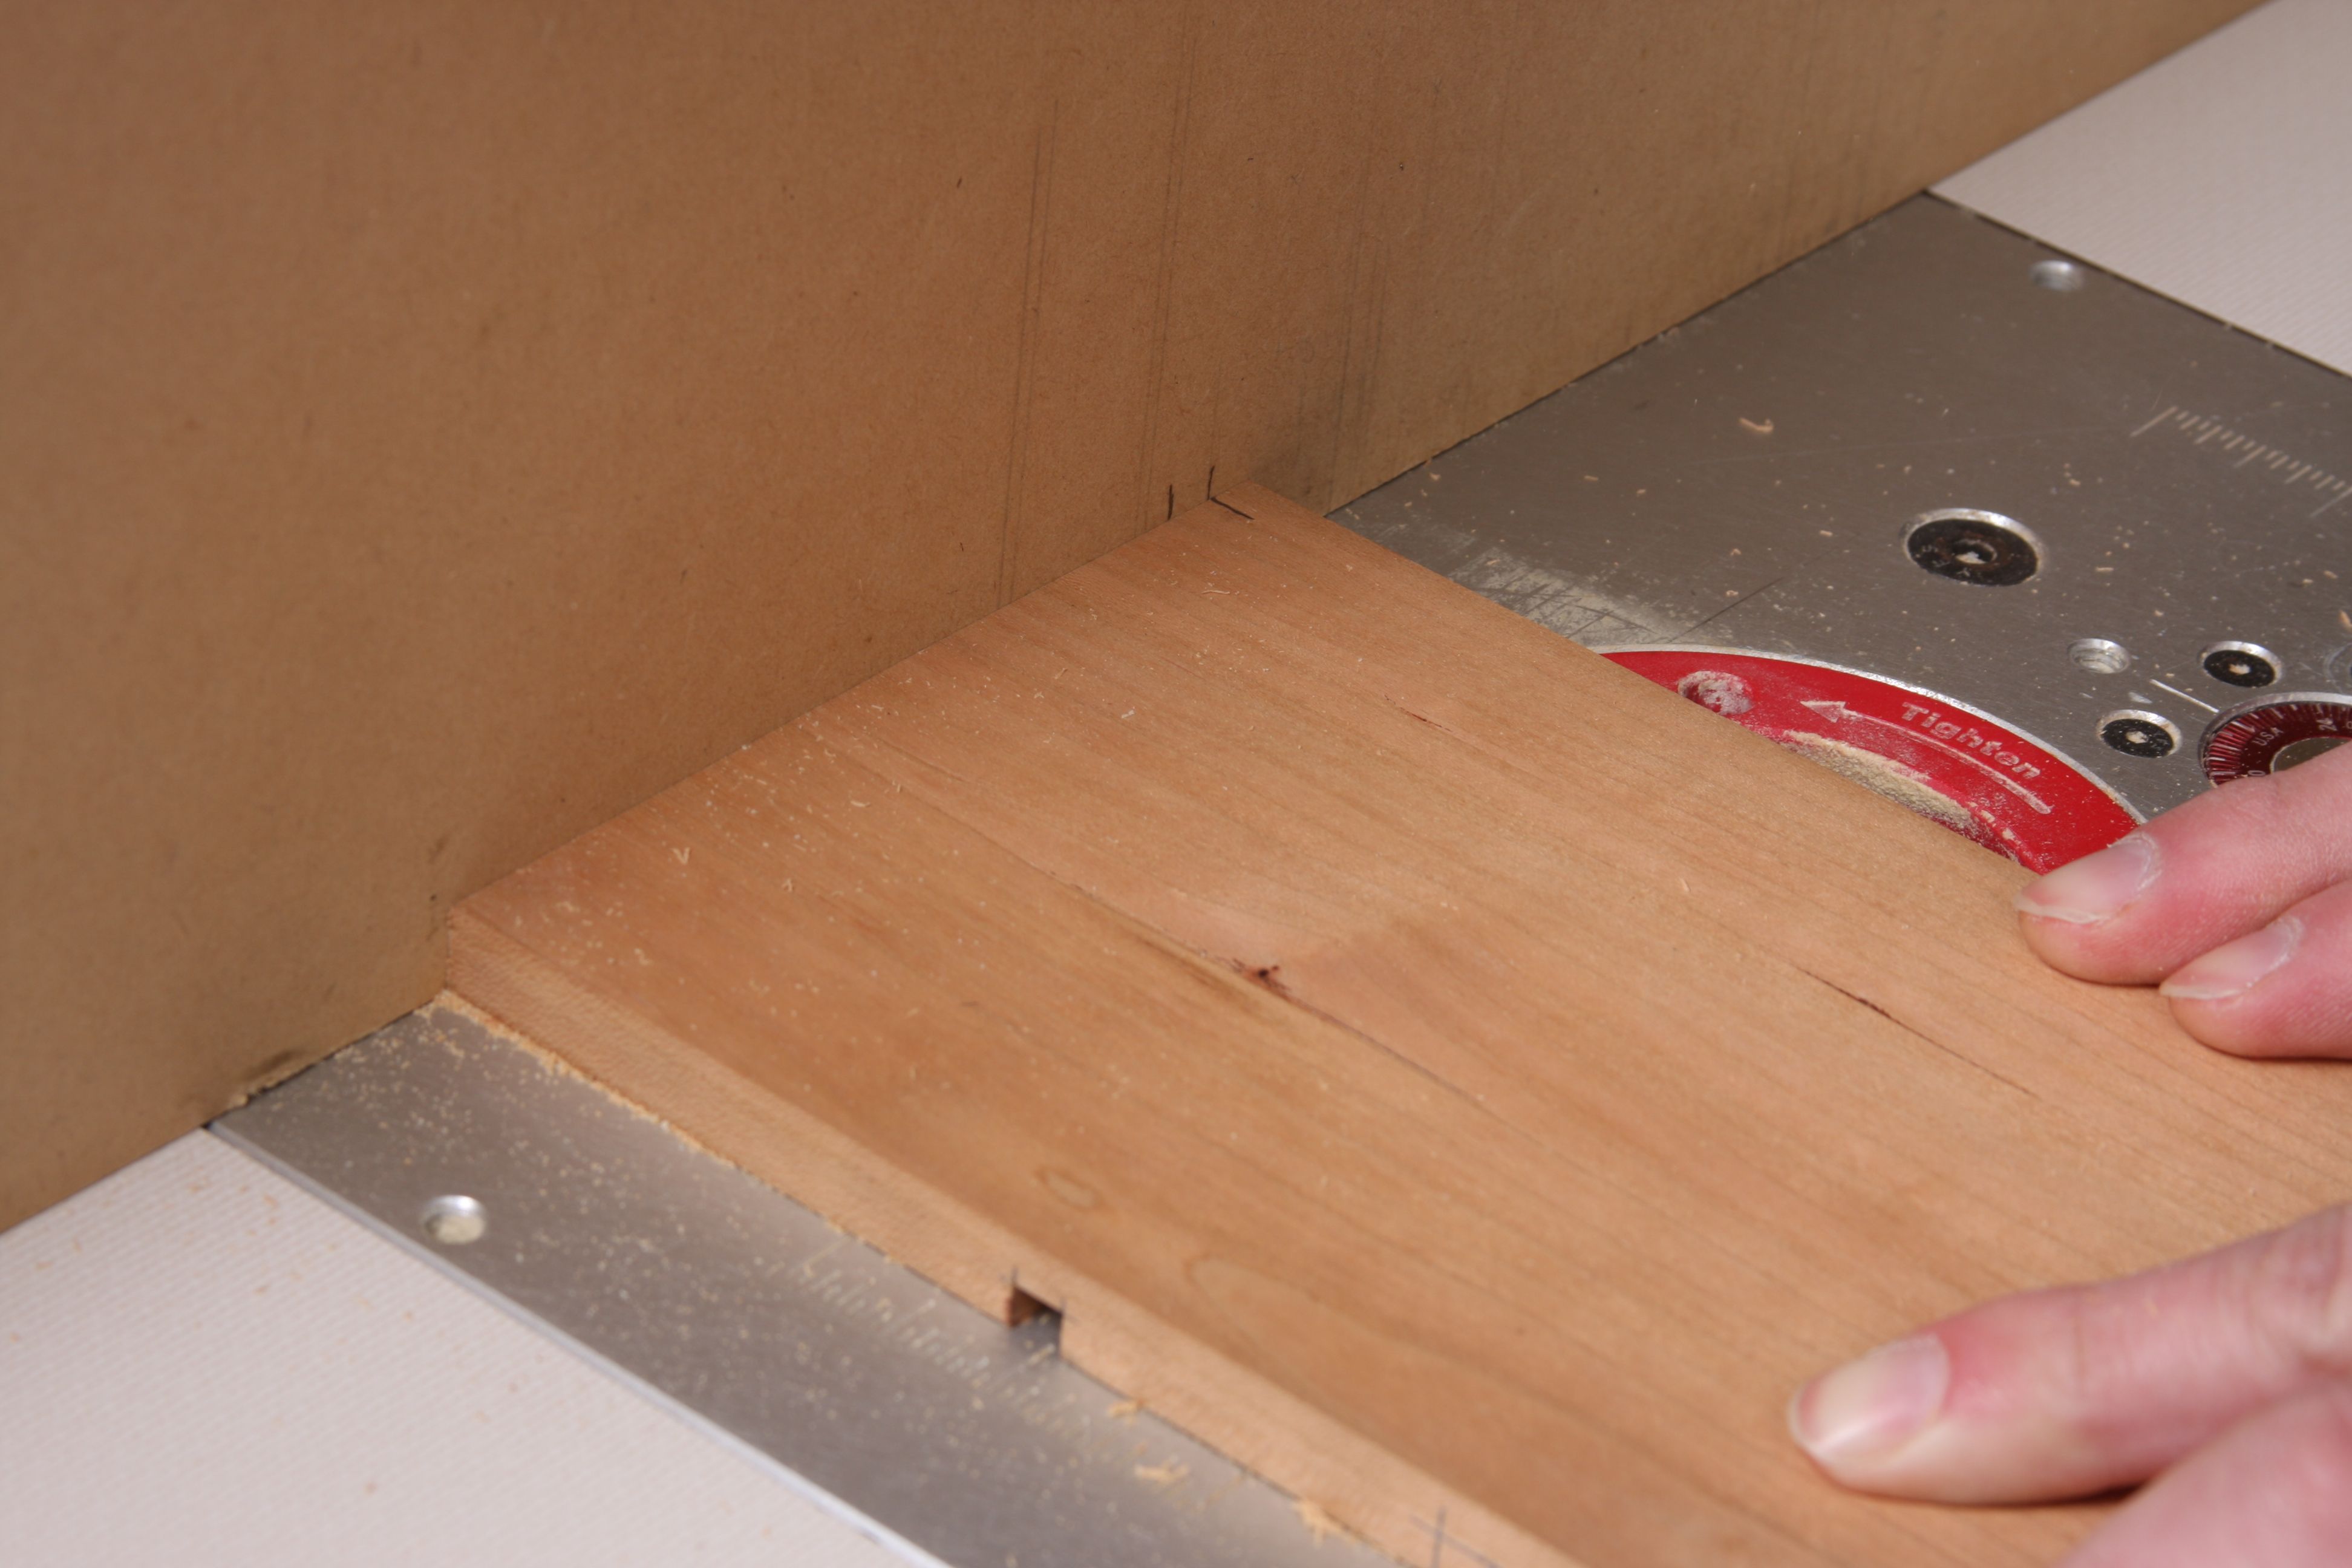
Rout the first dado. The stopped end of the dado is on the trailing edge of the workpiece. so cut into the leading edge and then stop when the line on the workpiece is aligned with the first mark on the fence face.
-
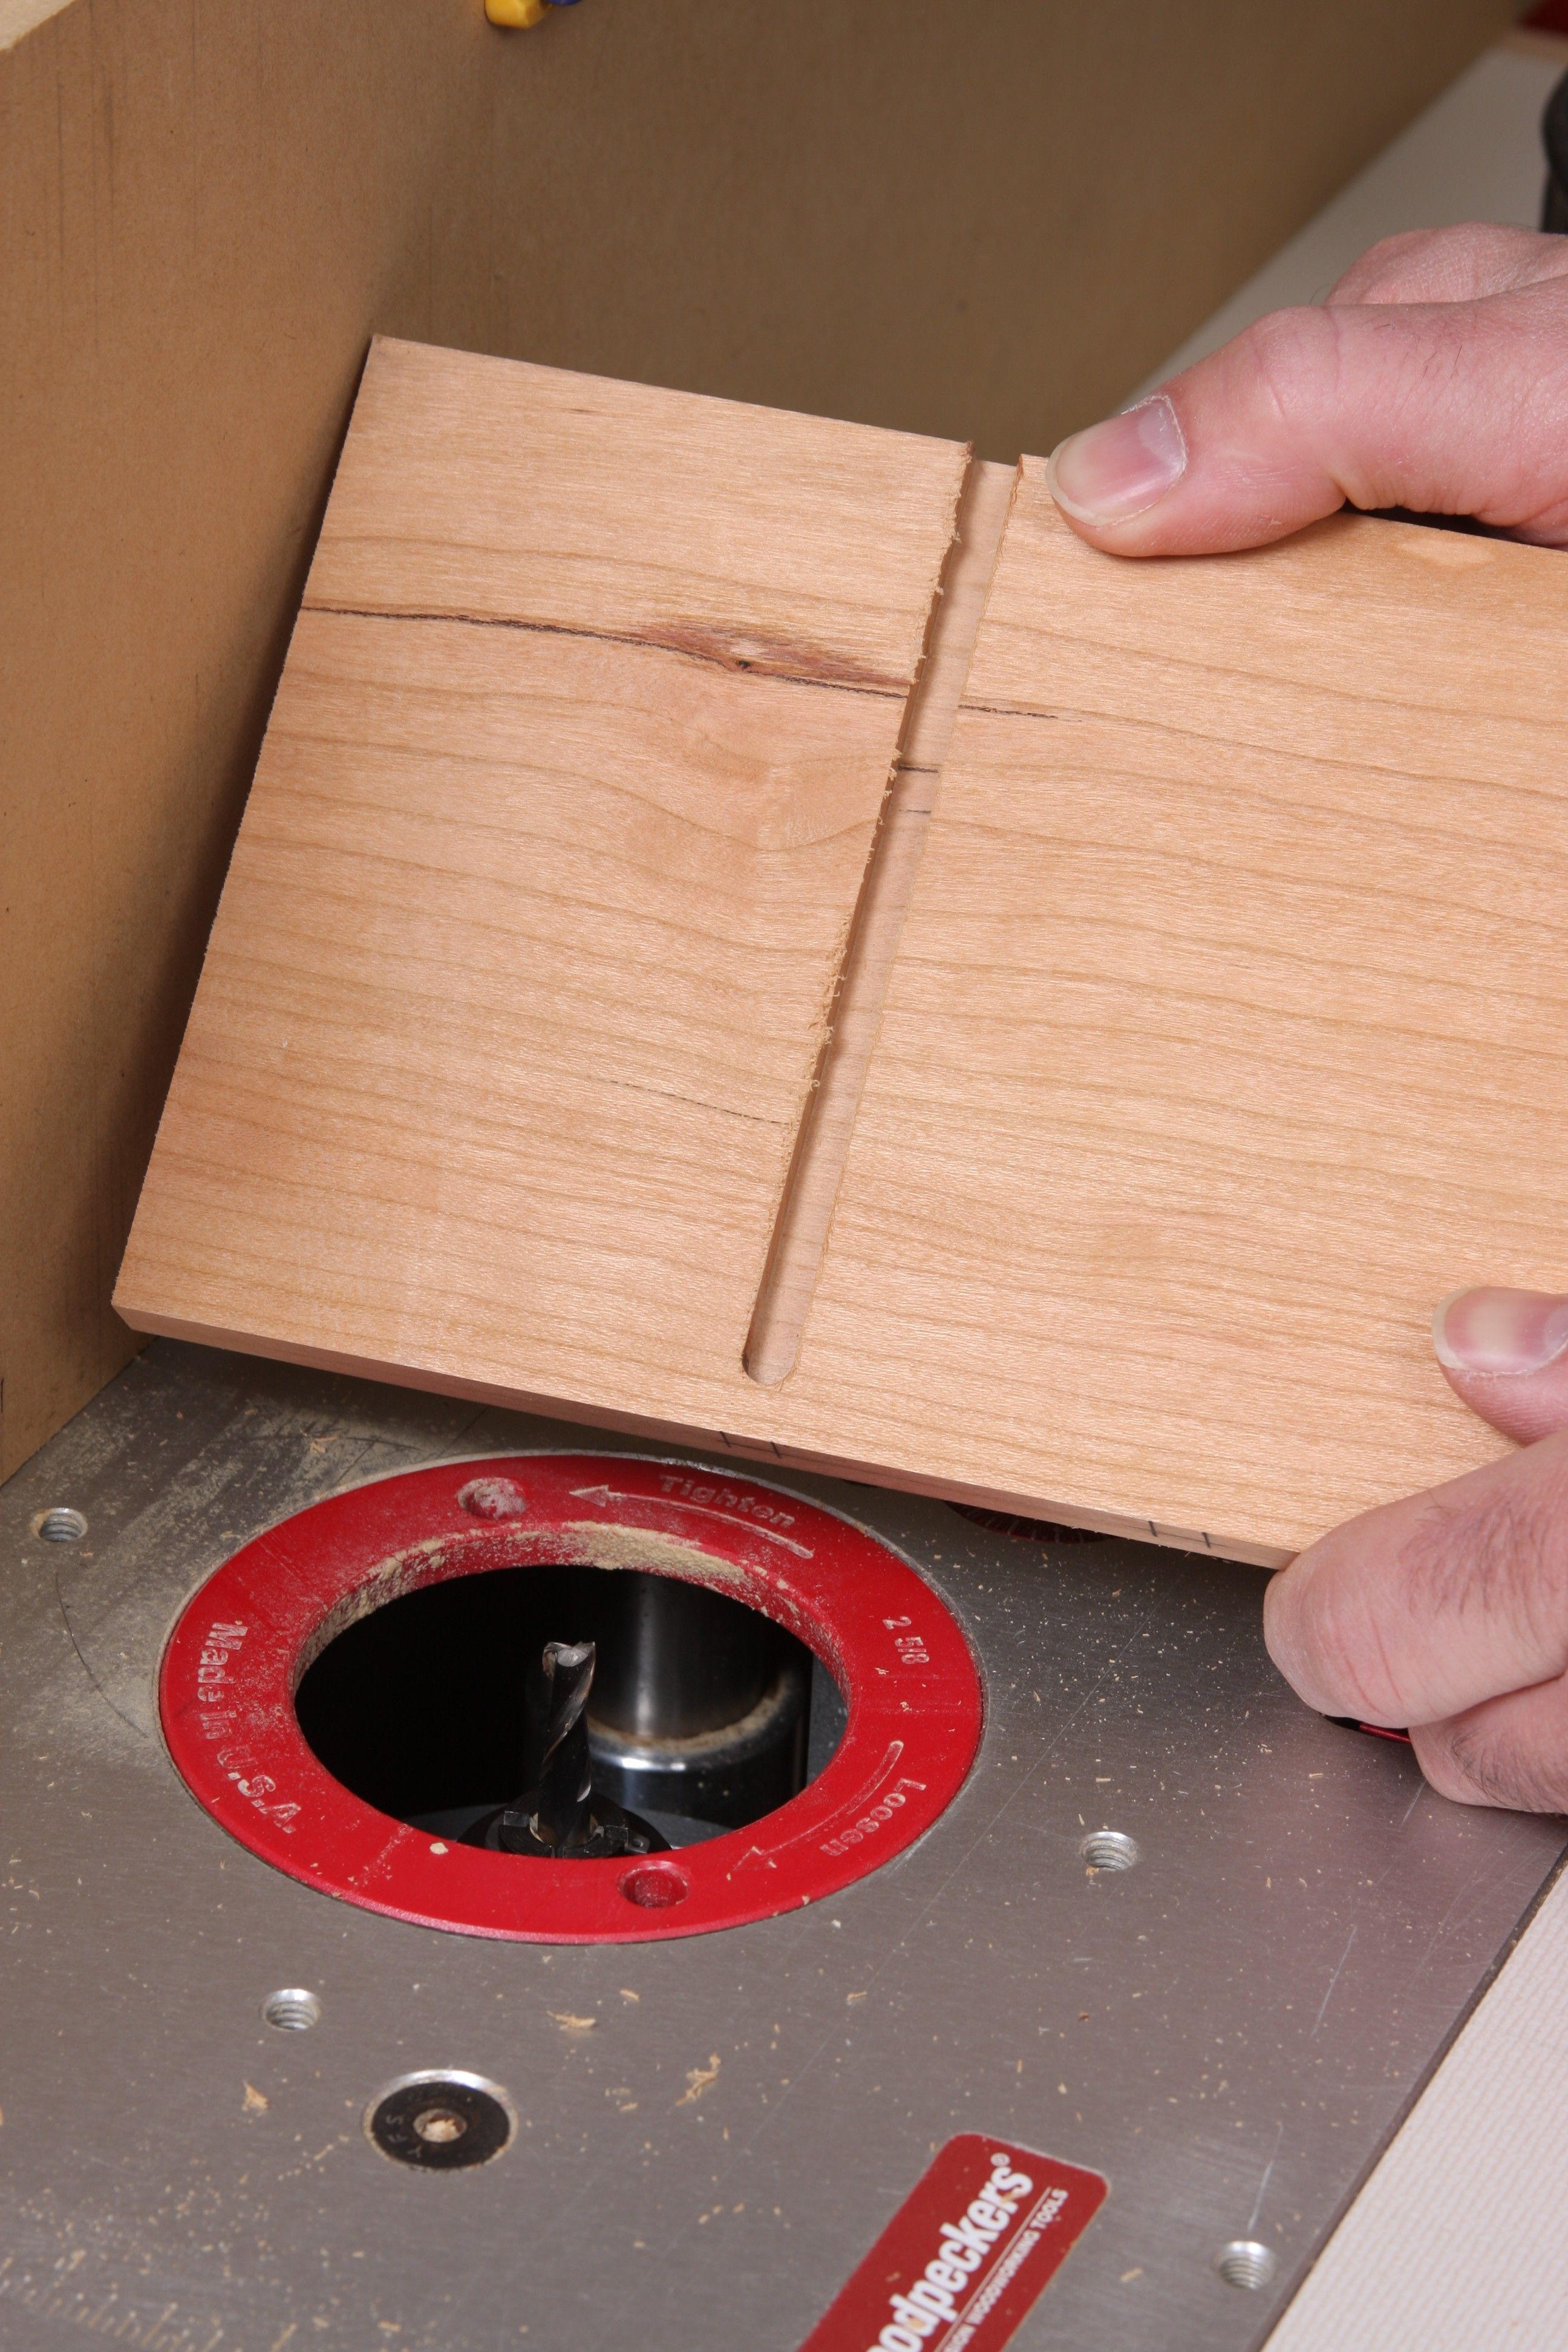
Perfect stopped dado. Here's the result, the dado ends precisely where I wanted it to.
-
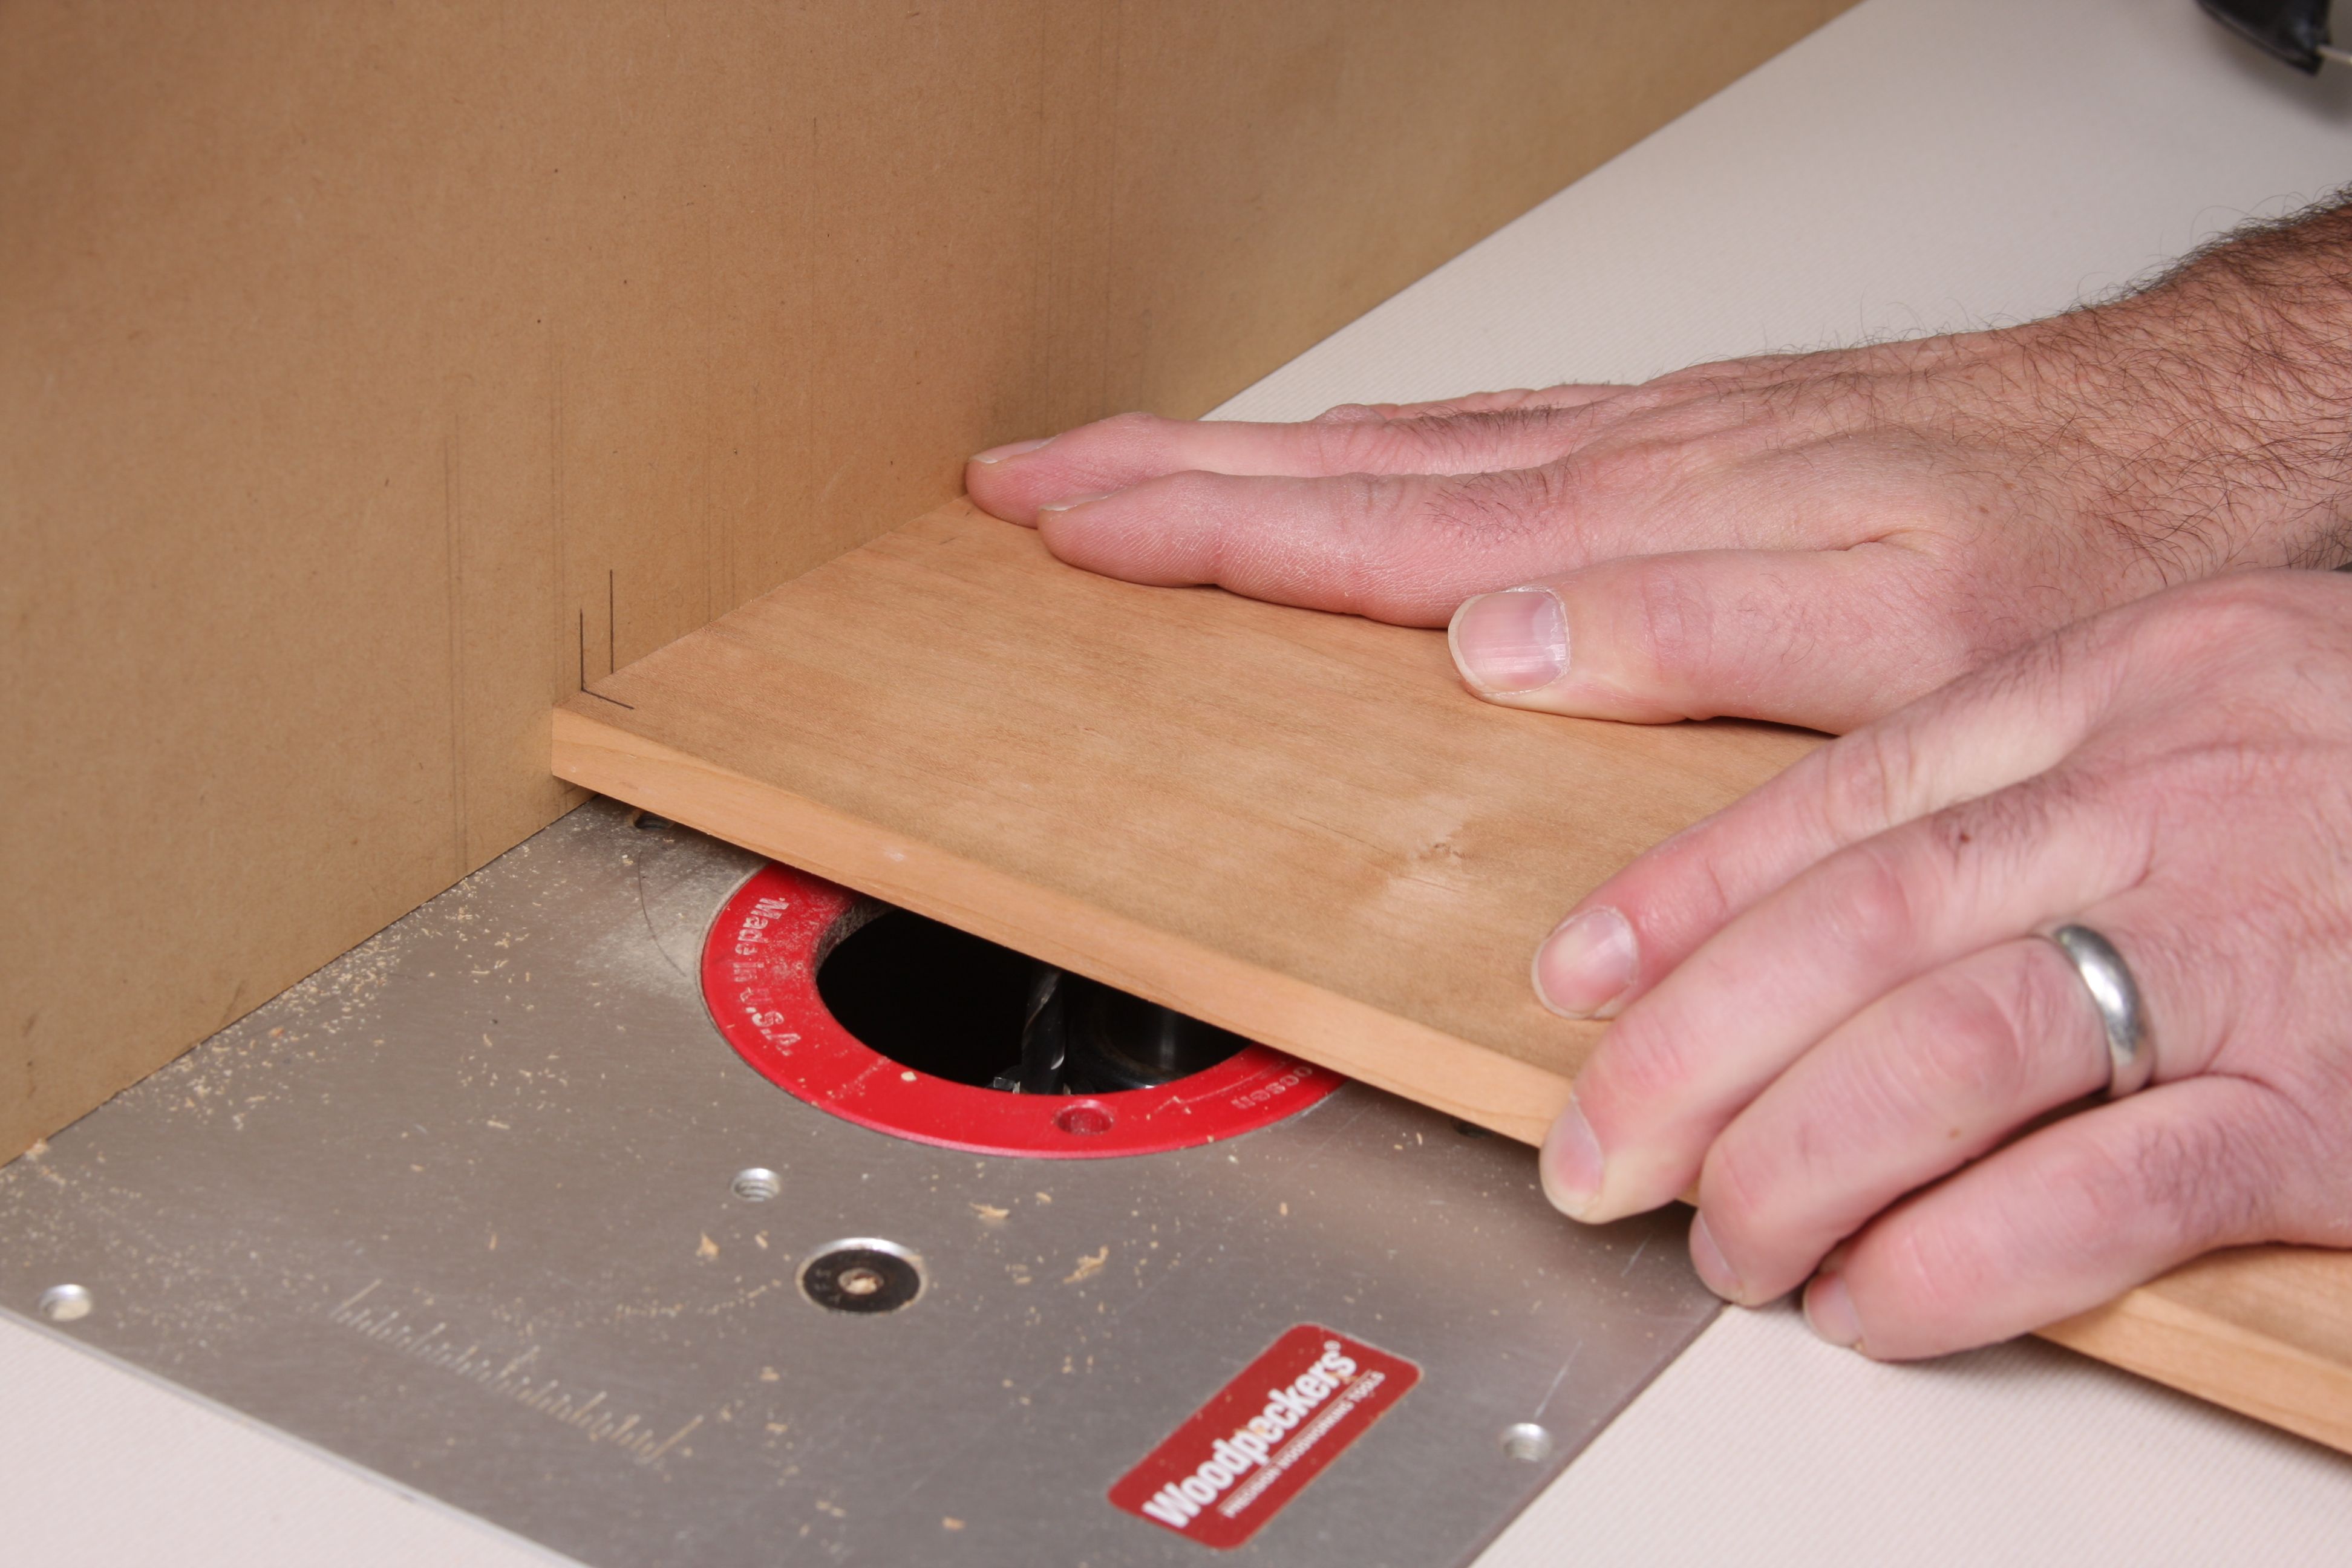
Rout the second dado. This one is in the second side of the cabinet, and is a mirror of the first dado. The stopped end is on the leading edge of the board, so you have to lower the cabinet side onto the bit. To do this, align the mark on the workpiece with the second mark on the fence, turn on the router, and then lower the workpiece onto the bit. Push it through the bit, letting it exit out of the trailing edge.


Comments
Or you make yourself a dado jig for your handheld. Make it square and fit a collar on the router to run along it. You put both boards together flush and square and mark them together like for a biscuit. Then you align your jig to the marks and hey presto! they are aligned.
My jig has a moveable arm for different width dadoes and I can cut sliding dovetails with it with two routers (the one from the table added), one with the straight cutter and one sized collar to rout the relief and then the other with the dovetail cutter to finish off with, down one side and up the other.
I have cut any number of stopped, including double stopped, dadoes with it that come out square and parallel every time. I made it from offcuts with a hardwood stock and plywood arms. Waxed plywood arms.
Great idea, but incomplete. The description calls for only a single mark on the fence, but the photos show two. It appears that a mark must be made on the fence that corresponds to both sides of the bit in order to assure the cut stops at the correct location.
come on guys this is old hat stuff. a better way is to use a mechanical stop clamped to your fence for dead on accuracy and most important use a sled for safety. I can't believe anyone would consider making a cut like this without a backer board and a clamp. Lowering a board into a spinning bit without support. '' WOW ''
I agree with Grumpy66. Has this guy still got all his fingers?
I only have 7 fingers, but that's all I was born with.
Log in or create an account to post a comment.
Sign up Log in