Simple Tip for Fast, Accurate Chair Joints
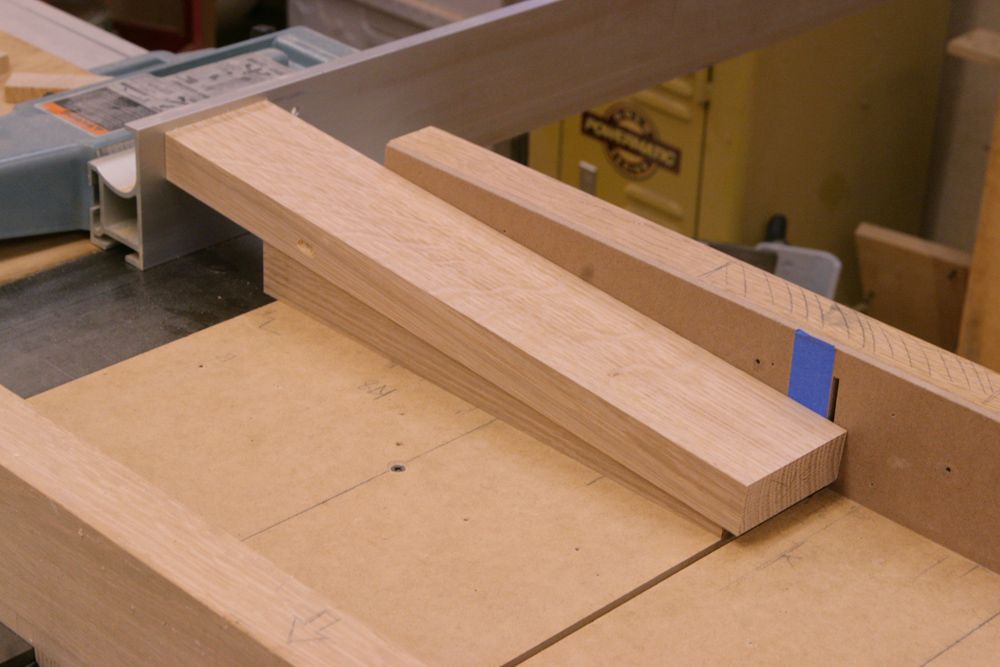
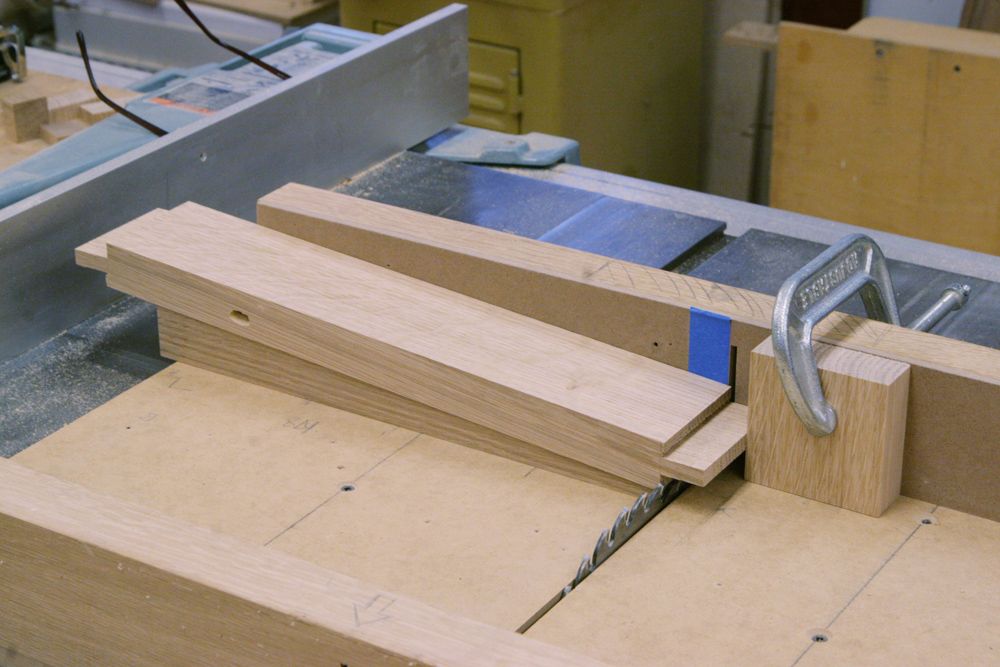
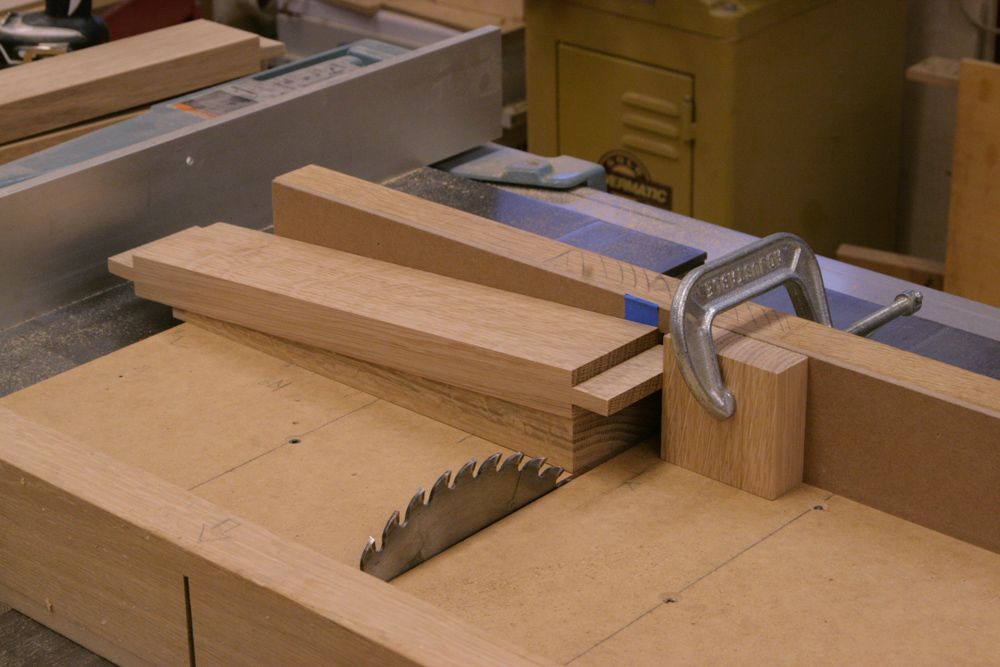
Clever method for cutting angled chair joinery using the tablesaw sled and a wedge.
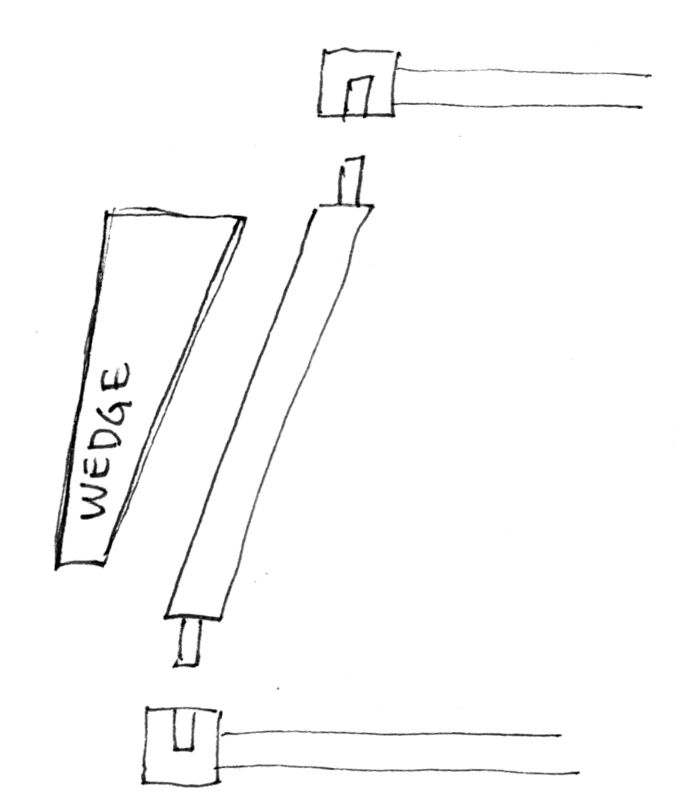
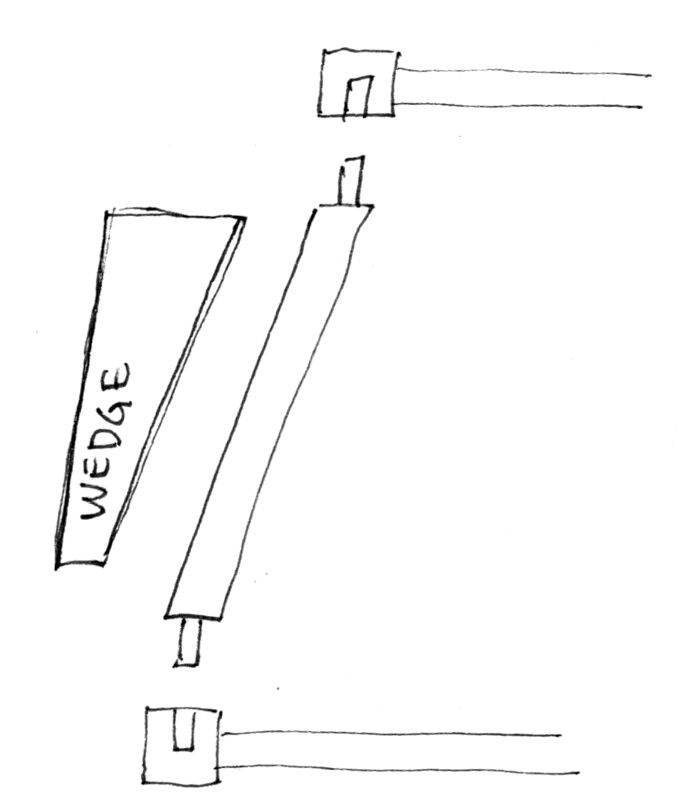
The first step is to make a wedge that matches the side angle of the chair. In this case it's approximately 4.5 degrees.
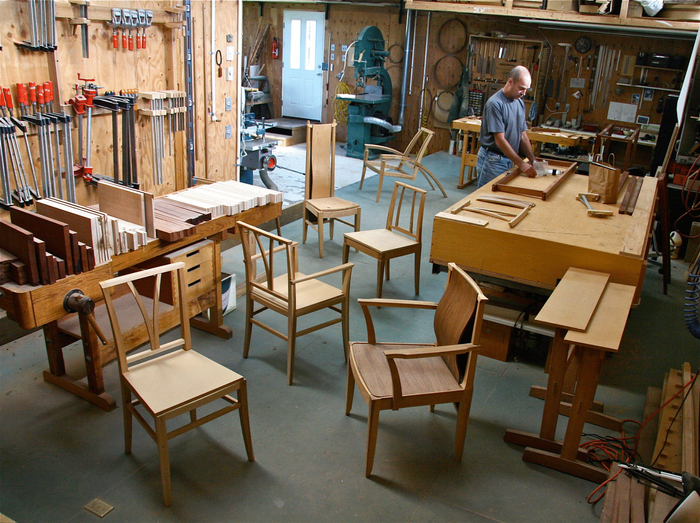
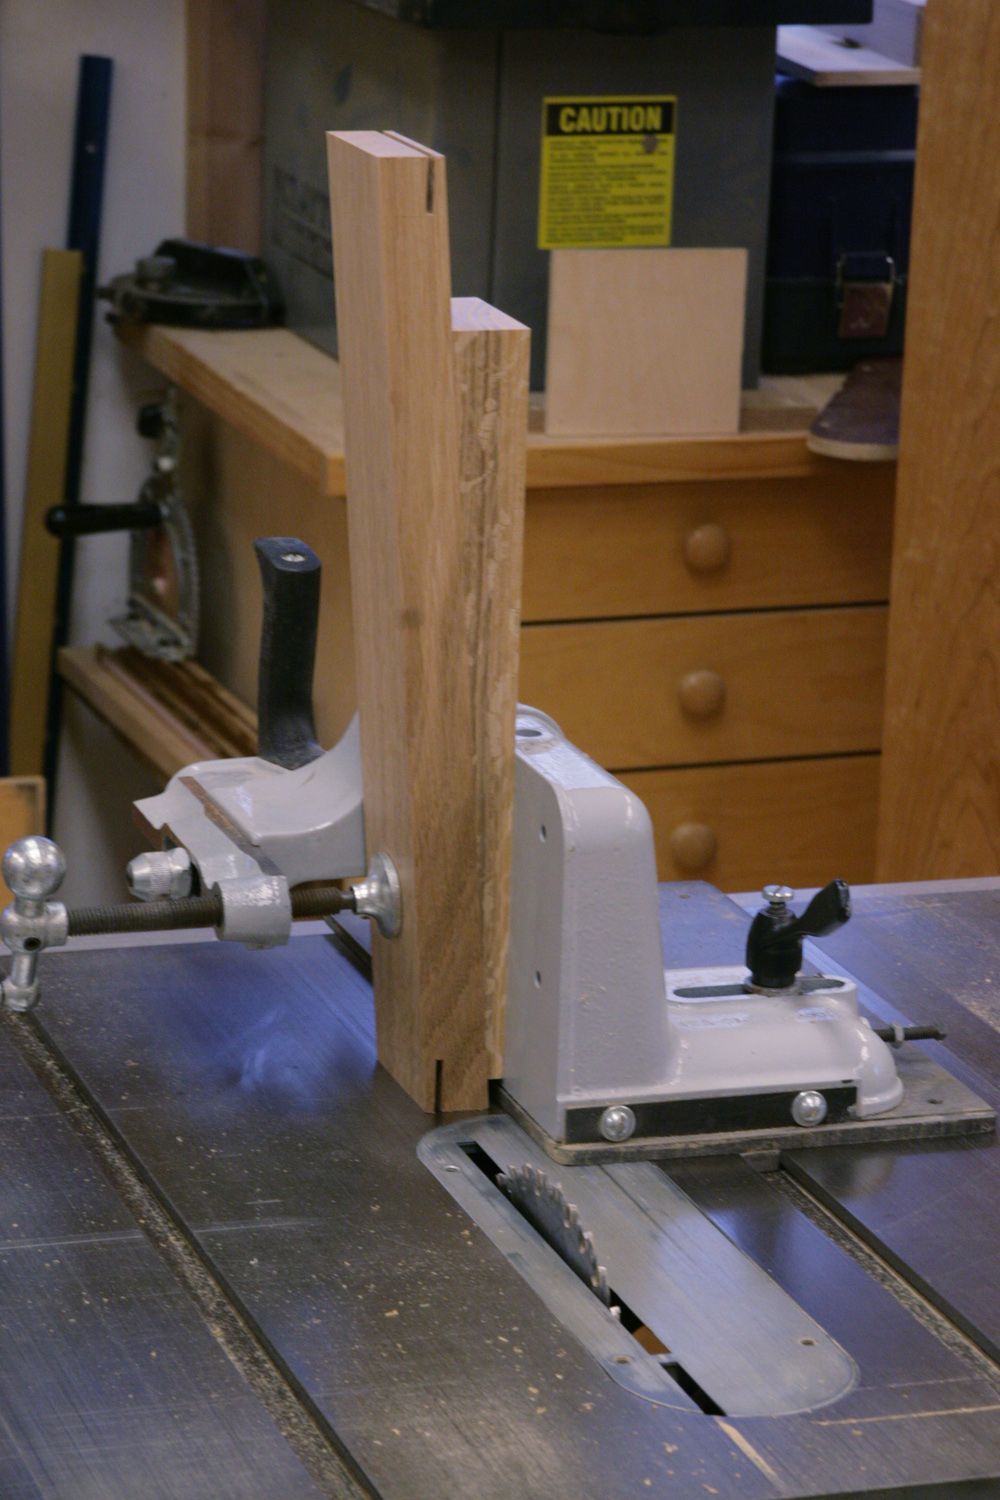
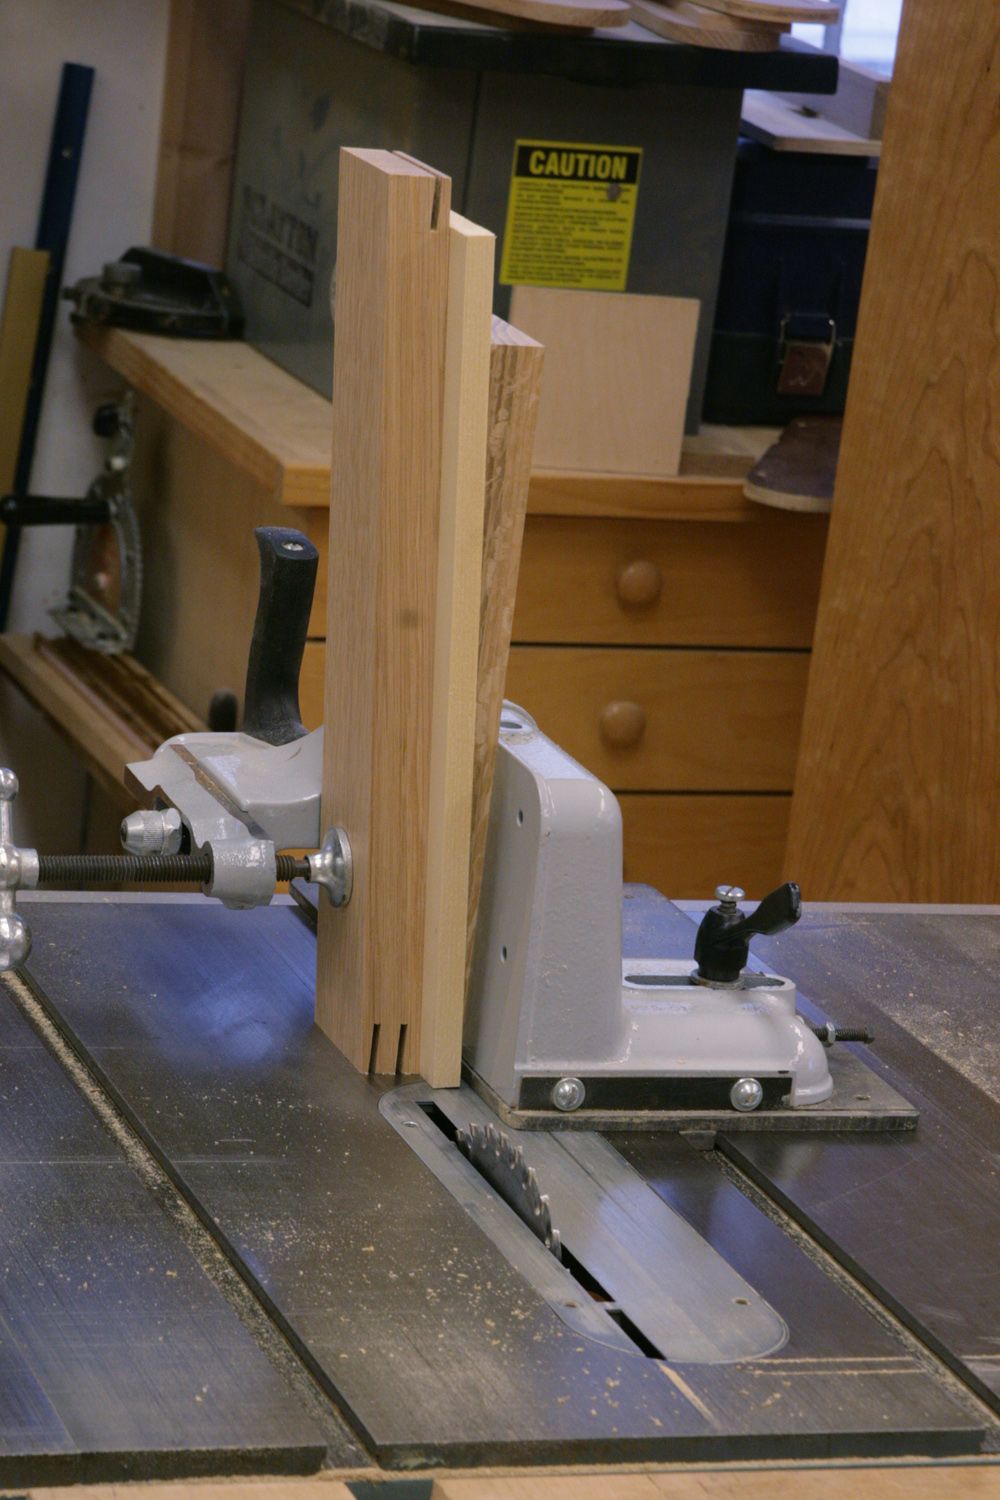
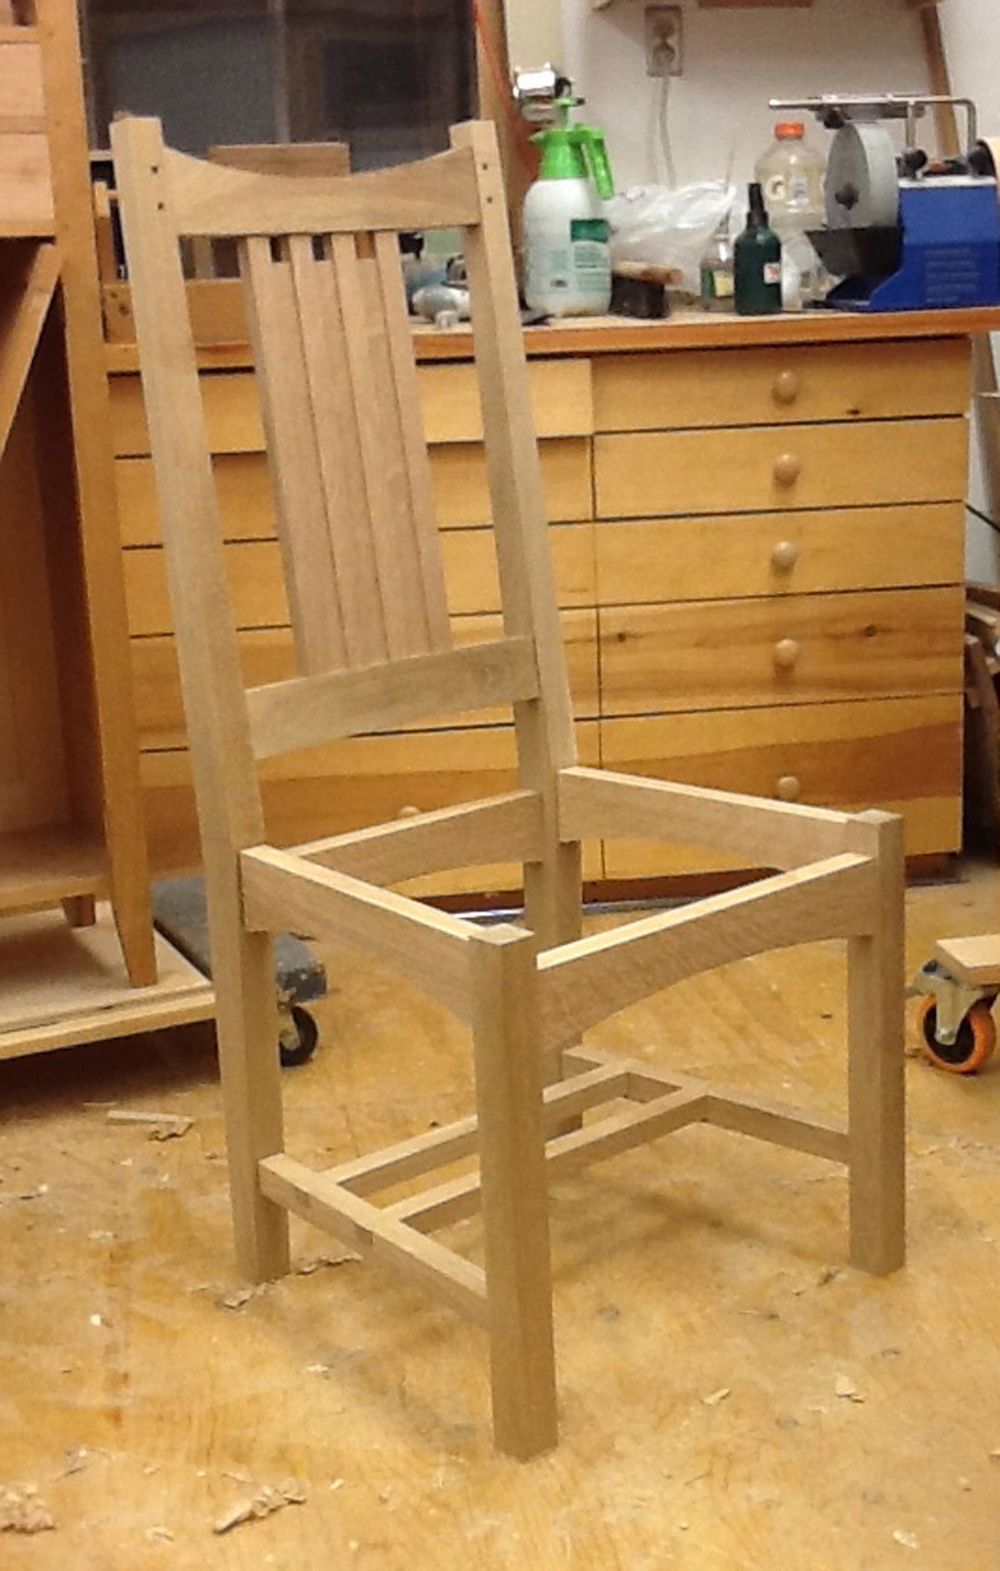
Recently, I was helping a friend make a set of dining chairs based on the design by Kevin Rodel (FW Mar 2007). Rather than use a router to cut mortises for slip tenons as shown in the article, I decided to figure out a way to tackle the job on the tablesaw. What I came up with is a really simple solution to cut all of the angled joinery quickly and accurately.
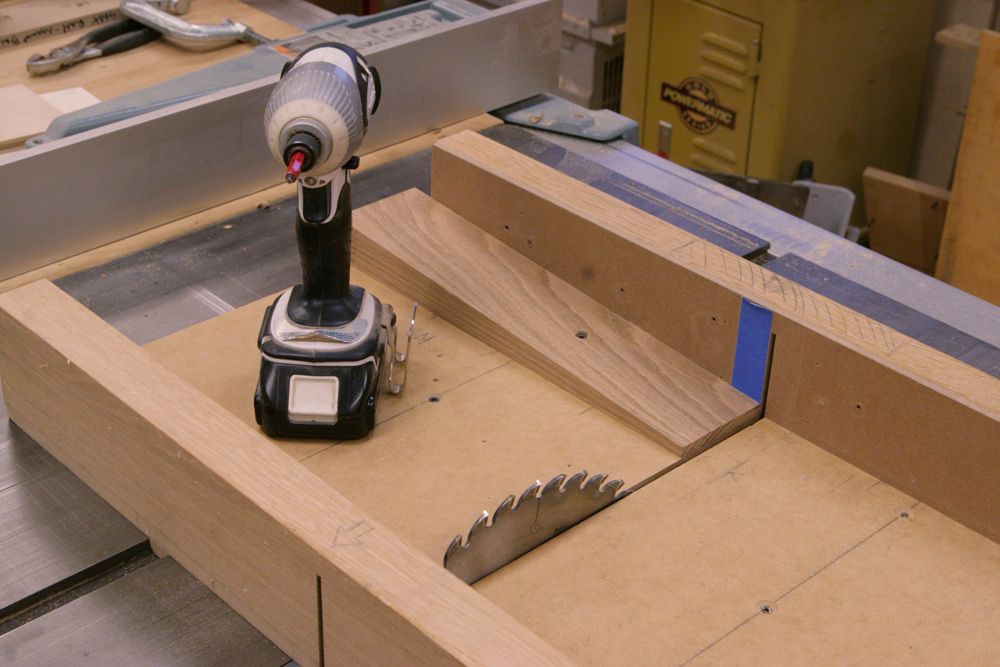
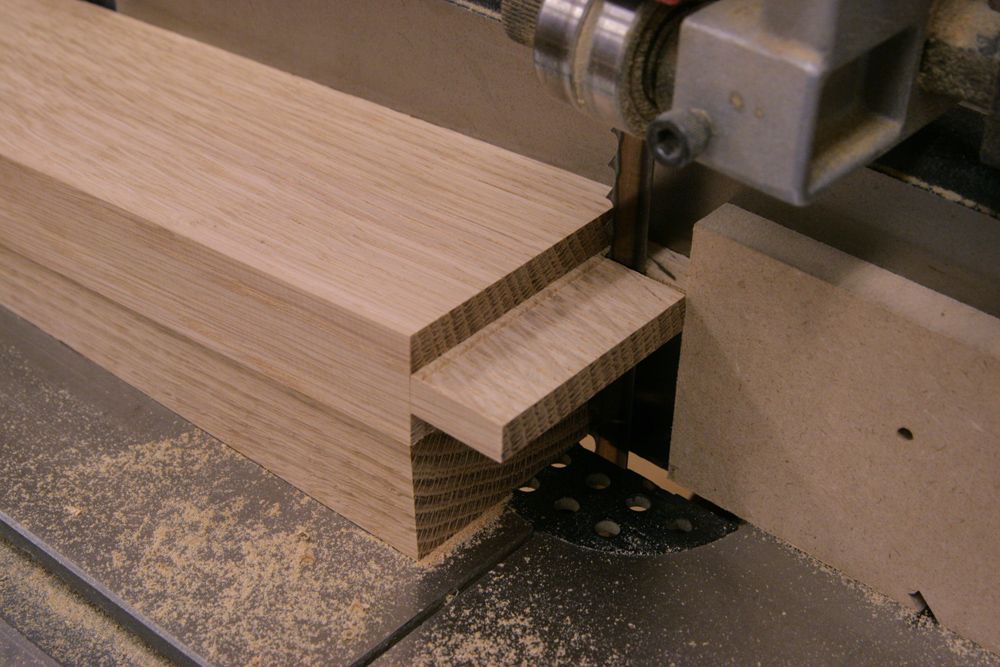
The biggest challenge in making even a simple chair is figuring out a way to connect the angled seat rails to the legs of the chair. The two basic options are to cut angled tenons on the stretchers or angled mortises in the legs. I decided to go with angled tenons. To make set ups easy, I started by making a wedged block that matched the angle of the side rails on the chair plan. I was then able to use the wedge on my tablesaw and bandsaw to cut all of the joinery without angling a fence or tilting a blade. It was my first attempt at making a batch of chairs and it’s a technique I’ll definitely put to use in the future.



Comments
Nice Tip!
Thanks Mike.
MikeO
This tip can be applied to many different applications.
The one thing I do to keep me orientated correctly is; as applied to your application. Is to raw two roughly parallel lines at a somewhat exaggerated angle (to your tenon) as a visual reference. Keeps me from flipping and end and cutting the wrong angle.
Mike,
I am completing a white oak trestle table built with the Rodel chair design in mind for the chairs to match. Working through the planning for the construction of the chairs, I developed sketches similar to the one you worked out. Like you, I wanted to use my cabinet saw rather than my router.
I am really glad to hear the design works well in practice. Thank you for sharing this terrific tip.It has really helped me prepare for the next step in my project(s).
Once again, having good teachers like you really helps.
Jurgen01
I heard Mike discuss this technique on the recent podcast, but was having trouble visualizing. Thanks for taking the time to snap a few pics !
What is the best way to make the wedge?
Thanks for posting this. After I heard you on the podcast, I had a difficult time envisioning it. It is much simpler than I had imagined. Now I have to find an excuse to put it to use.
Wade N
Where were you a week ago when I had to do exactly the same thing for a table? I got it done with a router but it would have been much faster and cleaner with the wedge and the same wedge and stop could have been used for all the shoulders. With a little more effort and creativity the wedge could have been used for the cheek cuts too. Good tip but bad timing.
I agree with the above comments. I too had trouble imagining this from the podcast but now it's crystal clear. I'll be using this to make an easel in the coming weeks. I also appreciate all my lessons courtesy of FWW, thanks. Now teach, what is the best way to make the wedge?
Wedges can also be used rotated 90 degrees, against the sled fence, to cut angled lap joints. I did that recently for a version of the classic oak high chair, where everything is 7 degrees. I think I just cut the wedge on the bandsaw but there's plans for making a jig to do that floating around.
This article could not have come at a better time! Just last week I just purchased the plans to make this chair out of walnut, and was debating how I was going to cut the mortises. The technique in the original original article seems a little "klugey", so I was debating about buying a horizontal router table to do the joinery. Thank you Mike Peconich for saving me S200 and showing me a great tip. Can't wait to get started!
Thanks Mike, a simple but effective jig!
I made the wedge by laying out the slope on a block and bandsawing to the line. I ran it across my jointer to smooth the surface. The exact angle isn't all that critical. In fact, I expected to be off a little, so I left some wiggle room by cutting the side and back rails to length first, but held off on cutting the front rail to length. This way I could dry fit the side rails to the back rail and measure the distance between the front legs for an exact length for the front rail. As long as I use the same wedge for future chairs, I can cut the front rail to that same length and everything should come together.
Mike
hey mike great tip. but how did you handle the compound angles on the two lower strechers
shtscore- Great question about the compound angles at the rear shoulders of the lower stretchers. I though it was going a little too deep in this post to cover that as well. On my prototype, I started with a normal angled shoulder with the stretcher cut to the fit at the widest point. Then I set a bevel gauge to the angle of taper of the rear leg and scribed the angle on the sides of the stretcher and connected the points across the top of the stretcher. I then chopped to the scribe lines by hand. When making the set of 4 chairs, we figured out a cooler trick for that as well. If you make a second wedge equal to the taper on the inside face of the rear leg, you can combine that with the original wedge to cut the shoulders at the correct angle on the crosscut sled. More fun with wedges! Sorry if this is a little confusing without visuals.
Just so I'm clear; the new overall length of the side rails is going to be the spec'd length plus the tenons? Or did you modify those to both be the same length at both ends?
Great tip Mike. My mind is always searching for ways to simplify common woodworking tasks. Any reason one couldn't carpet-tape the wedge to the workpiece, and slide it back and forth to cut the tenon with the tablesaw blade? If the workpiece slides on the wedge, obviously this would not work because the distance from the tenon to the tablesaw would not remain constant. However, if the workpiece is taped to the wedge, it could be moved side to side to cut the cheeks in one operation. I don't think it would interfere with the stop block either.
Thanks again for posting your method, I like it.
Mike, that is simply ingenious. I love how woodworking brings that out of us at times.
It worked for me!
Log in or create an account to post a comment.
Sign up Log in