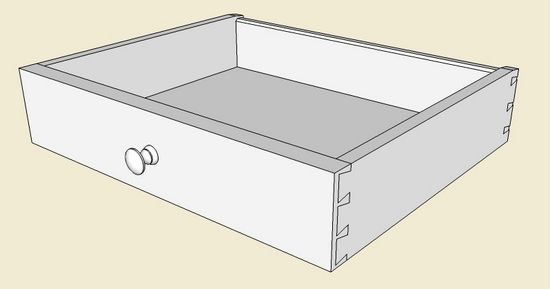
Both Dave Richards and I have recommended modeling components in the context of the assembled piece of furniture. This saves time and reduces errors by drawing a new component where it fits among other connected components. With this process, often there is no need to type in lengths of lines as you are keying off other parts of the furniture.
In this example, I will show creating a drawer bottom within an already connected assembly of a front, two sides, and a back piece.
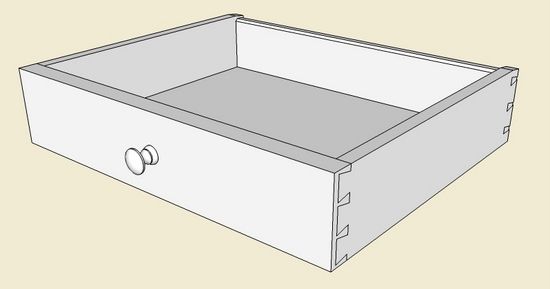
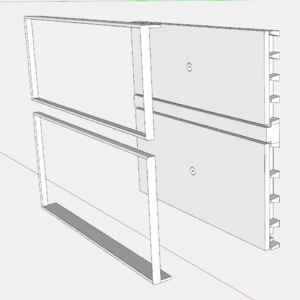
As shown below, the example drawer is typical classic construction with dovetails and solid bottom having beveled edges.
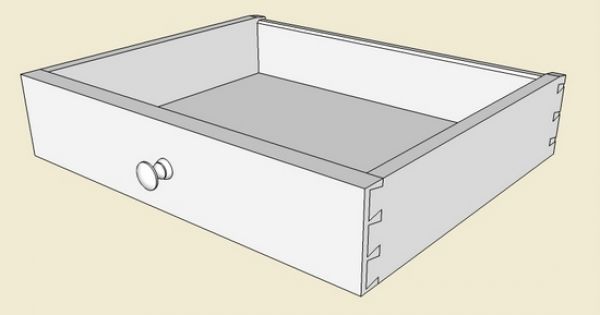
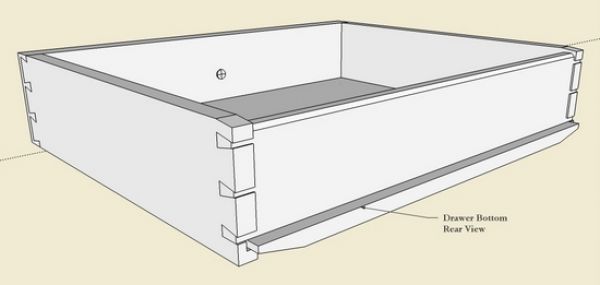
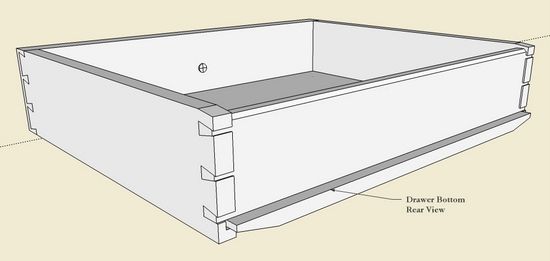
The beveled edges ride in grooves cut into the side and front components. I typically allow a 1/16-in. gap at each end of the drawer to allow for expansion/contraction (the grain of the drawer bottom runs sideways). Also, the drawer bottom is slid into position from the rear with a 1/2-in. extension beyond the back edge of the drawer sides.
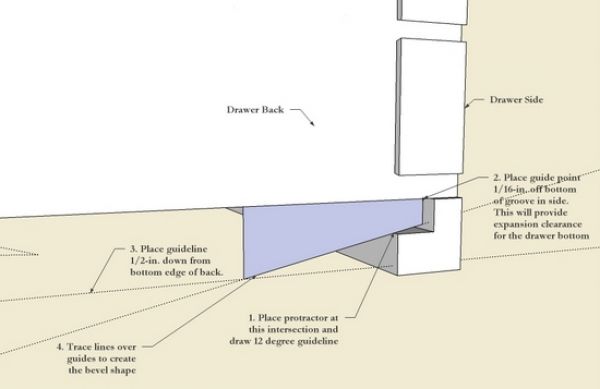
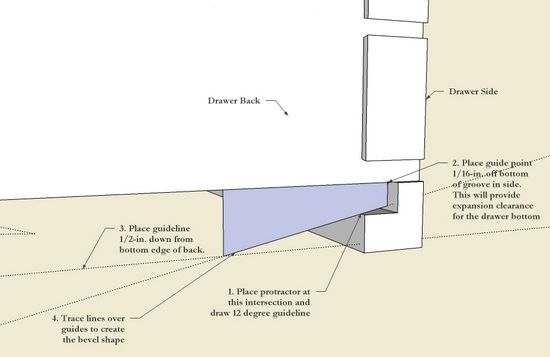
Step 1: With all other drawer components assembled, begin the construction of the bottom by creating the bevel edge shape. I typically use a 10 – 12 degree bevel angle and with the Protractor, place an angled guide line that touches the edge of the groove as shown. To provide the expansion gap, place a guidepoint with the Tape Measure 1/16-in. off the bottom of the groove.
This drawer bottom is 1/2-in. thick so place another guideline to indicate that dimension. Then with the line tool, trace over the bevel shape.
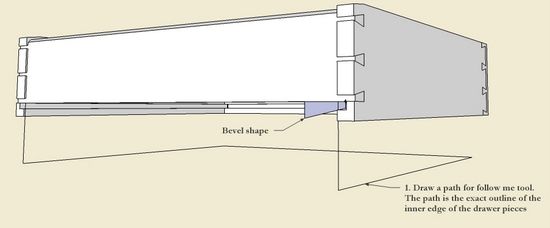
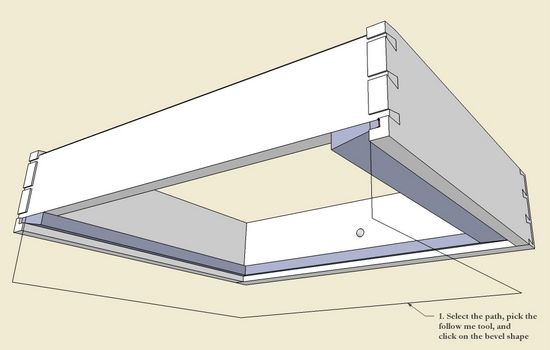
Step 2: In preparation for a follow me operation, create a path which is the outline of the inner edge of the drawer pieces. The bevel is only on the sides and front of the drawer bottom, so the path is 3-sided.
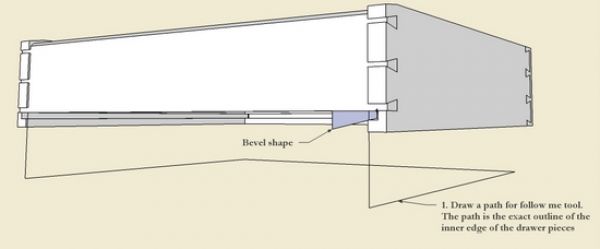
Step 3: Select the path and execute follow me. Now we have a drawer bottom that has no center, only its bevel edges on three sides. Note that the bevel edge will also be automatically positioned in the drawer front, also with the 1/16-in. expansion gap.
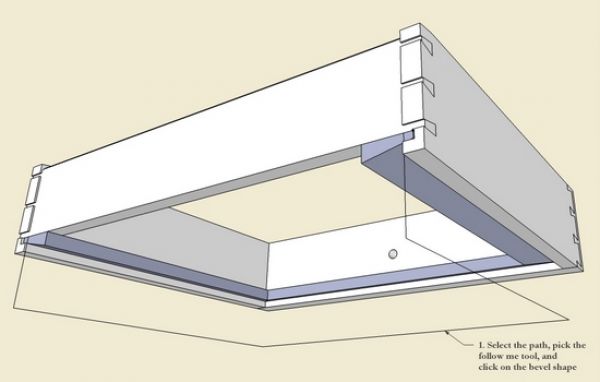
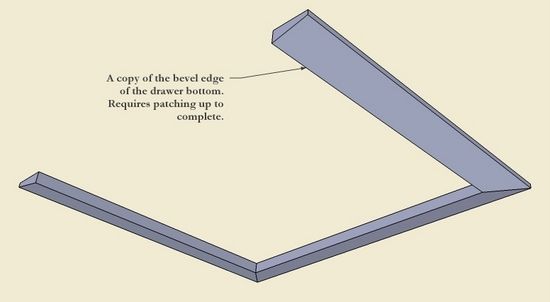
Step 4: Make a copy of the drawer bottom component, and move away from the drawer assembly.
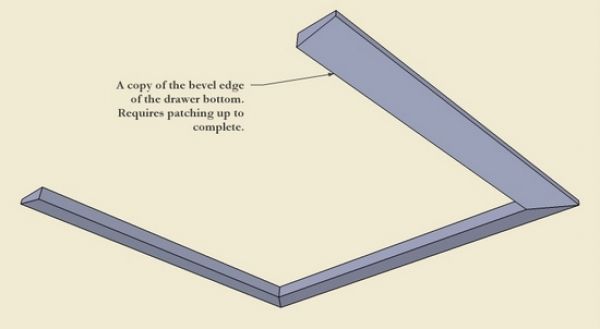
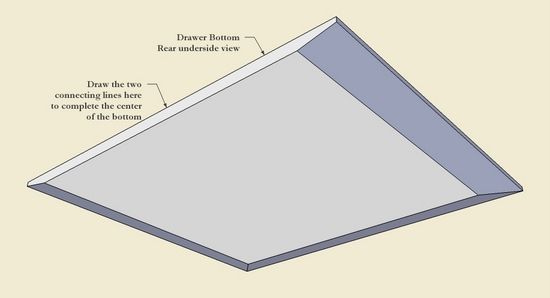
Step 5: Draw connecting lines at the rear edge of the drawer. This will fill out the missing faces to close up and complete the bottom component. On the top surface of the drawer bottom, use the eraser tool to delete unnecessary lines.
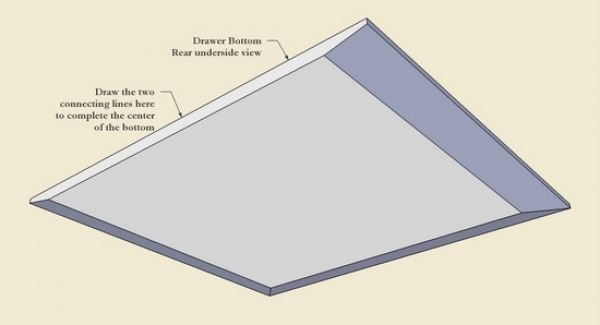
After completing this copied component, it can be deleted, as the original finished drawer bottom is perfectly positioned within the drawer assembly.




Comments
Dear Tim,
Having some trouble making the beveled on the drawer bottom-any more tips?
Thanks, Betsy
betsy T: I find that most problems occur in two areas:
1. Forgetting to open and close components
2. Using version 7 of SketchUp, and having the path for the Follow Me outside the wedge shaped component.
Version 8 allows you to have the path outside the profile component. After selecting the path with the Select Tool, then pick the Follow Me Tool. Right click on the profile and select Edit Component, then click the Follow Me Tool on face of the profile.
If that doesn't work, you need to send me your file to see what is happening.
Tim
Log in or create an account to post a comment.
Sign up Log in