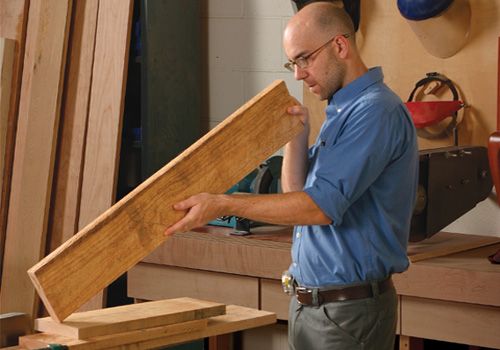
Get Organized to avoid mistakes. Inspect each board for grain direction, cupping, and bowing before you start milling, and keep them organized so you don't have to look at each one before feeding it into the next machine.
Fine Woodworking contributor Stuart Lipp’s first job at a furniture shop primarily involved cutting lumber to size. He learned quickly that to make beautiful furniture, you must mill carefully. Cut a board too narrow, for example, and you no longer have bookmatched panels wide enough for your doors. Mill a piece out of square, and you could throw a whole project off kilter.
The way to avoid mistakes, was to follow a logical sequence, and stack boards in an orderly fashion so that there was no question about how they should be fed into the waiting machines. To make things easier, as he moved from one machine to another, he started using two carts, one for the infeed side and one for the outfeed side.
By following Lipp’s three time-tested steps, you’ll be able to turn rough-sawn lumber into straight, flat, square furniture parts in no time flat.
Step 1 – Flatten Both Faces First
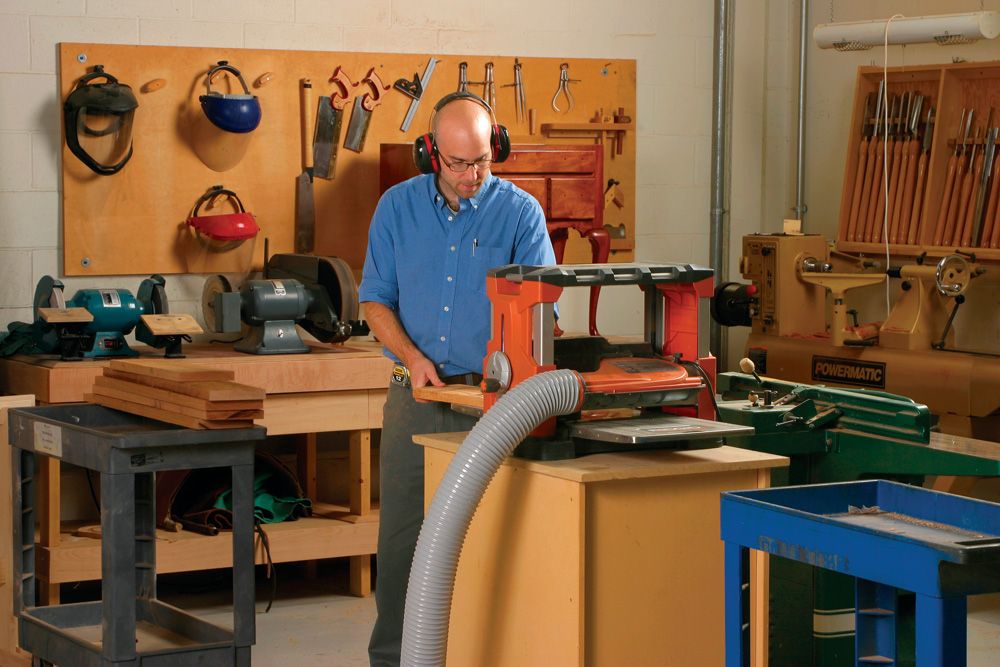
Milling a board square starts at the jointer, where you flatten one face. Then you move to the planer and plane the second face parallel to the first.
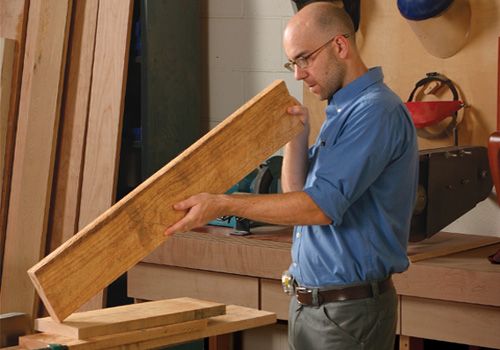
Get your boards organized before you start. Stack them so that they can be taken off the cart and fed directly into the jointer, which means the grain runs from top to bottom as it goes from the front end of the board to the back. If any boards are cupped or bowed, stack them so that the cup or bow makes a frown. The two low ends will provide a more stable base than the peak of the cup or bow. Lipp also throws a scrap board on the stack so that he can test his machine setups as he works through the milling process.
When planing, you can reduce snipe-the tendency of the planer to cut deeper at the front and back ends of the board-by feeding the boards through so that the leading end of one touches the trailing end of the one in front of it. Before the final pass, send the scrap piece through to check that the planer is set to the correct thickness.
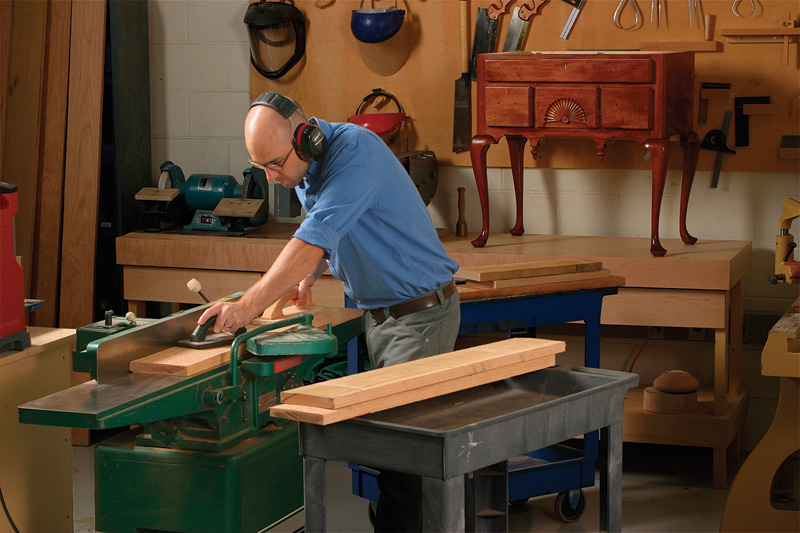 Faces, but no edges. Lipp starts by flattening a face, but doesn’t then straighten an edge. It’s not always possible to feed edge grain into the jointer properly when only one face is jointed. |
Jointer Flattens and Straightens First Face
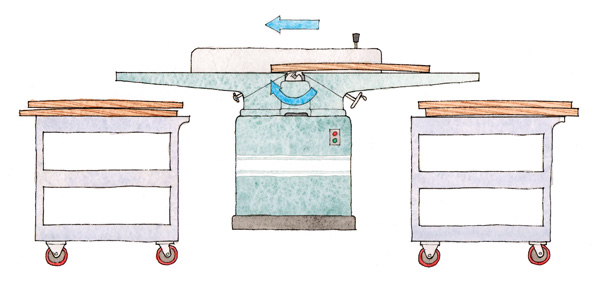 |
Because the jointer’s cutter is below the board, the grain should slope from top to bottom as you feed the stock from right to left. Feed a board backwards and the jointer will tear out grain rather than cut it cleanly. Stack the boards on your infeed cart facing the proper direction. Be sure to place the board’s concave side down. Next, feed the boards one-by-one. As you take boards off the jointer, stack them the same way they went in, on your outfeed cart. |
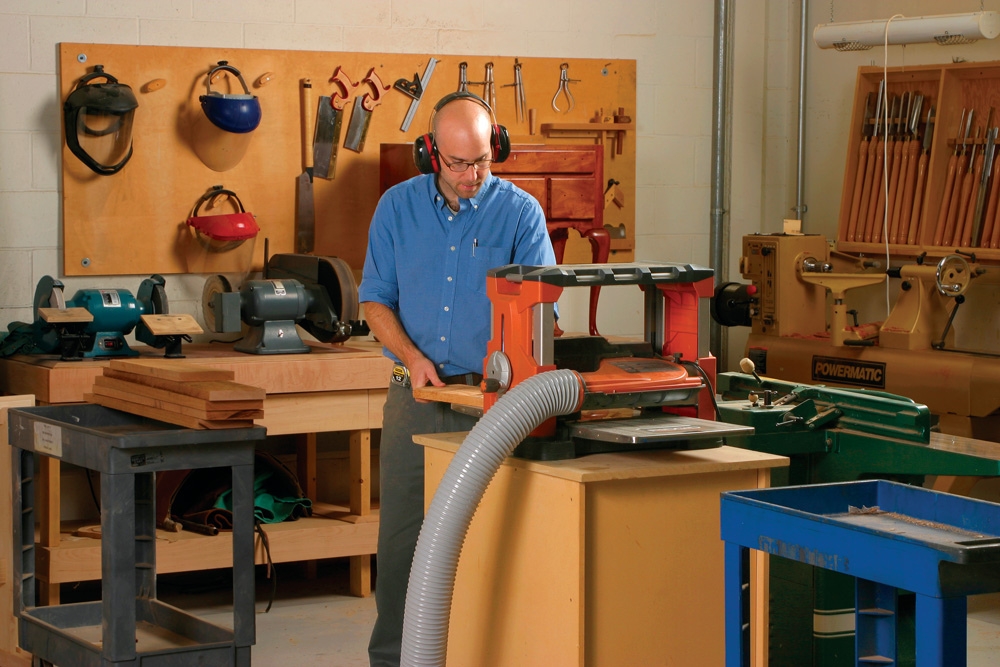 Plane second face flat. When the board is about 90% flat, begin to flip it end for end after each pass. That keeps the grain running in the right direction as you take equal amounts off each face, which relieves internal tensions evenly and minimizes how much the board will cup afterward. |
Planer Makes Second Face Parallel to First
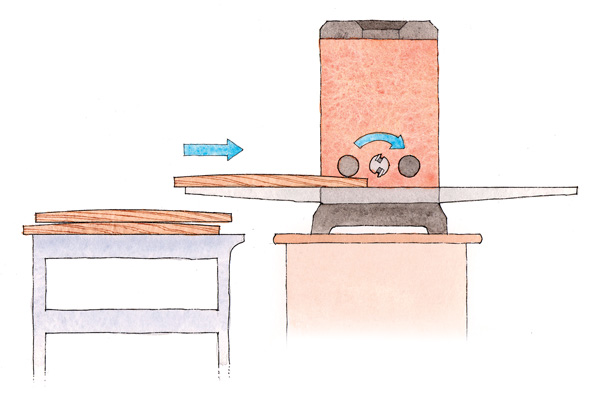 |
Planer knives hit the top of the board, so you’ll need to turn your infeed cart so that the grain direction is reversed and the end that went first into the jointer goes last into the planer. Remember, as the boards come out of the planer, restack them so that the grain runs in the same direction. |
Step 2 – Rip Wide Parts to Width Before Narrow Ones
After the boards have been planed to thickness, joint one edge straight and then rip them to width. But don’t joint any edges until you’ve checked to make sure the jointer’s fence is 90-degrees to its tables. When jointing the first edge, just like when jointing the first face, any crook in the board should face down.
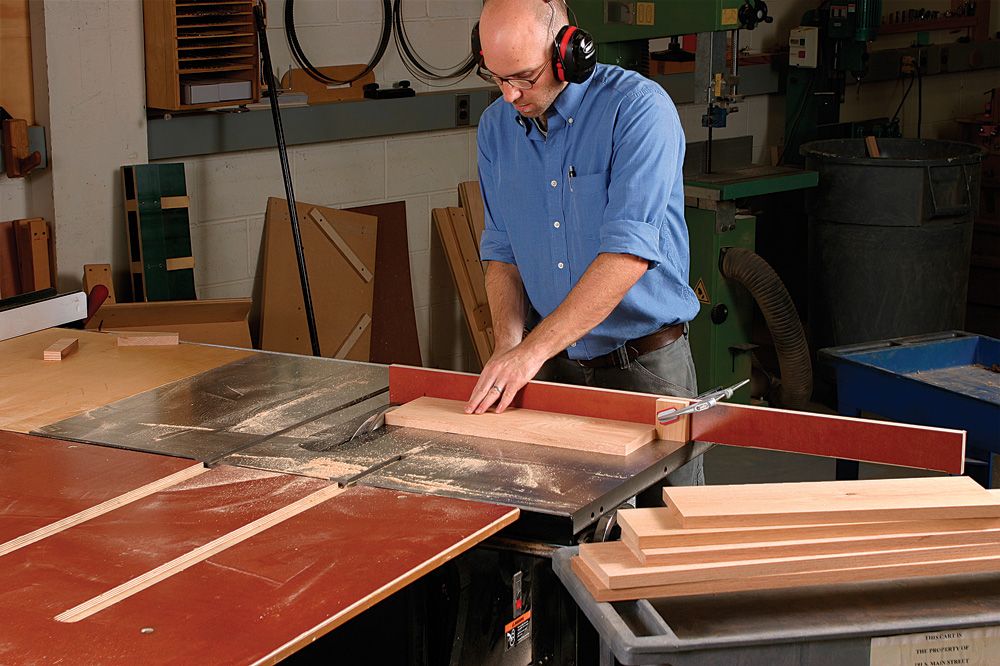
At the tablesaw, use the scrap piece in the stack to check that the blade is square to the saw’s table. Rip the widest parts first and work down to the narrowest-it’s always better to accidentally cut a part too wide than too narrow. The jointed edge should run against the rip fence.
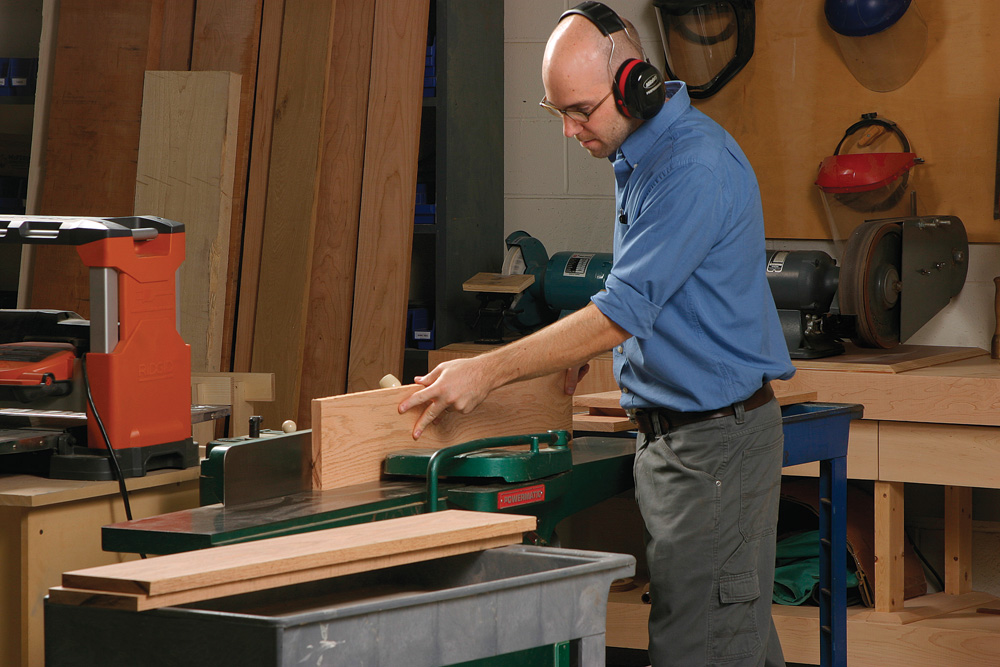 Right edge, right direction. Joint the concave side for stability. Both faces are flat and straight so you can flip the board either way to avoid tearout. |
Joint an Edge Straight and Square
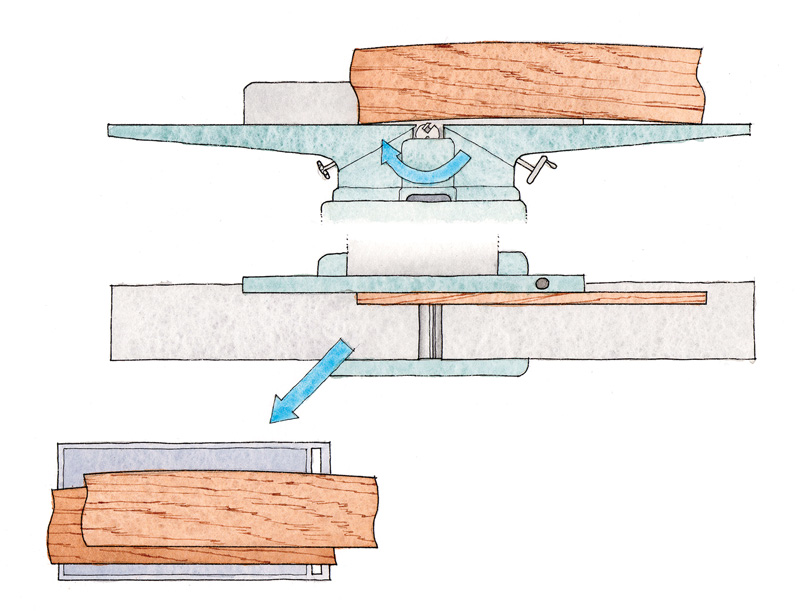 |
Flip the board as needed to run the grain past the knives in the right direction. Curved edges should face down, because the two ends of the curve provide greater stability than the hump on the other edge. Stack the boards on your outfeed cart so that the jointed edges face toward the jointer. When you roll the cart over to the tablsaw, the boards can be fed directly into the blade with the jointed edge against the rip fence. |
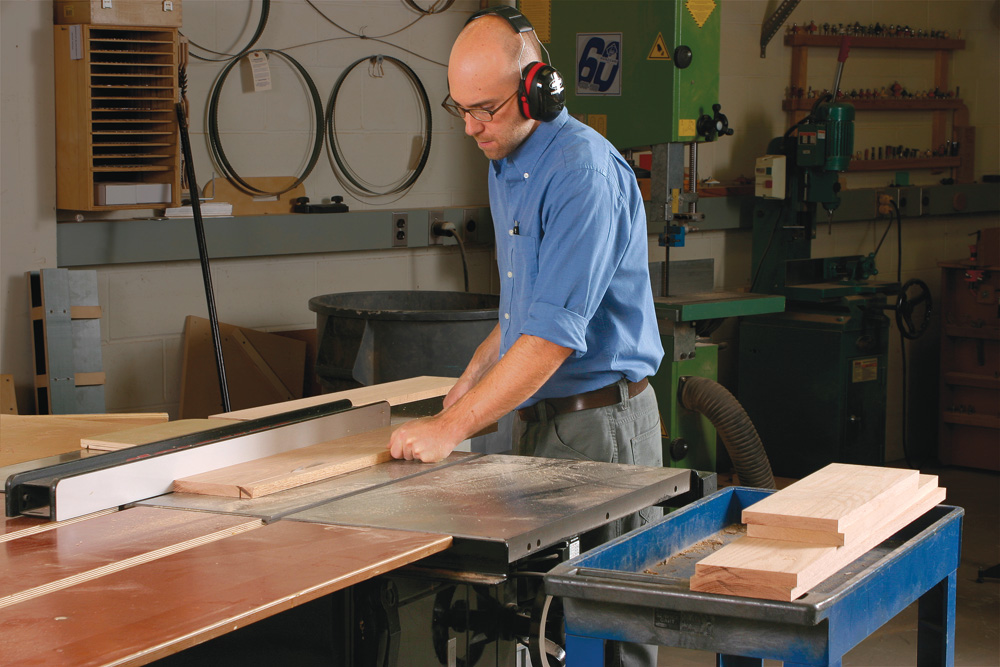 Straight from cart to blade. For safer ripping on the tablesaw, a board must have a straight edge to run against the fence. Also, use a push stick on narrow boards. |
Good Edge Goes Against the Fence
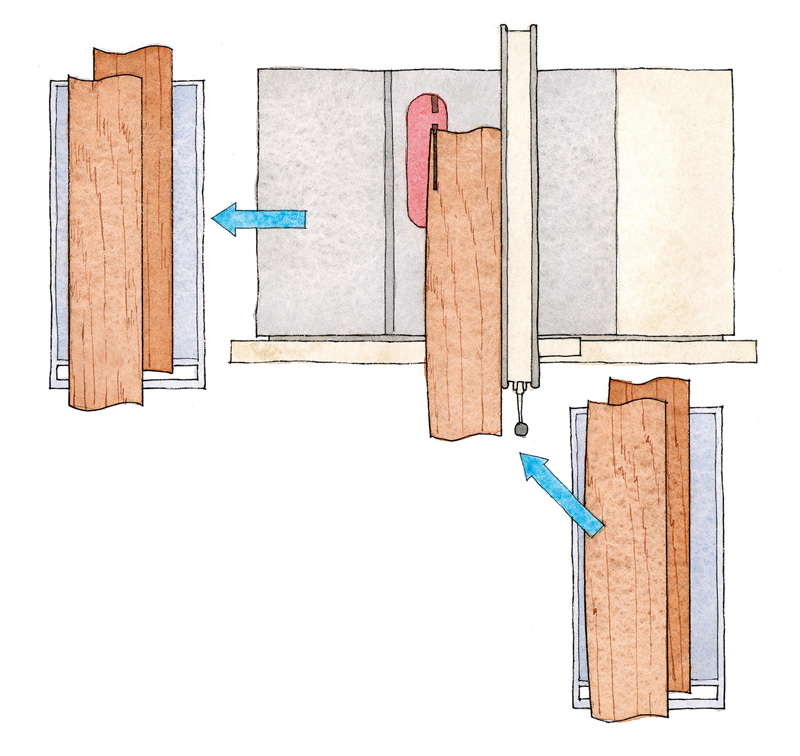 |
With the jointed edges toward the rip fence, the boards can be taken from the infeed cart and fed directly into the tablesaw blade without checking the edges first. Simple move each board directly over to the outfeed cart after each rip cut. |
Step 3 – Finally, Cut Parts to Length
Now it’s time to cut the boards to final length. You can use either a miter gauge with an auxiliary fence attached, or a crosscut sled. In either case, use the piece of scrap first to check that the gauge or sled is cutting square. Make sure to locate the test cut an inch or two from the end. If both sides of the blade are not buried in the wood, the blade could deflect and lead you to think it’s not cutting square when it is. Cut one end square on all of the boards. Then cut them to length, working from the longest parts to the shortest (it’s easy to cut a piece shorter, but impossible to go back and cut it longer).
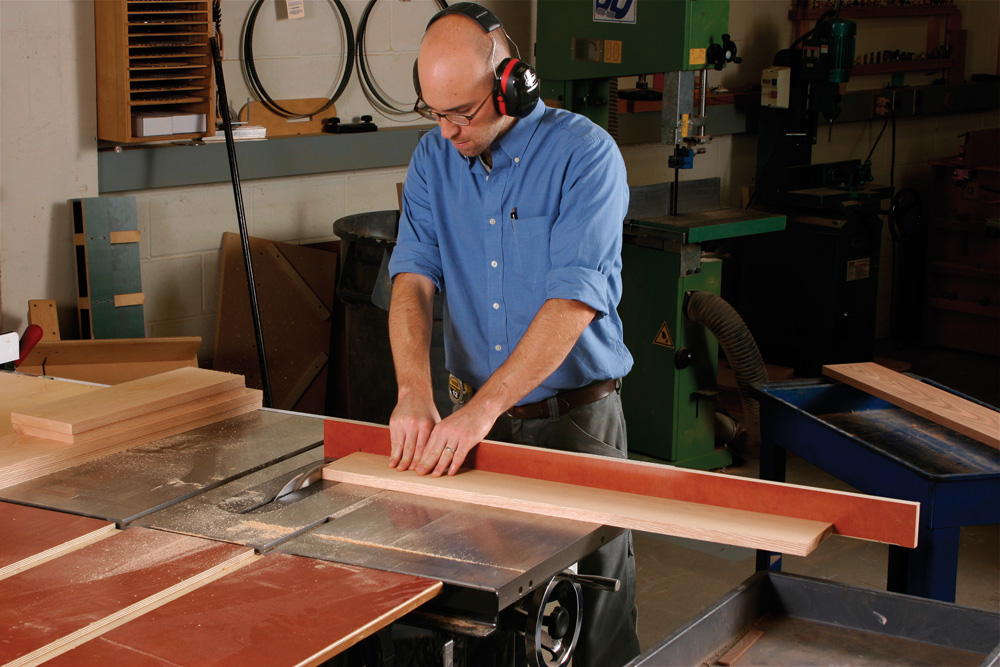 Smart stacking. Lipp saves time by stacking all of the pieces on the extension table. After cutting the boards to length, he stacks them on the outfeed cart. |
Square an End
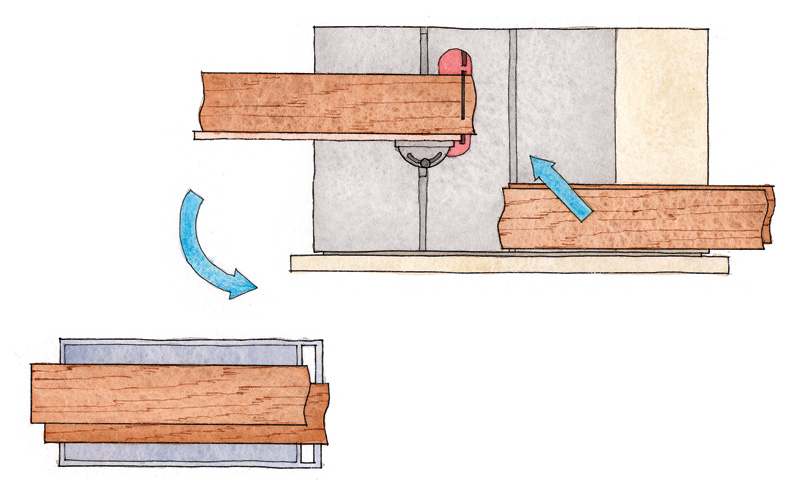 |
With all his stock set atop the tablesaw’s extension table, Lipp is ready to cut. He squares the first end, flips the board end for end, and places it on the outfeed cart, ready to be cut to length. |
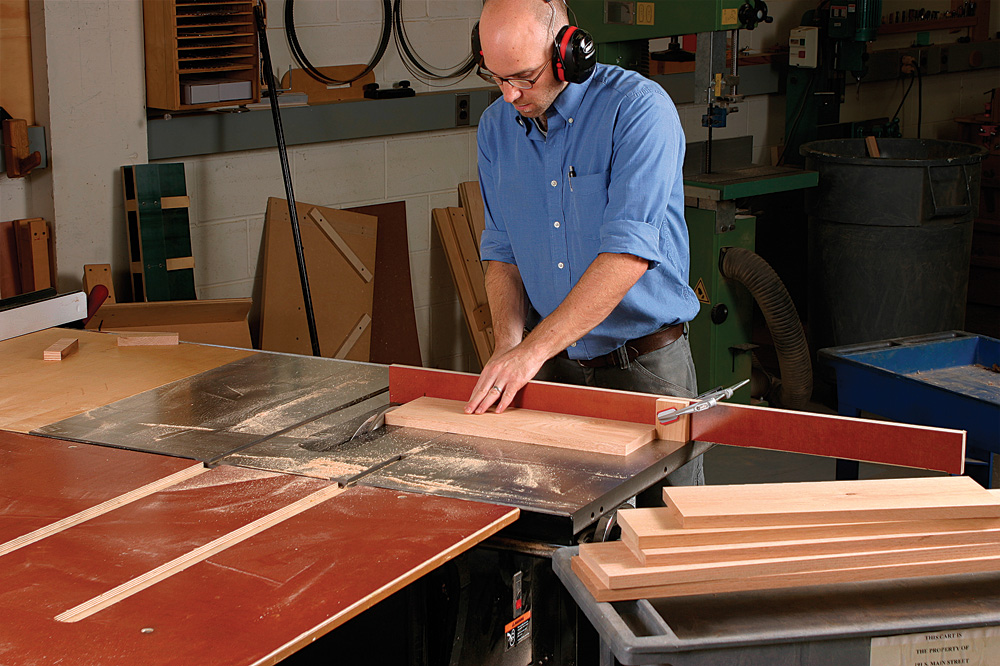 Work from long to short. To avoid cutting a piece too short, start with the longest parts and work toward the shortest. A board can always be cut shorter, but never longer. |
Cut to Length
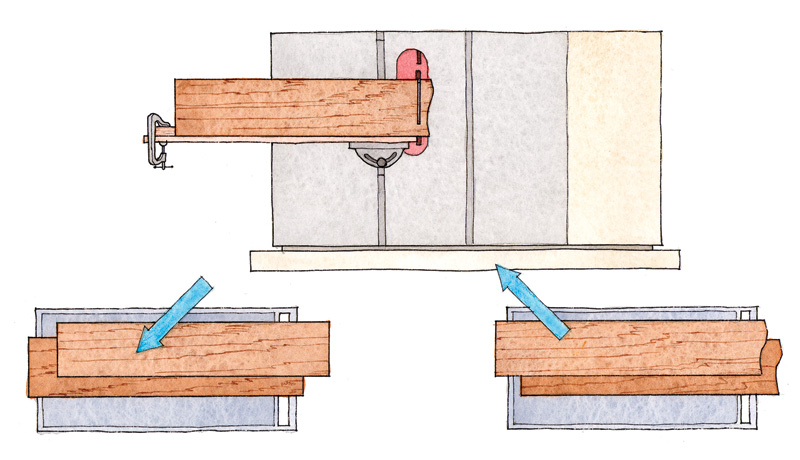 |
Switch the carts around (infeed on right, outfeed on left) and cut the boards to length. Use a stop block when more than one part is the same length. When it comes to stop blocks, a simple square block clamped to your miter gauge’s auxiliary fence works great. Cut every same-length part at once. Then move the block for the next shortest parts. |
| More on Milling Lumber • All About Milling Lumber • Lumber from Your Own Backyard • How to Get Square, Stable Stock |







Comments
Milling both faces before putting an edge to the jointer is a safer method to avoid splinters than milling an edge with a rough face exposed. This is in addition to the flexibility of flipping the board end for end to correct grain feed direction. It also make it easyer to alternate reference faces so that if you do not have a perfect 90 degrees on the jonter fence, the error will correct itself.
Thanks for all the good information Lipp and woodpapi. I am a beginner at woodworking and this helps me out a lot. I have a jointer and a planer and can now use them the correct way to produce nice pieces from rough lumber. Thanks.
This article was very helpful to me. Is there a way to use a jointer to mill boards wider than the blade. I have a 6" jointer and would like to mill 8" boards.
Paul Forrest
I'm curious about docforr's question also. How do you joint a glued up panel that's 8 or 9 inches wide if your jointer is only 6"? I haven't got a smoother plane so I don't have that option. Ive got 4 freshly glued up panels which will be the carcass for a spice chest setting on my workbench right now, and i'm fresh out of ideas.
What are your thoughts about milling in two stages? Mill the board short of the required thickness then return the next day to finish the job to allow for additional wood movement over night.
Log in or create an account to post a comment.
Sign up Log in