A Friendship box
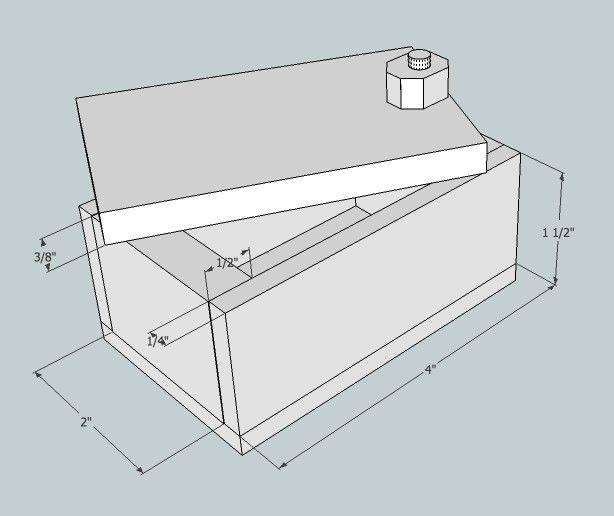
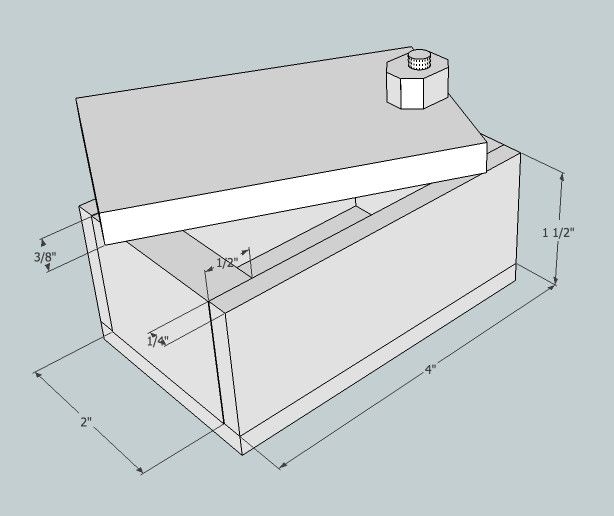
Friendship box from the Clear Spring School. Sketchup illustration available upon request.
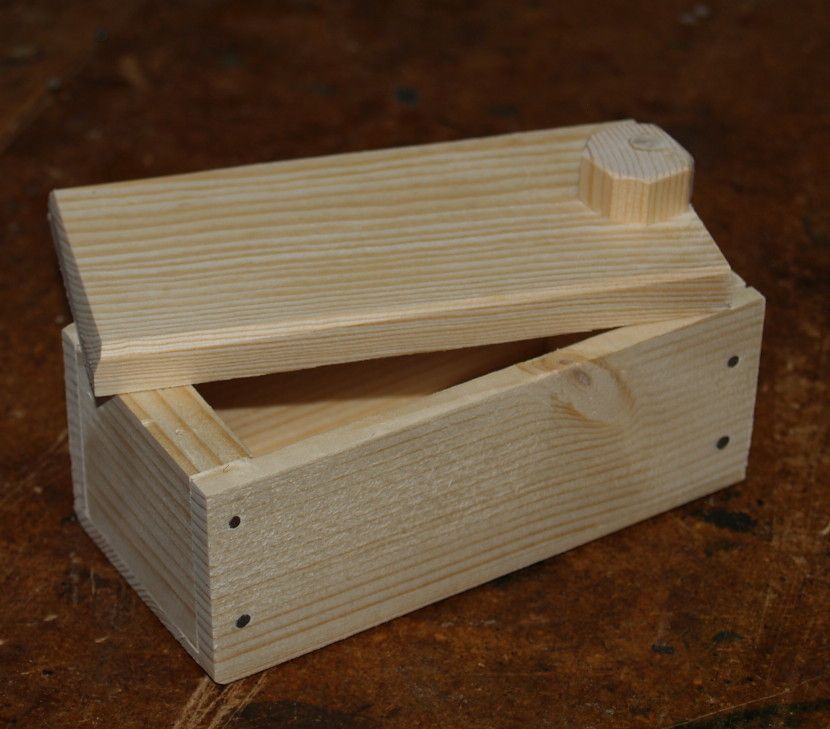
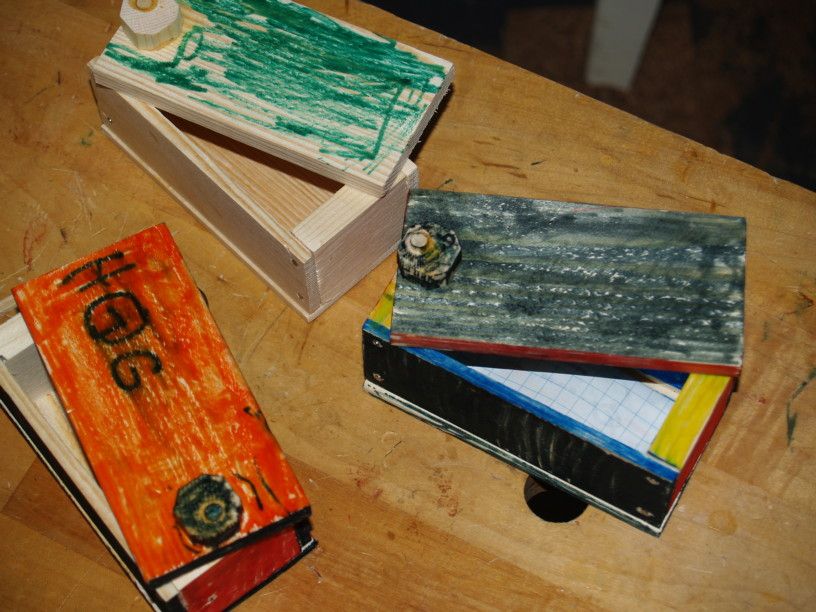
Nearly everyone will love a good box. Even kids know what to put in them, and are excited to make one. It can be hard for the kids to give what they’ve made away, so I promise my students that they can make one to keep the next week. Originally made by kids at east coast summer camps and exchanged as keepsakes among friends, friendship boxes have been made in a variety of styles and some years back Smithsonian Magazine had shown a collection of these historic boxes. We have made them for years in the wood shop at Clear Spring School in a variety of designs but this one is a winner because it can be easily assembled (not without some bent nails, of course) and the simple pivot hinge keeps a class of kids about as far away from broken off screws and misapplied hinges as humanly possible.
Working with kids as young as first grade, you’ve got to be prepared for bent nails, and a bit of complaining when the sawing takes longer than they expect. But their pride in having made something themselves will be apparent when you tell them that the friendship box they’ve labored to achieve must be given away.
Here are the steps…
First prepare the stock. I use hemlock or fir precut 2×4 studs as a cheap source of material for this project. I prefer it over hardwoods, as you can actually drive nails in it. First cut the 2×4 in half to be of a managable length for resawing on the table saw. Cut a 1/4 in. thick slice off one side, making stock for the front and back 1/4 in. thick x 1 1/2in. wide. Then cut a 1/2 in. thick piece from the 2 x 4. This will be used to make the ends of the box. I use 1/2 in. thick stock for the ends because it is thicker to nail into and can be drilled for a dowel to attach the pivot lid. Resaw what remains of the half 2×4 to cut the material for the top and bottom. The bottom should be 1/4 in. thick x 2 1/2 in. wide. You will notice that what you get from half a 2 x 4 makes enough material for several boxes. So when your child wants to make another to keep for him or herself you will be ready.
Depending on age of your child (even teens can enjoy this box) you may need to help with some of the marking and getting the saw started on line. Mount the wood securely in a vise or clamp it to a low work bench so the child’s hands (and your own) will not be in the line of the cut. For this design, cut two pieces of 1/2 in. thick stock 2 in. long for the box ends. Then cut 2 pieces from the the 1/4 in. x 1 1/2 in. stock 4 in. long to form the front and back. Cut a piece of 1/4 in. x 2 1/2 in. stock 4 in. long for the bottom, and a piece of 3/8 in. x 2 1/2 in. stock the same length for the top. You will also need a piece of 1/4 in. dowel 1 1/2 in. long and a piece of larger dowel or octagonal stock 3/8 in. long to form the keeper for the lid.
When all the parts are cut, the box will be ready to assemble. You willl need 18 gauge wire nails 3/4 in. long. Put a box end in the vise to hold it as your child nails a box front or back in place. Carefully align the edges as the nails are driven into place. I suggest that the child make two Ls first and then nail those together into the four sided box form. Then nail the bottom in place. Nails only need to be driven from the bottom into the 1/2 in. thick stock at the box ends to be secure enough to hold up for generations.
Next attach the lid. I drill through a piece of octagonal stock 3/8 in. long to make a keeper for the lid so it will remain attached to the box as it opens and closes. Use a drill press and hold it securely in place as your child does the drilling. Then put the lid in place on the box and drill through for the dowel to attach the lid to the base. I prefer to hold the box in exact position myself as the child operates the drill.
If you are in your woodshop with a grandchild, I can’t imagine a better way to share the pleasure of woodworking and extend it into a new generation than by making a friendship box. If you are lucky you will be its recipient and have a concrete remembrance of a wonderful time in your woodshop.
Woodwokring is about much more than making stuff. As Otto Salomon had said, the value of the carpenter’s work is in the usefulness of the objects he makes. The value of the student’s work is in the student. In other words, character and intelligence are formed through the process of making real things.
You can learn more about woodworking with kids, hands on learning and the Clear Spring School wood shop at my blog, Wisdom of the Hands.





Log in or create an account to post a comment.
Sign up Log in