Build a Slab-Top Table
Natural-edge slabs make great tabletops. Learn how to transform a slab into a beautiful top and discover two simple bases to support it.
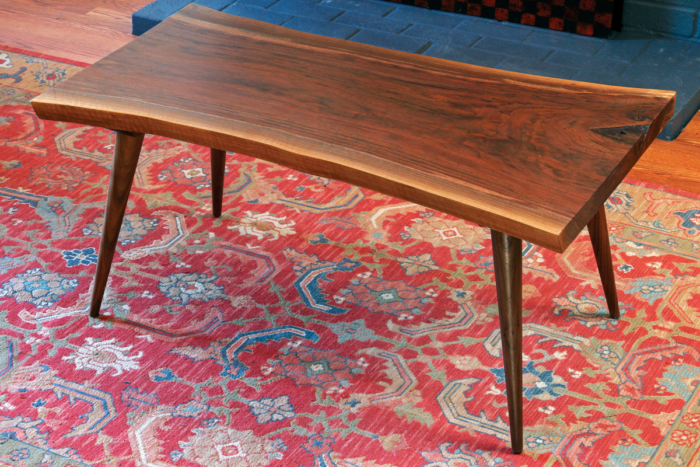
Walnut is a great choice. Sometimes called black walnut, this wonderful wood is available in slab form in many parts of the United States and usually has gorgeous grain.
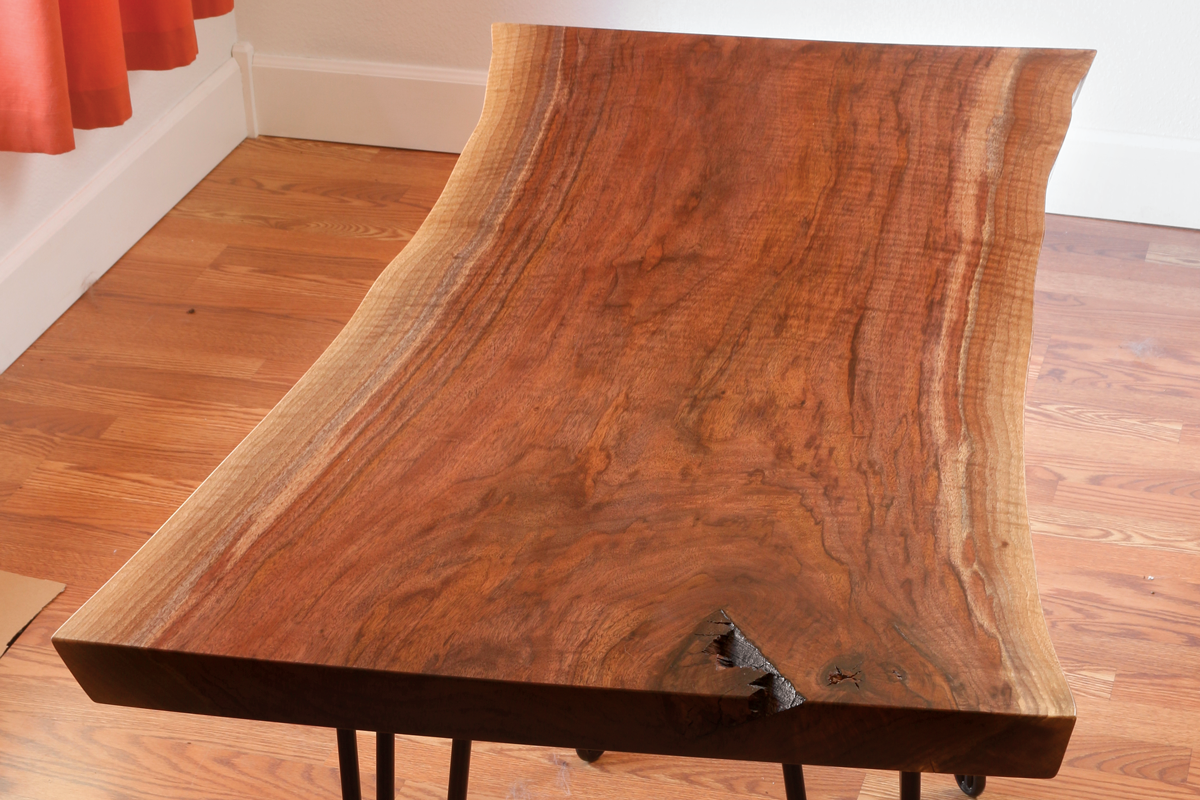
Wood slabs are boards that are big, thick, and wide, suitable for a tabletop or bench seat all on their own (vs. gluing together narrower boards). They take a bit more work to find and flatten than normal boards, but I’ll show you how to overcome those obstacles and enter the woodworking promised land. Of all the things you’ll ever build, none will have the wow factor of your slab pieces. There is something about the scale, the curvy edges, and the beautiful grain and natural “defects” that makes you feel like you brought the soul of a living tree into your home. Check out the marvelous transformation our slab goes through and you’ll see just what I mean.
|
|
Two designs for one slab
Learn to sand and finish a big natural slab of wood, and then you’ll be able to screw a variety of legs to it. I chose short, round tapered legs—in walnut, just like the slab—to create a great coffee table. For the desk design, I simply chose longer hairpin steel legs. Both leg styles are Mid-Century Modern, which looks good in almost any setting.
Both sets of legs are also available in various sizes. With shorter hairpins and a smaller slab, you can make a coffee table or even a small stool. The same goes for the tapered wood legs: They come in a few different sizes and in a few different woods, to suit almost any slab or top you make.
Speaking of tops, a live-edge slab (one that has the original bark edge on at least one side) is not the only way to go with these add-on legs. You could use a butcher-block top—either new or salvaged from an old workbench or countertop. Or you can use any collection of boards, if you have the skill to join them together.
Let’s start with the slab. Once you find one and get it sanded and finished, the rest is easy.
How to Handle a Big Slab
Here’s how to turn any wood slab into a beautiful finished tabletop.
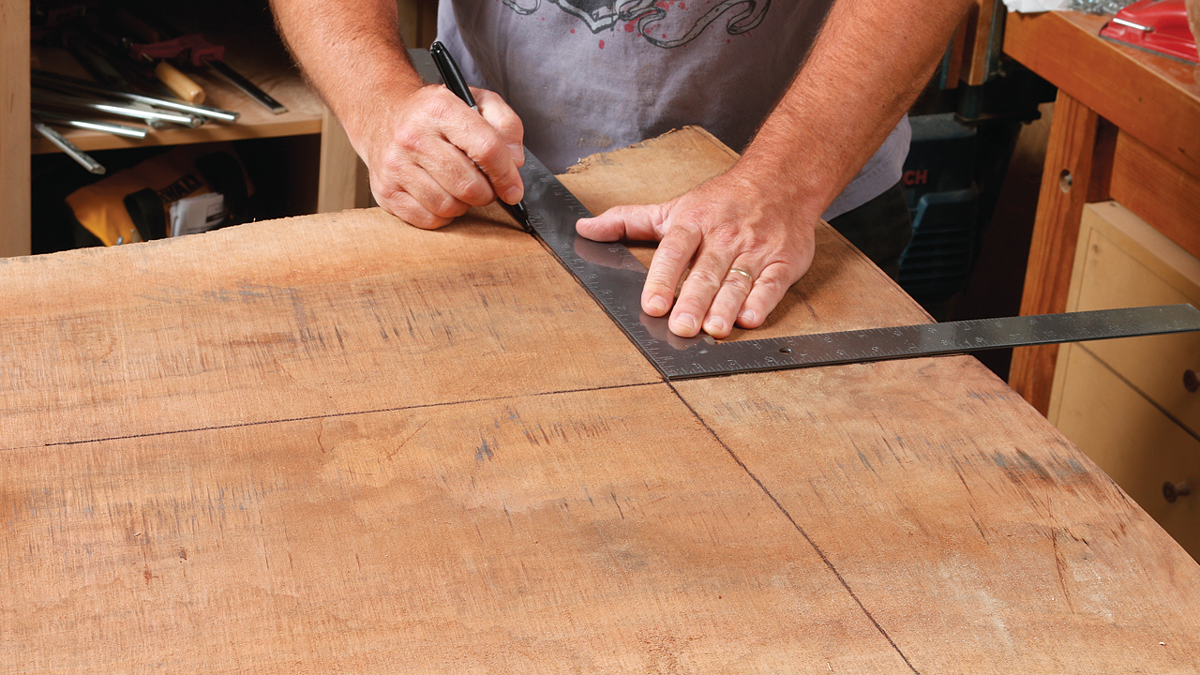
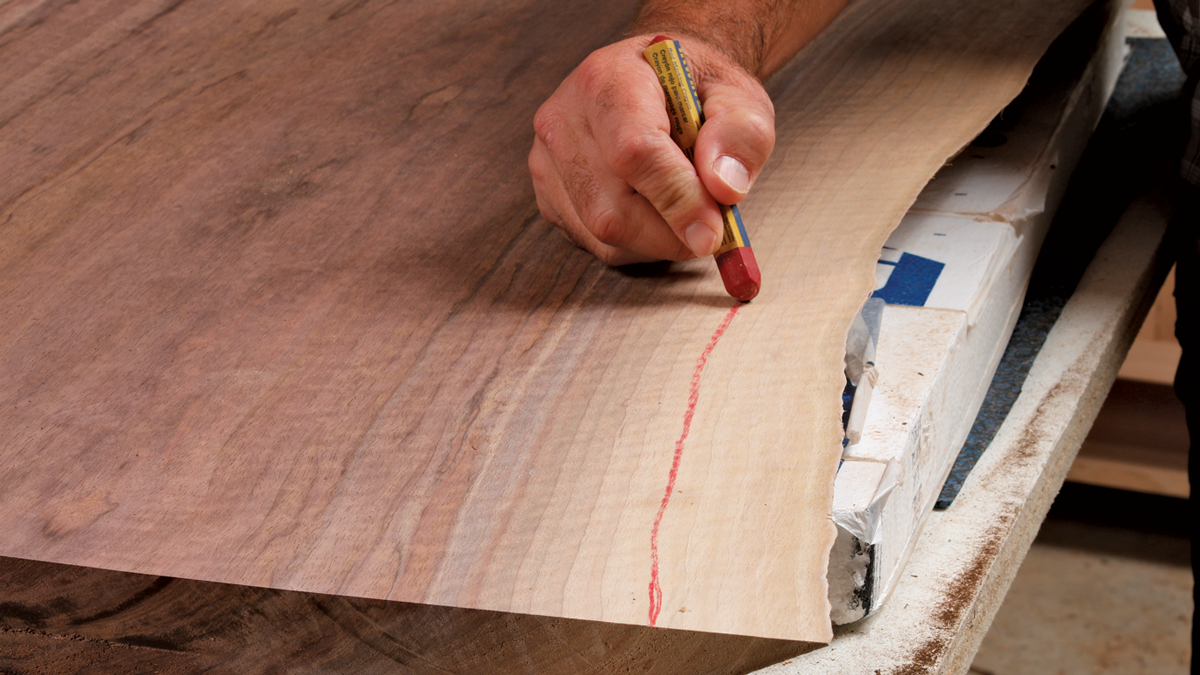
1. Cut off the waste. Draw a centerline and then use a big carpenter’s framing square to mark where you want to cut off the ends. The square will ensure that the two ends are square to the overall tabletop and parallel with each other. This is also a chance to cut off defects you don’t want in the finished top.
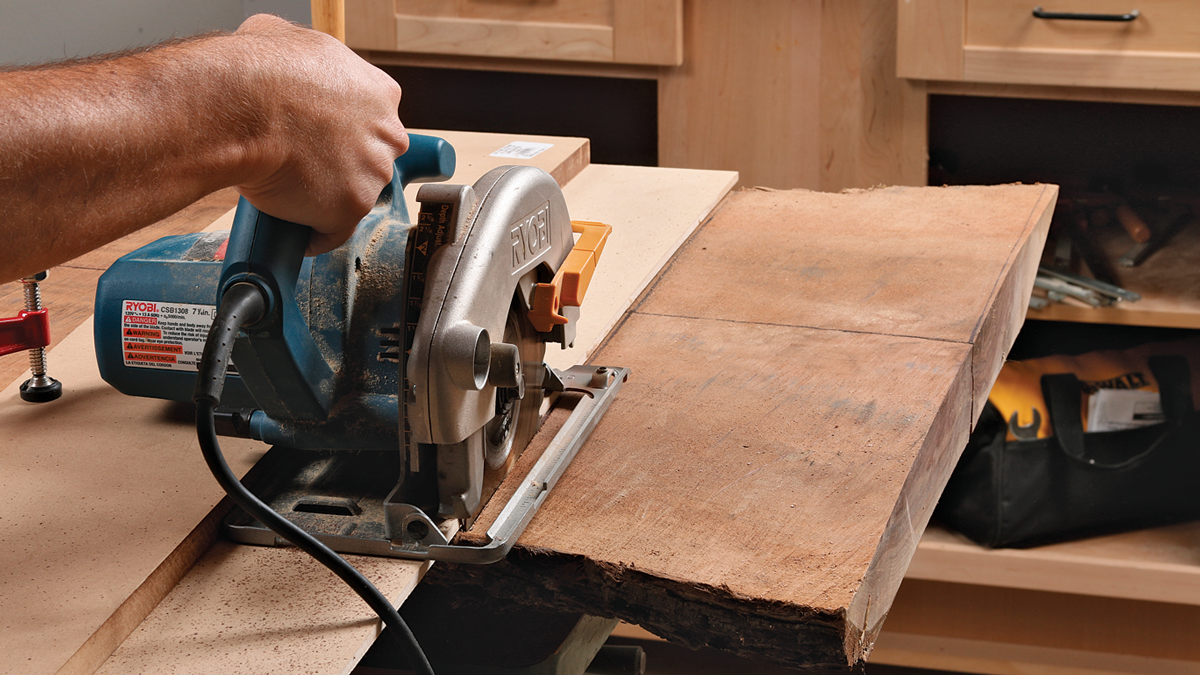
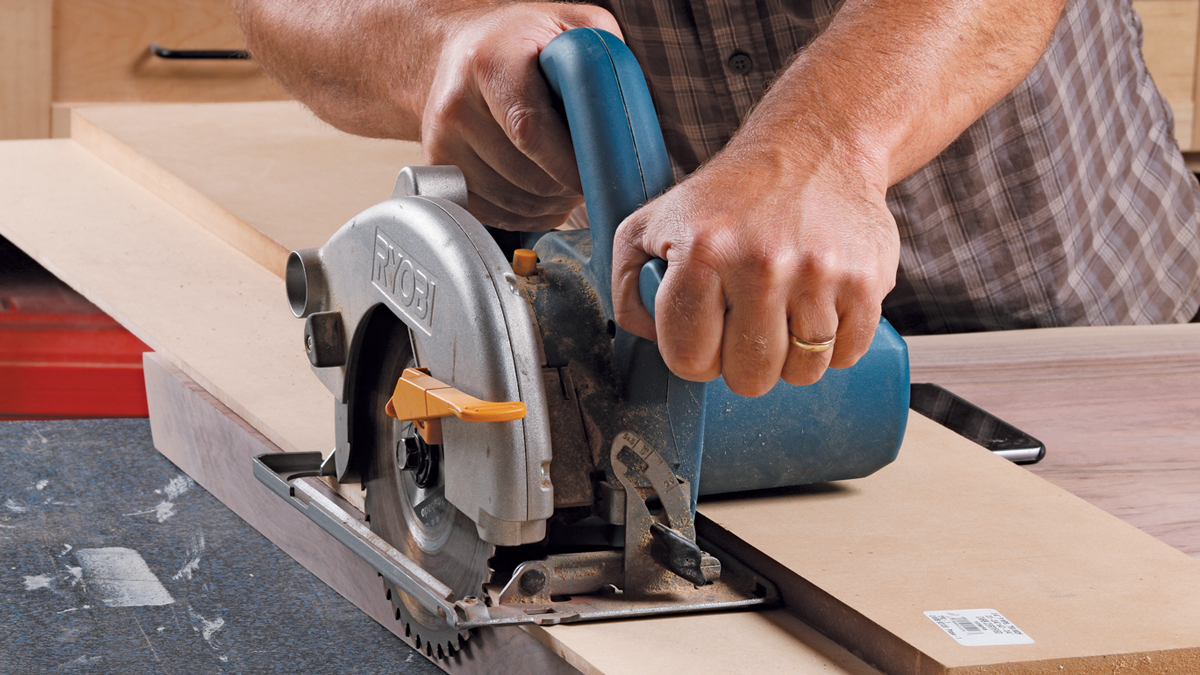
2. Use your saw guide. The saw guide works with your circular saw to deliver clean, straight cuts so you don’t have a ton of sanding and smoothing to do on the ends.
 |
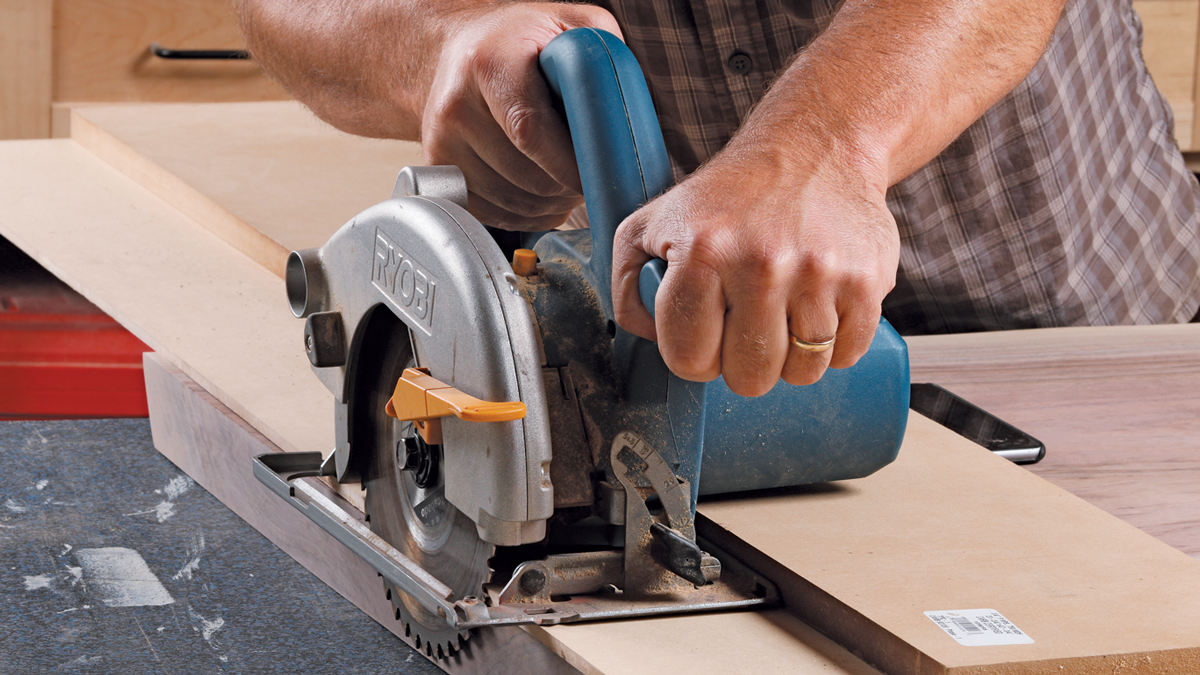 |
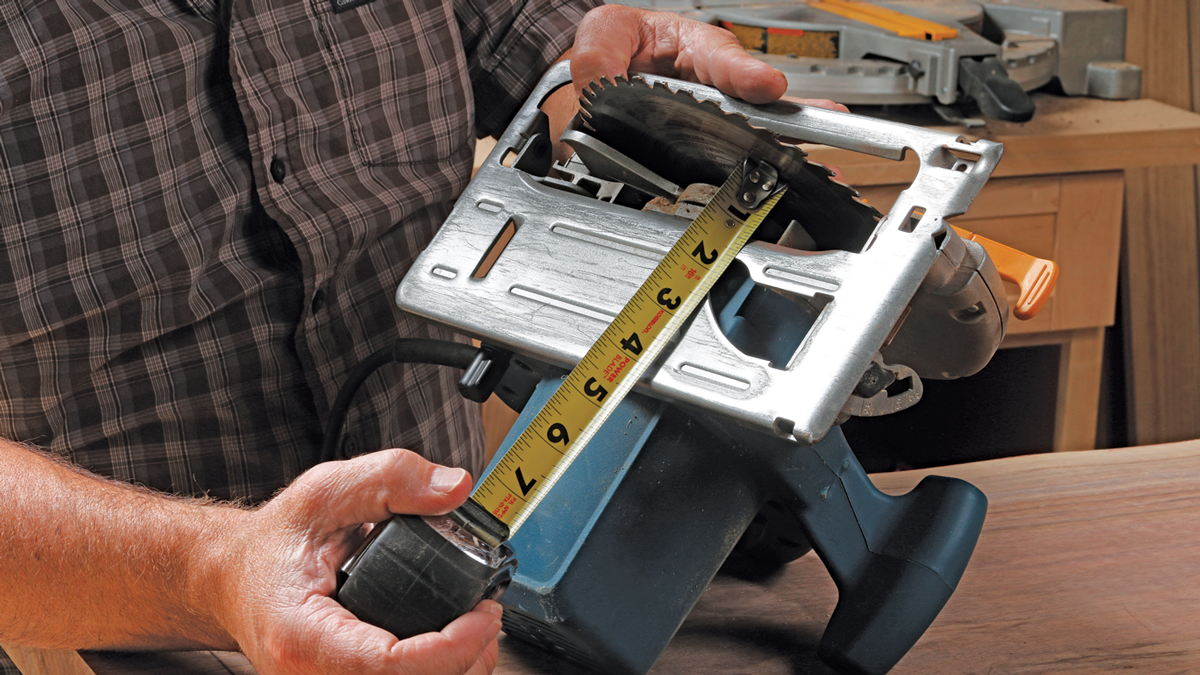
3. A trick for thicker slabs. If the slab is extra thick, your motor might bottom out on the fence of your saw guide and stop you from setting the blade deep enough. So just use the thin edge of the guide as your straightedge, with the saw riding on the actual wood. Measure the distance from the edge of the base plate to the blade, and then clamp the guide that far away from your line and make the cut with the saw riding against the edge of the guide as shown.
 |
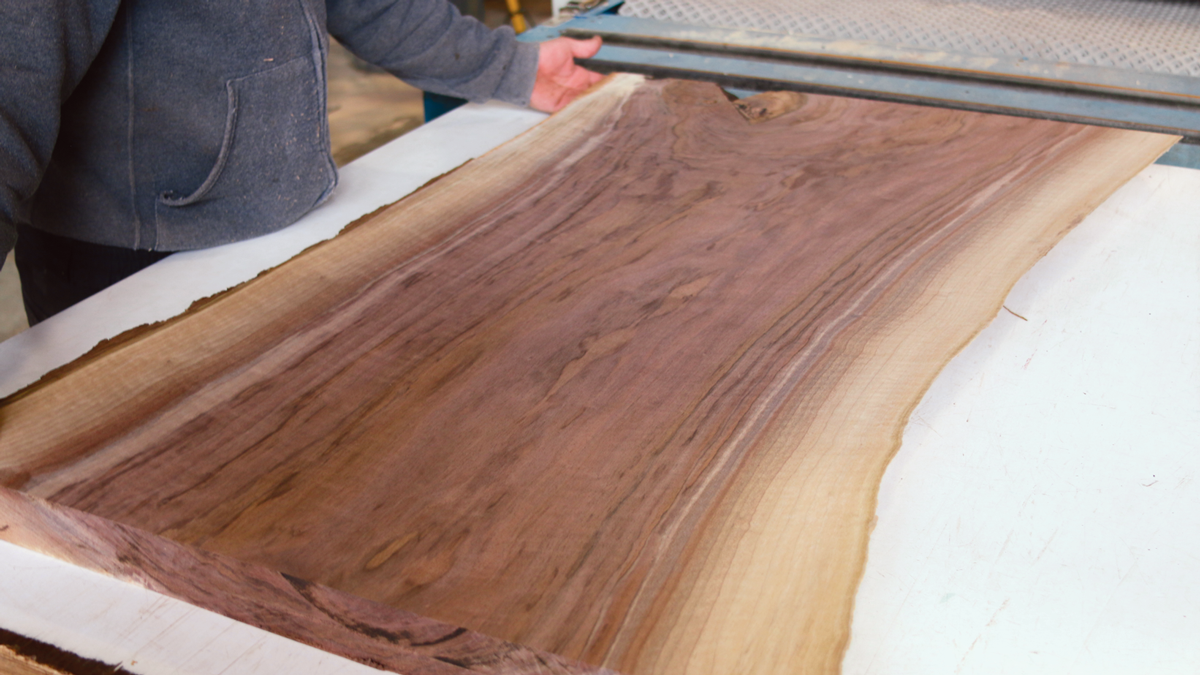 |
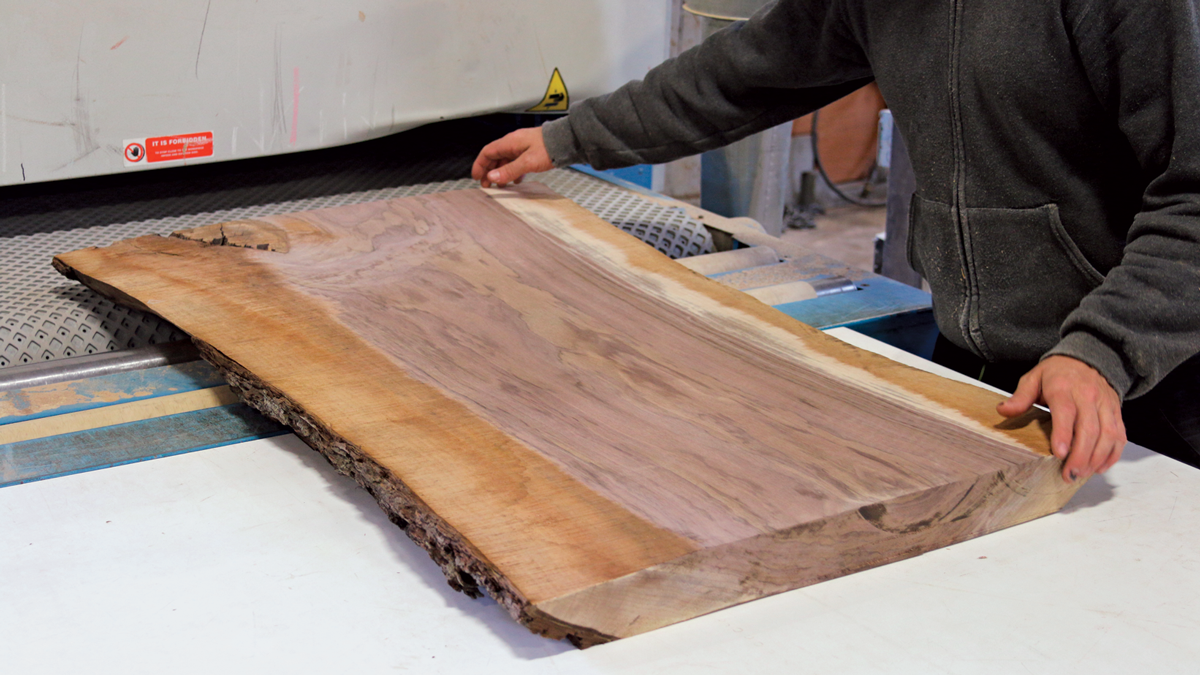
4. From rough to smooth. A wide-belt sander reveals the pretty colors and patterns under the roughsawn surface. A few more passes and this side is done.
 |
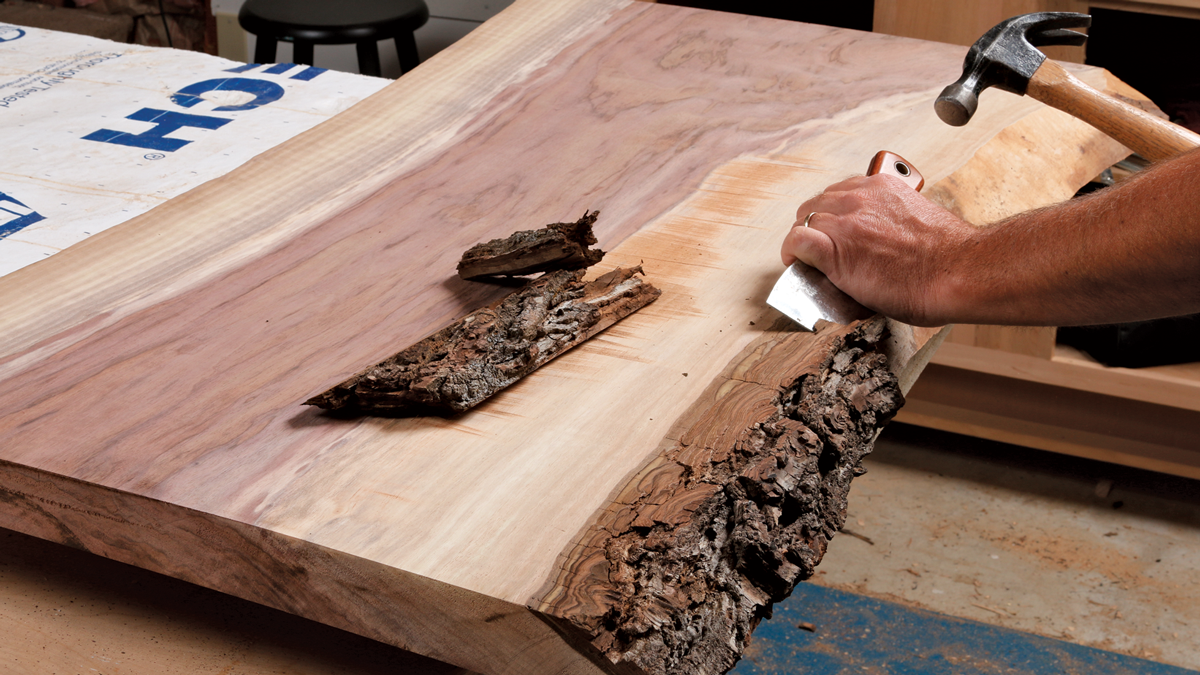 |
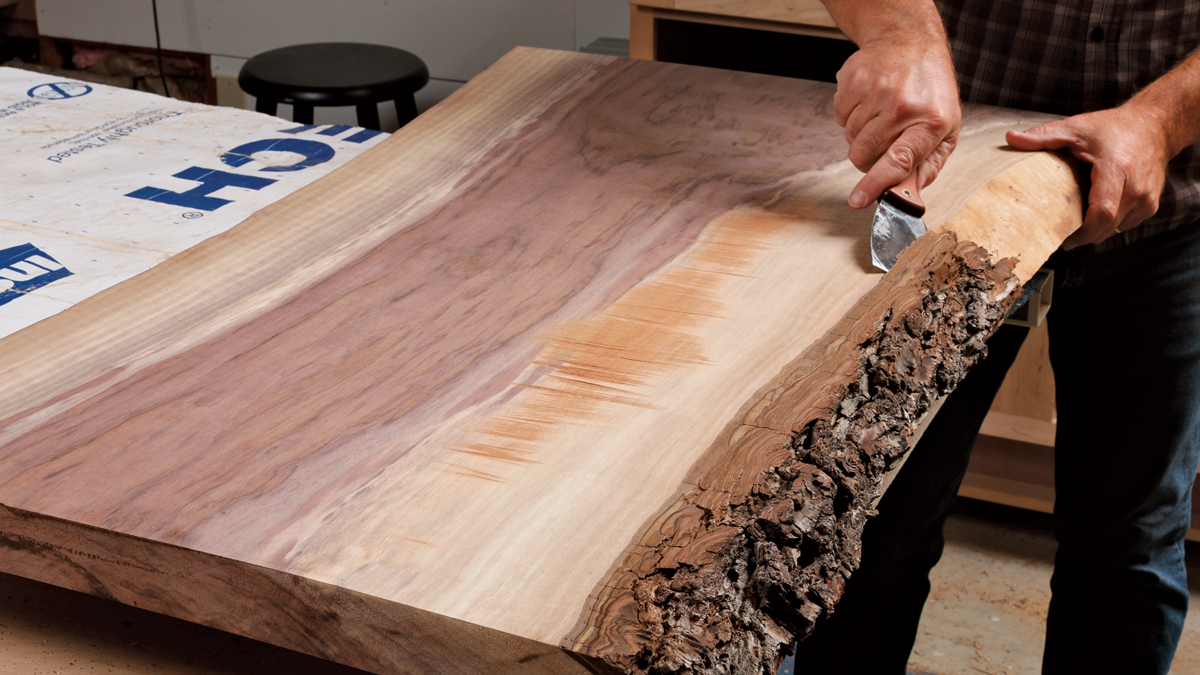
5. Bag the bark. You might be tempted to keep the bark on the slab, but it will eventually fall off, leaving the edge unfinished looking. So get rid of it now. Use some kind of scraper to pry it off and then clean up the edge with sandpaper. Notice that we left a few sawmarks on this side when smoothing this slab, because it will be the bottom of the table. That’s because I wanted as much thickness as possible.
 |
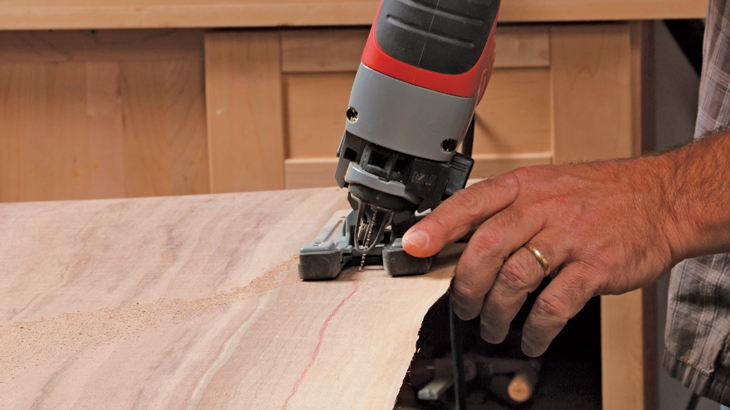 |
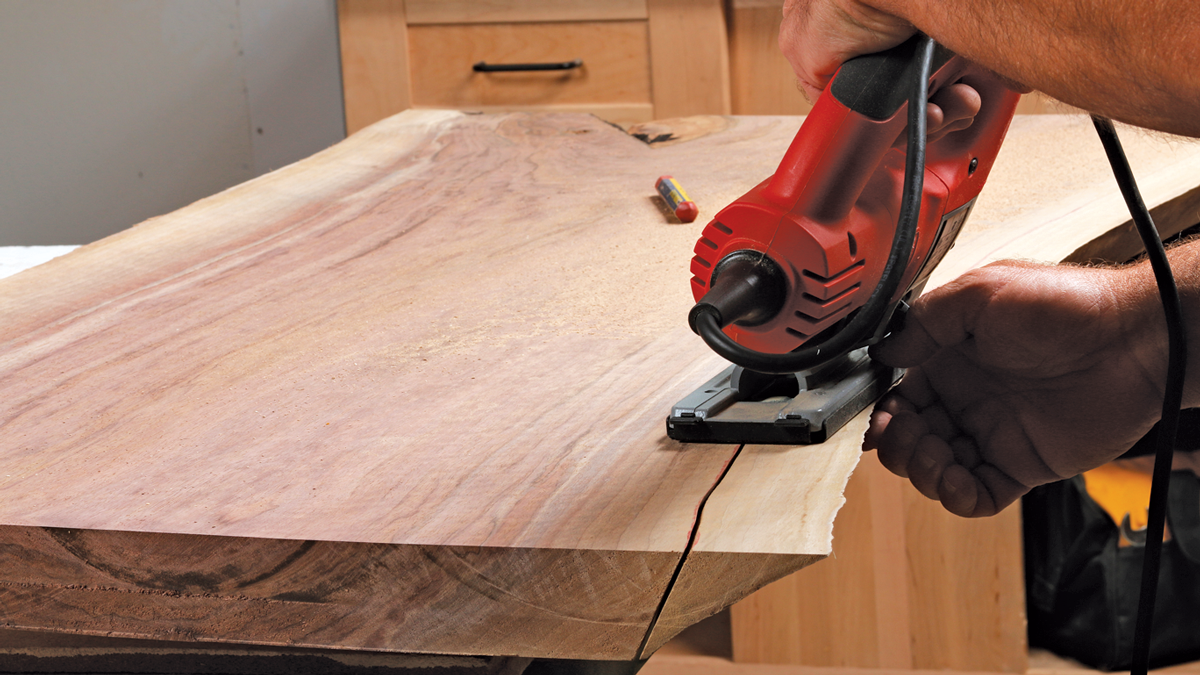
6. Great trick for reshaping an edge. If the edges of your slab are too sharp, like these, or damaged, they are easy to reshape. Just draw a line along one of the grain lines, angle your jigsaw blade to the new angle you want, and cut along the line.
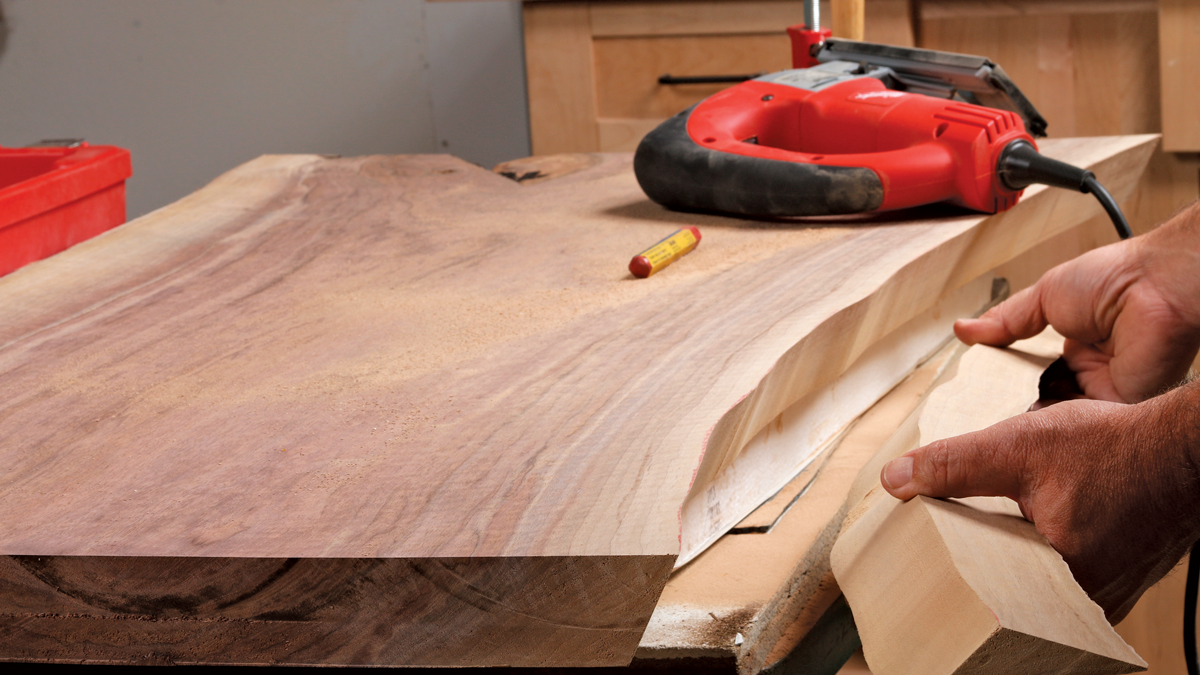
7. New natural. The new edge looks as real as the original one. A bit of sanding will smooth away the sawmarks.
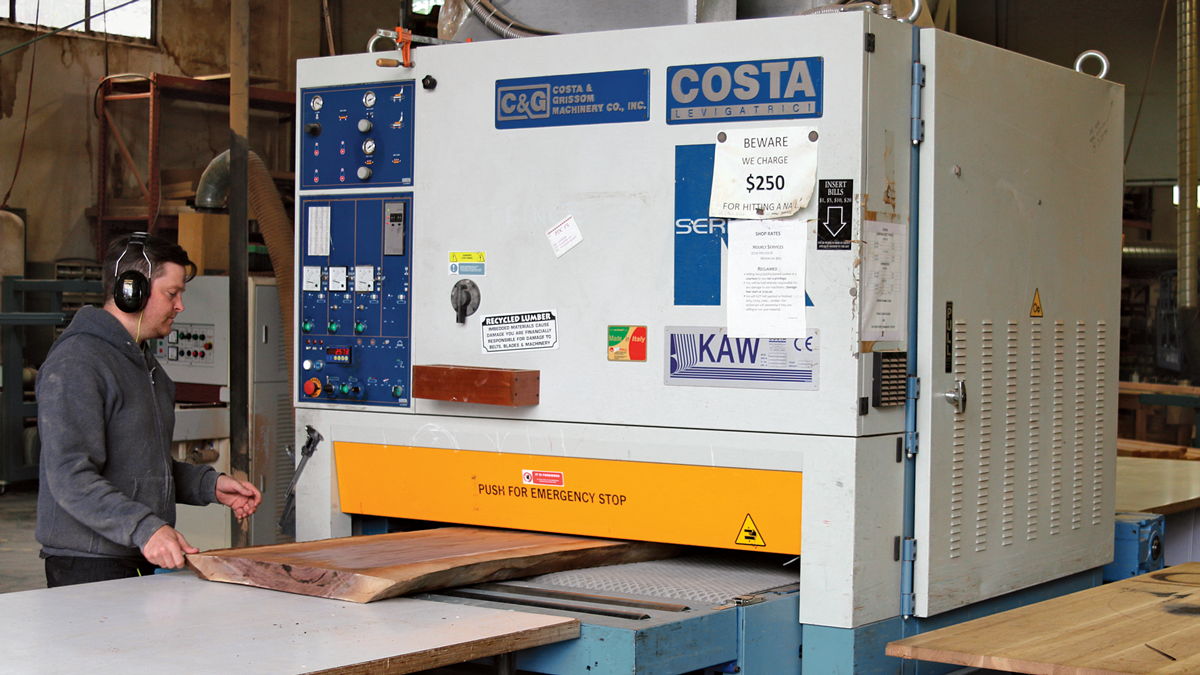
Hire a Pro to Flatten Your SlabSlabs are wide and often have defects like cracks and knots, and even the best ones will have curved and warped a bit as they dried. Even if you had a jointer and planer—two big milling machines for wood—the slab would be too wide for them. Hand tools will flatten them, but it’s a tricky and time-consuming process. So you’ll need to buy some time at an industrial woodworking shop with a big wide-belt sander. Again, local pro woodworkers or club members might be able to point you in the right direction. I found a millwork shop in Portland that would flatten my slab for around $50. I cut off some of the waste to make it shorter, threw it in my truck, and just handed it over to a worker at the shop. He did the rest, in about 20 minutes time, handing me back a perfectly flat slab, sanded to about 100-grit or so.
Call in a pro. If you bring your slab to a professional millwork shop, they’ll flatten and smooth it on a big belt sander like this. It takes only about 15 minutes and shouldn’t cost more than $50 or so. |
Sanding and Finishing the Slab
 |
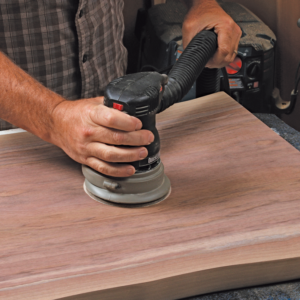 |
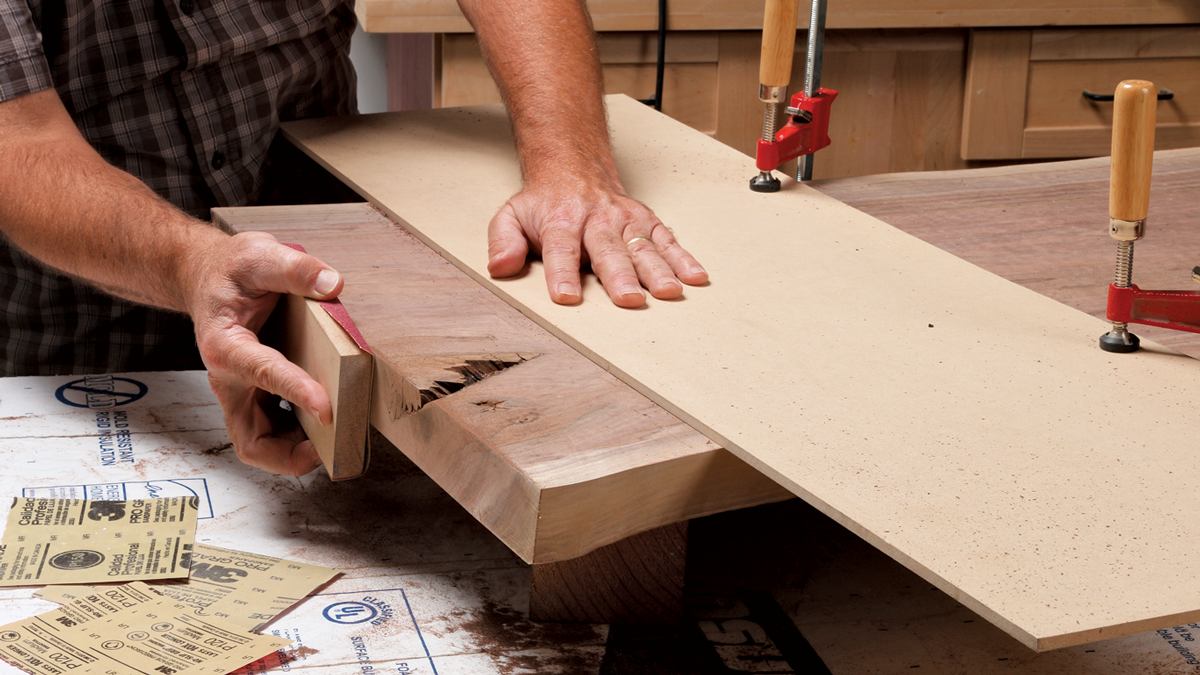
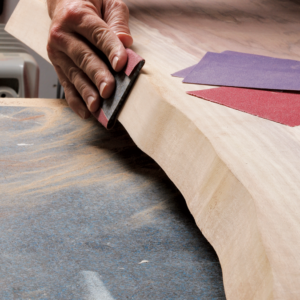
1. Sanding tips. On the end grain, you’ll need to get rid of the burn marks from the saw by starting with rough sandpaper. Use a block as you work up through the grits to 220-grit. On the curvy edges, back up your sandpaper with a piece of flexible rubber if you have it, working up to 150-grit. Go up to 150-grit on the top too, but use your sanding block or a random-orbit sander. Look how awesome this slab is starting to look!
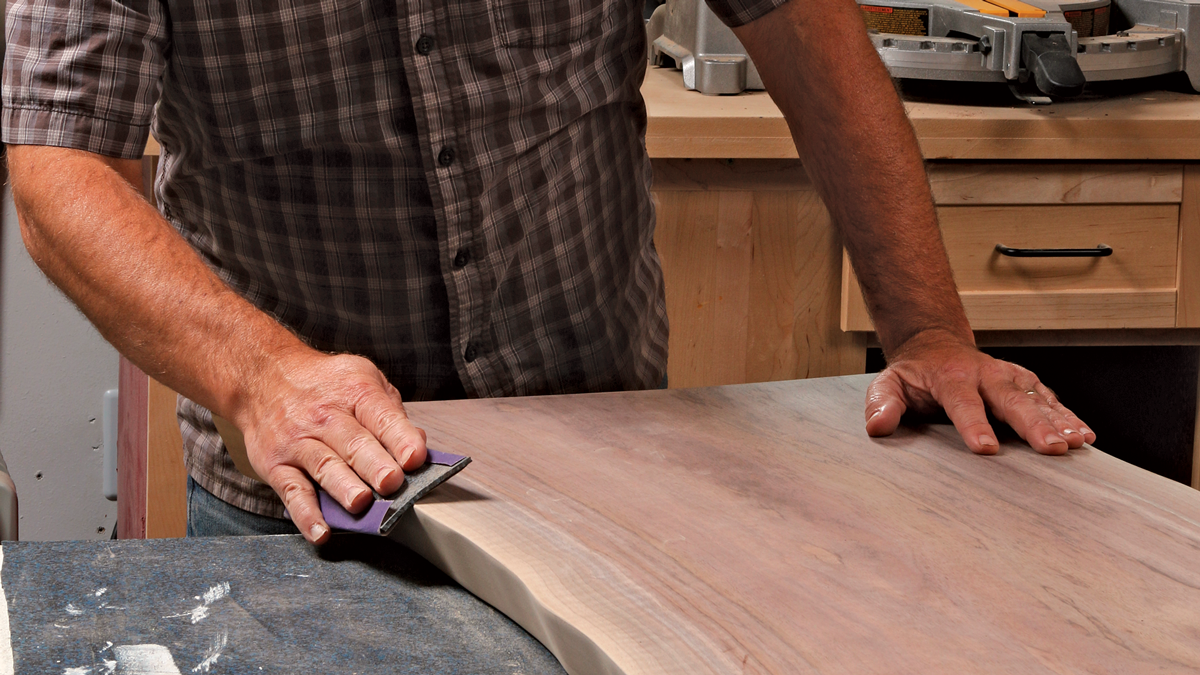
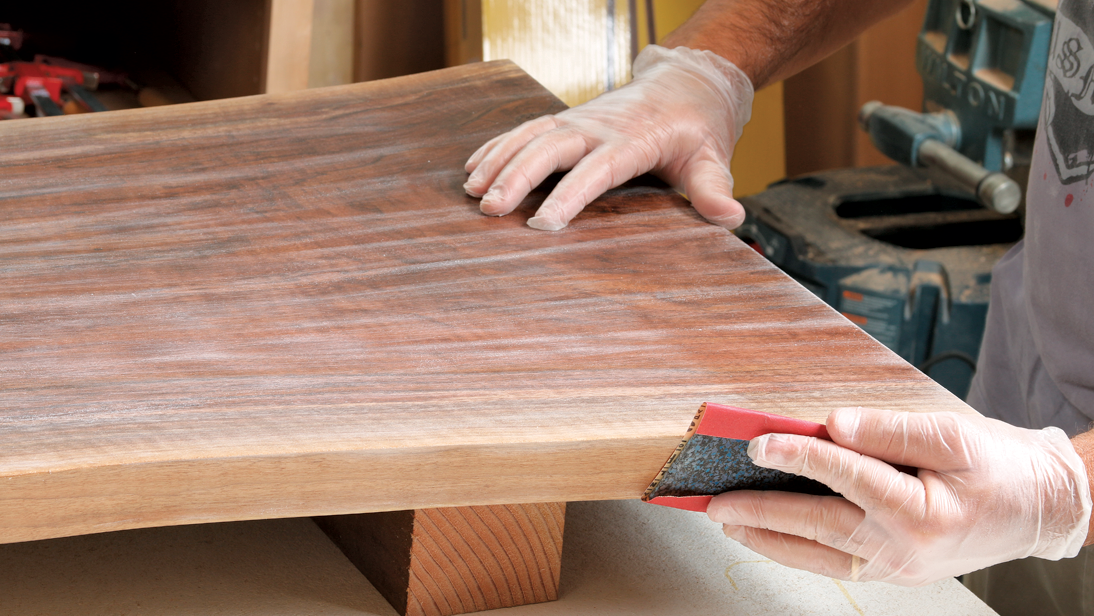
2. Final touches before finishing. Break all the sharp edges to make them friendly to hands and arms later. Use rough sandpaper at first to make tiny roundovers, and then smooth those edges with finer paper.
 |
 |
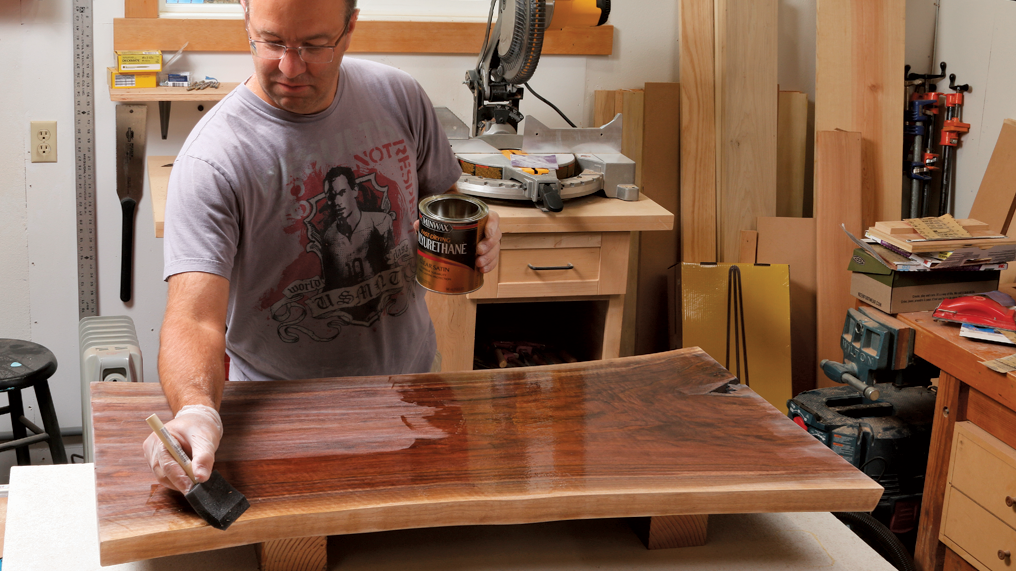
3. Thick tabletop finish. Apply three or four coats of oil-based polyurethane, sanding with 220-grit paper between coats. On the ends, sand between coats with 320-grit paper for a buttery feel. Elevate the slab while applying finish so you can reach the edges easily.
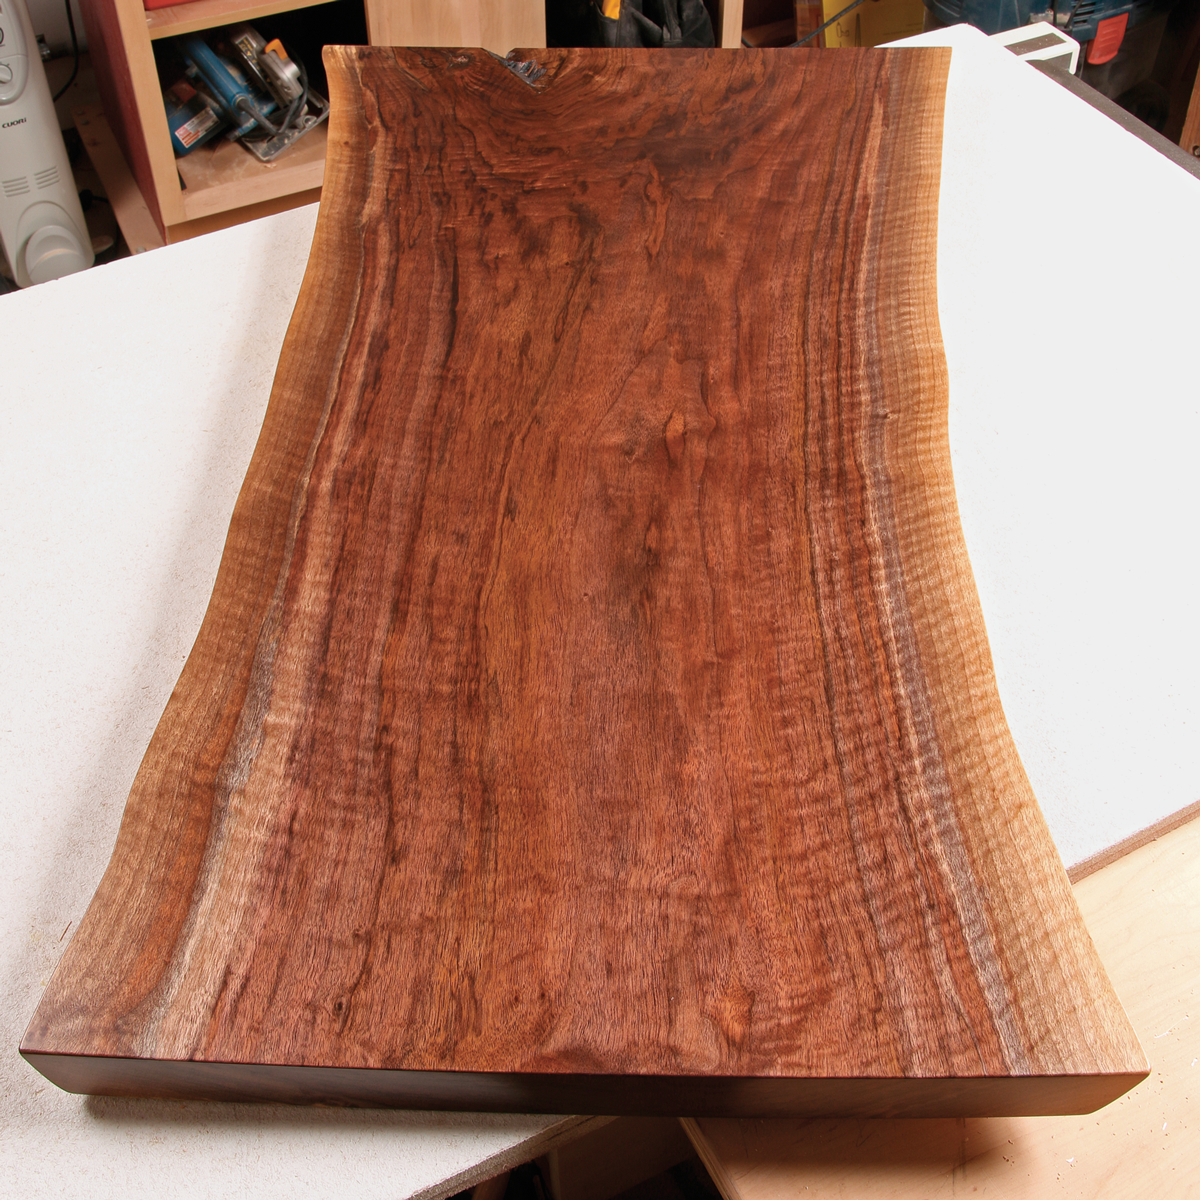
4. Magic. The polyurethane reveals the inner beauty of this slab. You never know what you’ll find. This beautiful rippled grain was a total bonus, but the rainbow of amazing colors is what I’ve come to expect from walnut. This is why you are better off buying nice woods than trying to apply wood stain to cheaper ones. You’ll never match this natural beauty.
Hairpin Legs Are Dirt-Simple
These legs come with the screws you need (I got mine from www.rockler.com). All you have to do is decide where to place the legs, and then drill some pilot holes. I went for a 4-in. overhang at the ends of the tabletop when placing the legs. That looked about right.
SuppliesScrew-on hairpin legs
www.rockler.com |
 |
 |
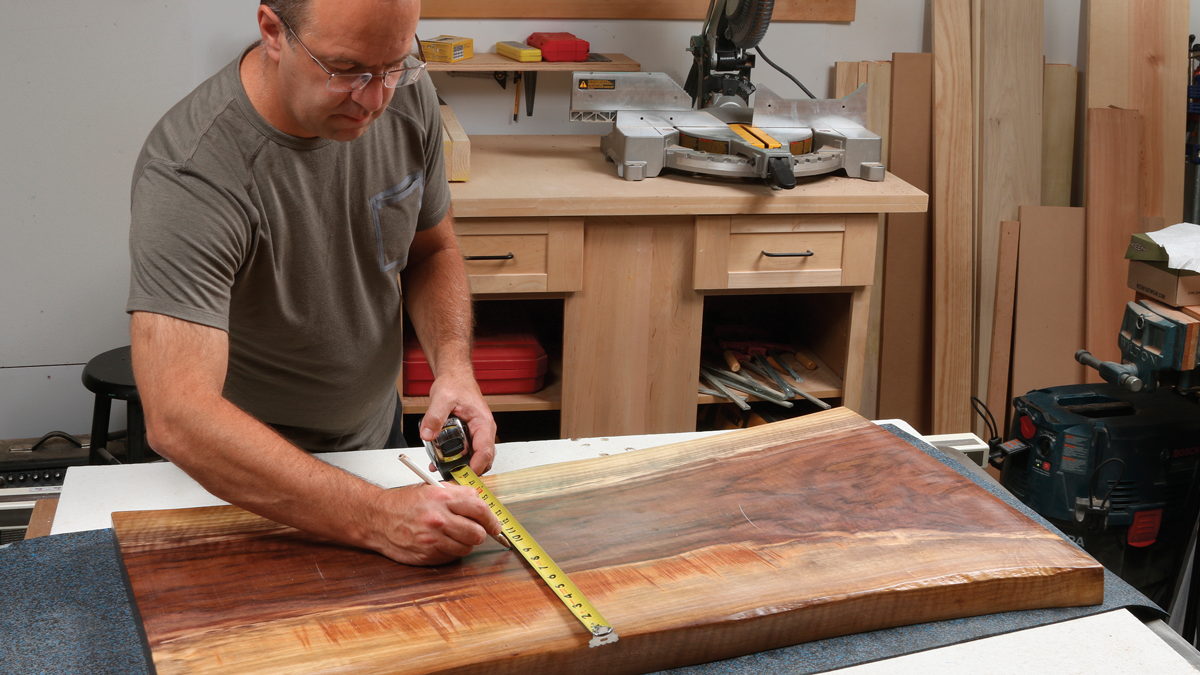
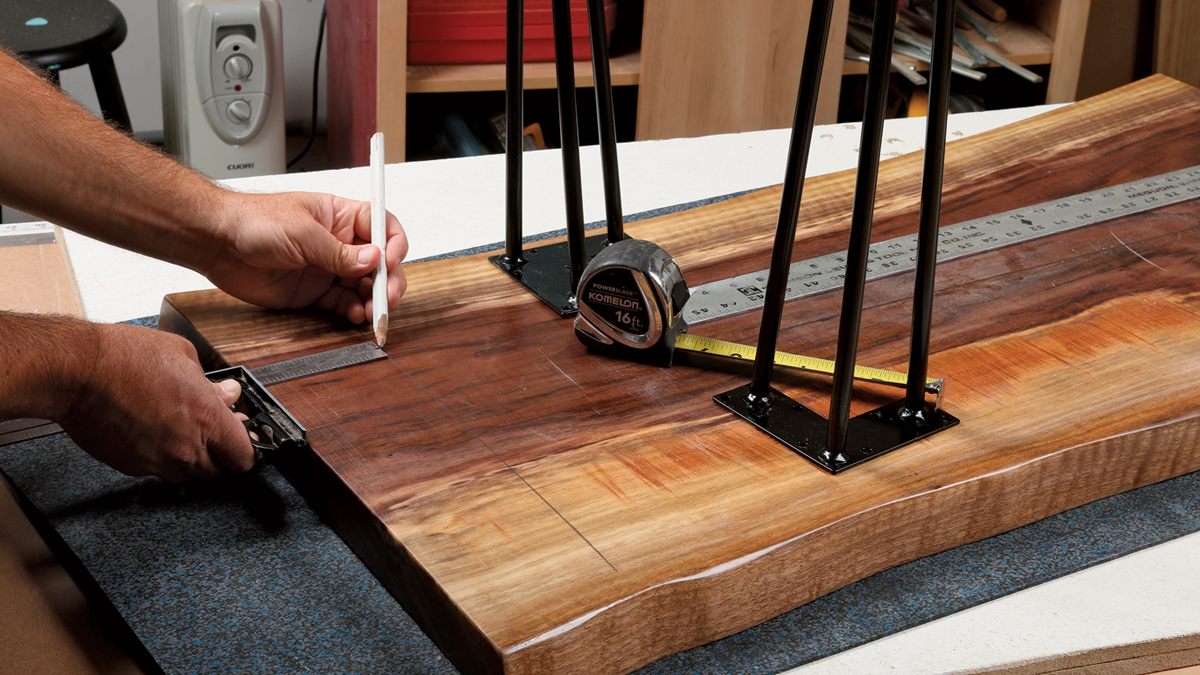
1. Mark a centerline. Measure to find the center of the underside of the slab, and then use your combo square and long ruler to mark a long centerline down the middle.
 |
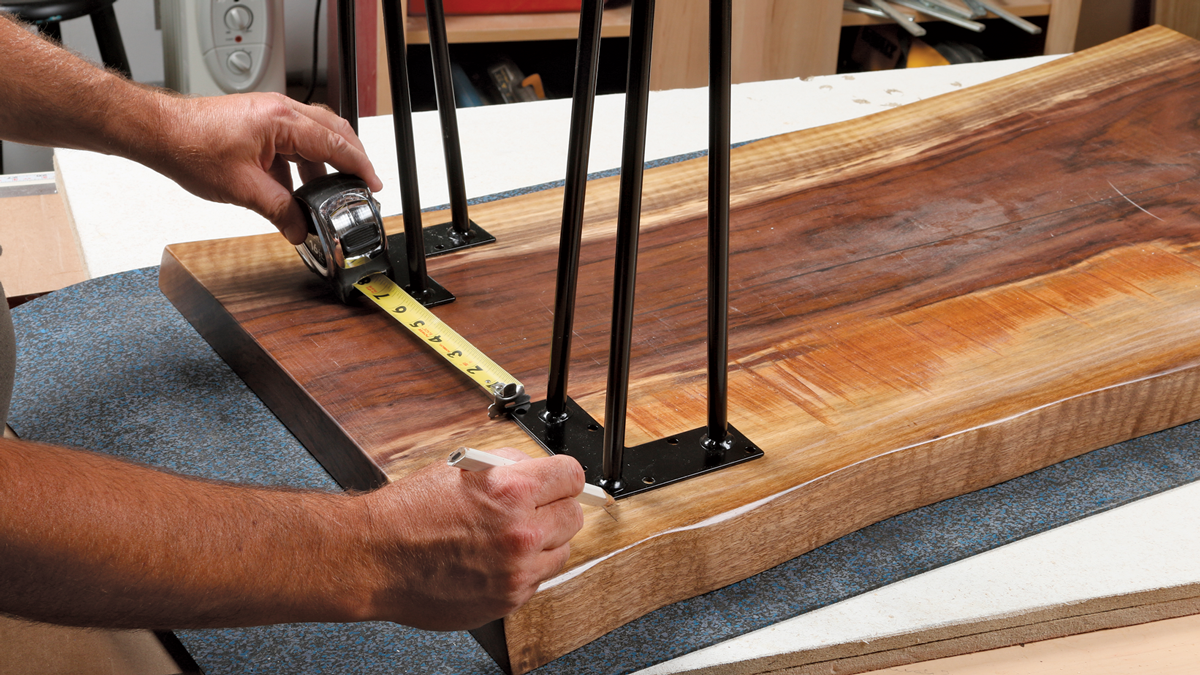 |
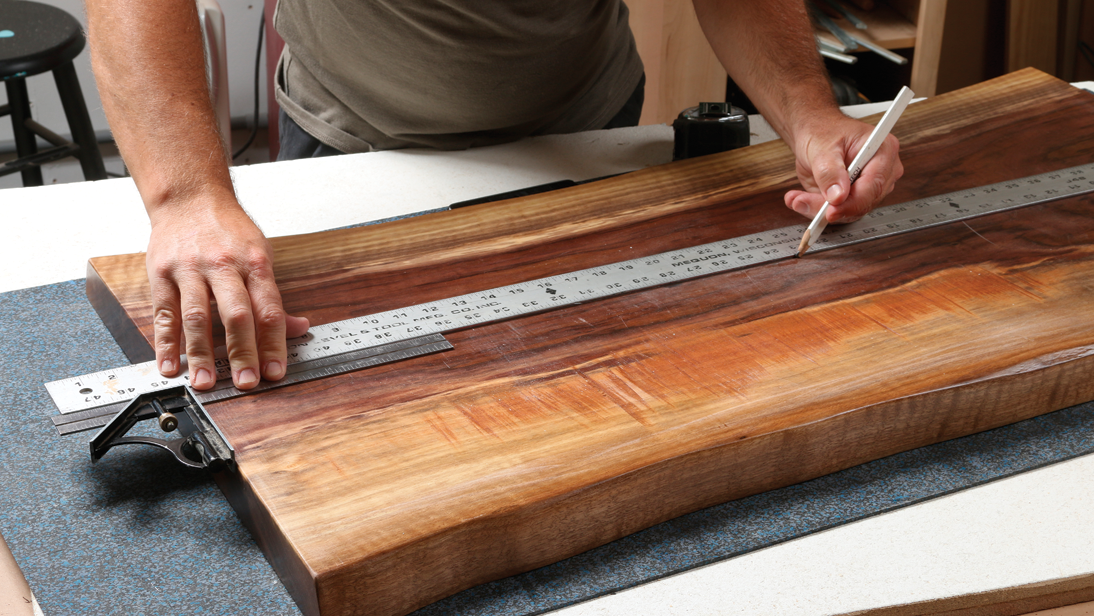
2. Locate the legs. Use the square to mark end lines for the leg brackets. Then sit each leg on that line and measure an even distance out from the centerline to the end of the leg bracket and trace the far edge as shown.
 |
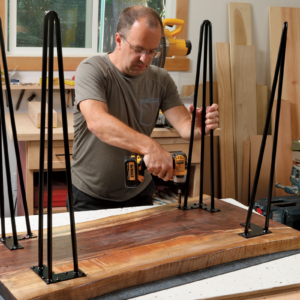 |
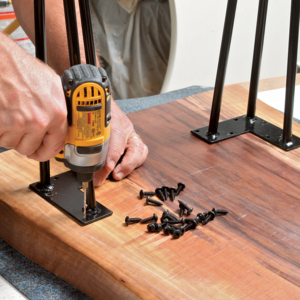
3. Drill and drive. Hold the leg brackets on their layout lines and drill pilot holes for each screw. Drive each screw and move on to the next hole. When the legs are all attached, your desk is done!
Wood Legs Need Finishing First
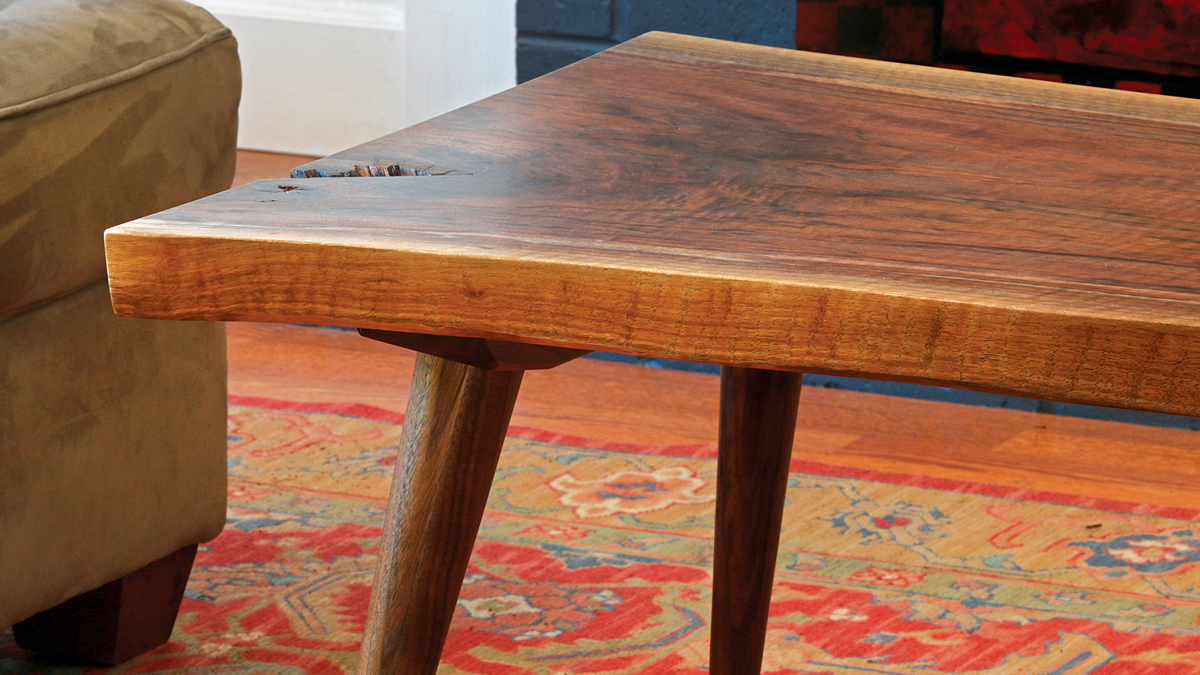
These tapered walnut round legs and brackets aren’t cheap, but they are beautiful and come in four different woods (available from www.tablelegs.com). Pick the bracket size that fits under the slab you have. The brackets and legs are just as easy to attach as the hairpin legs, but they need a few coats of the same finish I used on the tabletop.
SuppliesTapered wood legs
|
 |
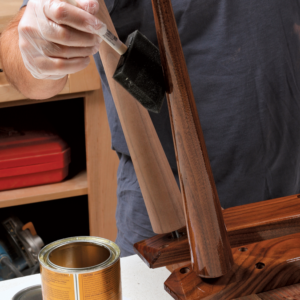 |
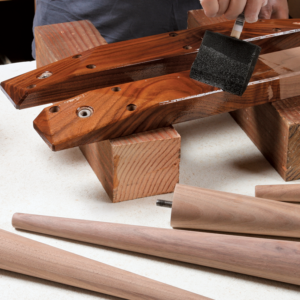
1. A few coats of finish. Start with the brackets, elevating them on some boards so you can reach the edges easily. Then brush finish on the legs, screwing them partway into the brackets before touching them up and smoothing any drips. Sand between coats, just as on the slab.
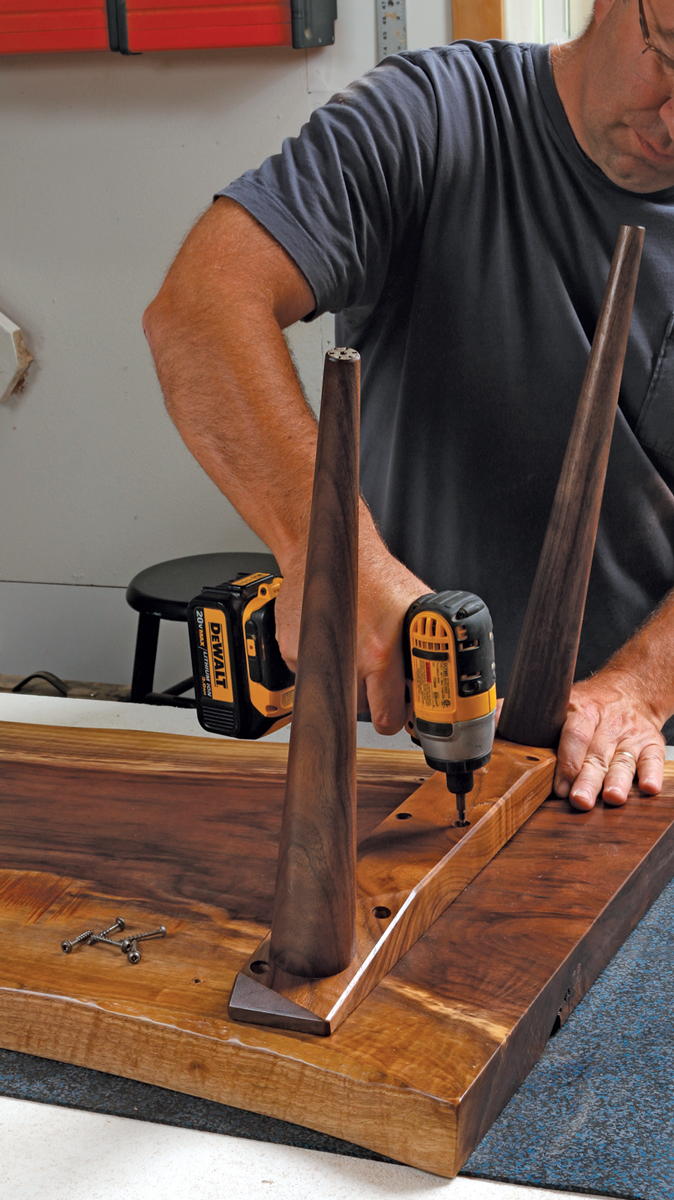
2. Installation is easy. Mark guidelines near the ends of the slab, as you did for the hairpin legs, and then center the brackets side to side. The screws are “self-tapping,” meaning they have a tiny drilling tip, so they don’t need pilot holes. Notice how beautifully made these parts are.
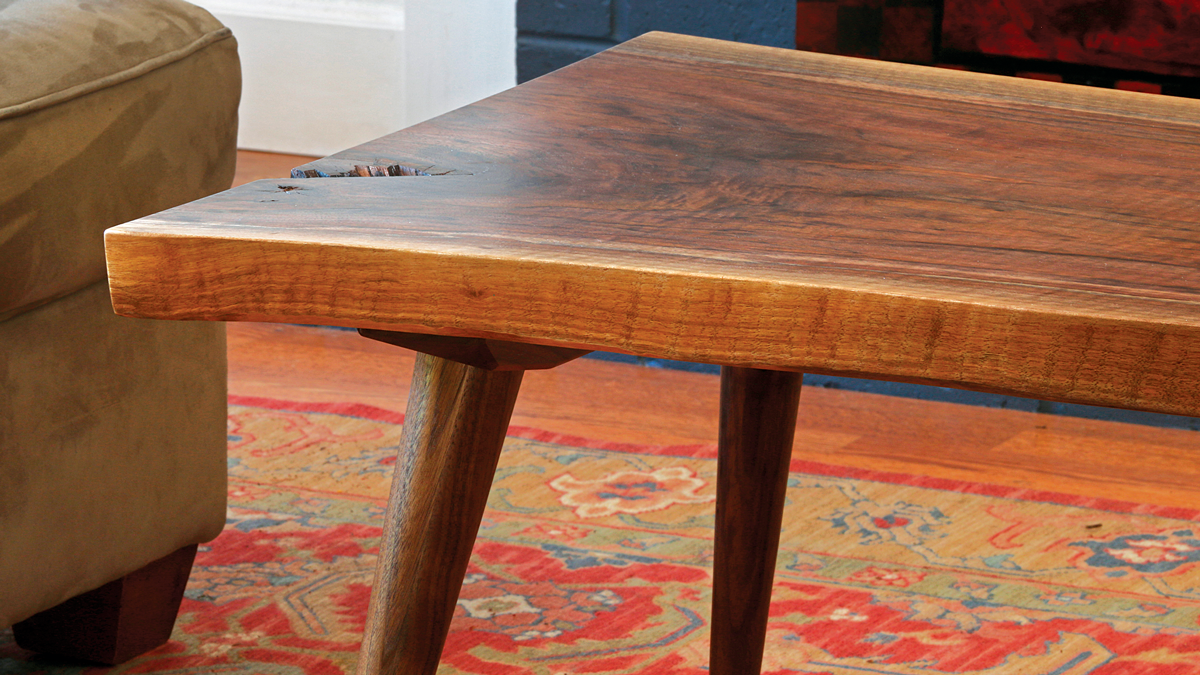
3. Brackets barley show. The brackets have beveled edges so they look sleek and unobtrusive on the bottom of the table.



Log in or create an account to post a comment.
Sign up Log in