Four Handmade Gift Ideas
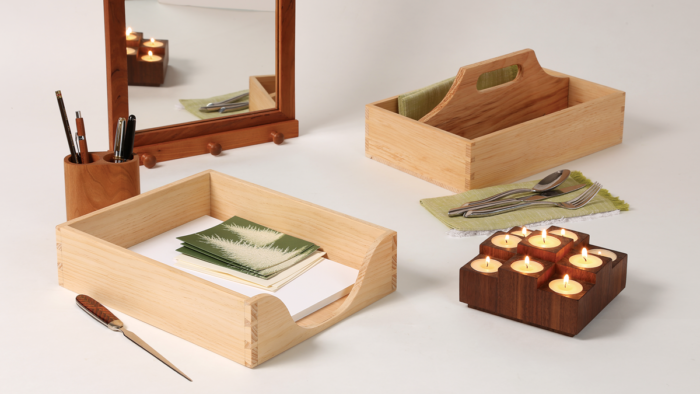
Four ideas for handmade gifts that will please your friends and family and use up the scraps lying around your shop: a versatile flatware carrier, a two-piece desk set with tray and pencil holder, a tea light holder, and a hanging mirror.

A woodworker’s friends and family always want to see the results of all that time spent in the shop. Small, quick-to-make gifts are a good way to show them. We’ve all made our share of cutting boards and keepsake boxes; here are a few plans for other quick pieces you can make. This is a great chance to use up those accumulated scraps and make a lot of people happy.
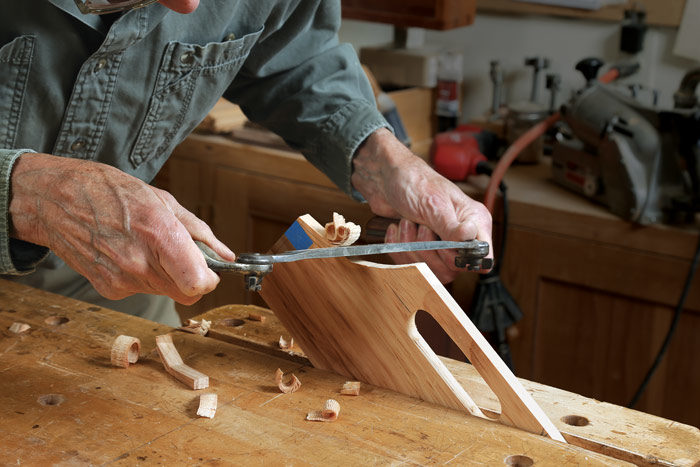
The first is a sweet caddy can be made with hand tools, power tools, or a combination. It is a variation on a Shaker dining room tray. The original was 18-1⁄2 in. long, but I find that most flatware and kitchen utensils will fit easily into this smaller version. Build it to whatever size you find most useful.
It can also be used for incoming and outgoing mail, to hold cords and chargers, as a tea caddy (with dividers added), as a desk organizer, or as a small toolbox.

The second is a small inbox with a pen and pencil holder that makes a great project. The box is dovetailed, with a cutout in the front for easy access to the papers inside. I use a bandsaw for the cutout, but a coping saw would work, too. The bottom can be quartersawn pine, glued underneath, or a floating panel set in grooves on all four sides. The pencil holder is a block of scrap, drilled with two holes.
The third project, a tea light candle holder, is a great chance to use scraps, no matter the species. It’s also a chance to get creative. Although my holders are all tidily rectilinear, feel free to offset the parts and expand the sizes, numbers, shapes, and layouts. If you’re a turner, turn a disk and drill holes in it. If you’re a carver, shape and carve a nice slab and drill holes to suit.
The Shaker wall mirror may take a bit longer than the other gifts, but it is well worth the effort. The mirror rests on a shallow hanging shelf, and its forward angle can be adjusted. The frame has mitered corners
Near the top of the back, you’ll drill a small hole and insert a piece of string, with a large knot at the end to keep it from pulling out. The top end of the tapered hanger has a hole that allows it to hang on a peg.
From Fine Woodworking #264
For the full article, download the PDF below:
More on FineWooworking.com:
- VIDEO: Chris Becksvoort, the dovetail master at work
- Under-Bench Tool Cabinet – Practical storage cabinet utilizes the wasted space beneath your benchtop
- Sturdy Stool for Home or Shop – Comfortable and quick to build, it fits the workbench or the kitchen island
Fine Woodworking Recommended Products

Suizan Japanese Pull Saw

Get the Plan
4 Handmade Gifts
Here are four ideas for handmade gifts that will please your friends and family and use up the scraps lying around your shop. Christian Becksvoort provides directions and plans for a versatile carrier for flatware, tools, or other odds and ends; a two-piece desk set with a tray and pencil holder; a multi-level holder for tea lights; and an adjustable hanging mirror. These projects are straightforward to build, elegant to look at, and practical too.


Comments
What is the best way to symettricalyl lat out that curve on the front of that box that holds the paper?
https://www.finewoodworking.com/2017/02/08/shopmade-drawing-bow
An alternative is to get either the Digital or Printed plans from the link provided. The plans contain the full size pattern for that curve.
Thanks Ben. I'm not sure if that drawing bow would be the best way to lay that curve out, but I appreciate your time and response. I am intrigued by curved patterns because I can never seem to proportionally lay them out with consistent results
After looking again at the holder, you're right. That might not be the best tool for the job. Not in one fell swoop at least. You might want to look into a french curve for laying that out, or like Dave Richards said in the comments, get the full size plans.
To symmetrically lay out curve draw one half of it on a folded piece of paper.
Cut out a piece of paper the same size as the front of the box in its full-size dimensions. Then, fold that piece of paper in half left to right. Next, draw onto that folded piece of paper half of the curve as you want it to be. That is, draw out the curve at it will appear on one half of the front, with the fold in the paper representing an imaginary middle vertical line in the side. Cut that that shape out of the folded piece of paper and then unfold the paper.
You are left with a symmetrical pattern you can use to cut out the front of your box.
If you don't have the confidence in your ability to freehand draw a pleasant curve, you can buy an inexpensive set of "french curves" which can help.
Log in or create an account to post a comment.
Sign up Log in