How to Add Glass and Art to a Picture Frame
What you need—and need to know—once you’ve built the picture frame.
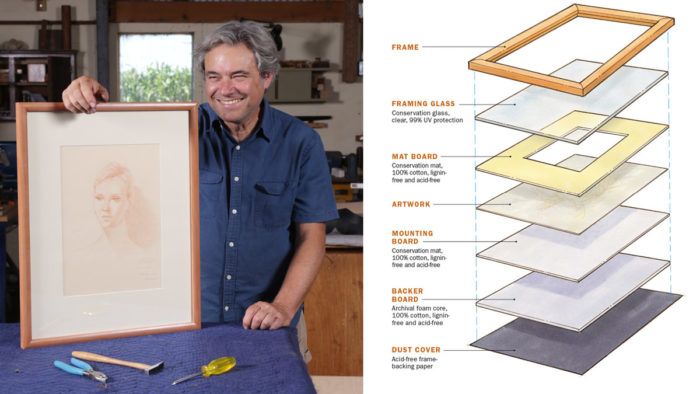
As a woodworker, you might think that once you’ve built a well-crafted frame for a piece of art, you’re finished. But even with the frame in hand, there are important steps to take and nuggets of information to know to be sure the art looks great and stays protected for the long term.
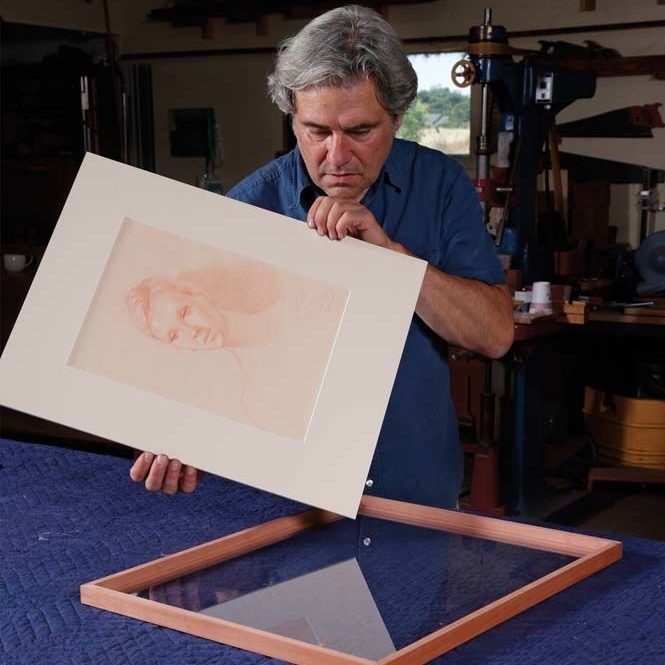
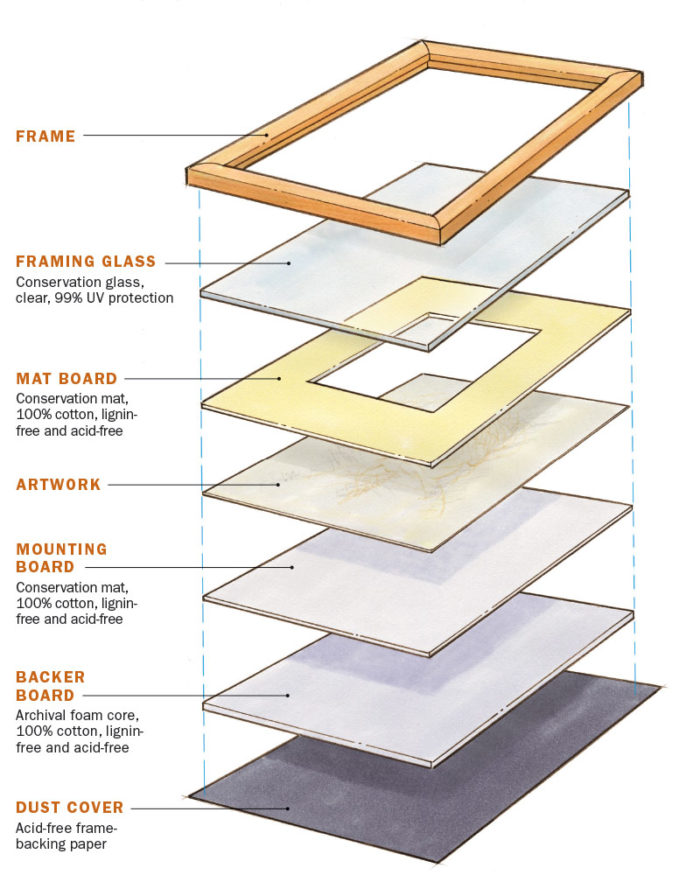
Selecting the right glass is the first step. Almost any glass will do the main job—protecting the art from being touched or affected by dust. But rather than buying window glass from the hardware store, consider glass made specifically for framing. It’s perfectly clear and is free of distortions. Depending on what kind you buy, framing glass can also prevent fading caused by ultraviolet (UV) rays and can limit glare and reflections that make it harder to view the art. Anti-reflective (AR) glass has an optical coating that reduces reflectivity. It doesn’t provide extra protection from UV rays, however. Conservation, or museum, glass comes in several varieties, including one that blocks 99% of UV rays but does not decrease reflection, and another that blocks 99% of UV rays and also dramatically cuts reflectivity. Regardless of what glass you select, it’s wise to hang the artwork out of direct sunlight and bright reflections.
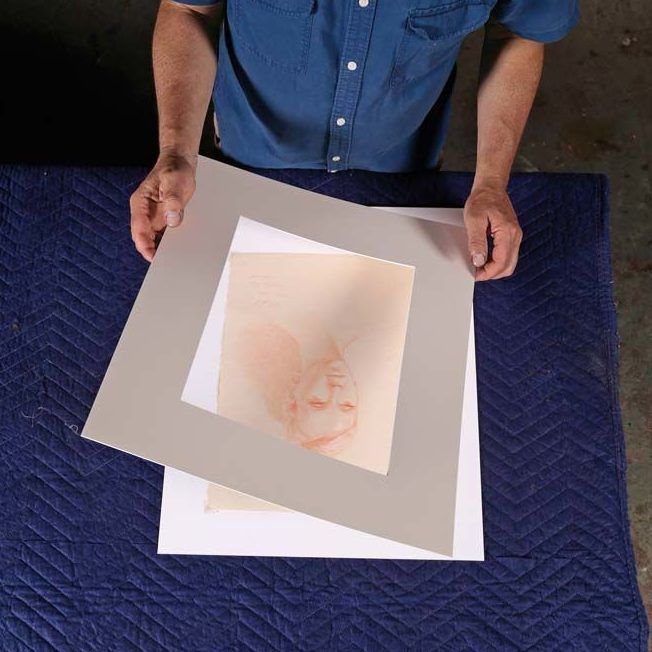
The mat board you choose is equally important. The wrong sort of mat, which could contain lignin if it’s made from wood pulp, can discolor the artwork dramatically over time. The best mat board is labeled archival and acid free; I used RagMat, which is made from 100% cotton. Also, the color of the best mats is produced with light-fast, non-acidic pigments rather than conventional dyes, which are more prone to bleed and fade. You’ll want two sheets of mat board, one to mount the artwork on, and another to frame it with. Behind the artwork you’ll need a backer board to keep the art package rigid and to press the mat against the glass. Foam core is a good choice; it’s stiff, yet soft enough to conform to minor inconsistencies in the mat and artwork. Here again you want to avoid material with any lignin or acid content. I used 3⁄16-in. foam core labeled archival and made of 100% cotton.
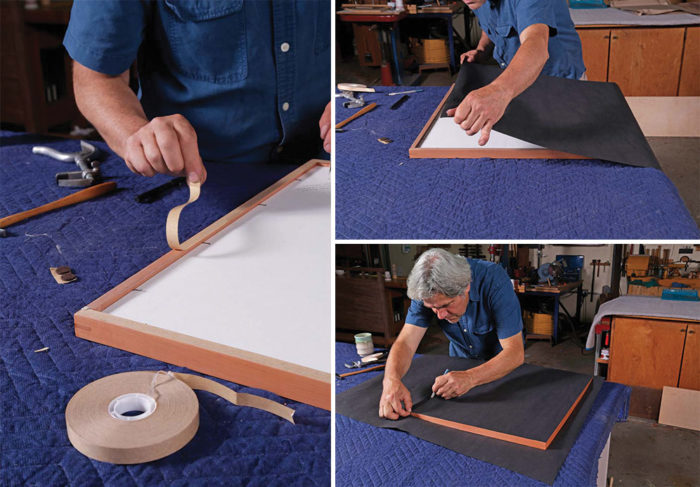
Once you’ve secured the backer board in the frame with brads or points, you’ll add the last layer of the sandwich, which is the dust cover. It gets stretched over the back of the frame to seal the whole package from dust and bugs. Kraft paper is often used for this, but my framer recommends acid-free frame backing paper, which won’t crack and tear over time the way a kraft-paper dust cover can.
You apply an oversize piece of the backing paper, adhering it to the back of the frame with archival double-sided ATG transfer tape. Then you cut it flush to the outside of the frame with a mat knife.
You can cut the glass, the mat board, and the backer board yourself, but I prefer to have a professional framer cut mine. They do this job all day long and are fast and excellent at it. The total cost for providing and cutting all the materials was $84. With the frame complete, there’s just one last task: deciding where to hang it.
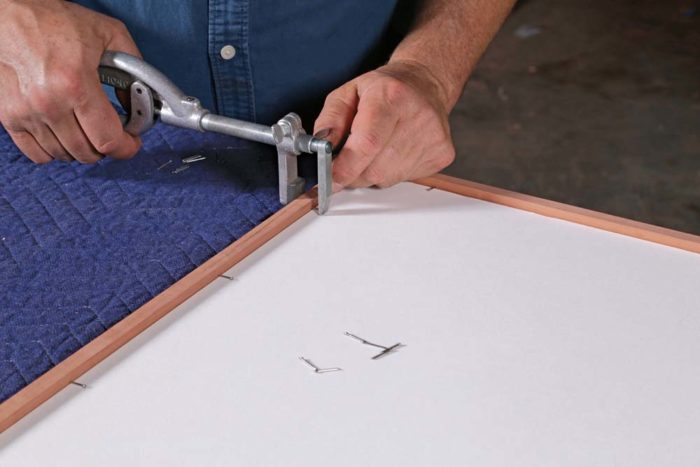
Assemble the art package:
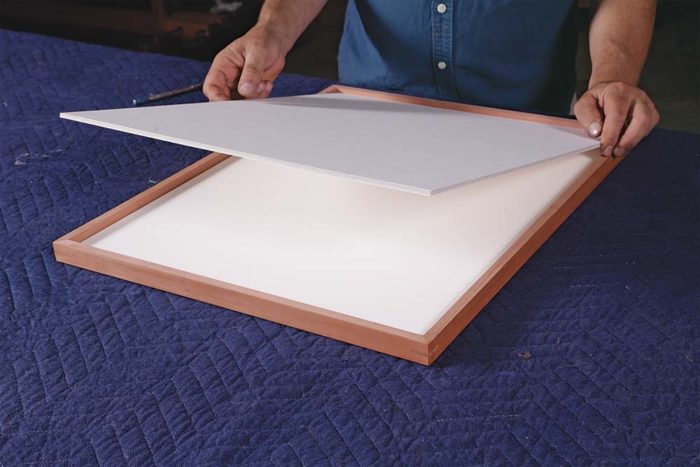
Add a dust cover and hang it up:

Michael Cullen builds frames and furniture in Petaluma, Calif.
Special thanks to Mary Fassbinder for sharing her framing expertise.
More on FineWoodworking.com:
- How To Make A Standing Picture Frame – Turn it around to change the picture
- Build a Greene-and-Greene Picture Frame – Shallow carving combines nicely with classic cloud-lift curves
- Picture-Perfect Clamps – For all mitered joints and budgets, there are clamps to get the job done right
Fine Woodworking Recommended Products

Suizan Japanese Pull Saw


Comments
Thanks Michael. It has taken me a few years to teach myself a mostly foolproof method for mounting and framing. There are many steps to a good result, most of which I've screwed up more than a few times, so the road to flawless results is a bit steep. I also mat and frame for friends and family. Once they see the results of my work, they are inspired to have me do the same for their photographs. I've even learned how to route frame stock, another humbling experience. Save your old fence boards!
Hi, I was wondering about the brad puller, name of tool, or brand.
Great article, thanks
Log in or create an account to post a comment.
Sign up Log in