A simple but stylish cutting board design
With some basic tools you can make a cutting board that stands out in the kitchen.
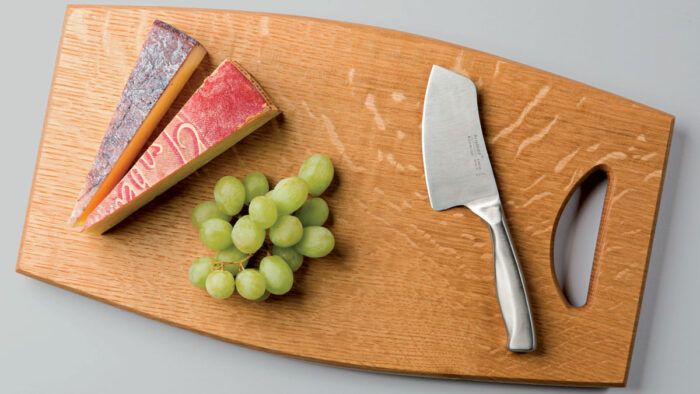
A cutting board is a great project at any stage of your woodworking journey. You can make them as simple or as fancy as you want, in all sorts of shapes for different tasks. And they are small enough to make in batches as gifts.
Most cutting board designs combine strips of different woods into a sort of crazy quilt. But you’ll need a tablesaw to create those strips. We are going to go the elegantly simple route—taking a naturally beautiful piece of wood and bringing out its best. We’ll do that with gleaming curves and a real wood finish: a wipe-on oil that lets viewers see deep into the shimmering wood grain.
For this cutting board design you’ll need to add a tool to your growing arsenal: a small router, sometimes called a trim router or laminate trimmer. Like your other power tools, the router will pay dividends for decades to come.
Let’s start by finding the right piece of wood. You might find it in your bin of wood scraps. If you are just starting out as a woodie, ask around the lumberyard or at the hardwood dealer for “shorts” or “cutoffs” with nice “figure,” which refers to the grain pattern. You can usually get these for cheap, and they make great cutting boards and small boxes. Ask for pieces that are already surfaced smooth, not roughsawn. That’s what I did in this case, finding a piece of white oak with beautiful grain. I actually bought a whole board, planning to make a series of cutting boards from it.
A lot of people spend a lot of time talking about the safest woods and finishes for cutting boards, but it’s really not that scary or complicated. Avoid woods known for causing allergic reactions. Rosewood, cocobolo, sassafras, yew, and olivewood are a few to watch out for, but those are rare anyway and almost any other hardwood is OK. Avoid softwoods like pine, alder, fir, and poplar, which won’t stand up well to sharp knives.
The king of the cutting-board woods is maple. It is hard as heck, it has super-tight grain (tiny pores) so it is easy to wipe off and clean, and the grain often ripples into curly patterns that look amazing under a coat of oil. But almost any hardwood will do. Cutting boards are pretty simple in design, basically putting the wood on display, so look for a board that is special-looking on its own.
As for wood finishes, they are all fine. All finishes are nontoxic once dry, despite popular belief. That said, thin oil finishes are better than thick varnishes because oil can be renewed when it gets dull, whereas thick film finishes like polyurethane will just get scarred and flaky over time and have to be sanded off completely.
This simple cutting board uses just one short piece of wood, but it will teach you about curves, routers, and how to apply a gorgeous finish. It will also make you the envy of your guests.
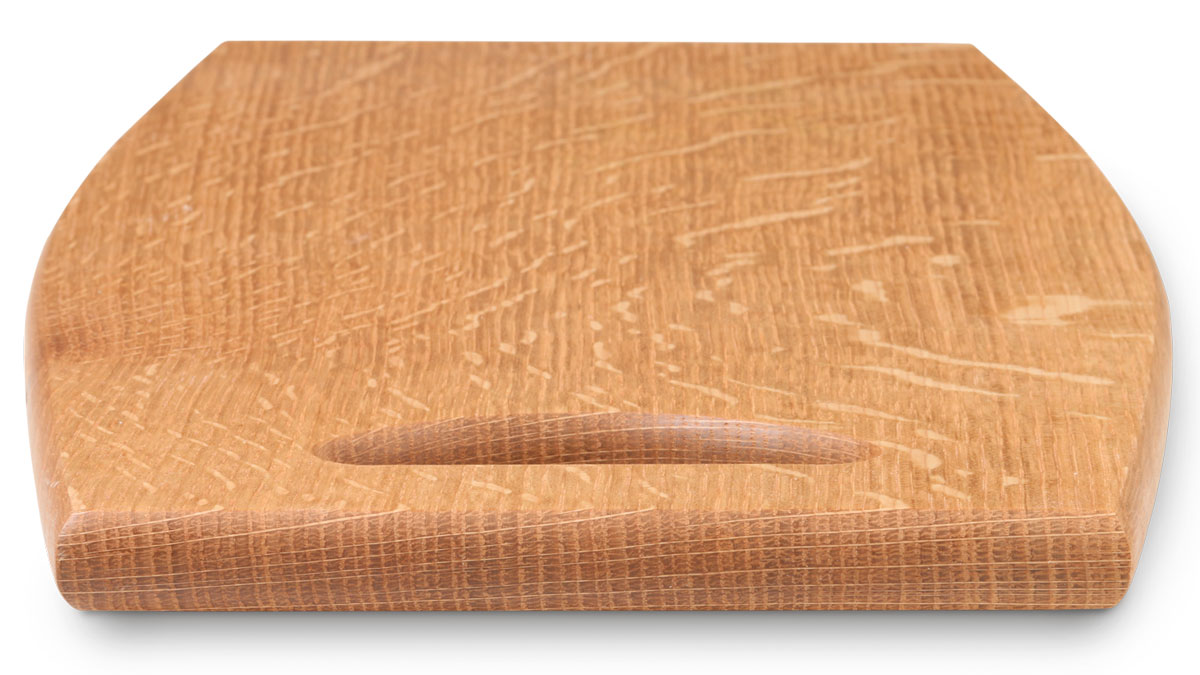 The harder the wood, the better it will stand up to sharp knives. Be sure to get a board that has been planed smooth on both sides. This is white oak, with almost perfectly vertical grain (look at the end of the board). That creates cool stripes on the face of the board, called “ray fleck.”
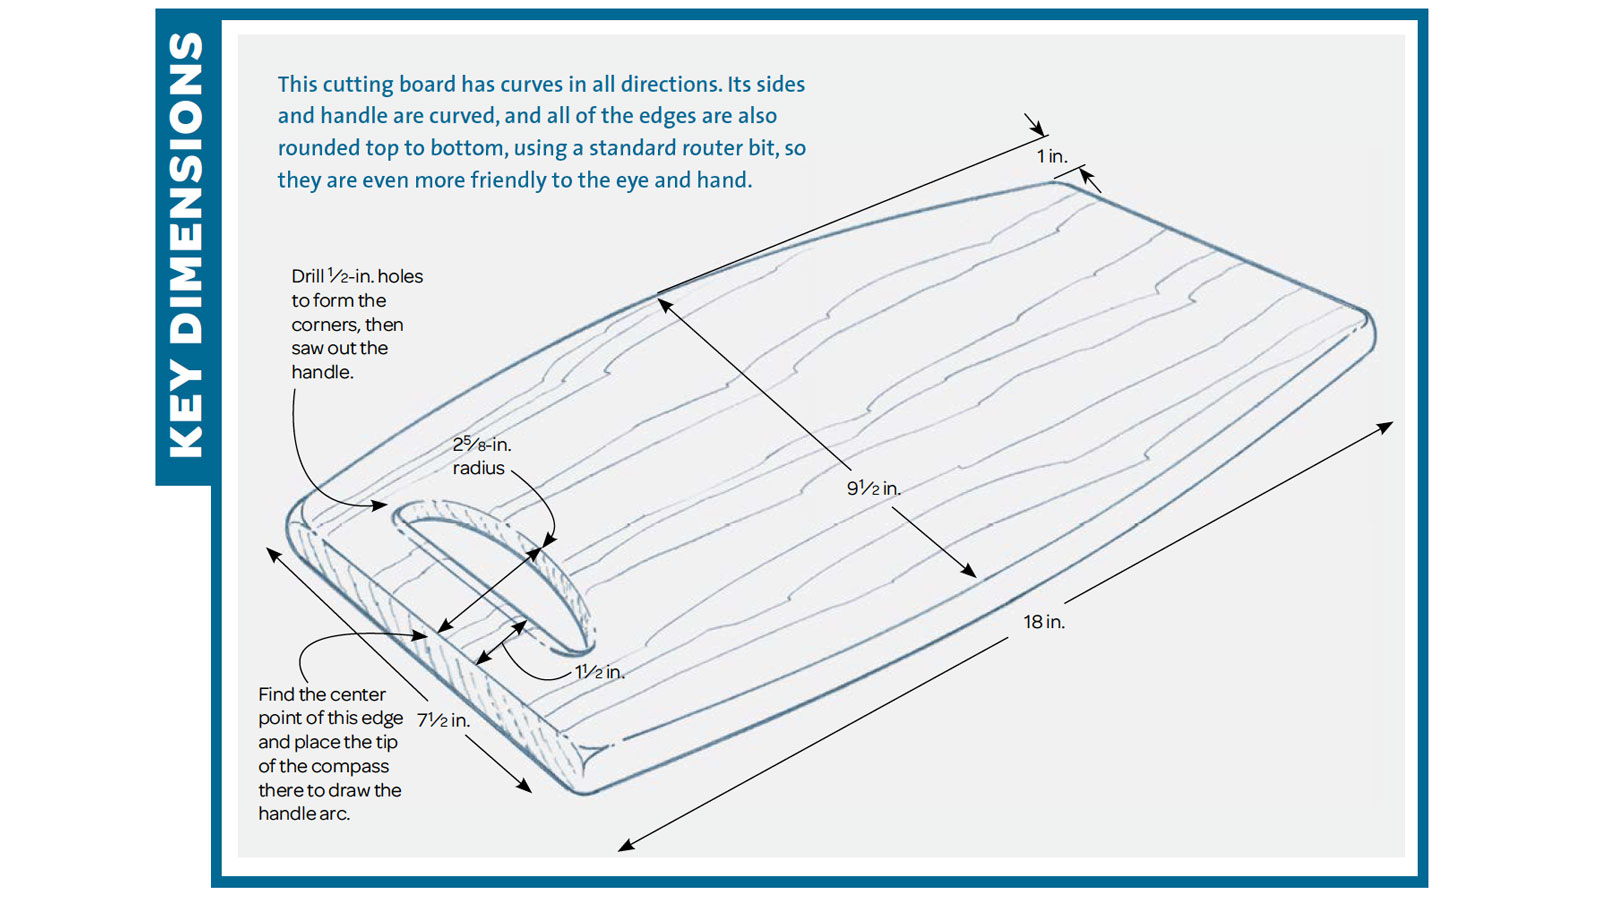
Lay out the cuts
1. Cut to length. If the board is too wide for your miter saw, use the circular-saw guide to get a straight, smooth cut at each end. Make sure the guide is square to the board and elevate both of them in order to clamp everything down so it doesn’t move.
 |
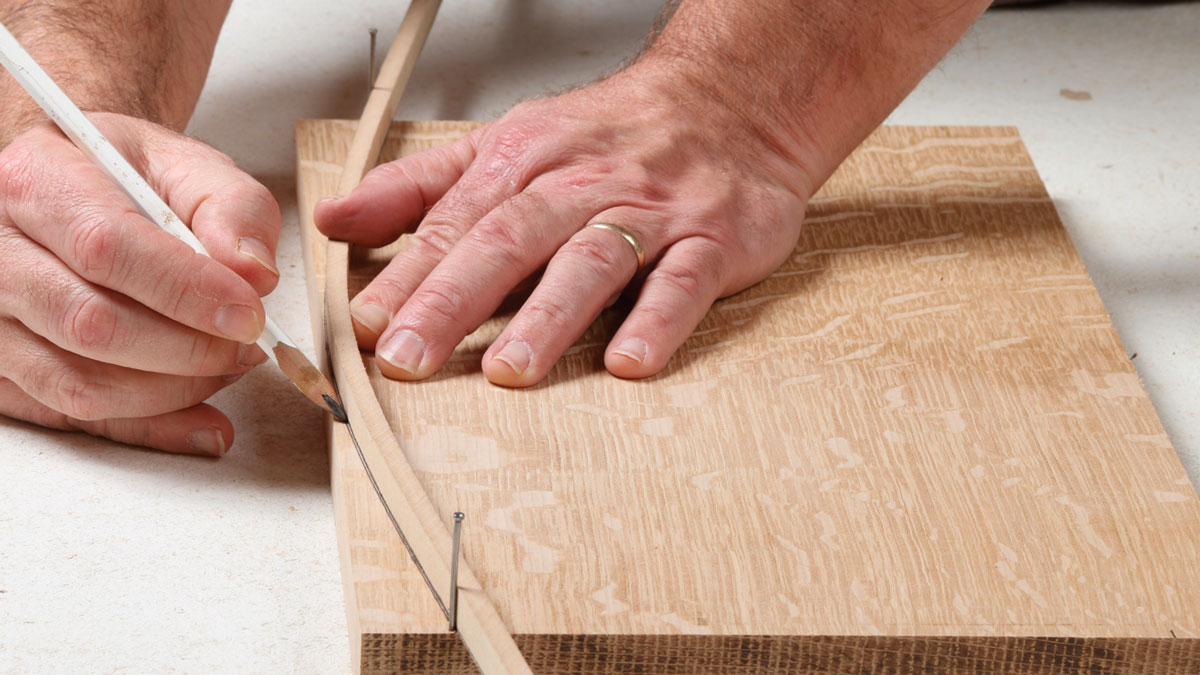 |
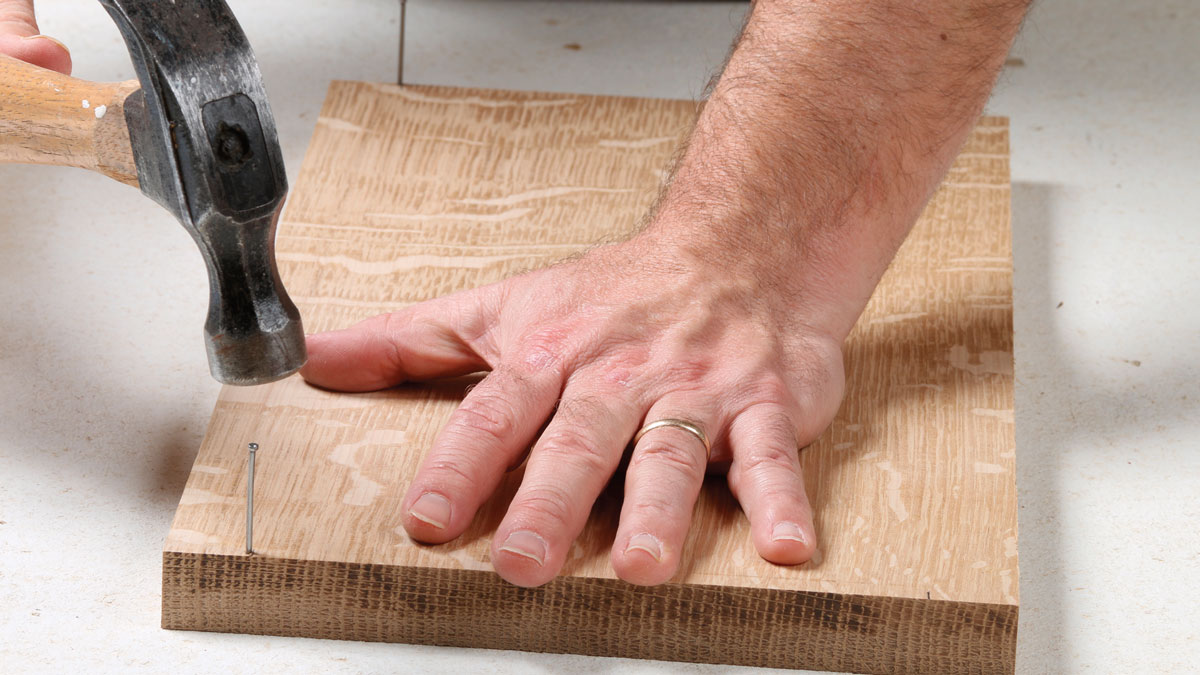
2. Bend a stick to draw a curve. Any consistently thin ruler or strip of wood or metal will do. Tap in a couple of nails at the ends of the curve, just inside the waste area. Then mark the center point of the curve and push the stick to that point to draw a beautiful arc.
 |
 |
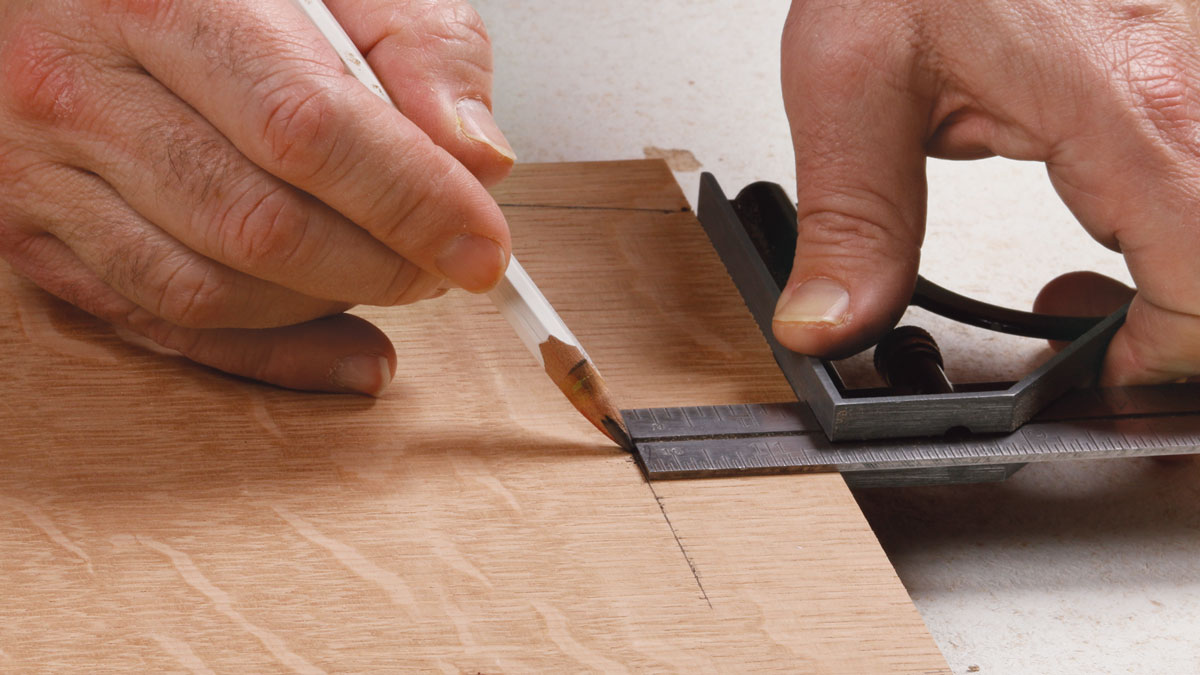
3. Lay out the handle. Use your combo square to draw a line 1-1/2 in. from one end. Then set a compass to 2-5/8 in. and put the point near the outside edge, right at the center point, and mark the curved part of the handle.
Saw out the handle
A jigsaw is perfect for this job. You just need a hole to get it started. In this case, we’ll drill two, forming the round ends of the handle.
 |
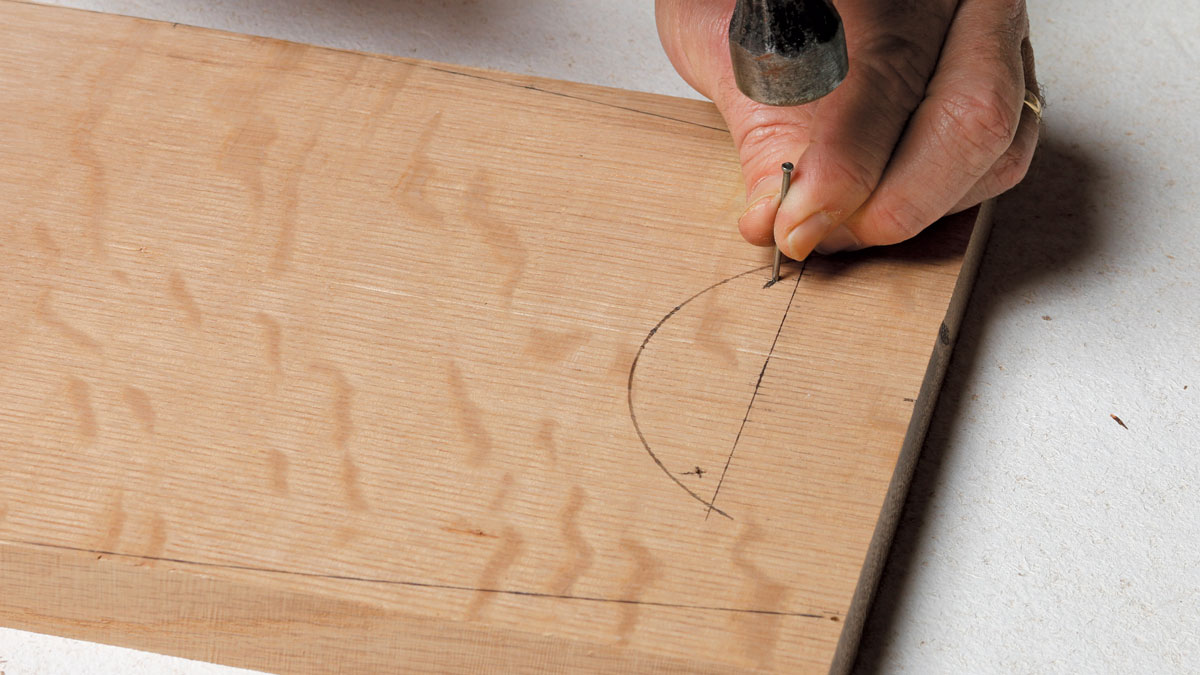 |
1. Mark the hole locations. Because these 1/2-in. holes will serve as the ends of the handle opening, we want to drill them in just the right spot. Measure across the ends of the opening to center the drill bit so it will just touch both lines. Mark that spot, and then dimple it with a nail.
 |
 |
2. Drill in stages. This is a big hole, in a hard wood, so start with a small drill bit and work your way up to the full 1/2 in. Normal drill bits will follow each other, centering themselves in the smaller holes. However, if you have a 1/2-in. brad-point or Forstner bit you should do the hole in one shot. Notice the piece of waste wood below the cutting board. That will prevent splintering on the bottom of the holes.


3. Saw hole to hole. Start at the outside edge of the hole so there is no bump between the hole and the jigsaw cut. Saw along the inside edge of the lines, and try to cut smoothly into the outside edge of the opposite hole so you have less sanding to do later.

4. Now cut the outside curve. If your board is wider than the 9-1/2 in. needed, you’ll have more wood to rest on as you cut. In my case I used the whole width of my board, so I was careful to keep the jigsaw flat on the wood so the cut would be square.

5. Sand the outside edges. The round bearing on the router bit (see “Router 101”) will follow any bumps, so you want to eliminate them now. Use your sanding block with rough 80-grit paper to smooth out your jigsaw cuts. Do the straight ends of the board too.
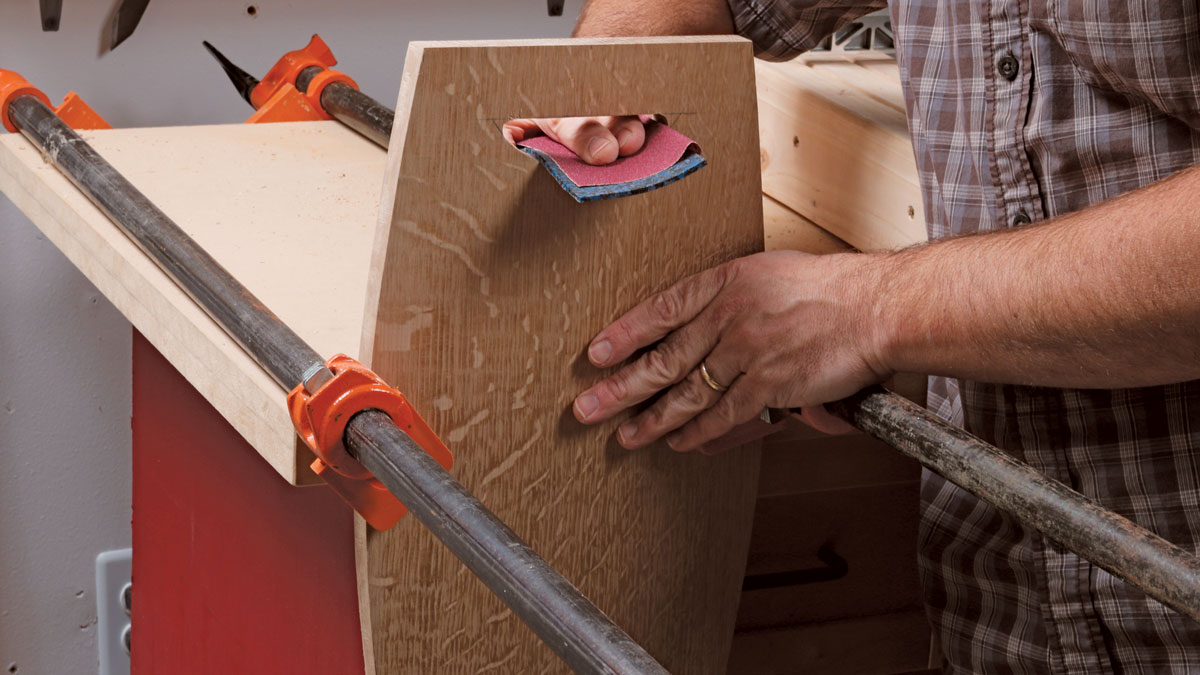
6. A sanding trick for the handle. Use some thick but flexible rubber to back your sandpaper. I use an old rubber mat, which makes the curves smoother and also fits inside small spaces. Note that I clamped the board in a nice vertical position here.
Routing the edges
This is a good project for learning basic routing. Hold the router firmly as you turn it on, and make sure the bit is free and clear when you do. Then place the base on the wood and move the bit and bearing toward the edge you are working on. Now you can start routing that edge.
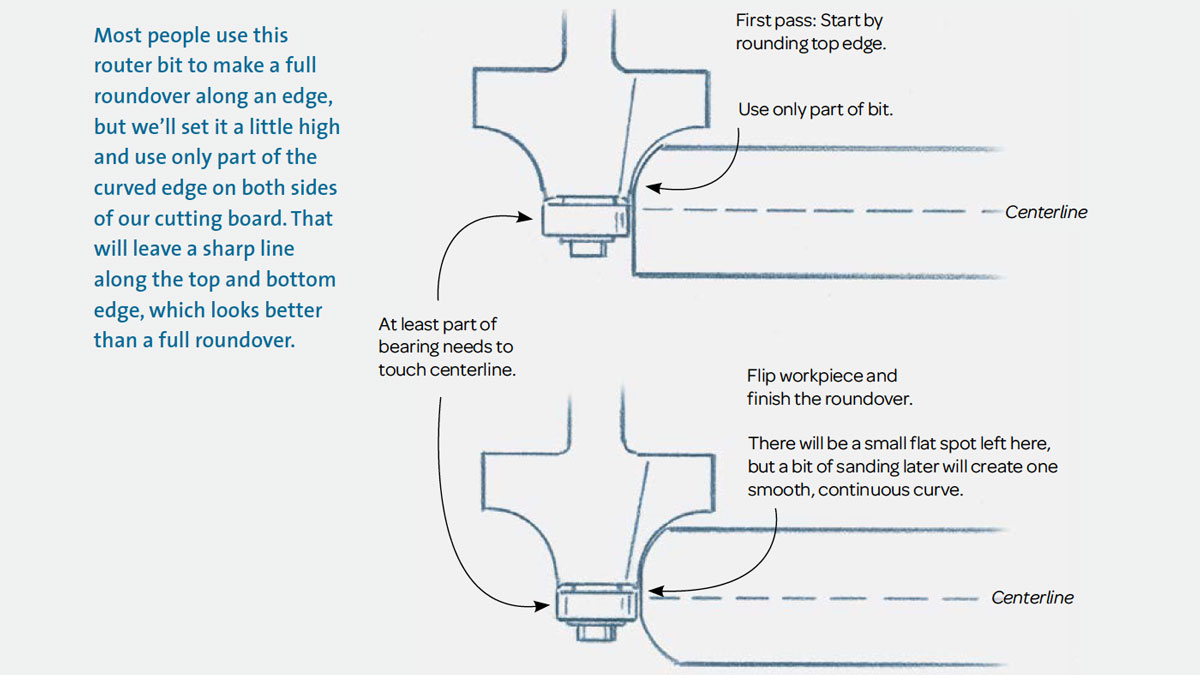
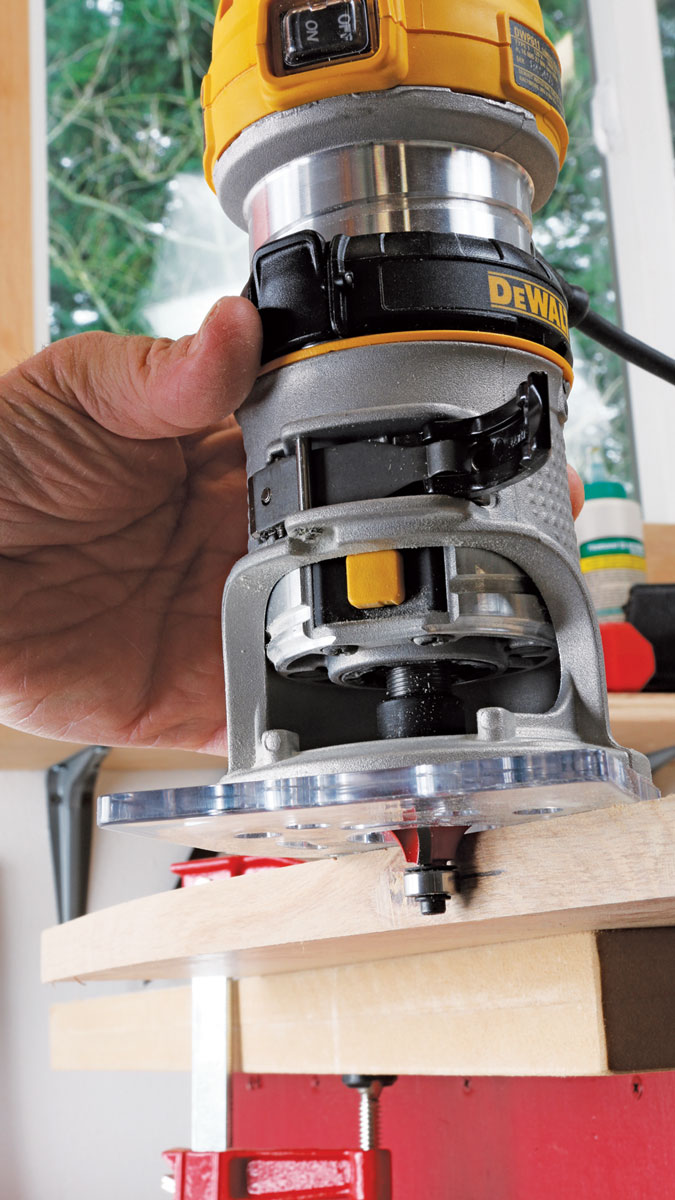
1. Set the depth first. Mark a centerline and set the depth of the router bearing so at least its top edge touches the line.

2. Clamp rout. Clamp down the cutting board and rout in a counterclockwise direction around the board, against the rotation of the bit. That will make the router easy to control. Use one hand to hold the router and the other to keep its base flat on the wood. Start in the middle of an edge, not at a corner, and then feel the bearing on the router bit wrap around each corner as you go from edge to edge. You’ll need to reposition the board and clamps to complete the job.
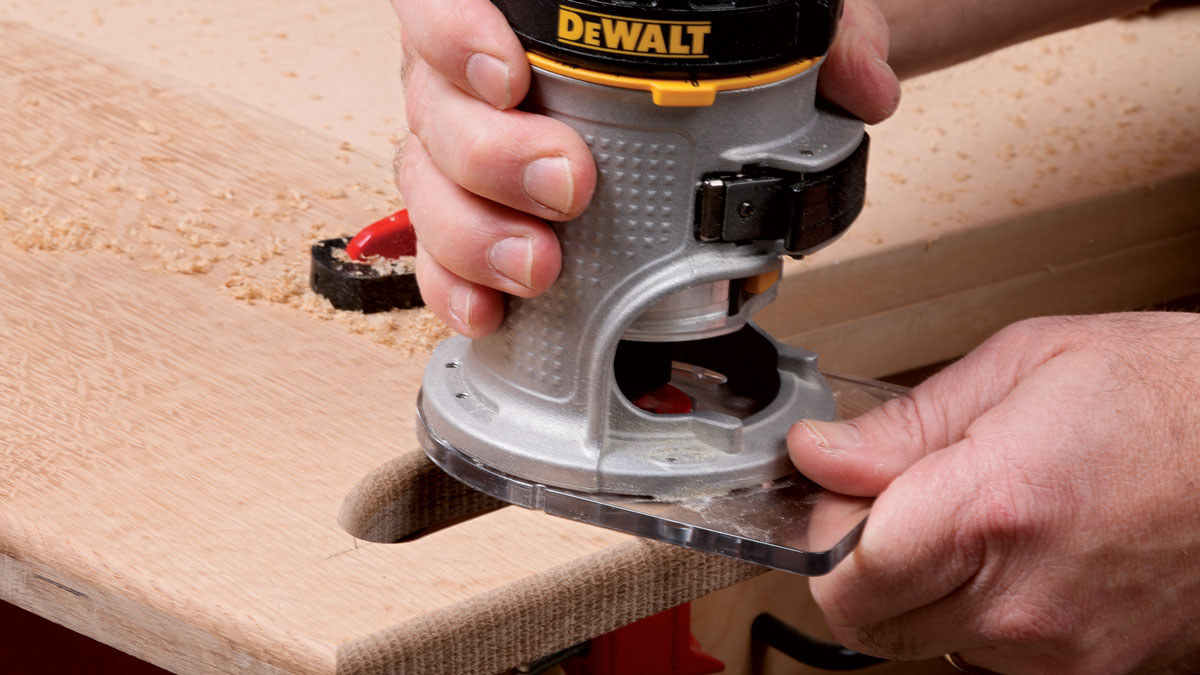
3. Rout the inside handle, too. This time, move clockwise around the shape. Keep the router moving steadily to avoid burn marks and make an extra pass to remove any bumps from the first one.
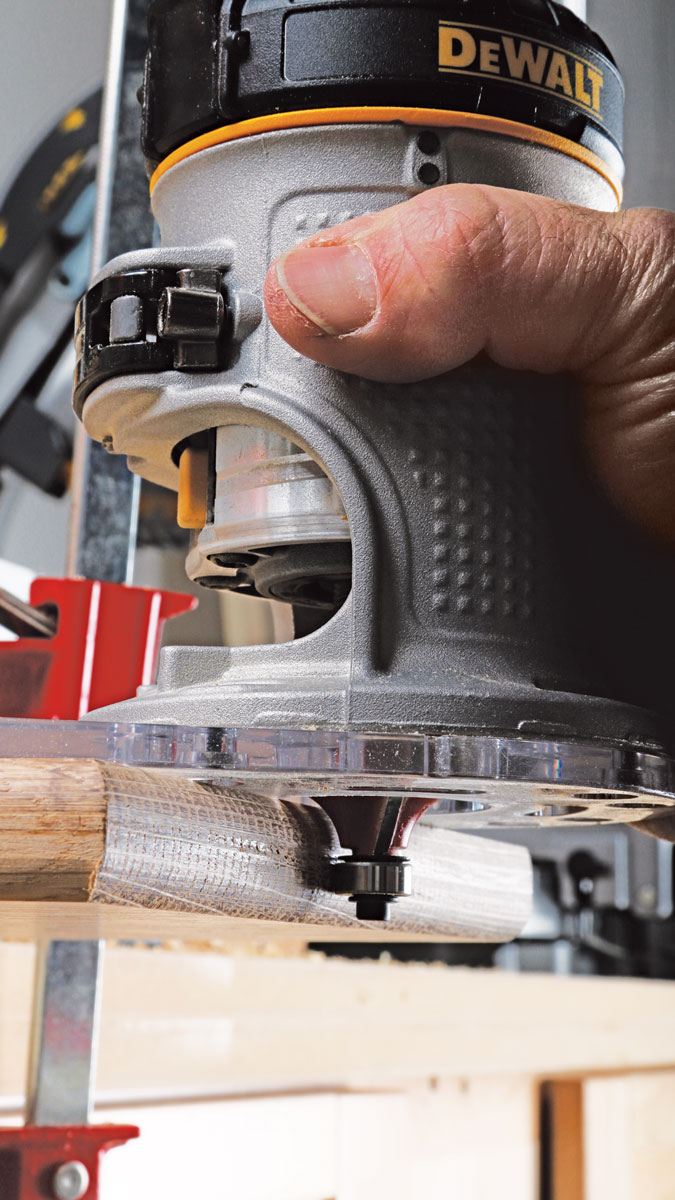
4. Now the flip side. After moving your clamps to rout all of the edges on one side, flip over the cutting board to rout the edges on the opposite side. Notice that there is just enough of a flat spot left on the edge for the bearing to ride on. Use your sanding tools to turn the router cuts and that little flat into one smooth curve along the edges and inside the handle area.
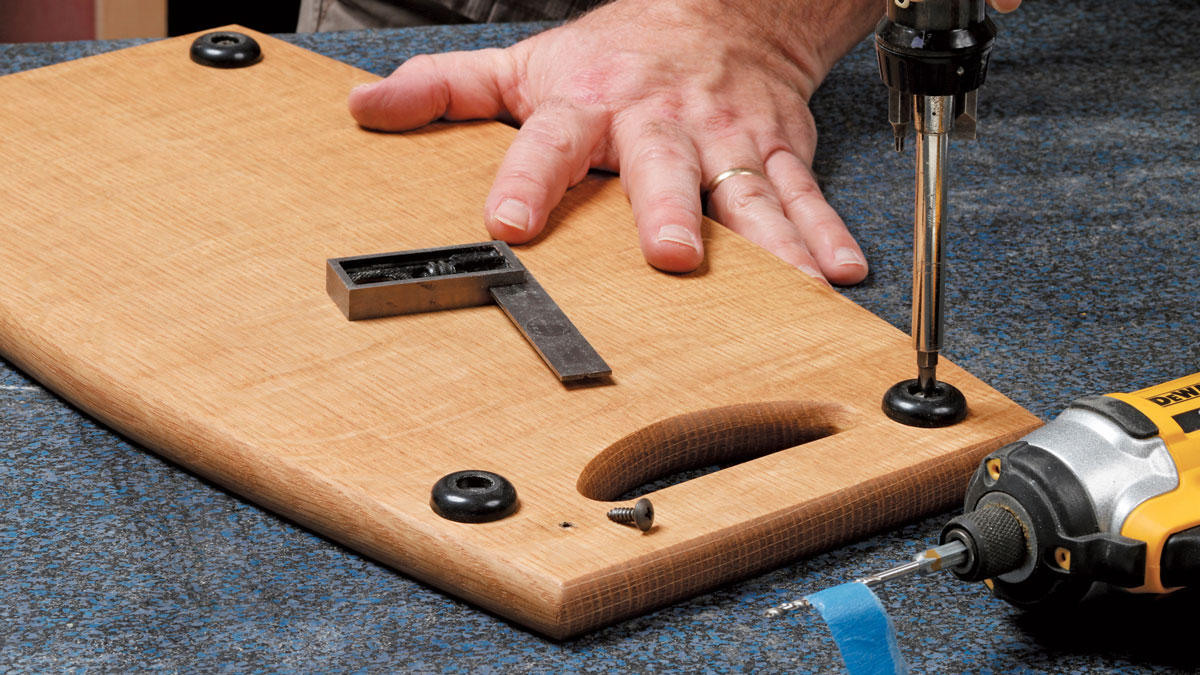
5. Add feet if you like. I found these non-skid plastic feet at my local home center. They’ll raise the board off the countertop so it dries more easily after being rinsed off.
How to Apply a Beautiful Oil Finish
A beautiful finish is all about preparation. If you sand the right way, you’ll get an amazing finish on any wood. Be sure to back up your paper with a block for all the flat surfaces.
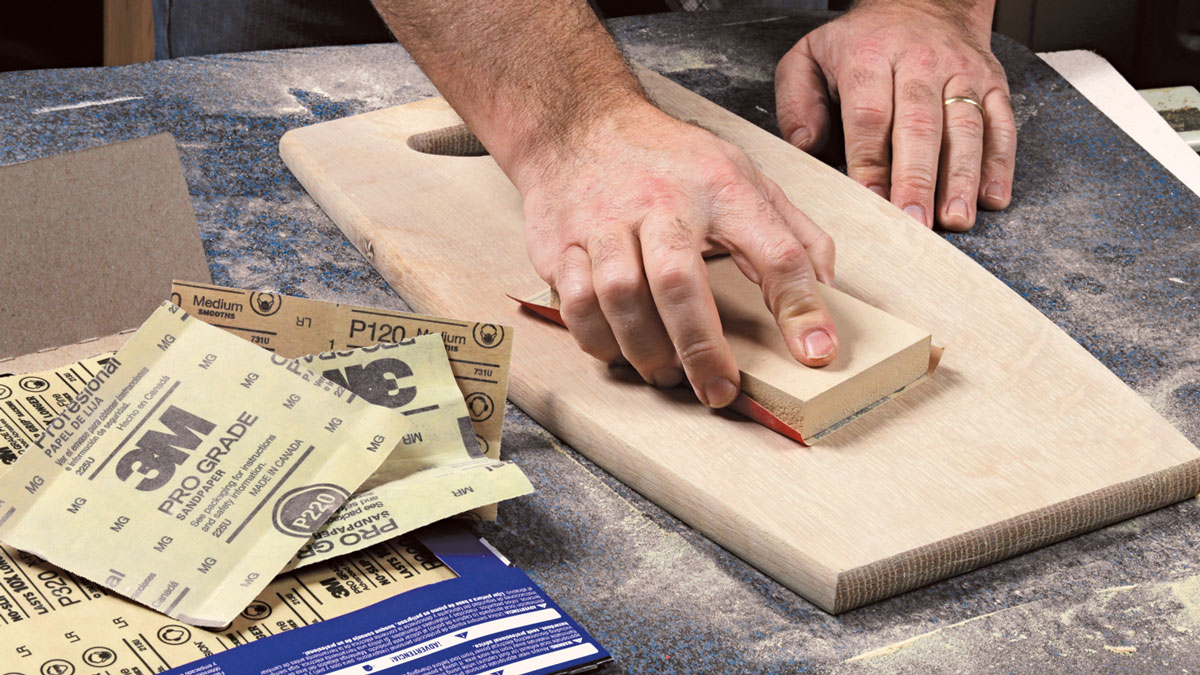
1. Work through the grits. When sanding the edges and faces of this cutting board, or any project, work progressively from rougher grits like 120-grit up through the finer grits: 150-grit, 220-grit, and 320-grit. Each successive grit makes finer scratches, removing the rough scratches from the previous one, ending with scratches so fine they will just look like a smooth sheen under an oil finish.

2. Vacuum away the dust. This is the best way to get sanding dust out of the pores in the wood so the grain looks its best. Compressed air also works, or a wipe with a T-shirt if nothing else.

3. Wipe on, wipe off. Use any clear (not tinted or colored) oil finish designed for wiping. Wait 5 or 10 minutes after wiping on a generous coat of oil, and then buff it off with clean cloth or paper towels. By the way, disposable vinyl gloves are awesome for finishing, saving you a lot of hand-washing.
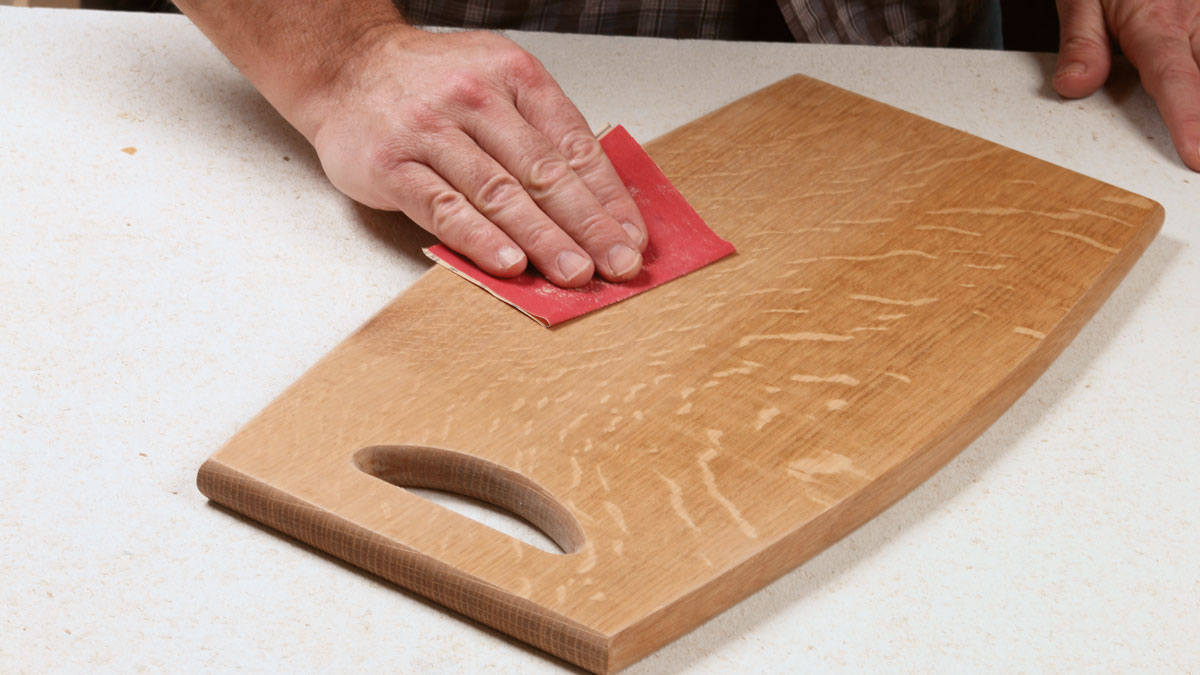
4. Sand between coats. Wait at least 6 hours and then sand lightly with 320-grit. You don’t need a block this time. Just fold over the paper and sand lightly to smooth away the little dust nibs and wood whiskers that tend to rise after the first coat.

5. Just two coats for a cutting board. Apply one more coat of oil, wiping it on and buffing it off. Let it dry for 24 hours.
Fine Woodworking Recommended Products

Suizan Japanese Pull Saw


Log in or create an account to post a comment.
Sign up Log in