How to Mill Rough Lumber
Learn how to four-square a board, an essential skill in woodworking.
In episode nine of our free video series, Getting Started in Woodworking, we demonstrate how to turn a piece of rough-sawn lumber into square and stable stock for your woodworking projects. This process, known as four-squaring a board, is an essential skill in woodworking.
While you can purchase pre-surfaced lumber at your local home center, there are several benefits to buying rough-sawn lumber from a hardwood dealer and milling it to size in your shop. Rough-sawn lumber is typically less expensive than pre-surfaced lumber. And rough-sawn lumber can be milled to custom thickness giving you more flexibility with your woodworking designs. Check out this video for a detailed explanation on how lumber is cut and sold, including how to speak like a pro at the lumberyard and how to calculate a board foot.
Most importantly, milling your own lumber allows you to always work with square and stable material. Wood has a tendency to warp and twist while laying around your shop as it acclimates to the temperature and humidity, and you avoid lots of errors by milling it to dimension after its had time to settle in your shop.
The four-square method of milling lumber
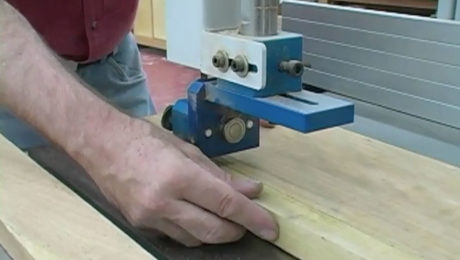
For this lesson on milling lumber, we headed out to the Connecticut Valley School of Woodworking, where instructor Bob Van Dyke demonstrated the classic sequence used to prepare rough lumber with power tools. Sometimes referred to by the acronym “FEE” (faces, edges, ends) the sequence involves flattening one face of the board on a jointer and then creating a parallel, flat opposing face with a thickness planer. After the faces are flat and parallel, square one edge with a jointer and then rip the other edge parallel on a tablesaw. Finally, crosscut the board to length with a miter gauge on the tablesaw.
Five tips for milling lumber:
– Cut in the direction of the grain to avoid tearout
– Don’t have a jointer? Use a router to trim a straight edge and a planer to surface the face
– Don’t have power tools? Surface a board the old-fashioned way with a handplane
– Use push sticks and push blocks to stay safe during the milling process
– Milled lumber should be properly stored to prevent warping or twisting as the wood acclimates to the climate in your shop
If you have a question about this episode send us an email or post a question in our Q&A forum.
Related links
How to Use a Jointer
How to Use a Planer
Flatten Boards Without a Jointer
VIDEO – Smooth wide boards with a handplane
Videos in the Series
-
Start Woodworking: Basic Woodworking for BeginnersJuly 1, 2019
-
Setting up your first woodworking shopJuly 1, 2019
-
Make a Cutting BoardJuly 1, 2019
-
Basic Joinery for WoodworkingJuly 8, 2019
-
Sharpening Woodworking Tools – Start Woodworking S1:Ep7July 15, 2019
-
All about Block PlanesJuly 15, 2019
-
How to Mill Rough LumberJuly 15, 2019
-
Oil-and-Wax Finish – Start Woodworking S1:Ep10July 15, 2019



Log in or create an account to post a comment.
Sign up Log in