This Simple Transforming Table Will Transform Your Woodworking Skills
A modular project that works as a table or a set of storage shelves.
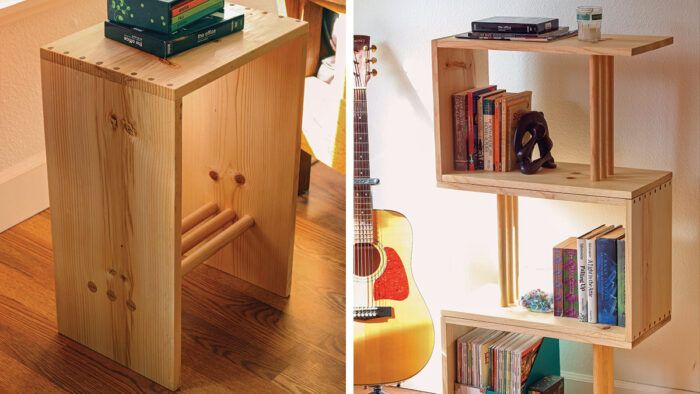
My transforming table is based on the Ulm stool, designed by Max Bill in 1955. Bill came right out of the Bauhaus movement, which was founded in Germany in 1919 by architect Walter Gropius, who wanted to reconnect fine art with craftsmanship and put soul and beauty back into furniture and architecture. Bill’s uber-functional stool is an icon of Bauhaus design.
A German friend told me that his university handed out stools like this for dorm use, because it could be used upright as a low table or seat, or on its side as a bookcase. Also, why not start students off with an inspiring example of functional design?
I took the Ulm stool as my inspiration, partly to make it fit the tools and techniques for a beginner woodworker, but also just for fun. There is nothing wrong with copying classic pieces, but I encourage you to make designs your own.
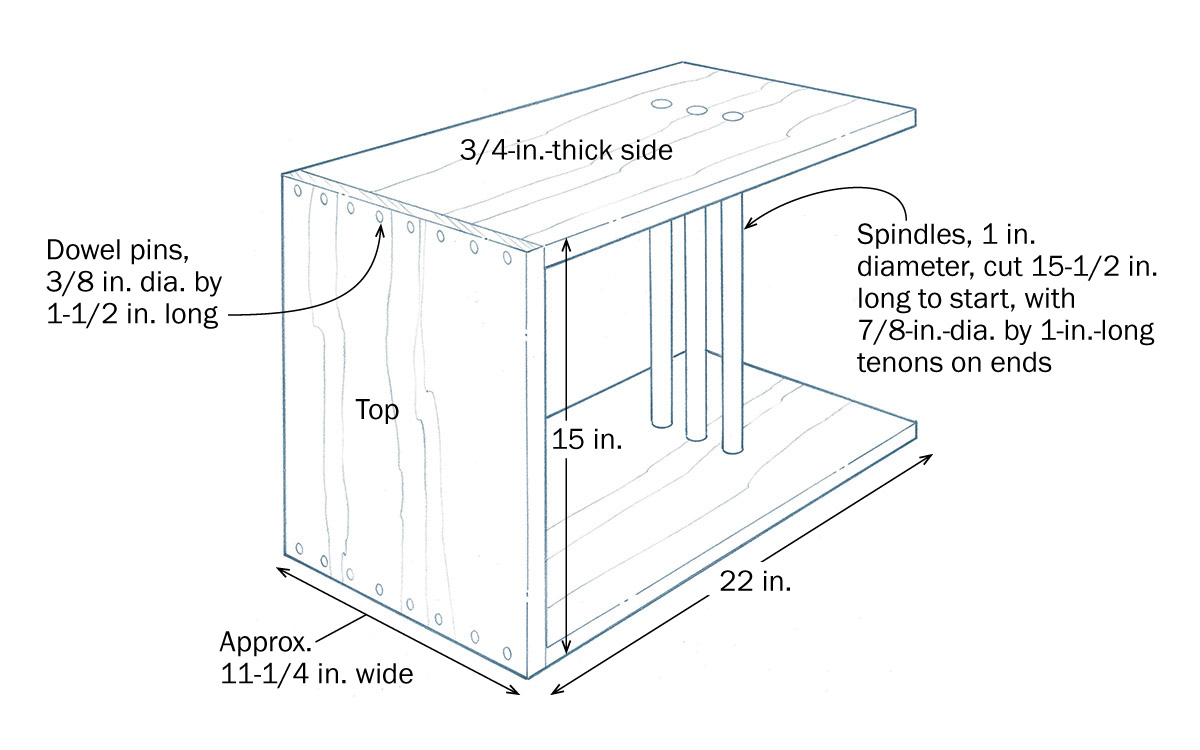
For my table, I dumped the dovetails at the corners for simpler dowel joints. If you are ready to try dovetails, either hand-cut or machine-made, go for it. Finger joints, made on the tablesaw, would look awesome too. I also added a couple more spindles to the classic single post in the center, creating an array of three. And last, I altered the dimensions a bit, making the width match the 12-in.-wide pine boards (actually about 11-1/4 in.) available at home centers, and making the overall piece longer than the original Ulm stool, so it works better as a table in the upright position and as a bookcase when stacked on its side. At 22 in. long, that means it is a bit high for a stool. So if you are looking for true three-way functionality, just make the sides 18 in. or less. It’s all up to you.
Transforming table
This table/stool/bookcase is simple and spare, made from a single wide pine board, a row of 3/8-in. dowels at each corner, and a few spindles through the middle. All of the joinery is exposed, putting your craftsmanship on display and adding a decorative touch.
Materials (For One Table):
|
Chop up a big pine board
You can get both sides and the top from one long, wide, presurfaced pine board, available at lumberyards, home centers, and hardware stores.
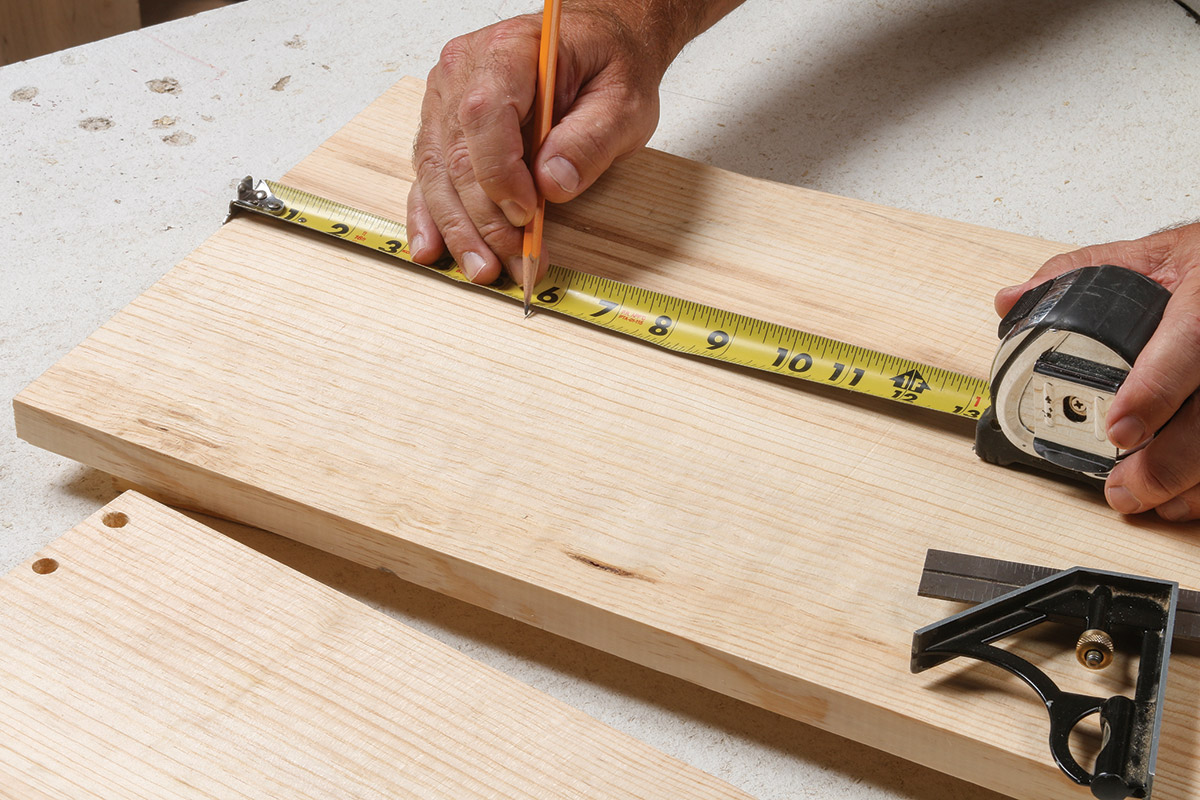
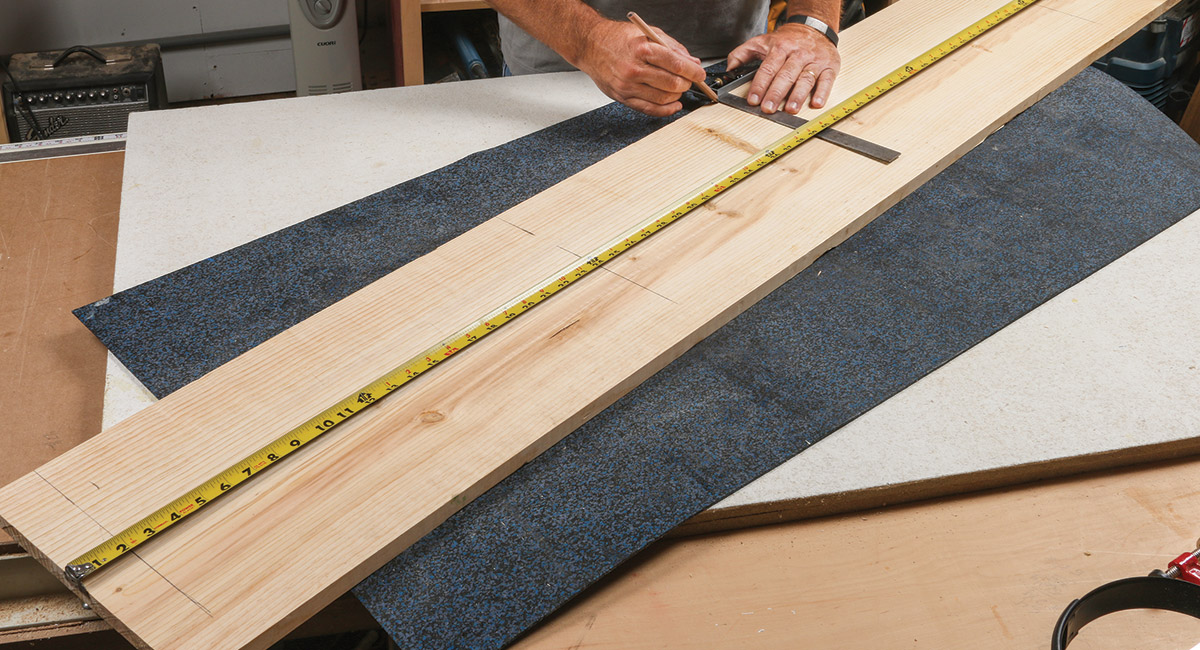
1. Lay out parts in sequence. For a better grain match at the corners, mark out one side, then the top, and then the second side as shown, making marks on the edges to remind you which way they go back together later.
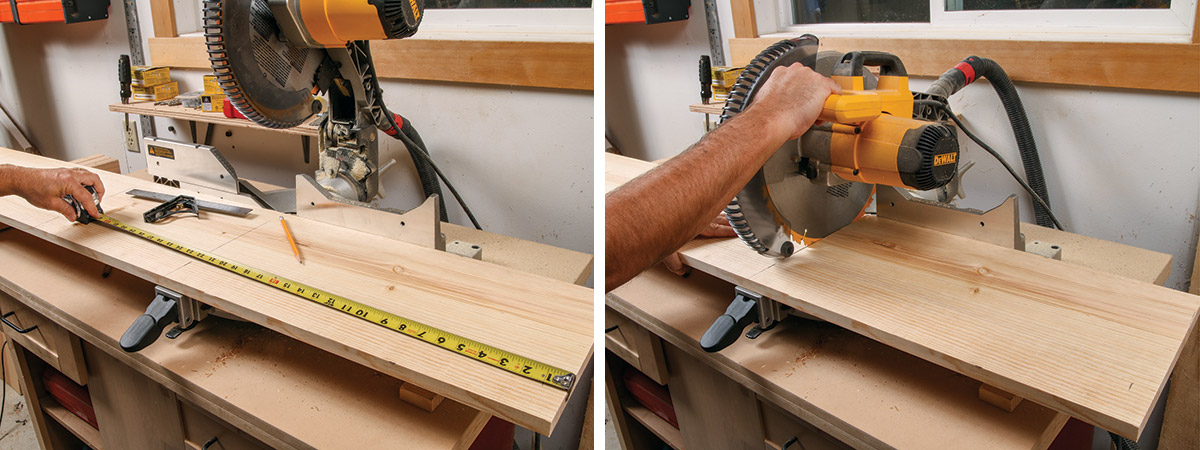
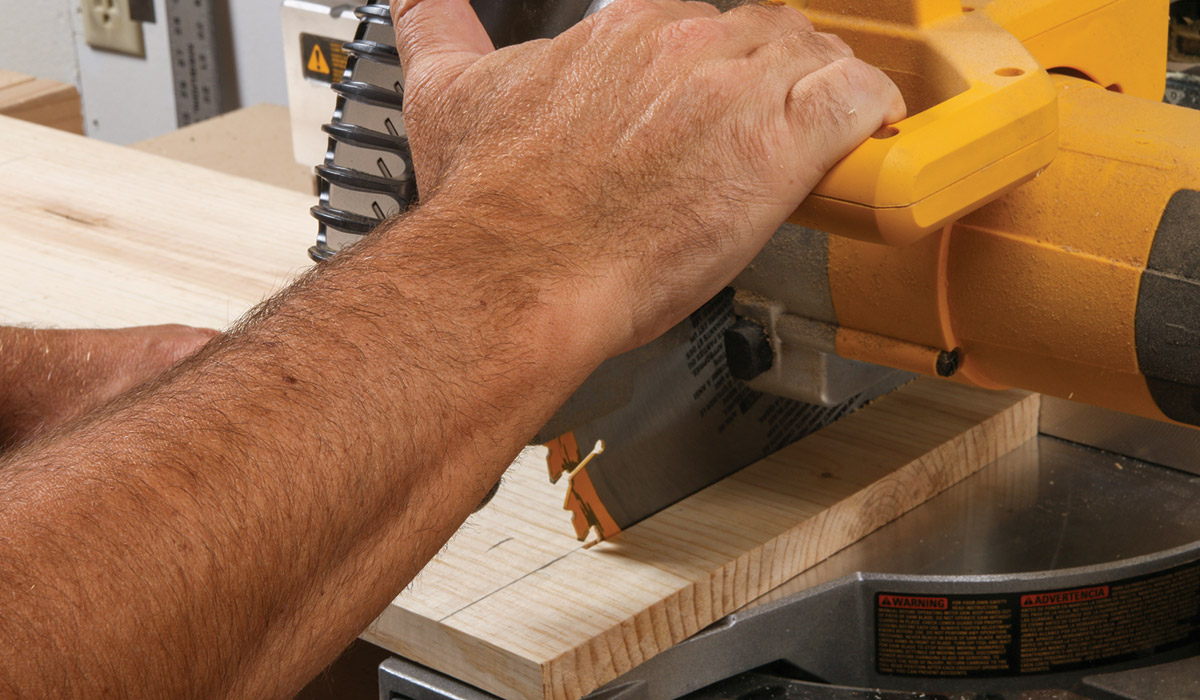
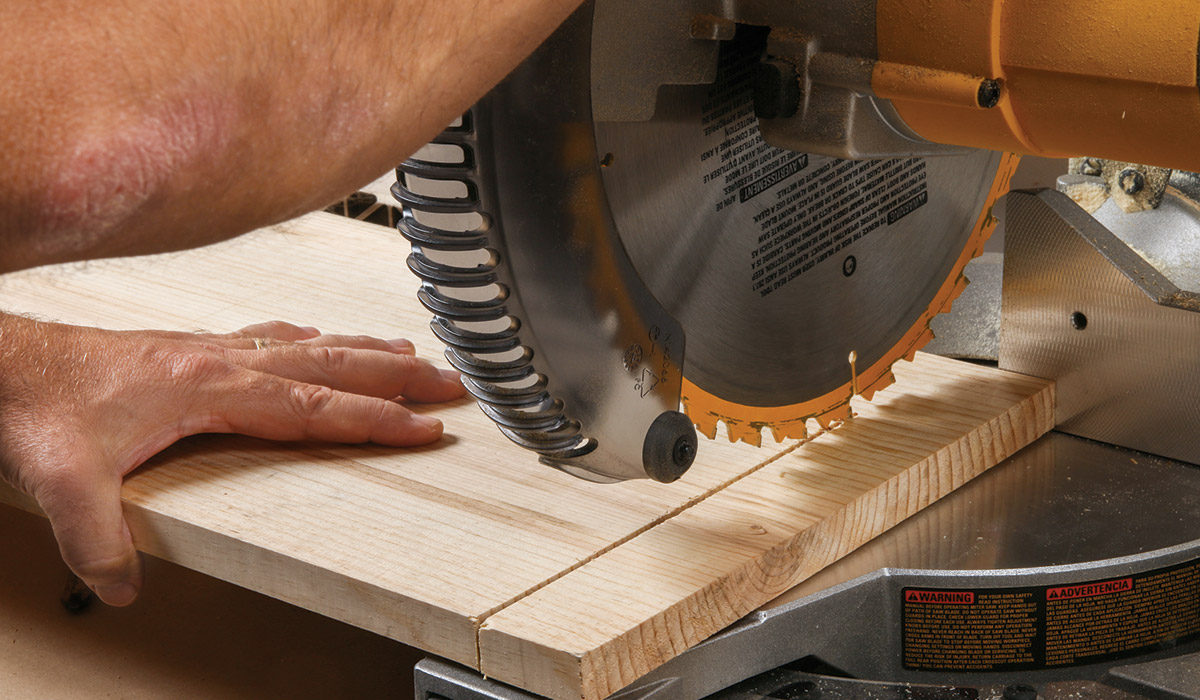
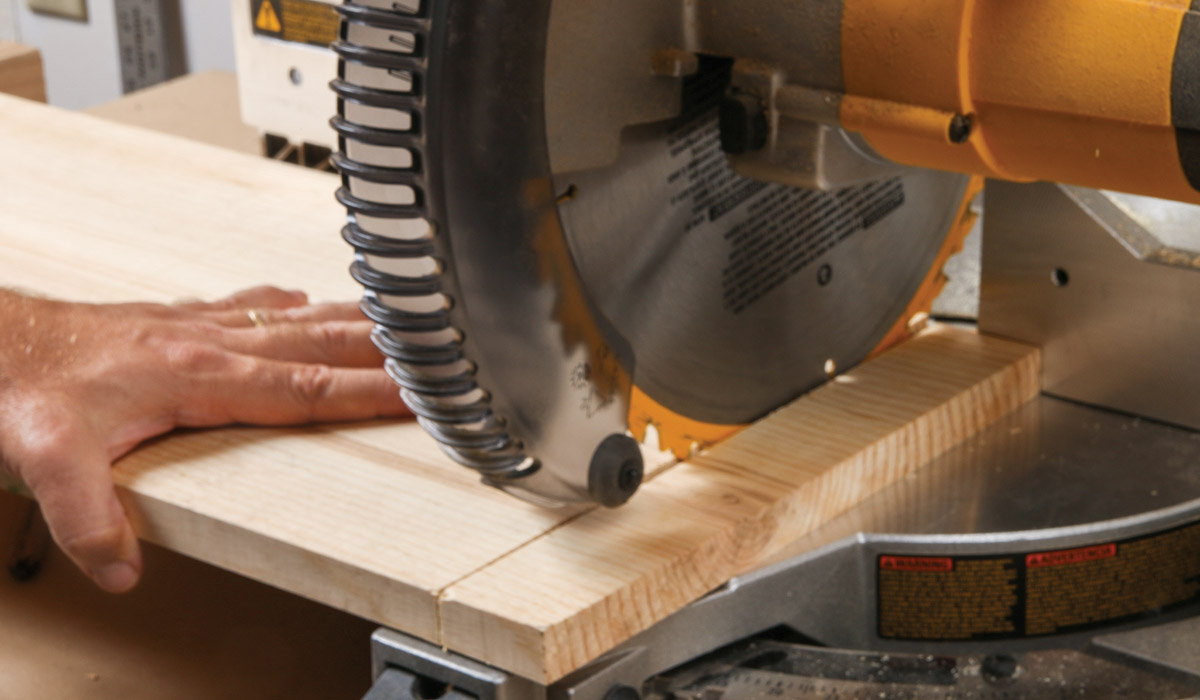
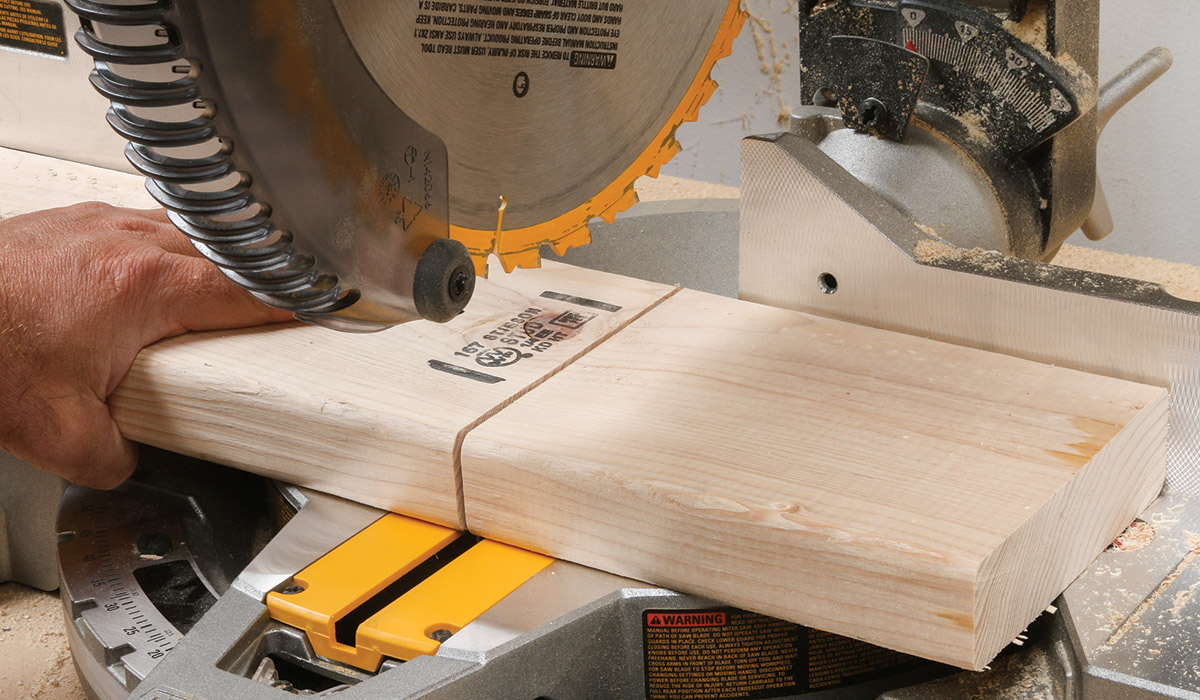
2. Cut the first piece. Make sure your layout mark is still accurate, and then use the flip trick (see the sidebar) to cut the first side of the table. Note that the blade should be on the left side of the line this time!
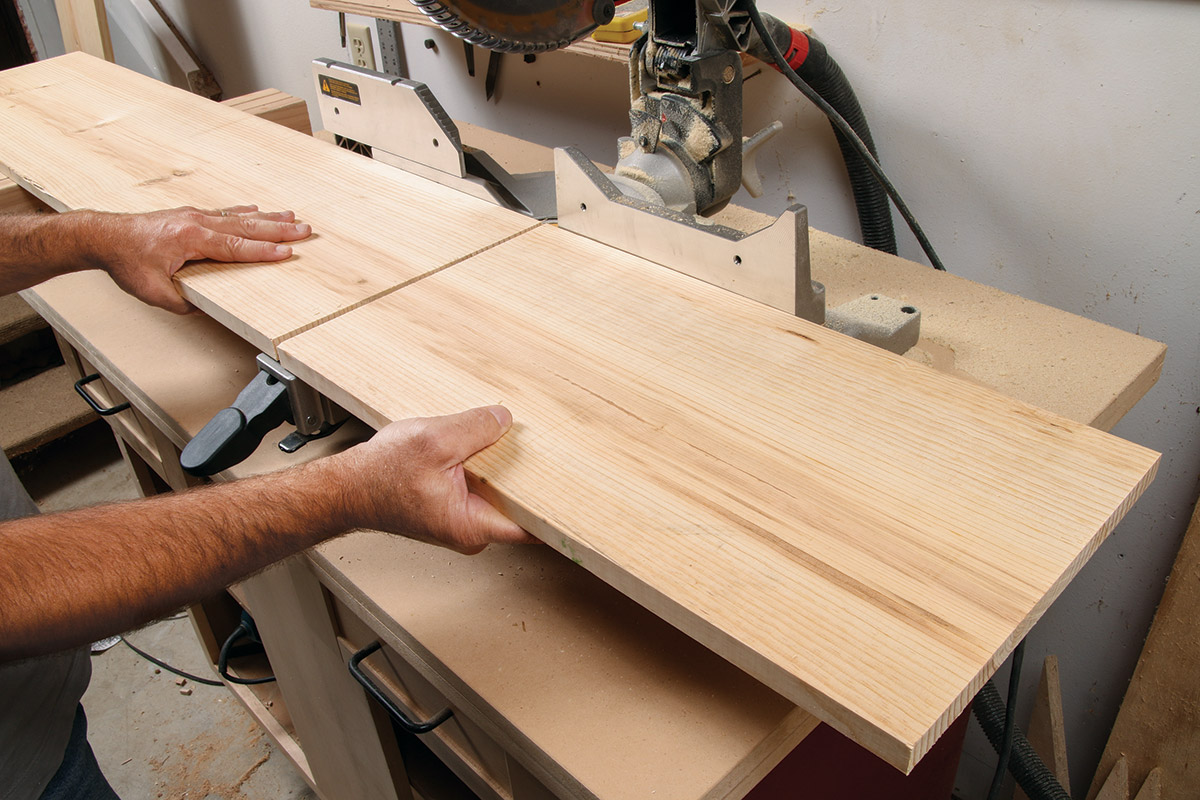
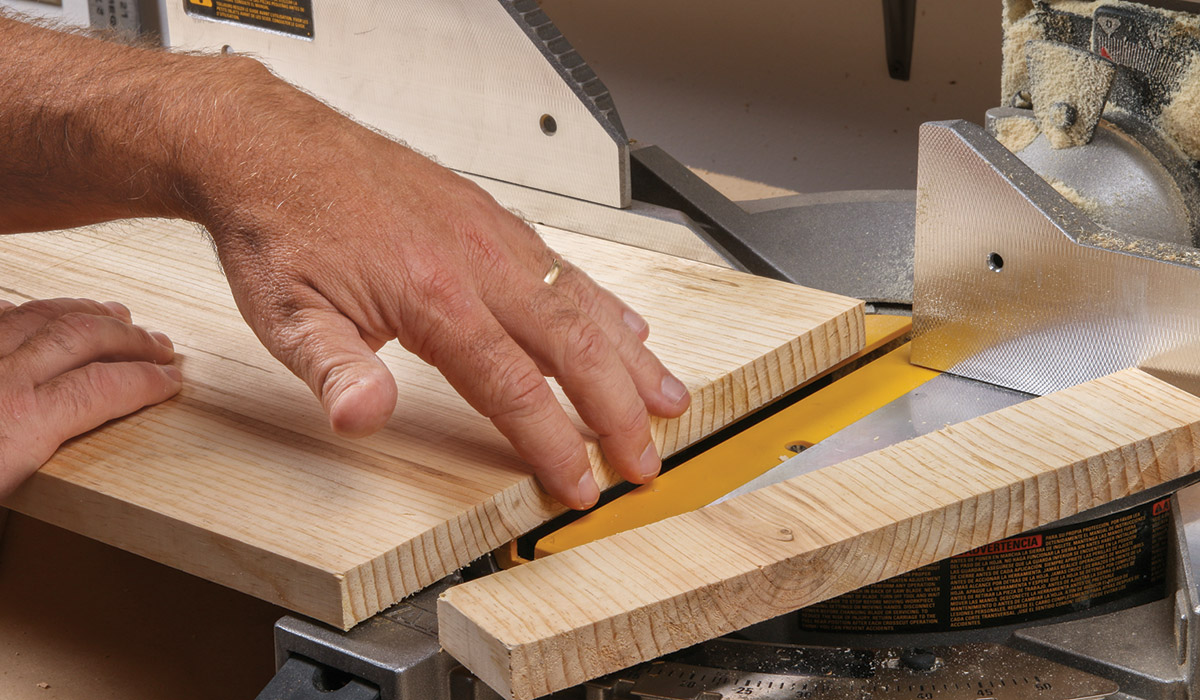
3. Cut the rest of the pieces. Your original layout marks will work for the first piece, but because of the material removed by the blade, your next few layout marks won’t be accurate. Measure again and make new marks for the last two parts as you go.
The Flip Trick for Wide Boards
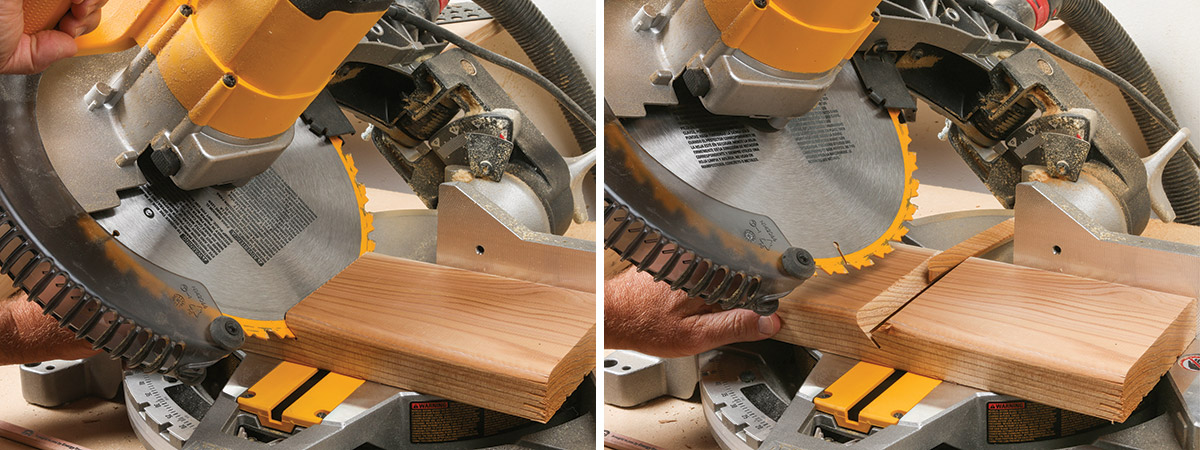
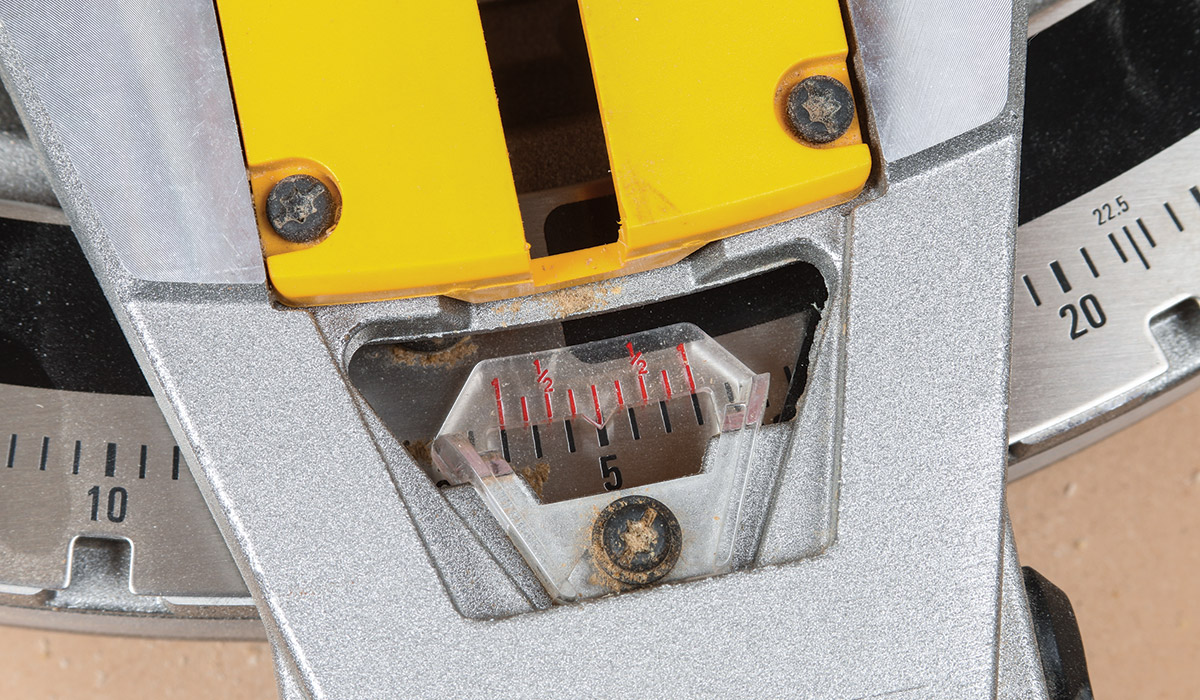
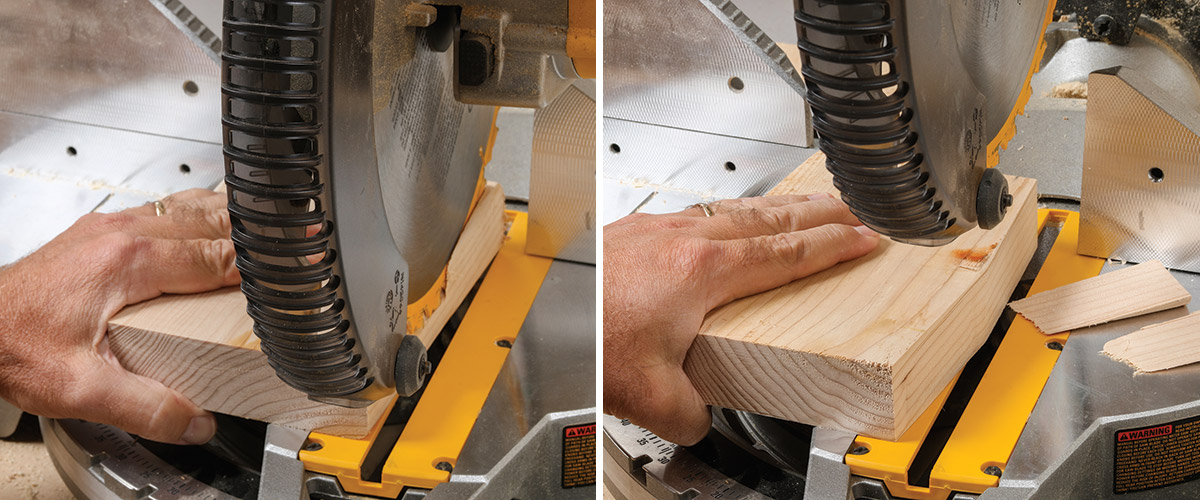
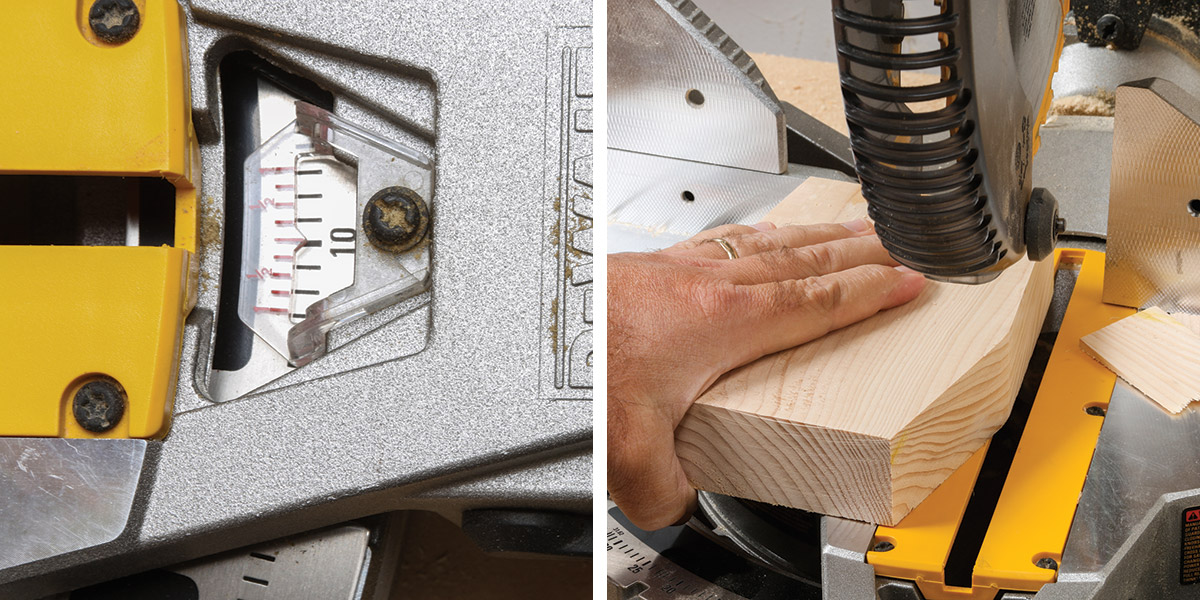
There will be boards that are too big for your miter saw to crosscut in one shot, but this trick will let you make a complete crosscut on pieces that are a couple inches too wide.
Lay out the dowel joints
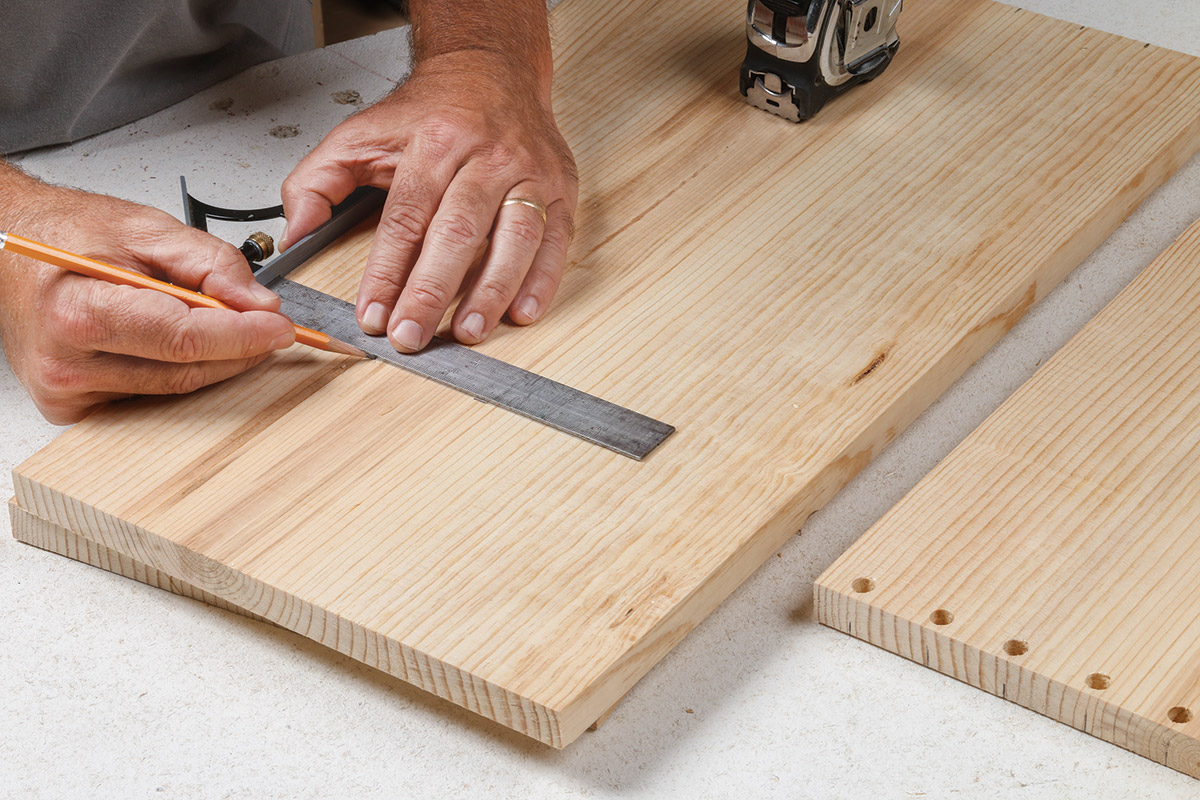
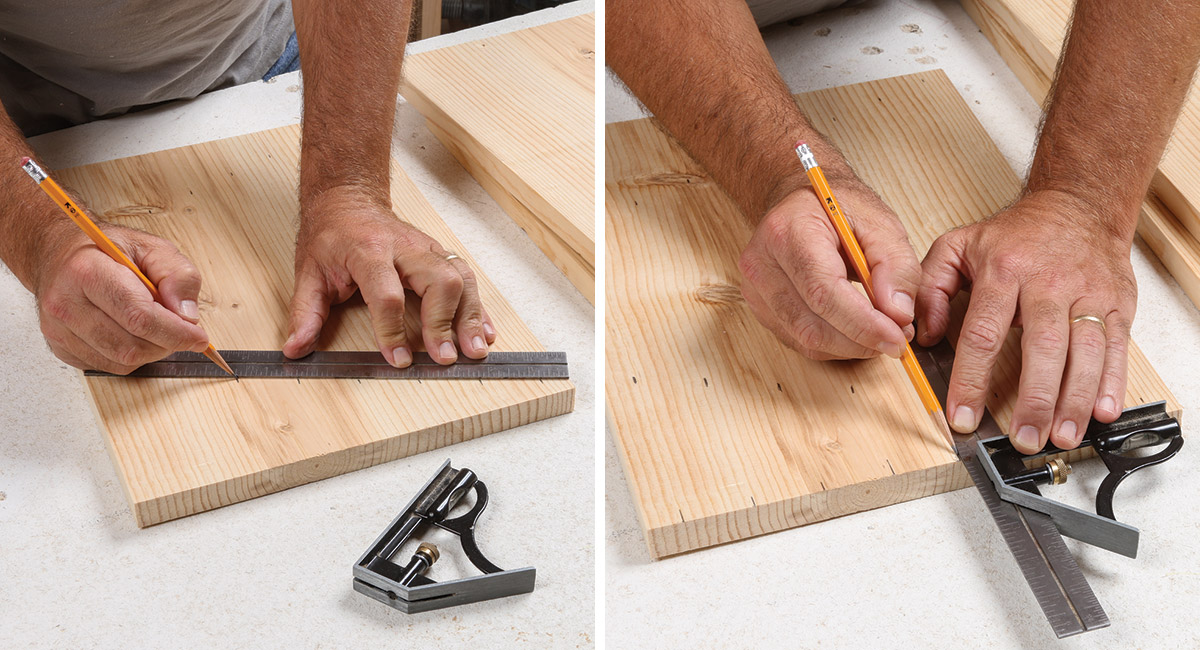
All you need to make the dowel jig work is small pencil marks. Lay out the dowel spacing on the top of the table, and then just transfer those marks to the two sides.
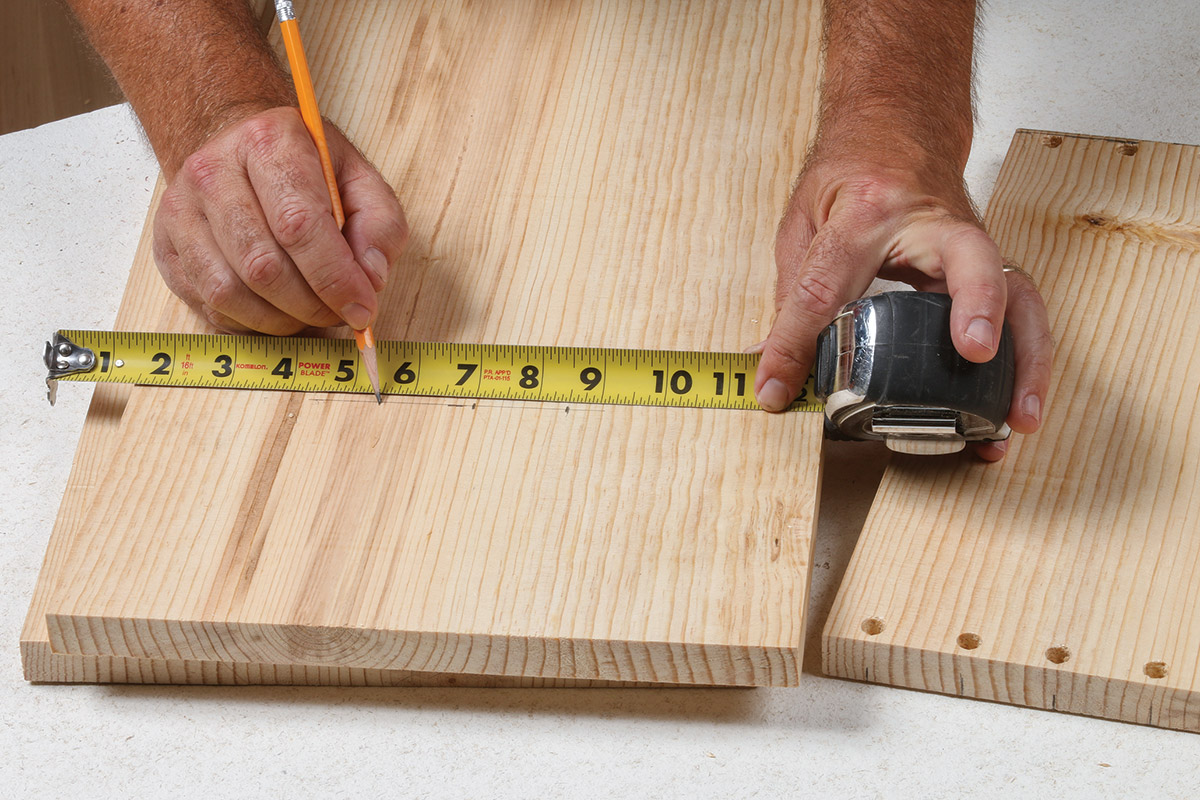
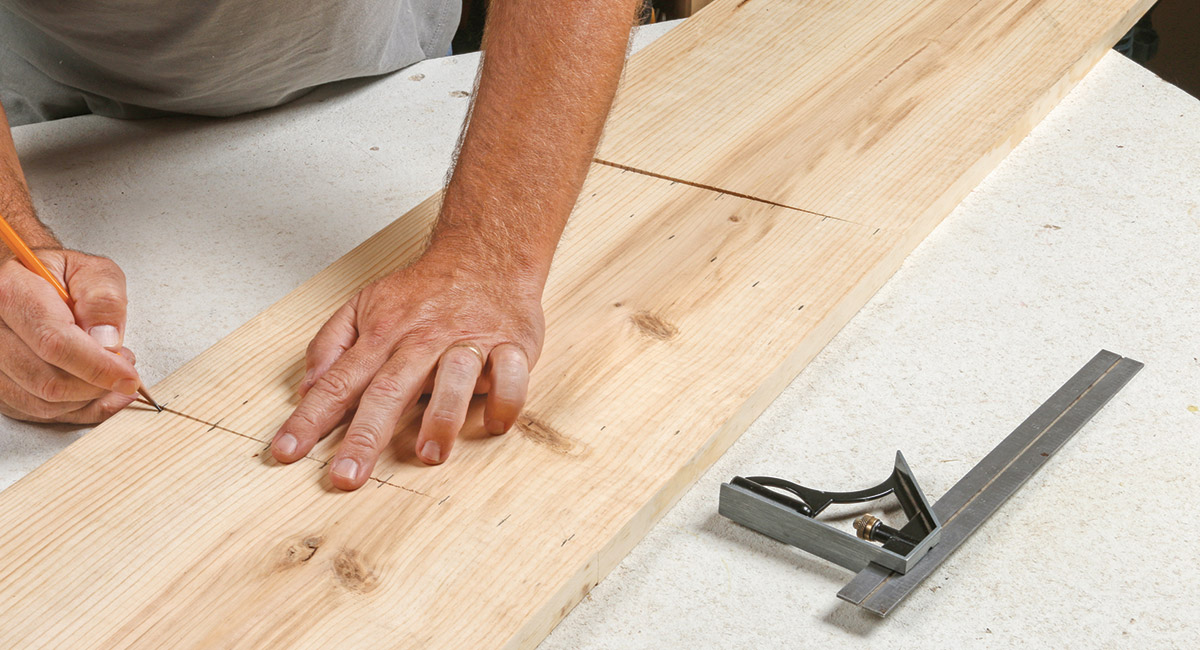
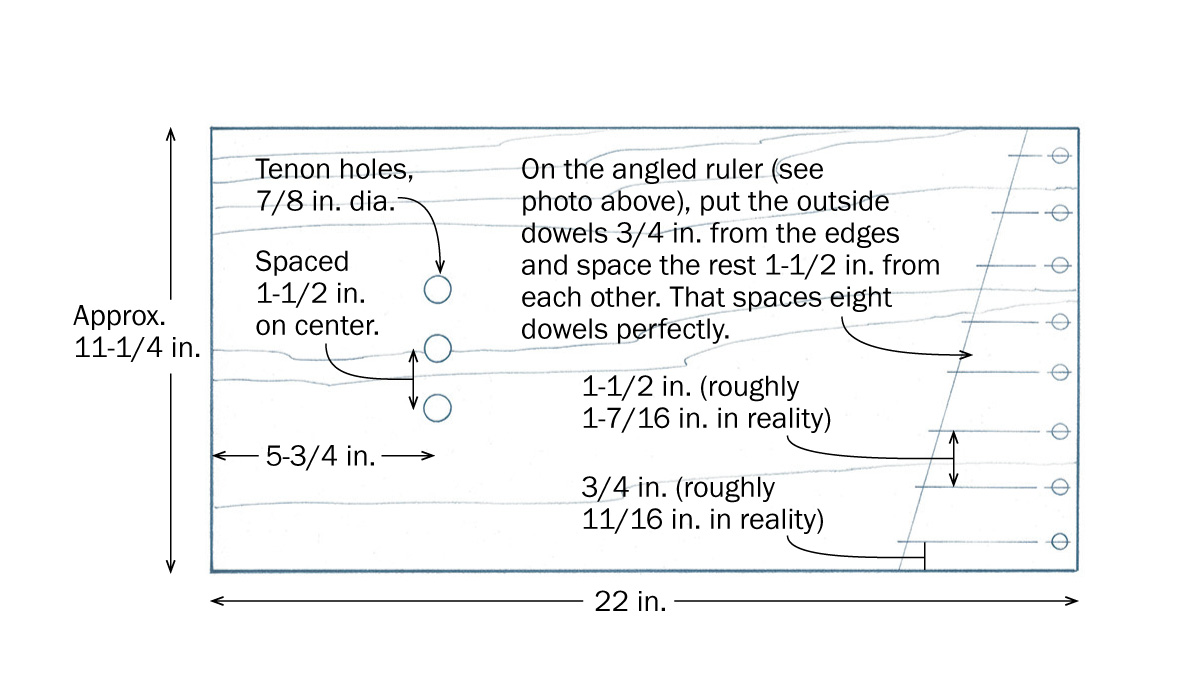
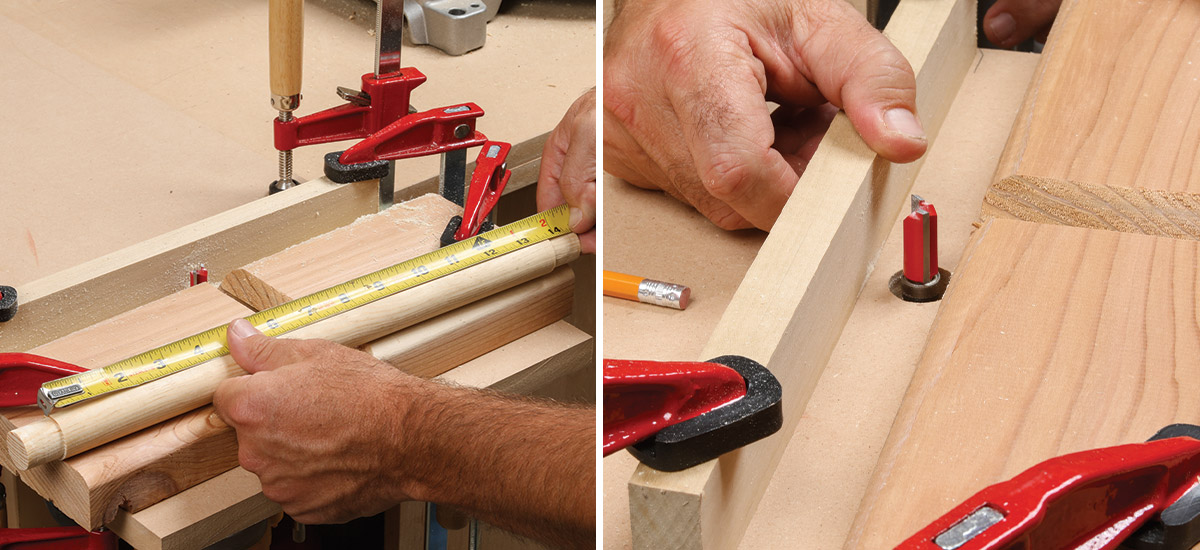
1. Spacing trick. When the width of a piece is an in-between dimension, you can just angle the ruler to make it work. Here the board is 11-1/4 in. wide, but the angle lets me use the full 12-in. ruler so I can divide the dimensions easily. Now just use a square to carry the marks to the edges where you need them.
2. Transfer the marks to the other pieces. With the top laid out, you can line up the sides as they’ll go in the finished piece and transfer the pencil marks over, so you can drill matching holes in mating parts.
Dowels Are an Underappreciated Joint
Used poorly in mass-produced furniture, dowels have gotten a bad rap, but used properly, there aren’t many faster and stronger ways to join wood pieces.
To make the perfectly aligned holes in the two mating pieces, you need some sort of drilling guide. I recommend the doweling jig from www.rockler.com. It is dirt-simple but deadly accurate, and costs just $20 for the jig, drill bit, and stop collar you need to make joints. You could make a houseful of furniture with this one little jig. The 3/8-in. size is best, as those dowels are small enough to fit into 3/4-in.-thick stock but also strong enough to make sturdy joints.
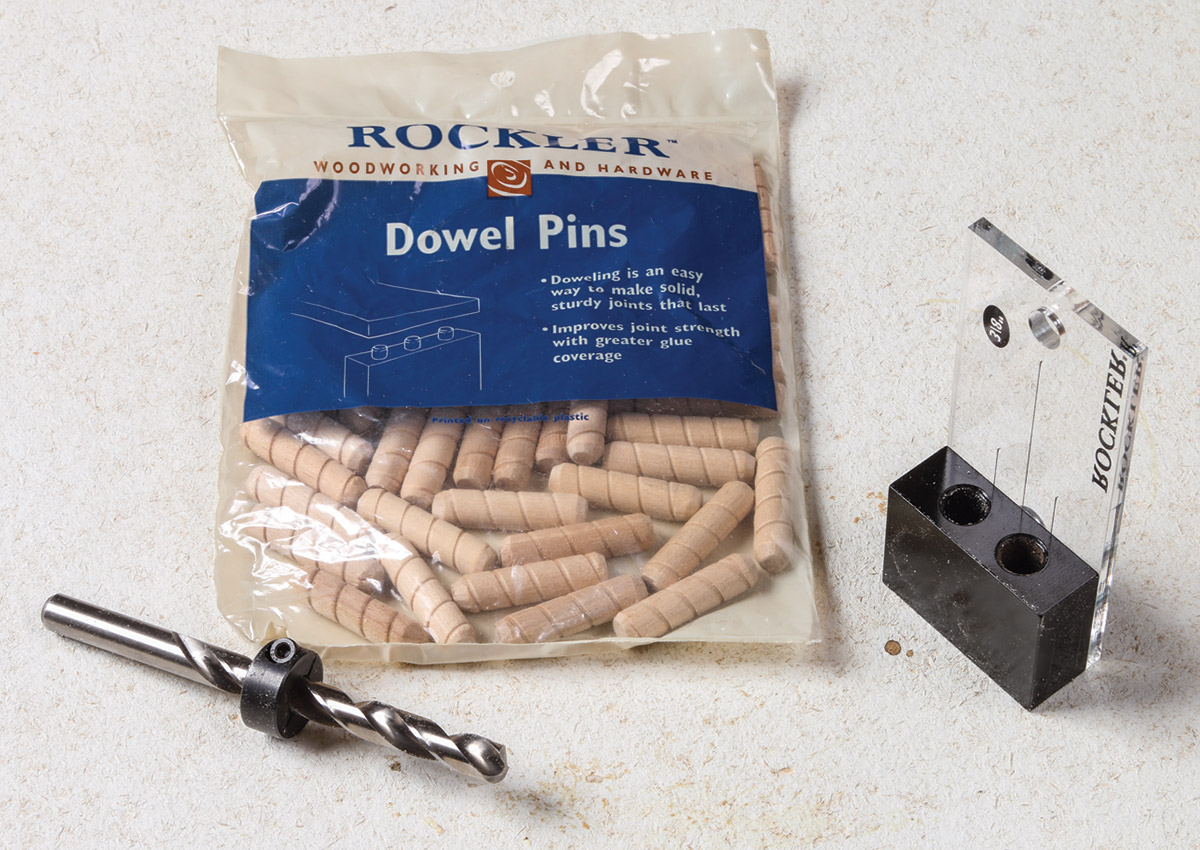
The jig comes with everything you need except the dowels, but Rockler sells bags of those too. You could also just buy 3/8-in.-dia. dowels at the hardware store or home center and chop those up as needed, but I find the thickness of those long dowels to be too variable, either too loose in the holes or too tight for easy assembly. The Rockler dowels are just right, plus they have chamfered tips so they insert easily and spiral slots that let air and extra glue escape when you push them in. The slots add some strength, too.
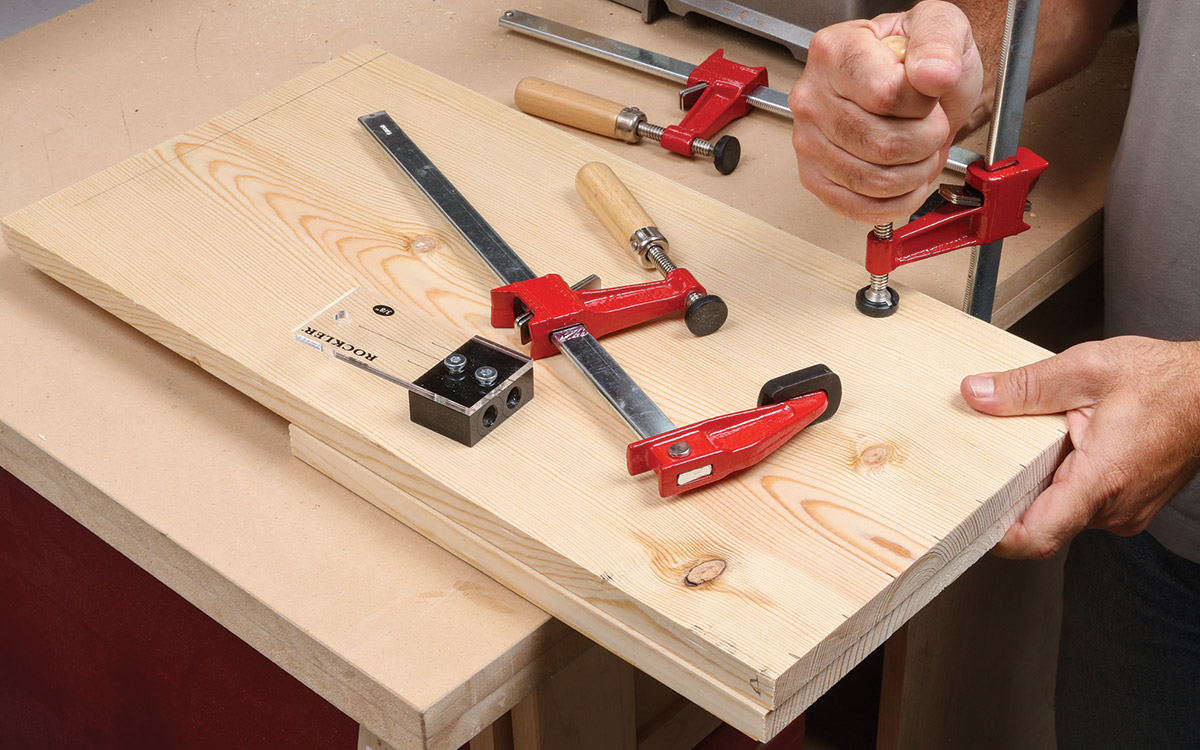
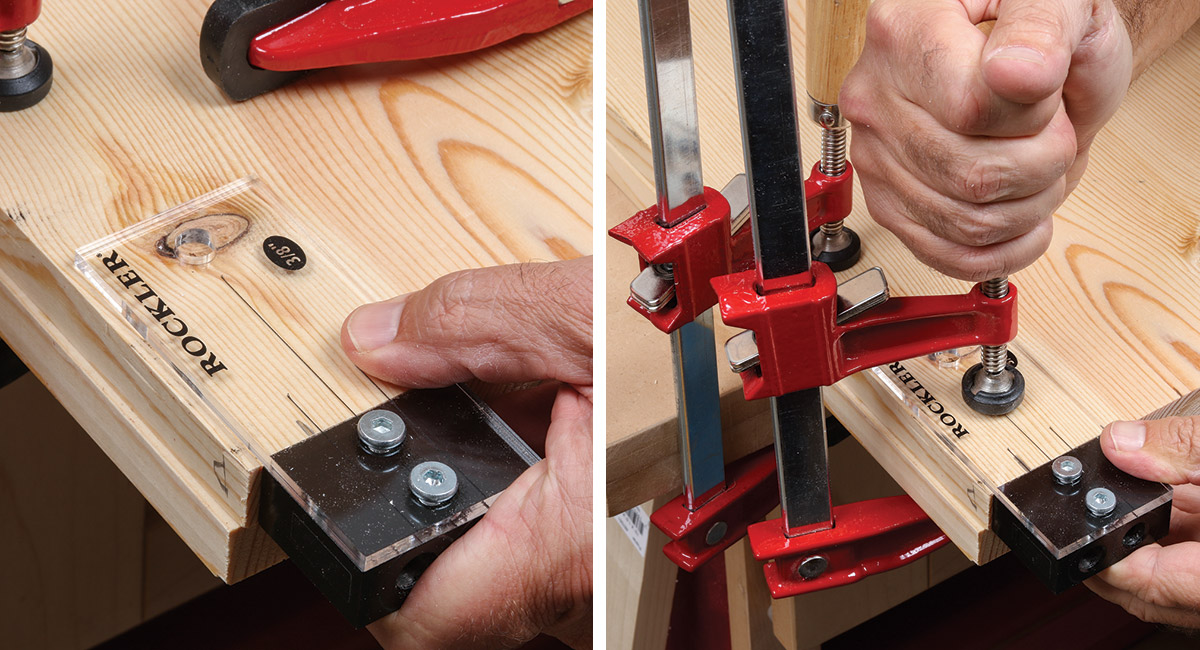
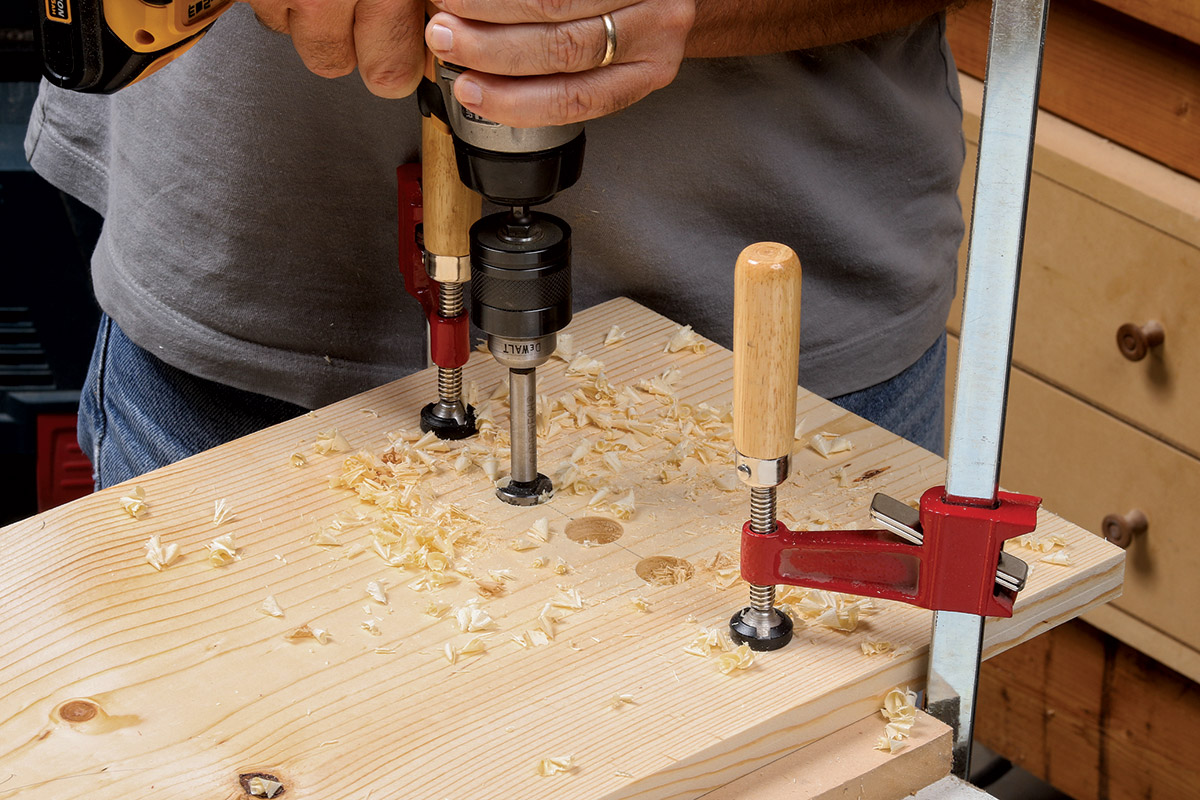
The Rockler jig is compact and aligns easily with a pencil mark on the wood, and it can be held in place with almost any type of woodworking clamp. After that, you put the supplied drill bit in your cordless drill, take it slow and steady, and you have a perfect hole in seconds flat. Align the jig with a matching pencil mark on the mating piece, drill a hole, and you have a joint.
Set up for success
There are just a few things you need to do before you start drilling.
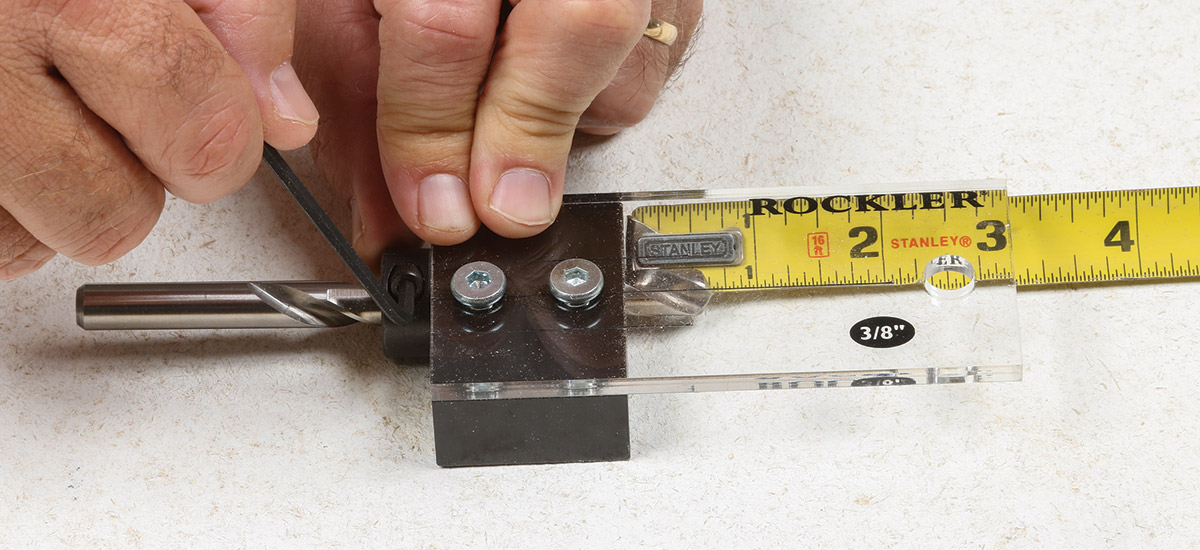
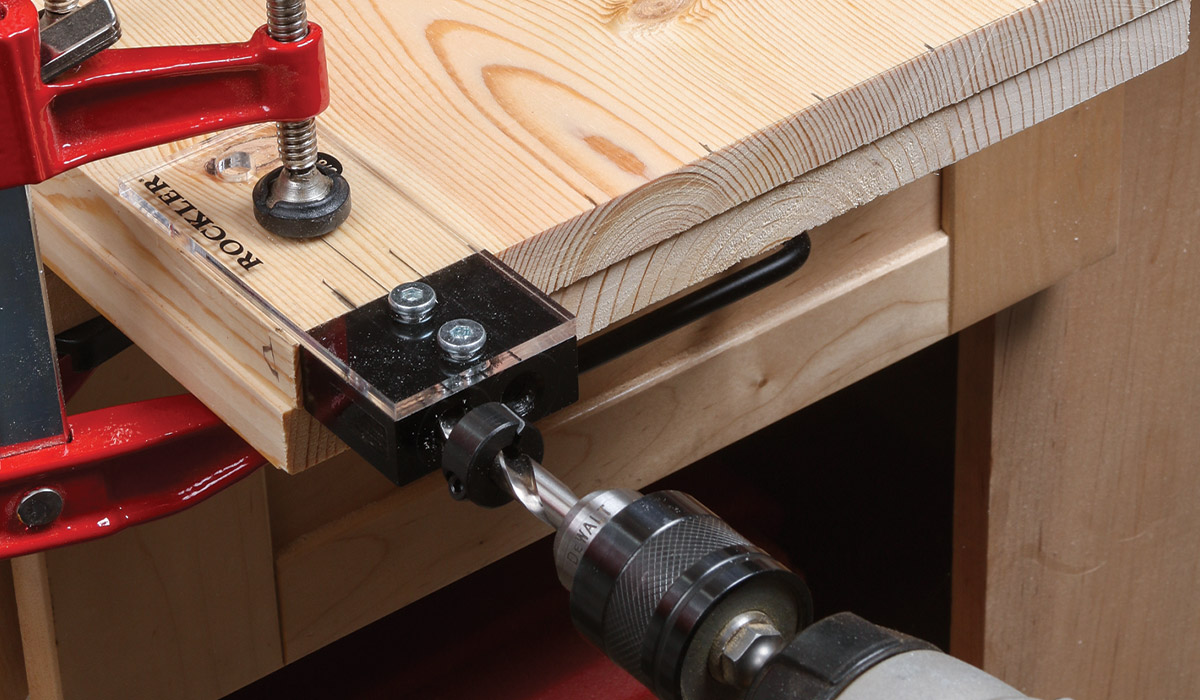
1. Set up the stop collar. We’ll drill dowel holes in the sides first, and those can’t be too deep or the 1-1/2-in.-long dowels won’t pop out the top of the table. So put the stop collar on the drill, insert the drill in the jig, and set the collar so the full diameter of the bit (not the very tip) sticks out only 1/2 in.
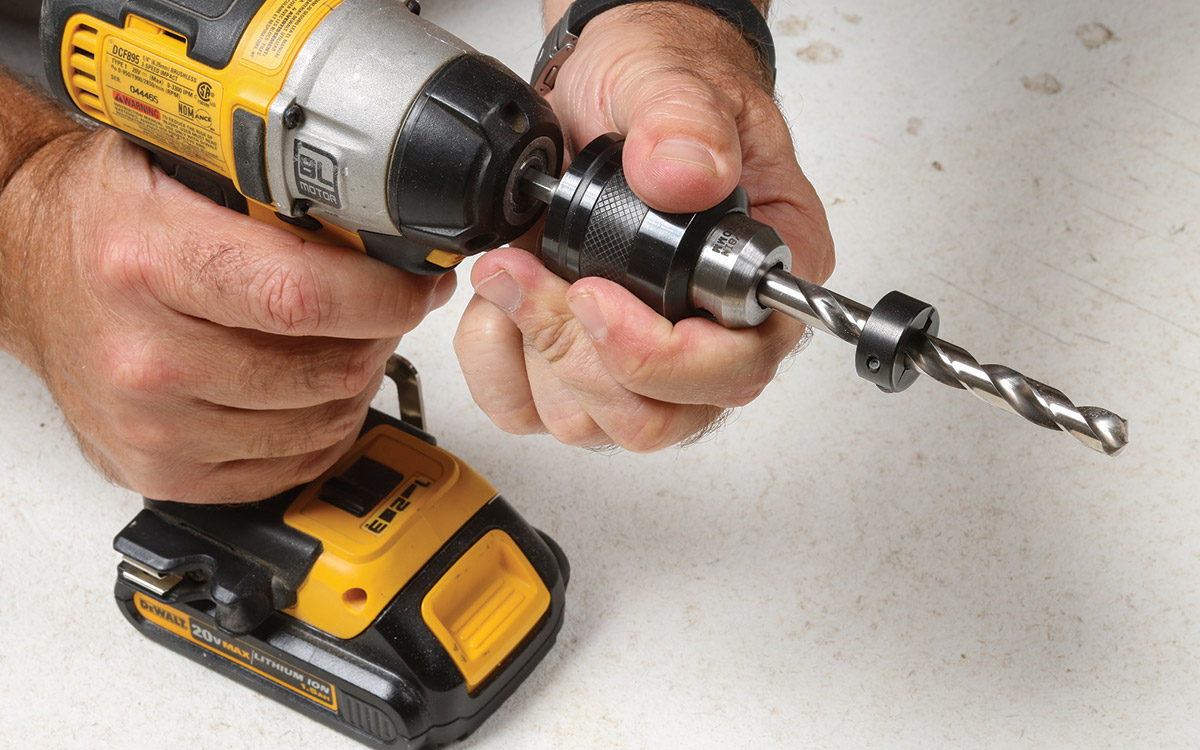
2. Bit goes in the chuck. My drill only accepts hex-shanked bits, so I need an auxiliary chuck to hold round drill bits like this one.
3. Clamp down the workpiece. Clamp one of the sides to your workstation. (You don’t need the extra board below it. I was a bit confused here.)
Drill the sides first
The sides get holes drilled into their ends. The key here is to drill to the right depth, so the right amount of dowel is sticking out.
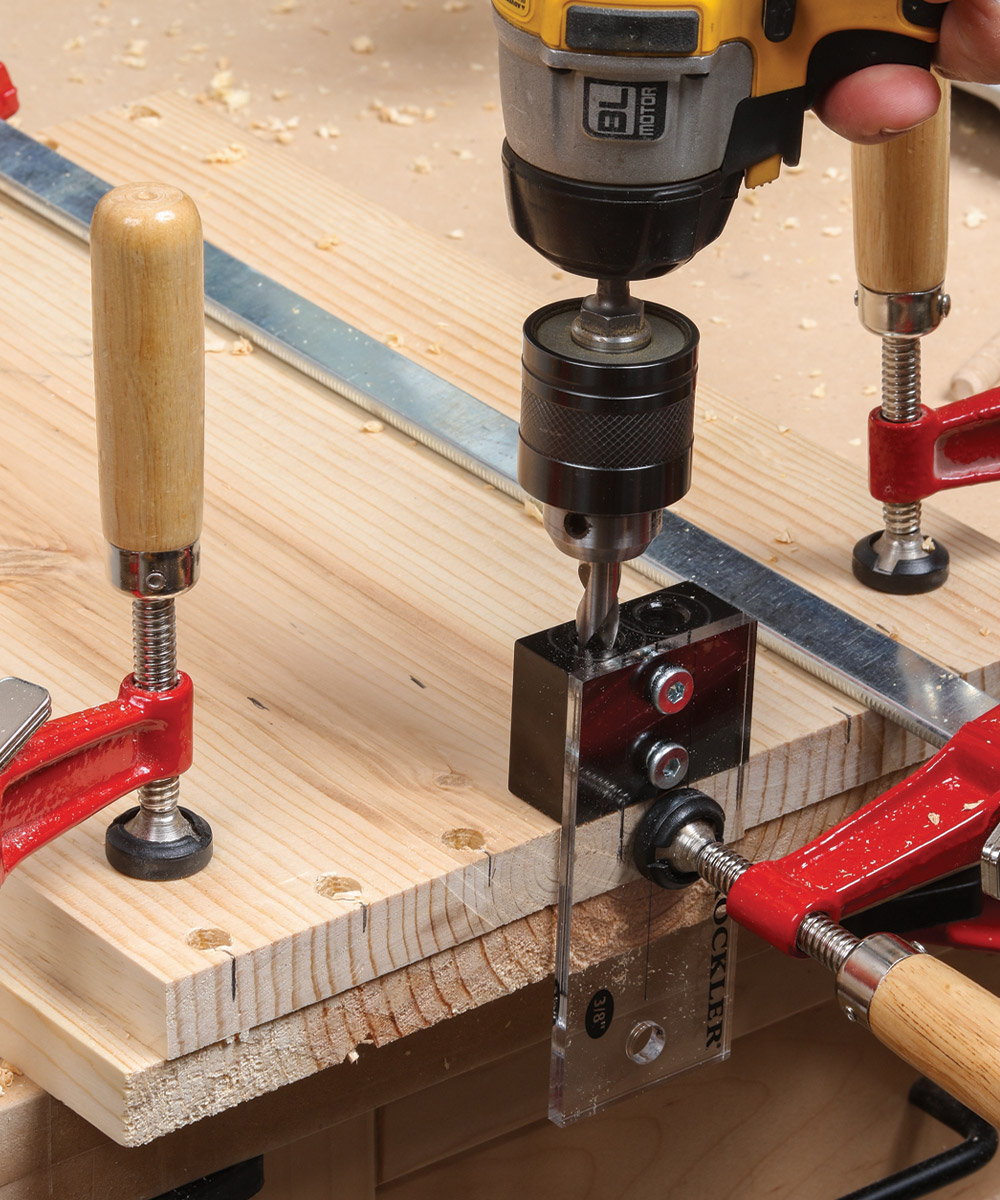
1. Easy alignment. There are three alignment marks on the dowel jig: one in the center (which you can ignore) and one on each side, lined up with one of the holes. To line up the jig, just pick one of the outside lines, line it up with a pencil mark on the workpiece, clamp the jig in place while pressing it tightly against the end of the board, and be sure to use that same hole when drilling.
2. Slow and steady. The drill might want to grab, so hold it firmly and drill steadily for a clean hole.
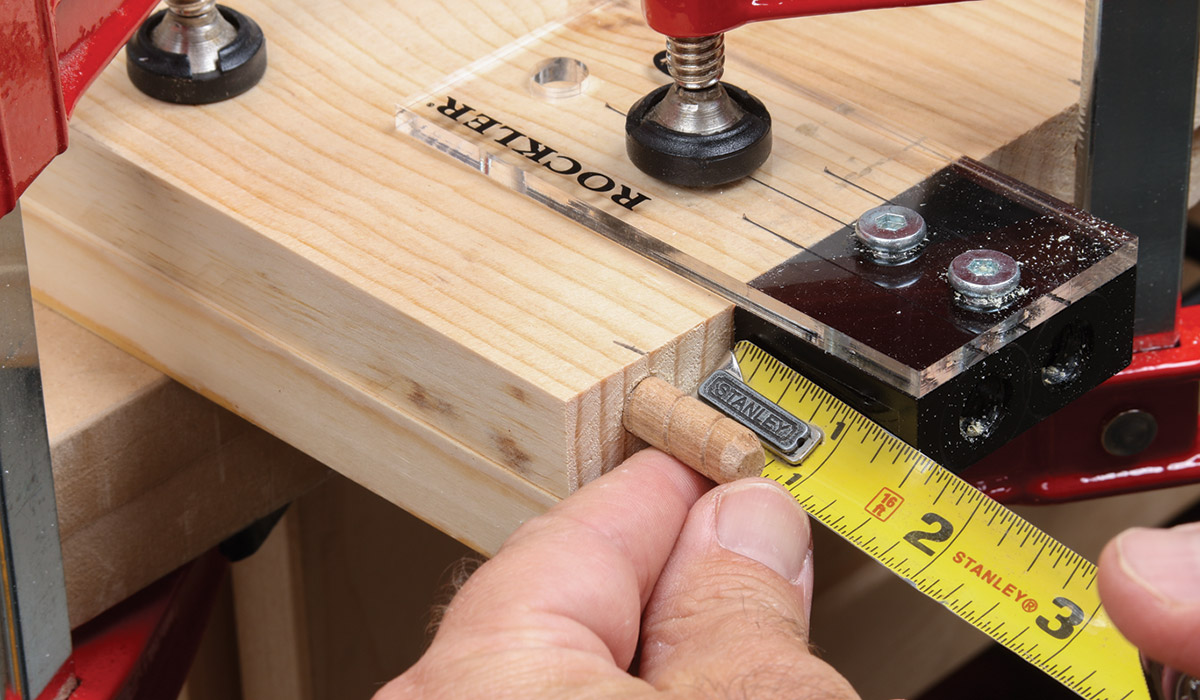
3. Check the depth. Insert a dowel and make sure enough is protruding to get through the top of the table with at least 1/8 in. sticking out. If the depth is wrong, reset the stop collar on the drill bit. Otherwise, continue drilling the rest of the holes.
Now drill the top
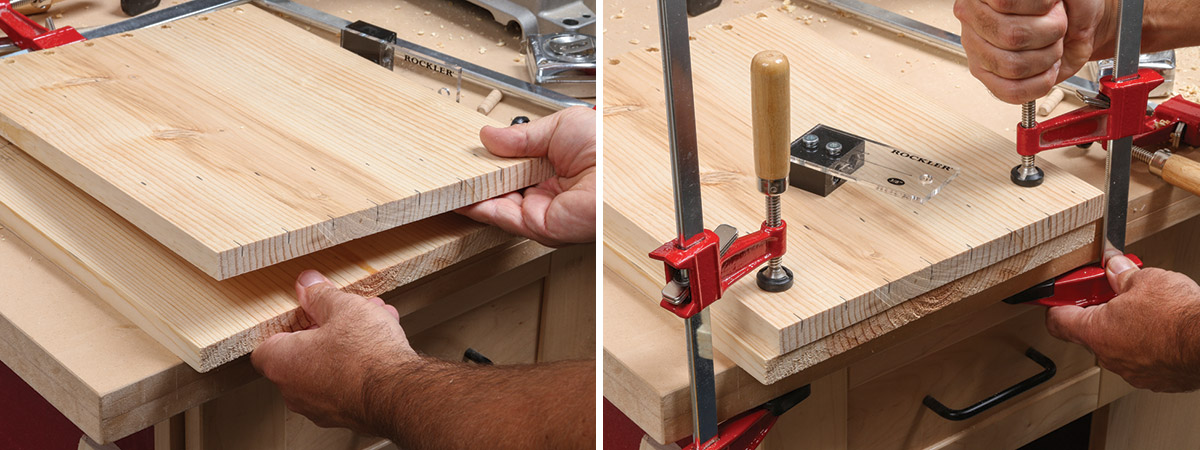
The holes go down through the edges of the top and out the bottom side, so you don’t need the stop collar on the drill bit, but you do need the scrap board underneath, which will stop the underside of the dowel holes from splintering.
1. Get ready. Place the scrap board below the real workpiece. Note that I’ve wrapped the layout marks around onto the end grain, where I’ll be able to see them when the jig is in place. When clamping down the boards, make sure the workpiece sticks out a bit farther than the scrap below it, so the jig can align correctly.
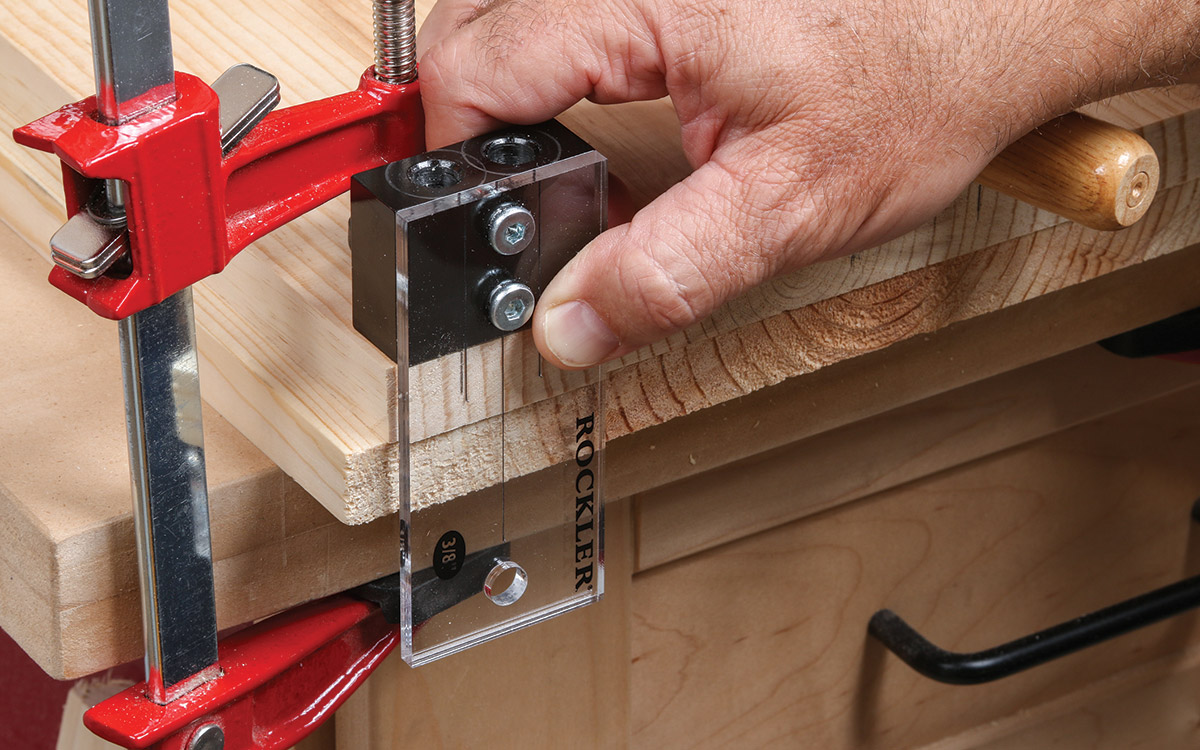
2. Go vertical. The jig goes upright to drill these holes. You can see why I had to wrap the layout marks onto the end grain.
3. Clamp the dowel jig in place and drill. Move the jig along as before, realigning and reclamping as you go, to drill another perfect row of holes. If you are getting a lot of blowout around the holes, try switching to a brad-point-type bit of the same size. Brad-point bits are available online.
Drill the sides for the spindles
The 1-in. spindles will have 7/8-in.-dia. tenons on their ends. Drill holes for those tenons now.
 |
 |
 |
1. Layout is simple. Using the “Dowel Spacing” drawing, mark the location of the holes measuring from the bottom edge of the sides, and square a line across. Then mark the spacing of the holes along that line, starting by finding the center and then spacing the outside holes away from that mark.
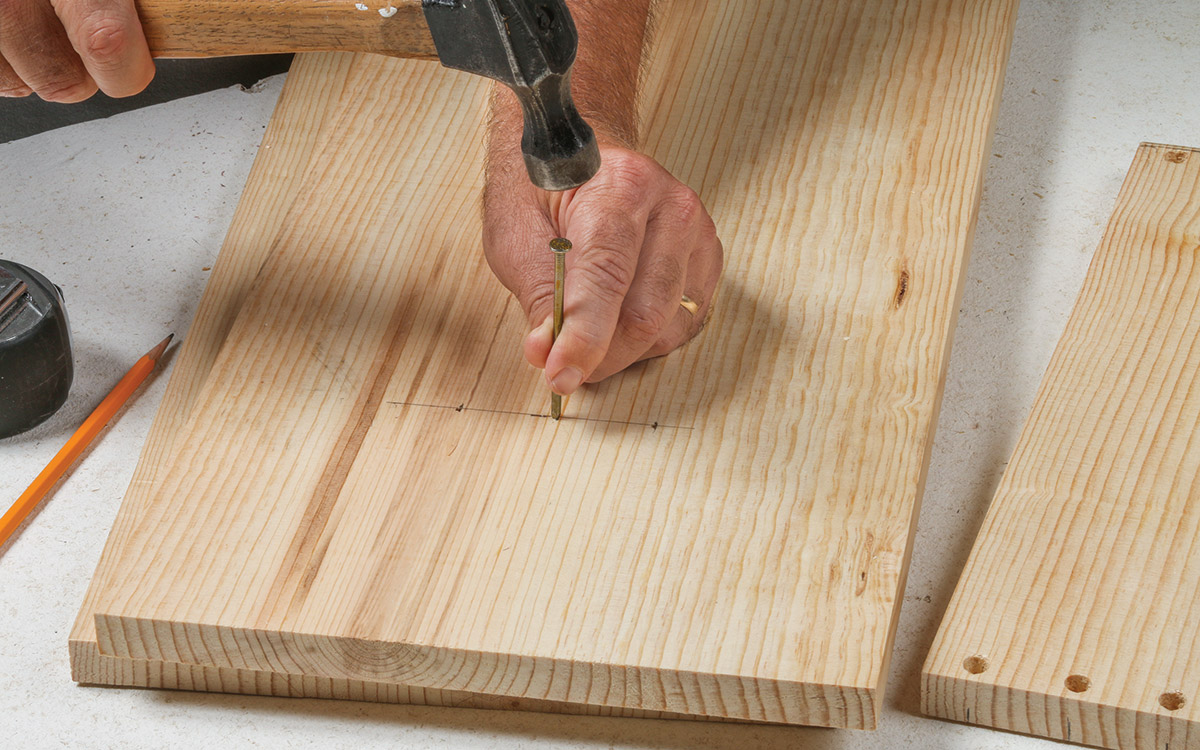
2. The nail trick. To make a shallow dent at the center of each hole for accurate drilling, just use a big nail.
3. Smooth drilling with a Forstner bit. The Forstner bit will follow the dent you made with the nail, but be sure to keep the bit vertical and square to the workpiece for an accurate hole. Also, you need another scrap board clamped underneath to prevent splintering on the bottom side.
Get ready to make tenons
To form tenons on the ends of the spindles, we need to cut the spindles to length and make a V block as shown.
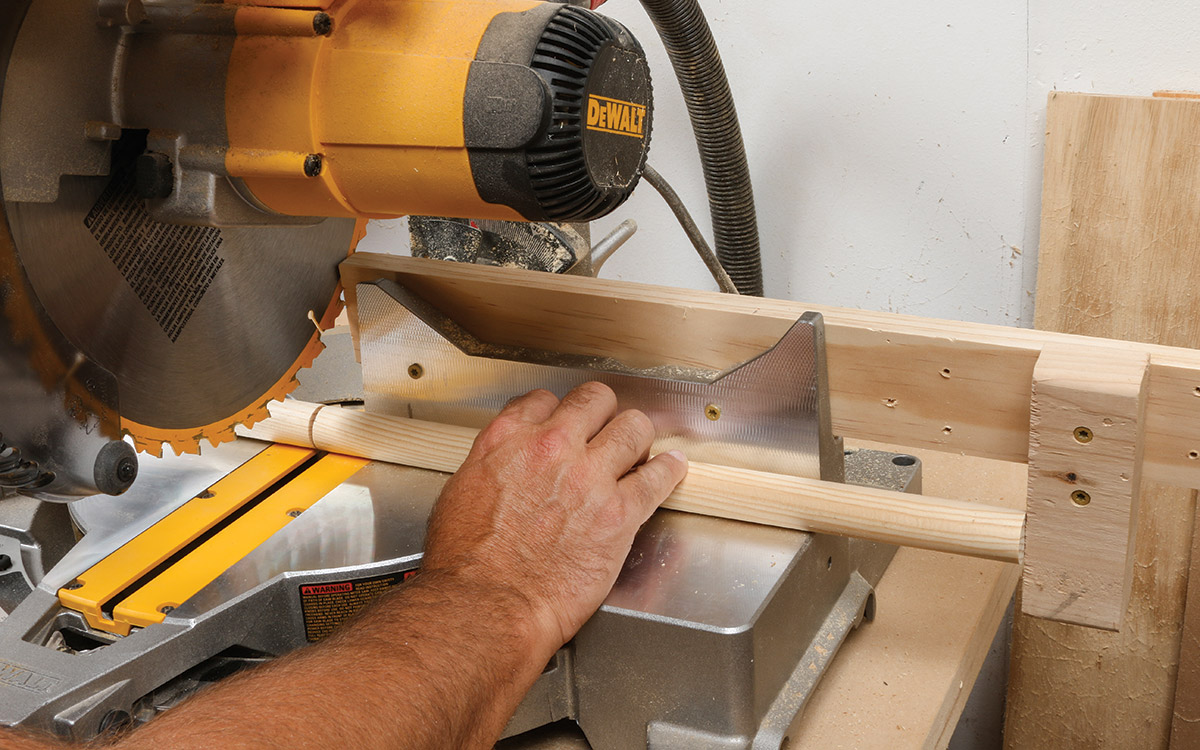
1. Precise lengths. In order to have the right distance from tenon to tenon on all three spindles, they all need to start at the exact same length. So use a stop block on the miter saw to ensure matching workpieces.
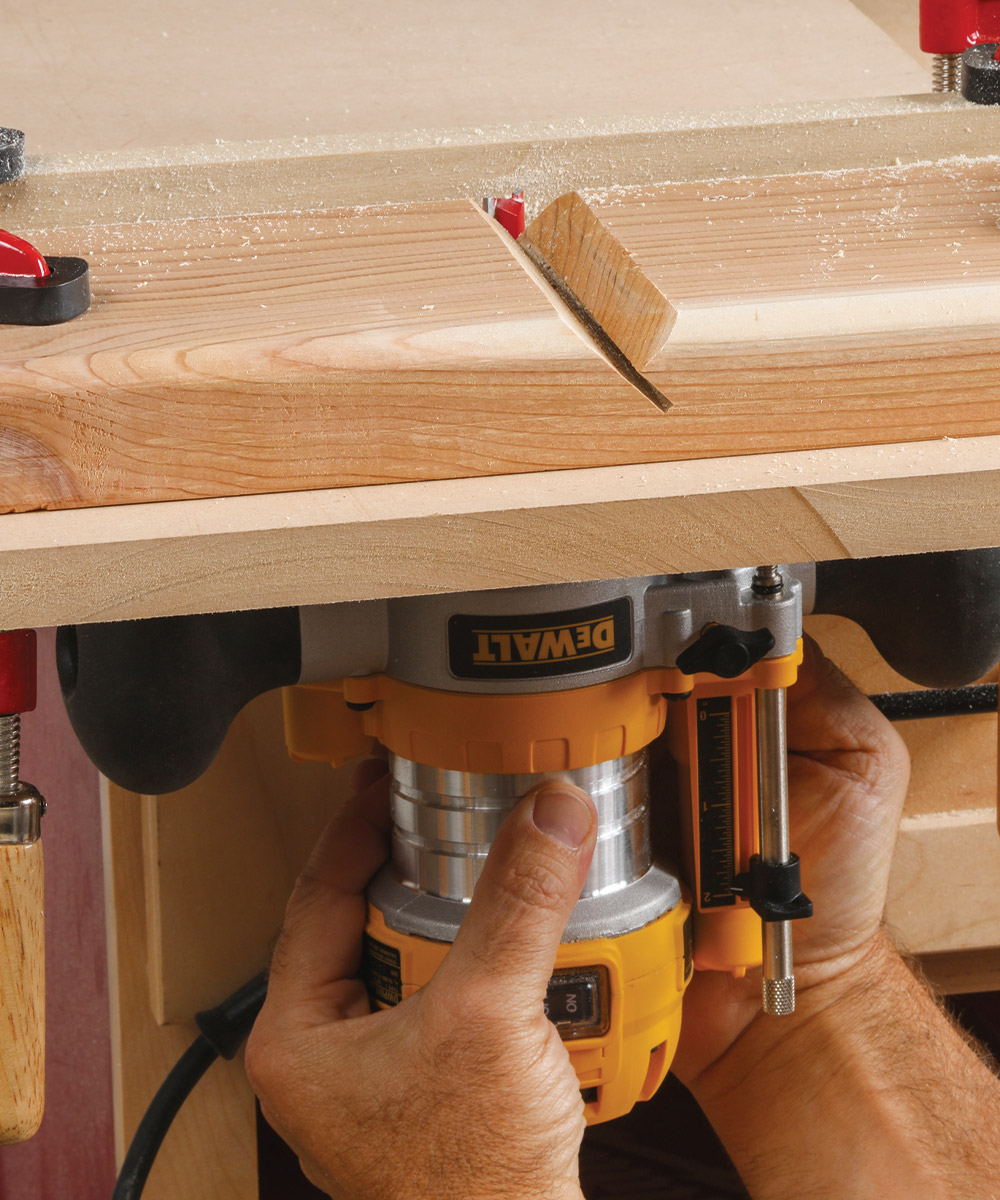
2. Make a V block. You’ll need a board about 1-1/2 in. thick or thicker to do this, and the width should be about 5 in. or 6 in. (A scrap from the outdoor bench projects works perfectly.) Make a 45-degree cut partway through the board. Then reverse it and do the same in the other direction, until a small V-shaped scrap pops loose. Shoot for a V about the size of the one shown here.
Make a router table
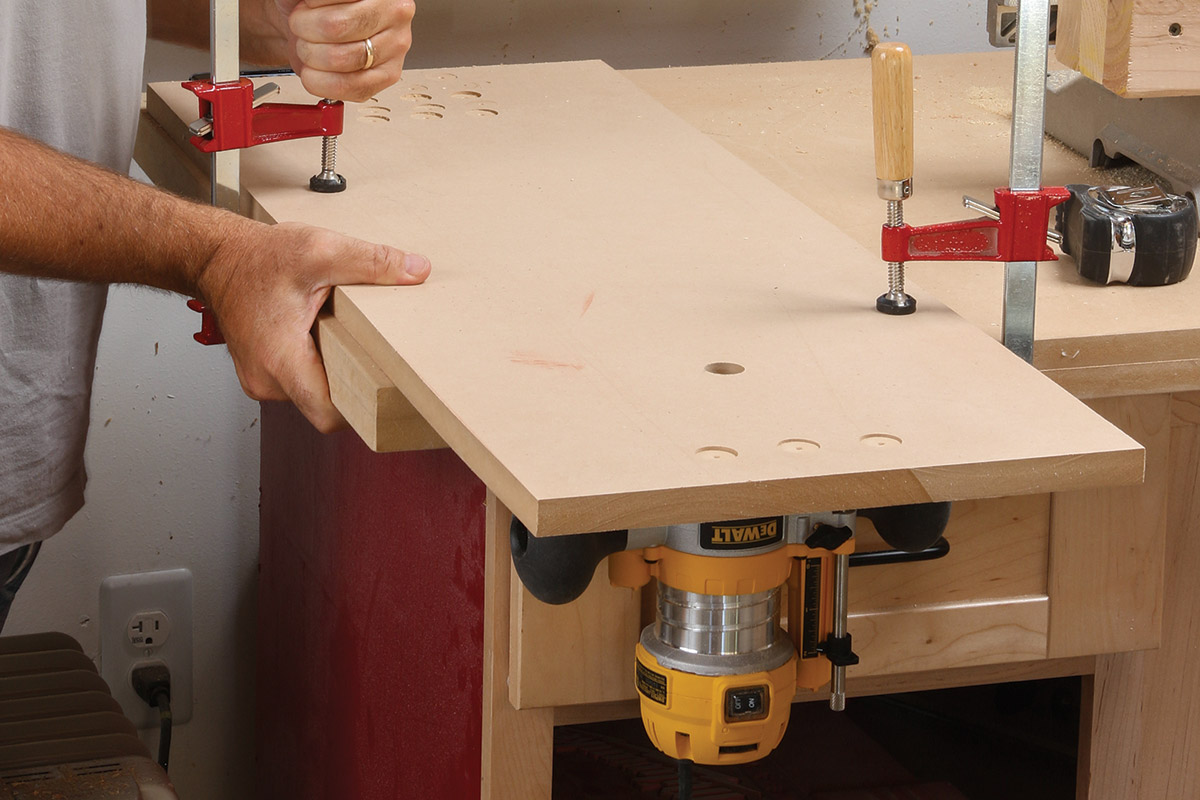
To form those tenons, there are a few more set-up steps. You’ll need to make a basic router table, but that’s nothing more than a piece of plywood or MDF at least 12 in. by 18 in., with the router screwed on from below.
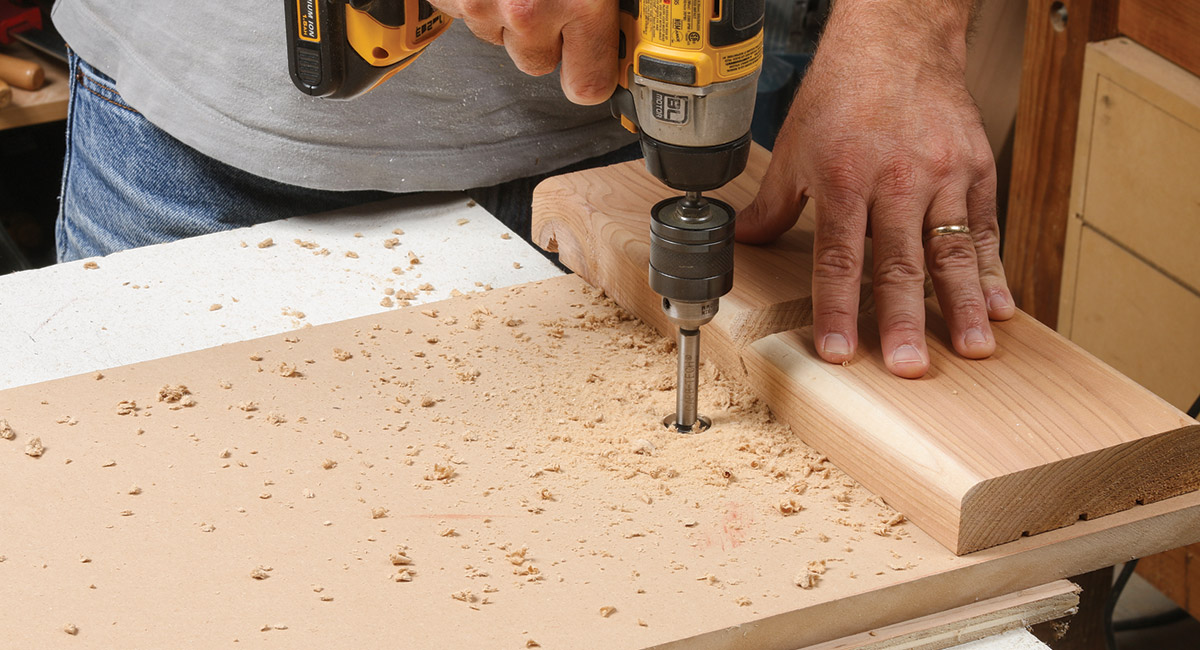
1. Drill a hole for the bit and chuck. Pick a Forstner bit that’s a little bigger than the chuck in your router, and drill through your plywood or MDF panel. To drill in the right location, put the V block near the end of the panel and drill right next to it. Note the scrap piece below, to prevent blowout on the backside.
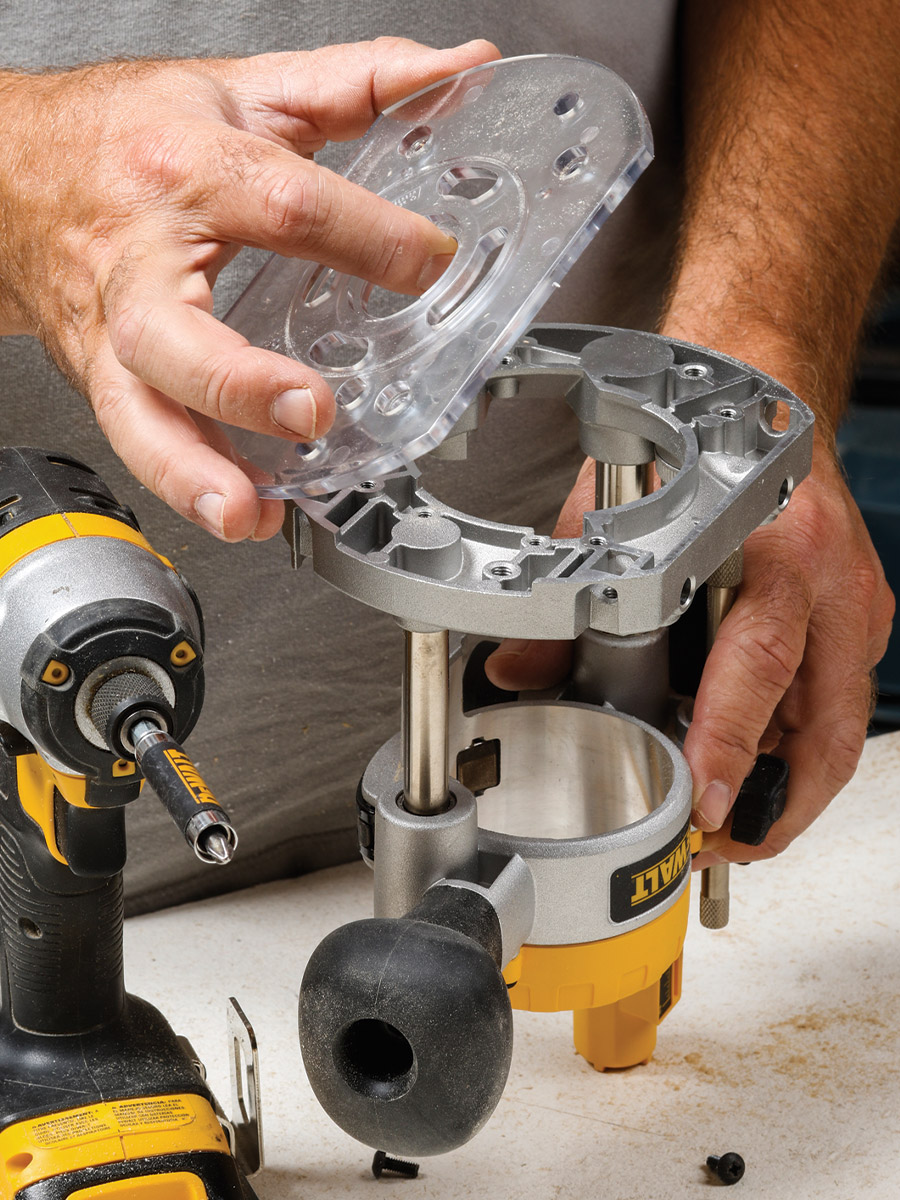
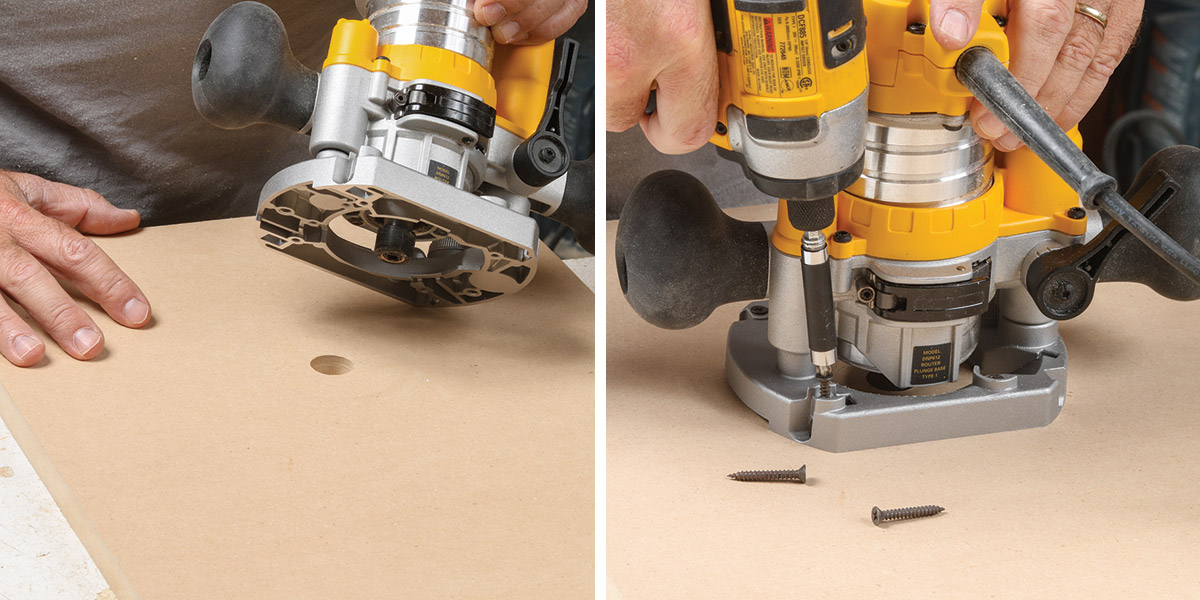
2. Remove the base plate. Before screwing the router base to the bottom of the makeshift router table, I removed the plastic base plate to get the bit to rise as high as possible above it.
3. Screw down the router. The chuck goes in the hole you drilled. Then you just use whatever holes are available in the base to screw it to the panel.
4. Clamp down the table. Just clamp the panel to the top of your workbench or worktable, and you’ve got a router table.
Turn the router table into tenoning jig
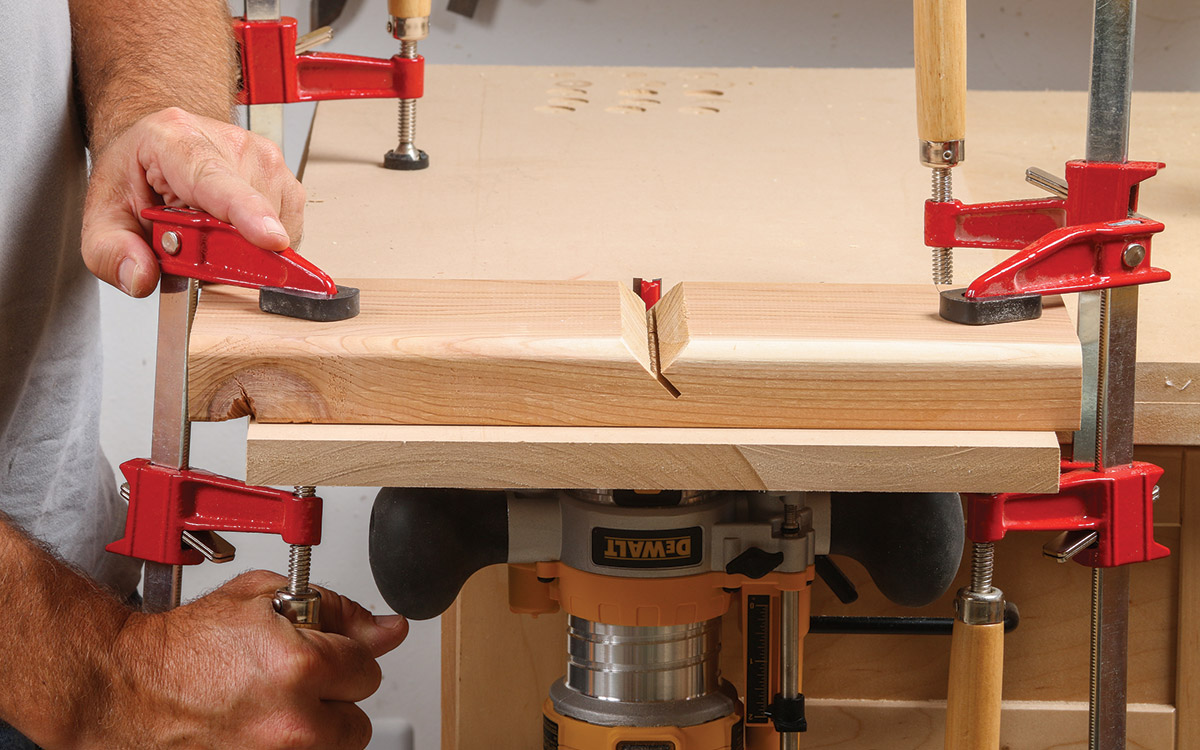
Next we need to add the V block and a simple fence to act as a stop.
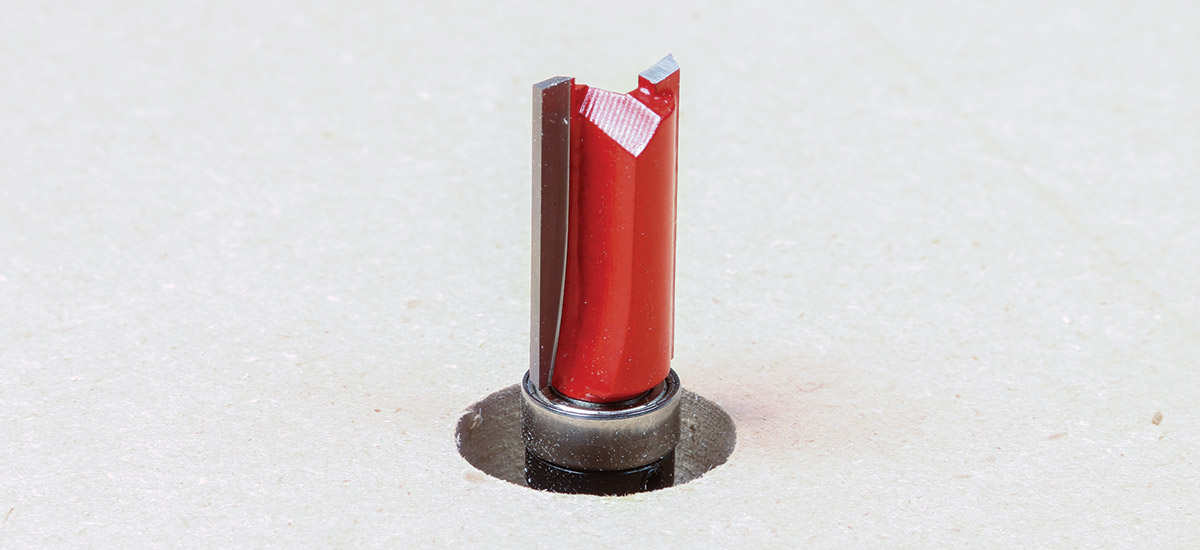
1. Any straight router bit will do. This one has a bearing on its base, but we don’t need that. You will need to adjust the router for maximum extension though, and pick a pretty long bit in order to reach the dowel in its V block.
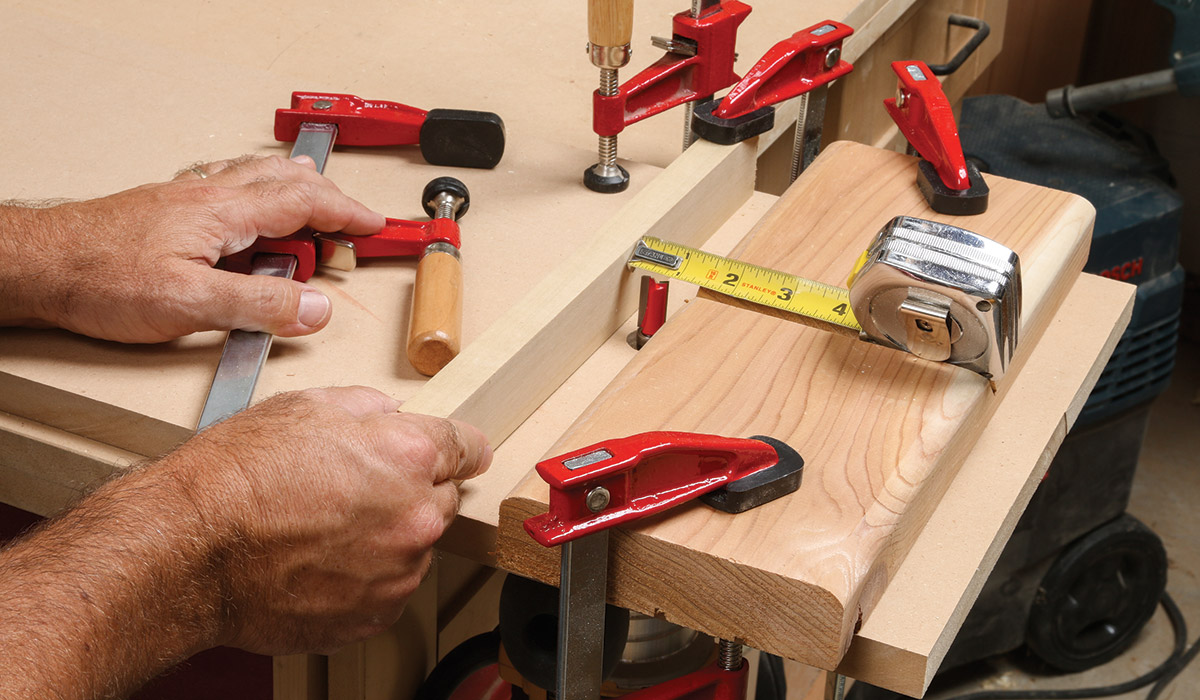
2. Line up the V block. The block goes at the front of the table but close to the bit, with the V lined up with the center of the bit as shown.
3. Adjust the fence. Clamp any small board to the table to create a simple fence. If you cut your spindles to exactly 15-1/2 in., you can adjust the fence so it is 1 in. from the inside edge of the router bit to create a 1-in.-long tenon on each end of the spindles. That will leave 13-1/2 in. between the tenons, which is the distance between the table sides.
A Jig for Round Tenons
The big challenge on this design was figuring out a way to form tenons on the ends of the three 1-in. dowels that form the spindles. In general, a tenon is cut a little narrower than the rest of its workpiece, creating a hard shoulder where the tenon starts. And that’s exactly what I needed here. If you just drilled a hole the same size as the dowels and stuck them through the sides, there would be nothing to stop those sides from collapsing inward under pressure, basically sliding inward along the dowel.
I needed a real tenon, with a square shoulder to bump up against the sides, stopping them in their tracks. As for stopping the sides from pulling outward, I had an easy plan: wedges driven into the ends (see below).
To make a tenon on a round part, a furniture maker would normally mount the spindle in a lathe and “turn” the tenon, forming the shoulder at the same time. Another good alternative is the Veritas Power Tenon Cutter that you can buy from www.LeeValley.com, which mounts in your drill. Those work great but are a little pricey. So I kept on brainstorming.
The thing about woodworking problems is that they are hardly ever unique. In other words, someone has faced down the same challenge sometime in the past. That’s why the most popular department in Fine Woodworking magazine is the tips section. Everyone loves the bite-size servings of workshop genius. And one of those tips came back to me in my time of need.
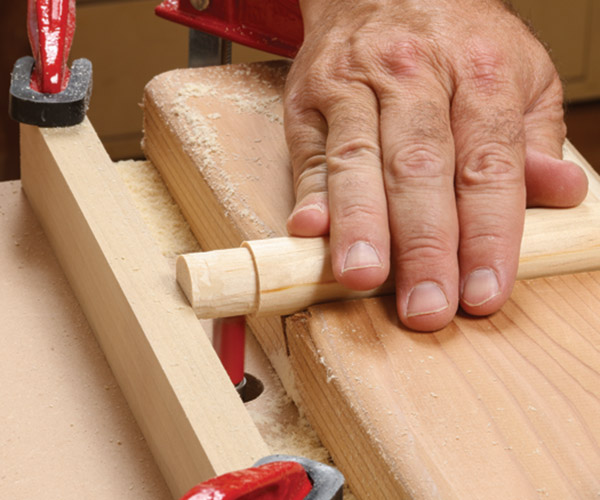
By using the miter saw to create a deep V in a thick piece of wood and mounting our small router under an improvised table, I created a lathe of sorts. The square router bit sticks up and the dowel goes in the V block. If you raise the bit just enough and spin the dowel by hand as you advance it over the bit, a perfect tenon is formed on the end. No lathe, no problem.
Let’s make tenons!
You’ve laid the groundwork and the rest is easy—and fun.
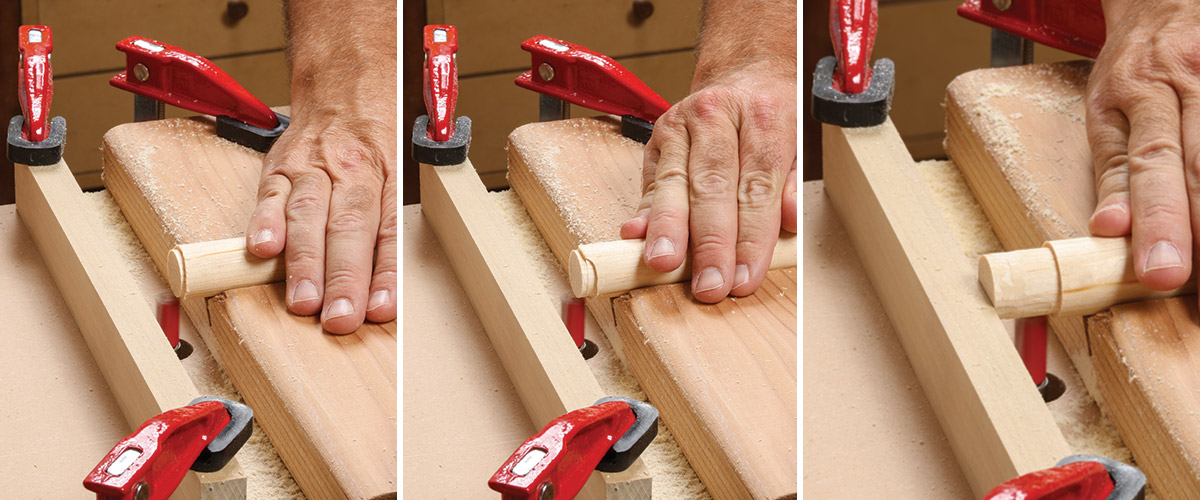
1. Adjust the height. You are removing only 1/16 in. of wood on all sides to turn this 1-in. dowel into a 7/8-in. tenon, so set the bit height for just a small nibble at first.
2. Slide and spin. Rotate the dowel as you steadily let it slide forward. When it hits the fence, make a full rotation for a clean shoulder. The tenon will be bumpy at this point, so slide it straight forward and back, rotating it between plunges, to remove the bumps.
3. Test the fit. Use the holes you drilled to check the tenon diameter. Adjust the router height until the tenon slips easily into its hole, and you can leave it right there for the rest of the tenons. Routers all have a clamp that locks the height—be sure to use it!
4. Check the distance. You are shooting for 13-1/2 in. between the tenon shoulders. If you need to adjust the fence, mark its initial location with pencil lines. Then you’ll know how far you are moving it. When the tenon lengths are nailed, rout all the rest of the tenons. Then pause to reflect on your genius.
Slot the tenons for wedges
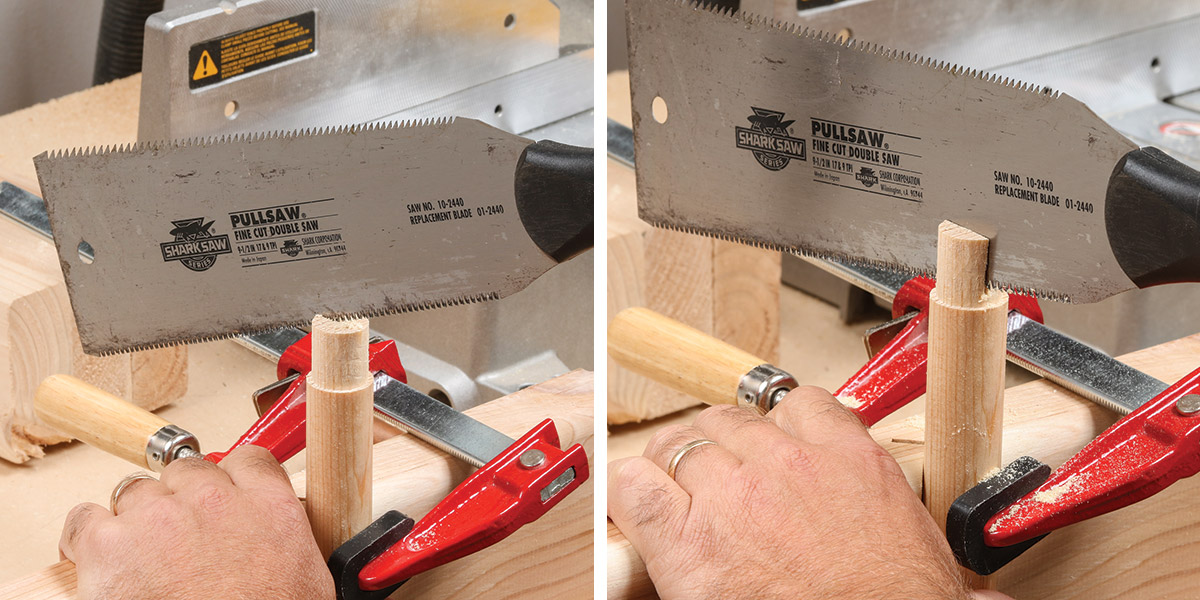
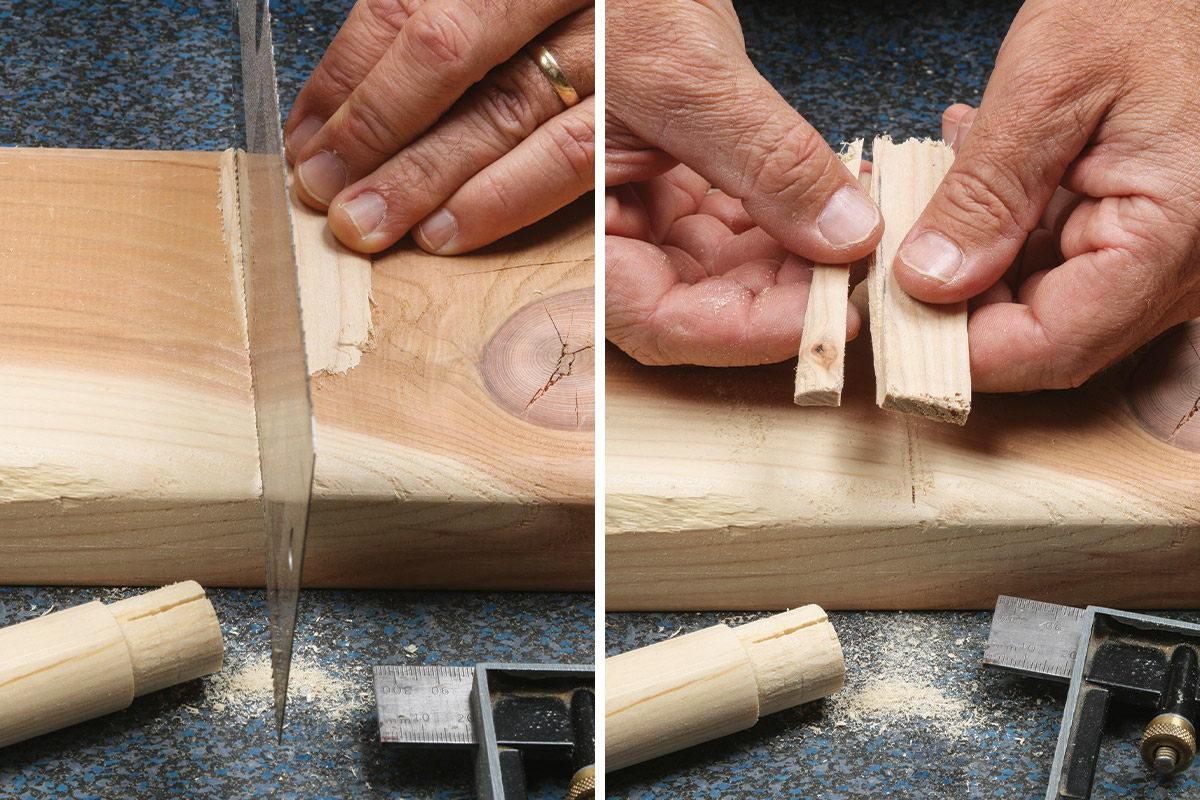
By hand-sawing a slot into the end of each tenon before inserting it, you can bang a wood wedge into the end after it’s assembled, locking it in place forever. This also means your tenon doesn’t have to fit its hole perfectly. The wedging action will spread the tip and fill any gaps. I used an inexpensive pull saw to saw the skinny slots, though the jigsaw would also work. Every home center sells a $20 double-edge pull saw like the one shown. Use the finer side for most jobs.
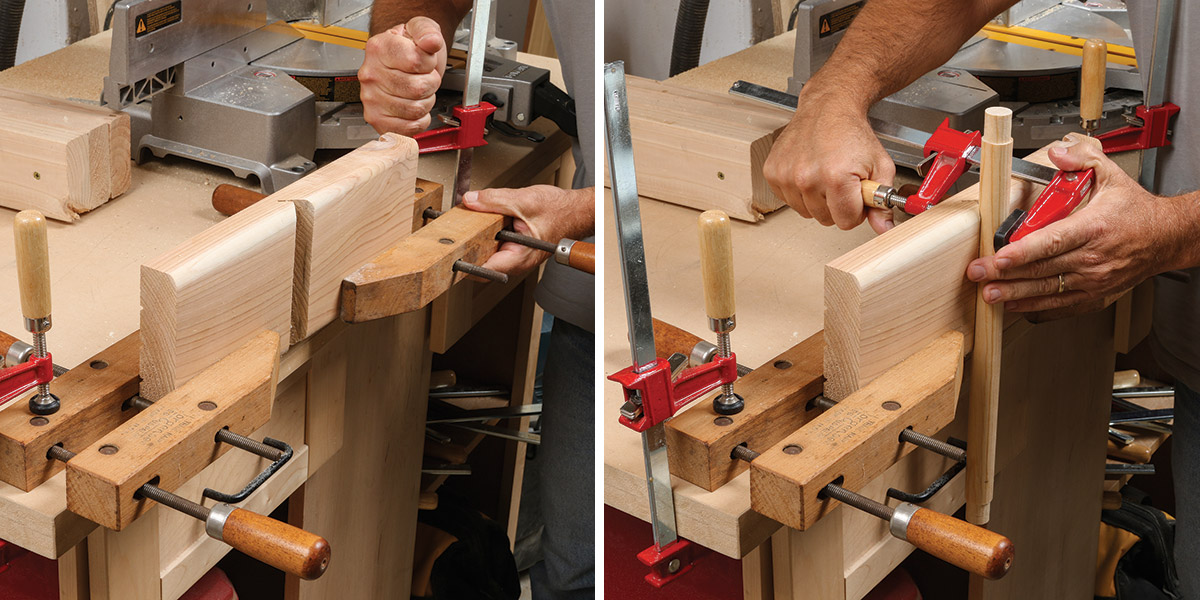
1. V block strikes again. To saw the slots, you need to hold the spindles vertically. Your V block works great for that. Clamp it between some wood hand screws, and clamp those down to the benchtop. Then one clamp holds the spindle in place.
2. Eyeball the cut. Pull saws cut as you pull, not push, so apply pressure only on the pull stroke. Just divide the tenon by eye, slotting it down the middle. Start at one corner, then level out the saw as you cut straight downward, stopping just before the shoulder.
Wedges on the miter saw
The miter saw makes short work of these little wedges, which are 7/8 in. wide, like the tenons.
1. Use a 2×4 or 2×6. With the blade set at 90 degrees, cut a chunk off the end of construction lumber like this 2×6.
2. Angle the blade. Five degrees makes perfect wedges.
3. Turn the block and cut wedges. Turn the workpiece so the end grain is against the fence and cut a small slice off one corner. Then flip the block and do the same thing at the other three corners.
4. 10 makes 5. After using all four corners of the block, you can pivot the saw to 10 degrees to cut more 5-degree wedges off the same four corners.
5. Cut and snap. Use your handsaw to cut mostly through the wedge, then snap off the waste piece. Cut both sides straight, shooting for the 7/8-in. width.
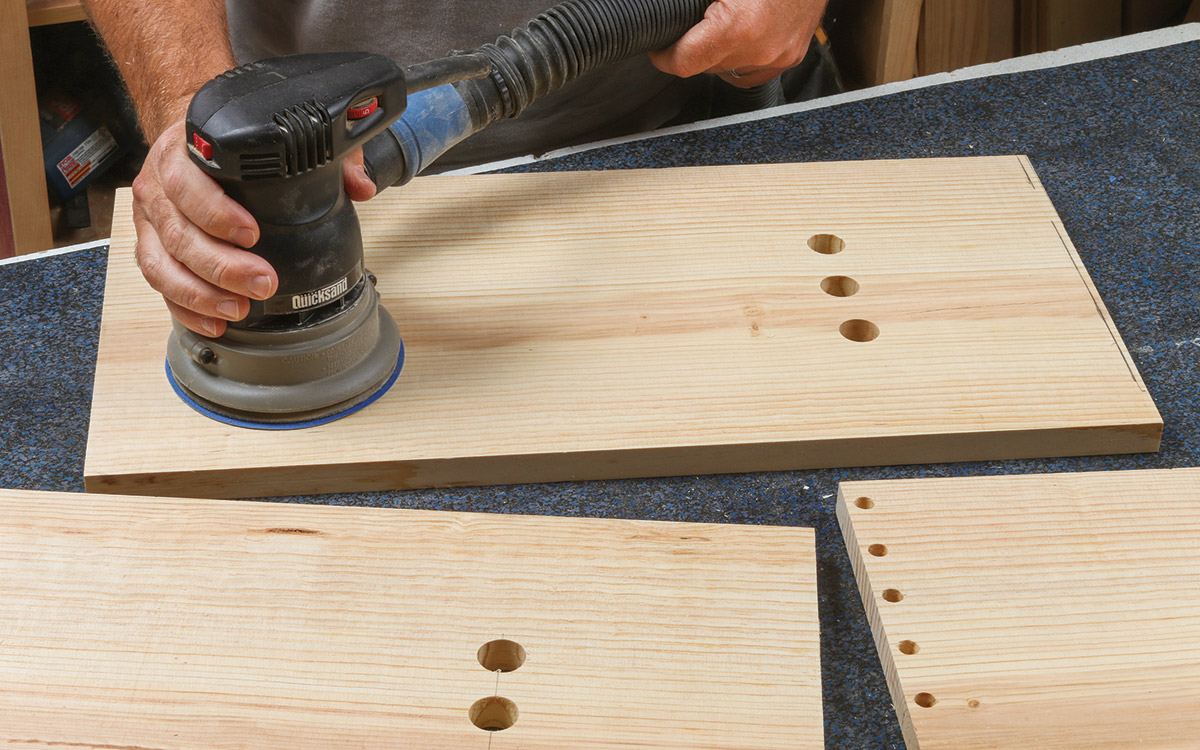
6. Prep for assembly. It’s easier to sand the pieces flat and smooth now than later, especially the inside surfaces, so do that now, by power or hand. Go up to 220-grit here.
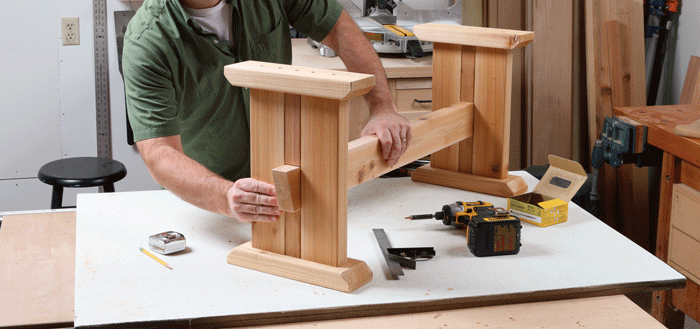
7. Dry run. Put the whole table together without glue to be sure it all works and you have the clamps you need. Note that you need to elevate the assembly to let the tenons pass through, and you need only a few dowels in the ends right now.
Spindles go in first
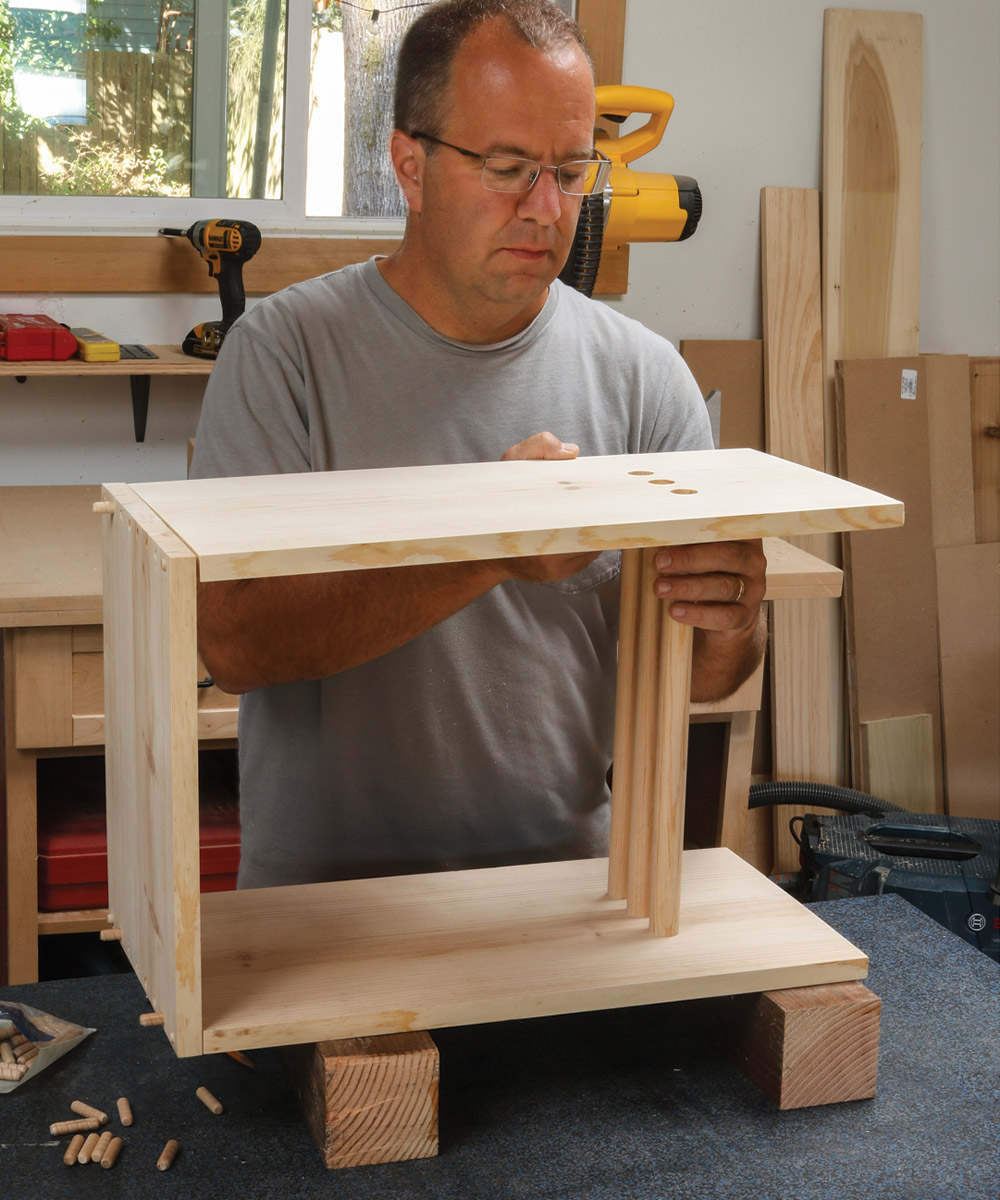
The keys to success with this glue-up are using Titebond III, which gives you more working time before it starts drying, and doing the assembly in the right order. Stage one is inserting the spindles and wedging them in place.
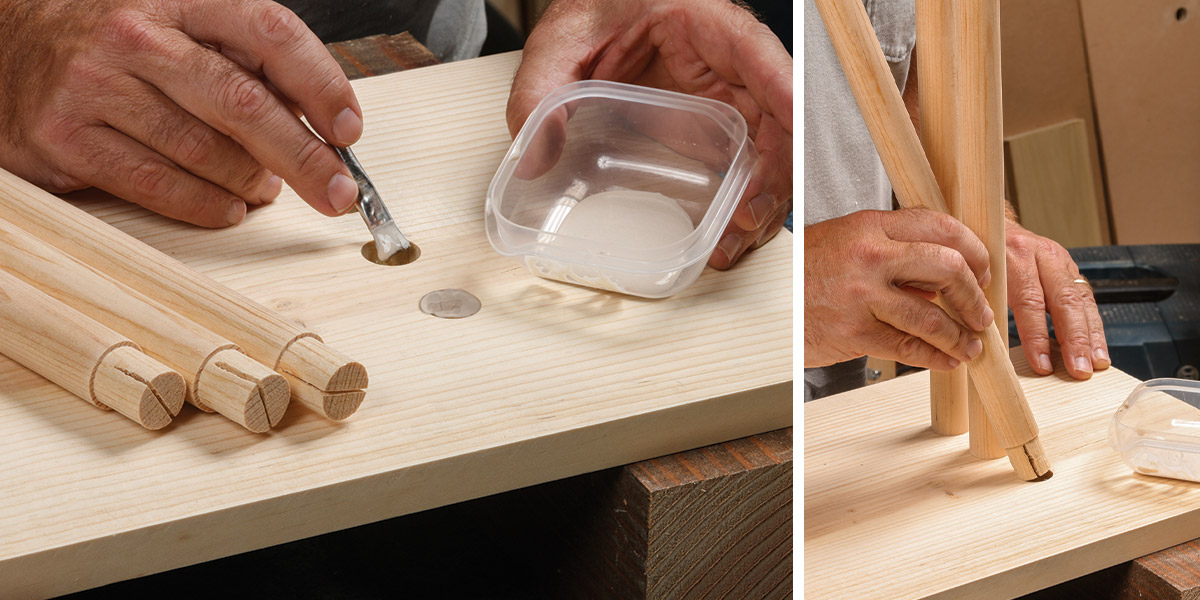
1. Spindles first. Put the glue in a dish of some kind and brush a liberal coat onto the insides of the holes. Then insert one end of each spindle.
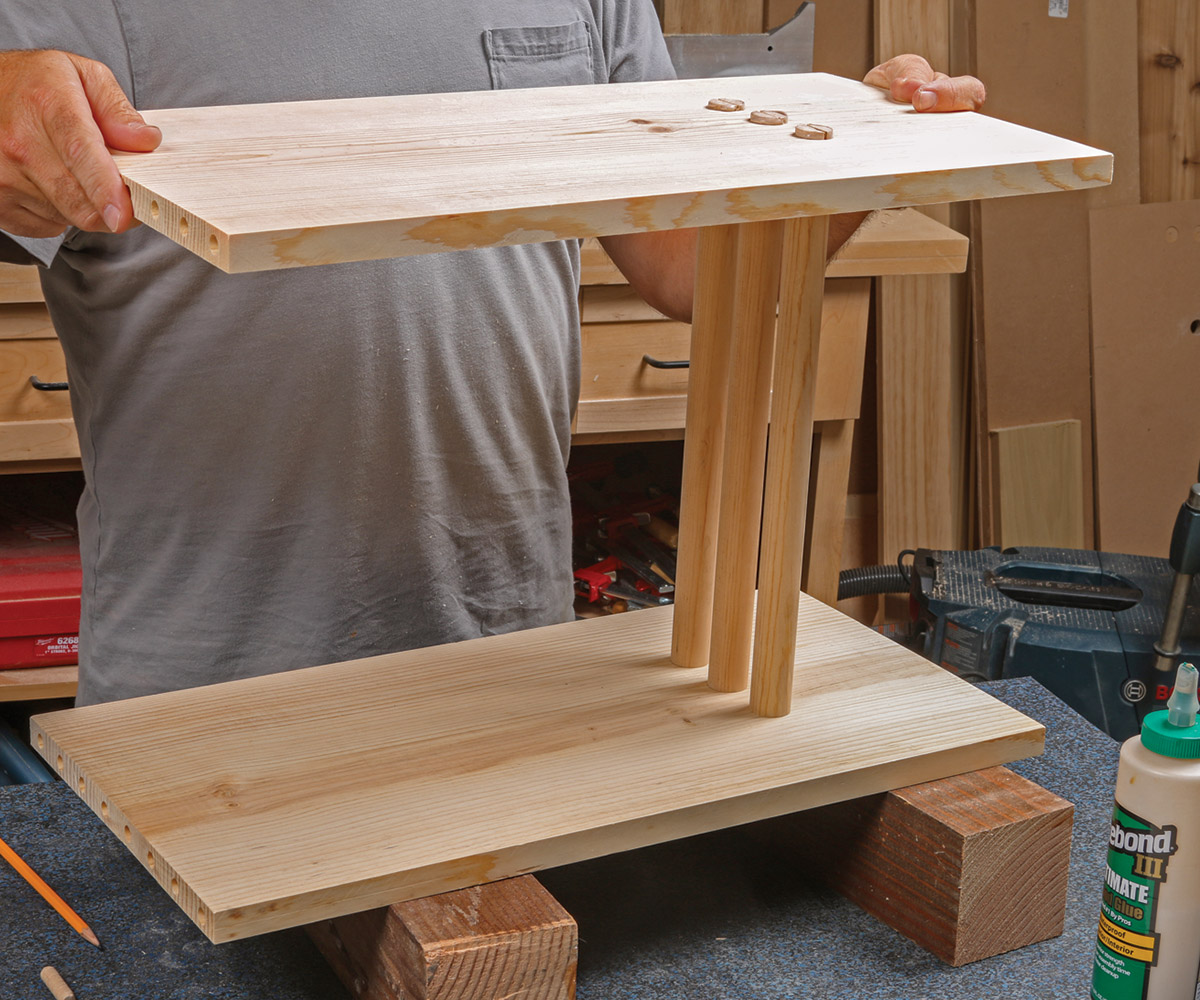
2. Now the other side. Put glue in the other holes and then wiggle the spindles around to get the opposite side of the table to drop onto the tenons.
3. Clamp carefully. Use clamps to make sure the tenons are fully seated, with no gaps at the inside shoulders. Then use a couple of dowels to put the tabletop in place temporarily. If the sides seem misaligned at all, twist them by hand to straighten them out.
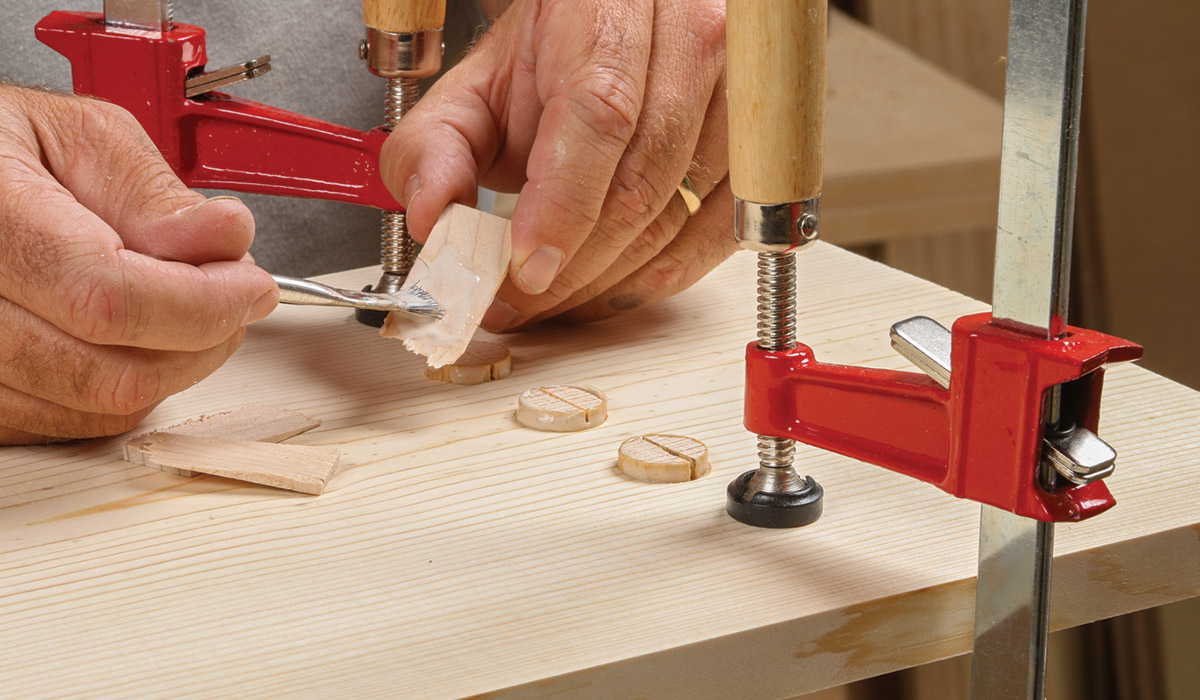
4. Align the slots and glue the wedges. Note that the slots are all horizontal. That is important. If they went the other way, in line with the grain in the sides, the wedging action could split those boards! Brush some glue onto the sides of the wedges.
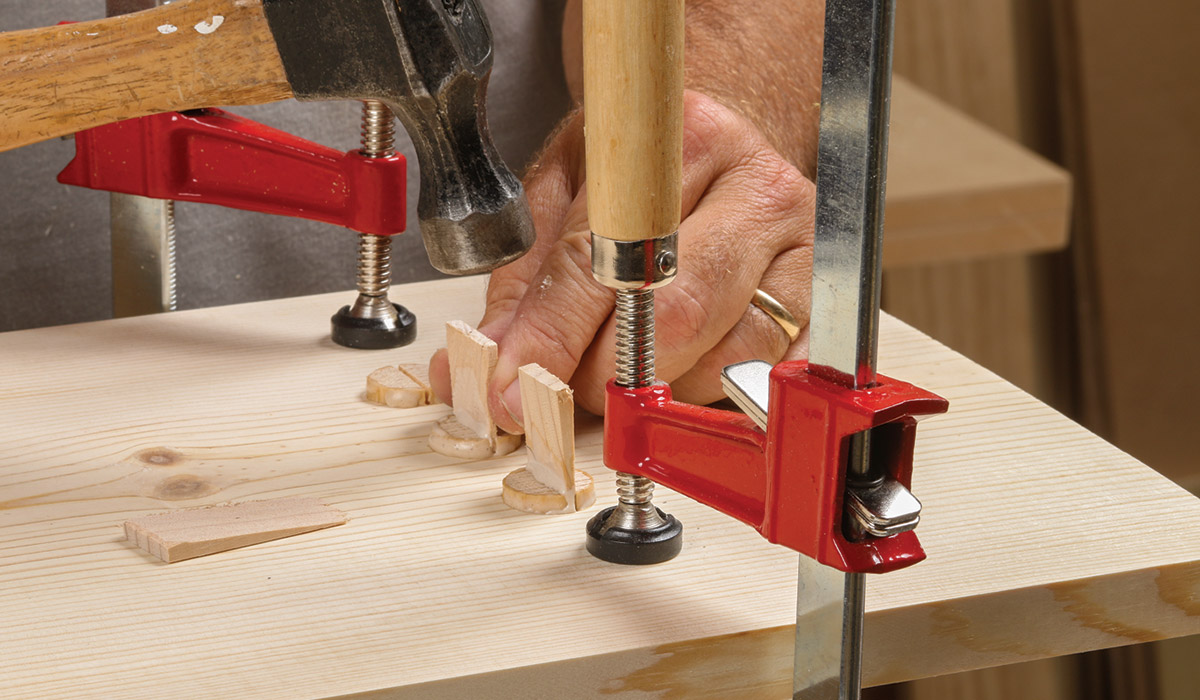
5. Bang ’em in and listen. Just like your crafty ancestors did, use a hammer to tap in the wedges until the banging sound becomes a dull thud. Then you know the wedges are solid. Now wedge the tenons on the other side, switching the clamps around if you need to. You’ll cut off the excess wedge later.
Now add the top
There are stages to this process too, which make everything easier.
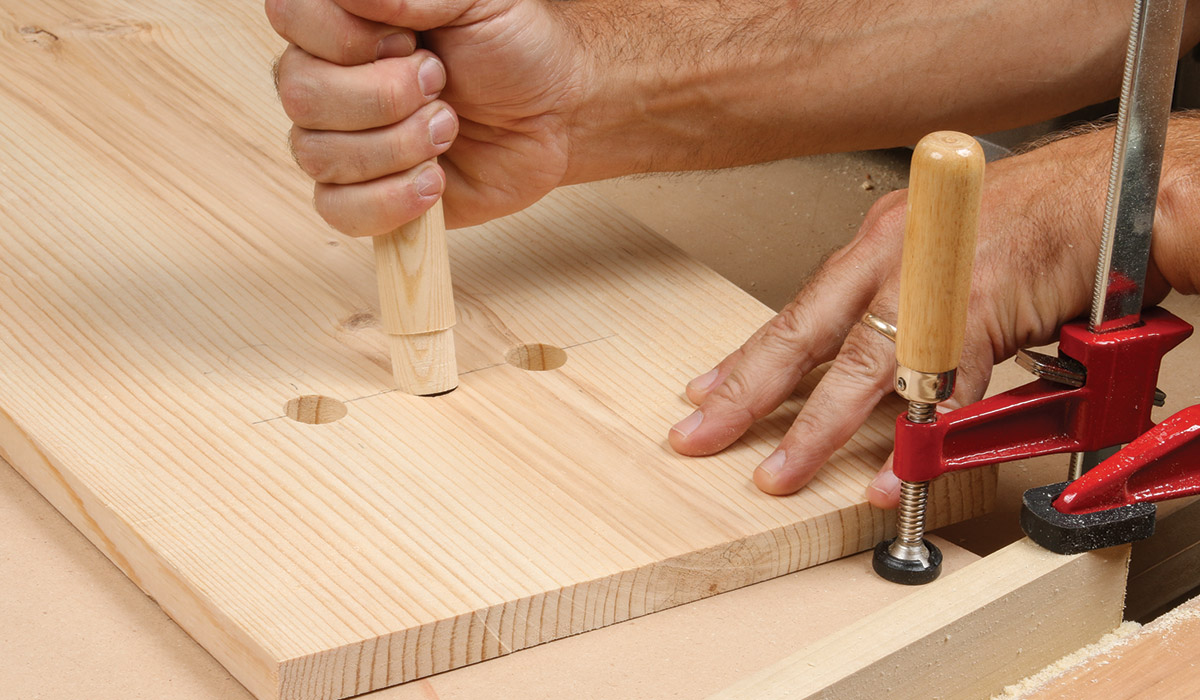
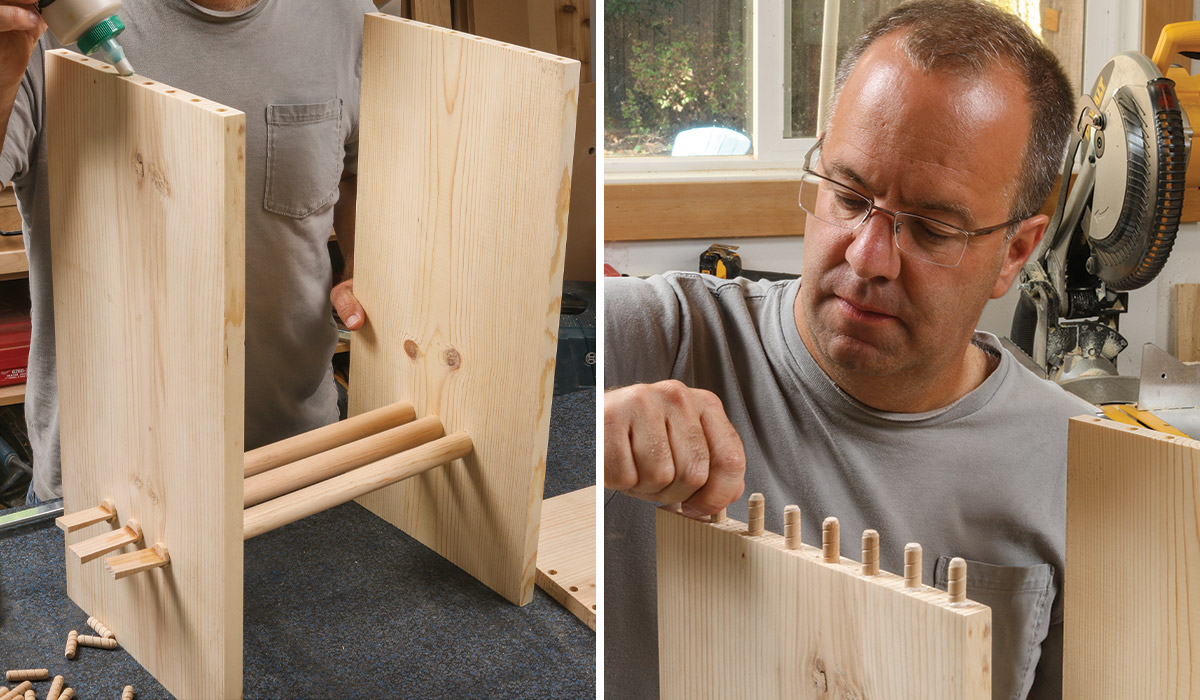
1. Dowels in first. Flip the table right side up and pour some glue in each of the dowel holes. Use a little stick to spread it around inside the holes, and then put in the dowels, giving each one a twist to spread the glue even more.
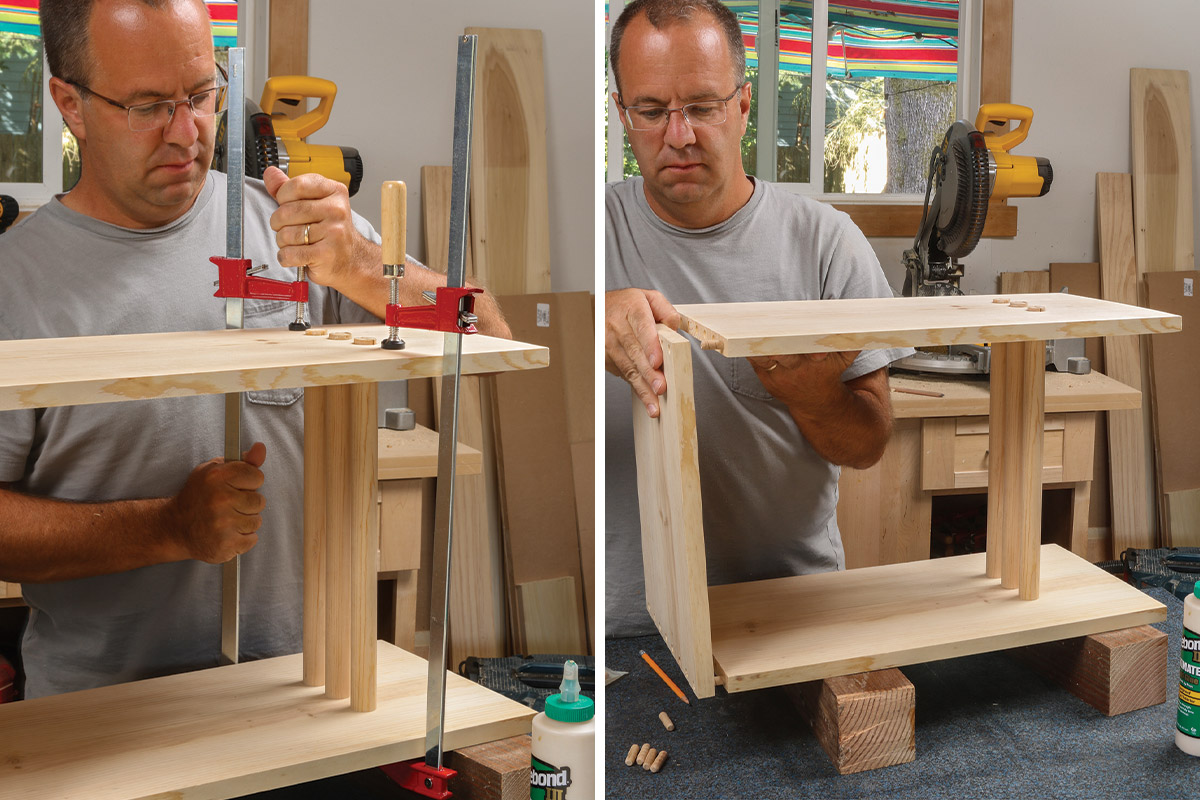
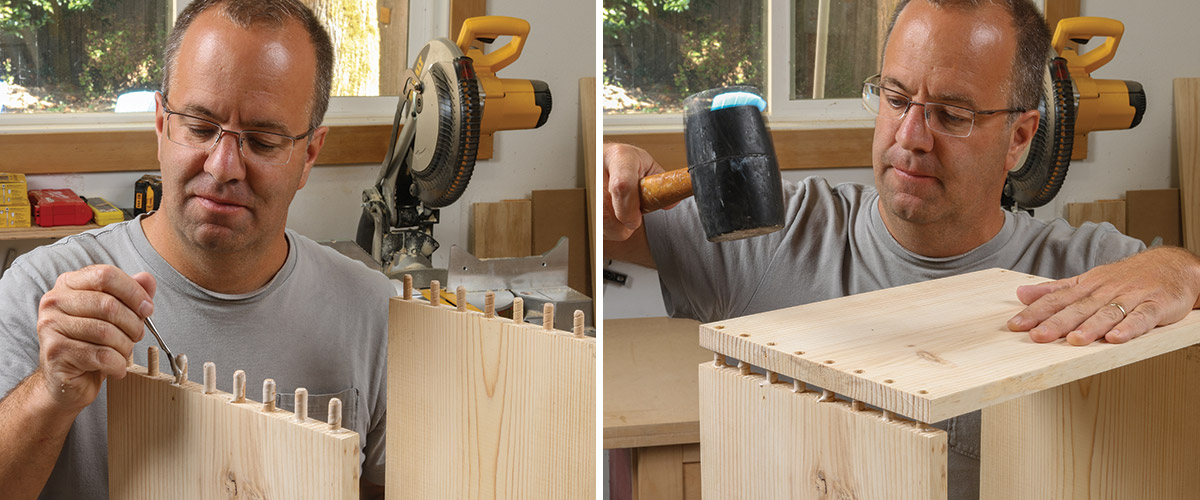
2. Now the top. Brush glue onto each of the dowels that are sticking up from the sides, moving as quickly as you can. Then fit the top onto the dowels and use a rubber mallet to knock it down into place. A normal hammer will work too, if you put a piece of scrapwood under it.
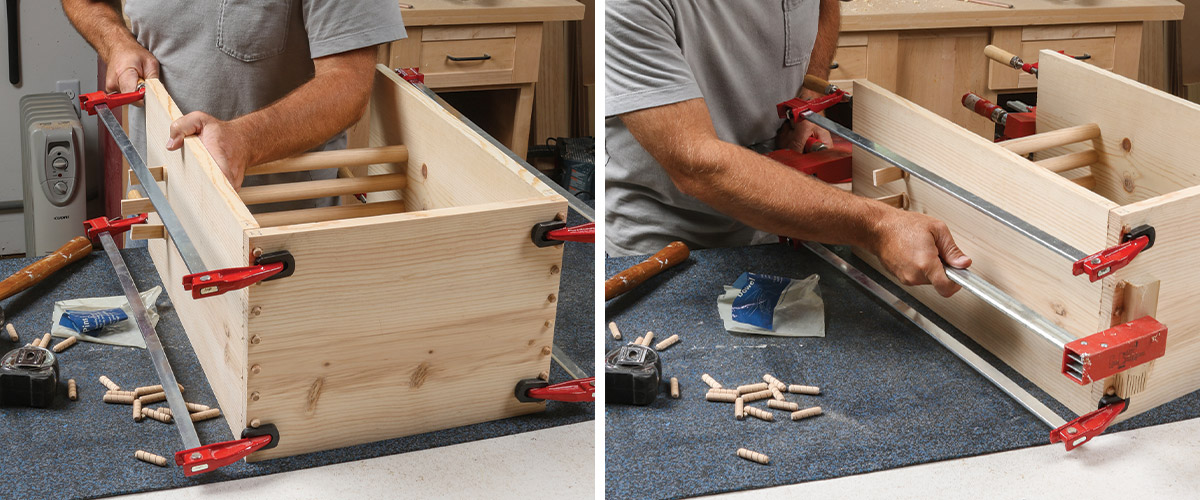
3. Clamping tips. Put clamps near the top and bottom, keeping them clear of the protruding dowels but as close to them as possible. You’ll need one at the middle, too. In this case, I used a wood block to keep the clamp pressure focused on the top, missing the ends of the dowels.
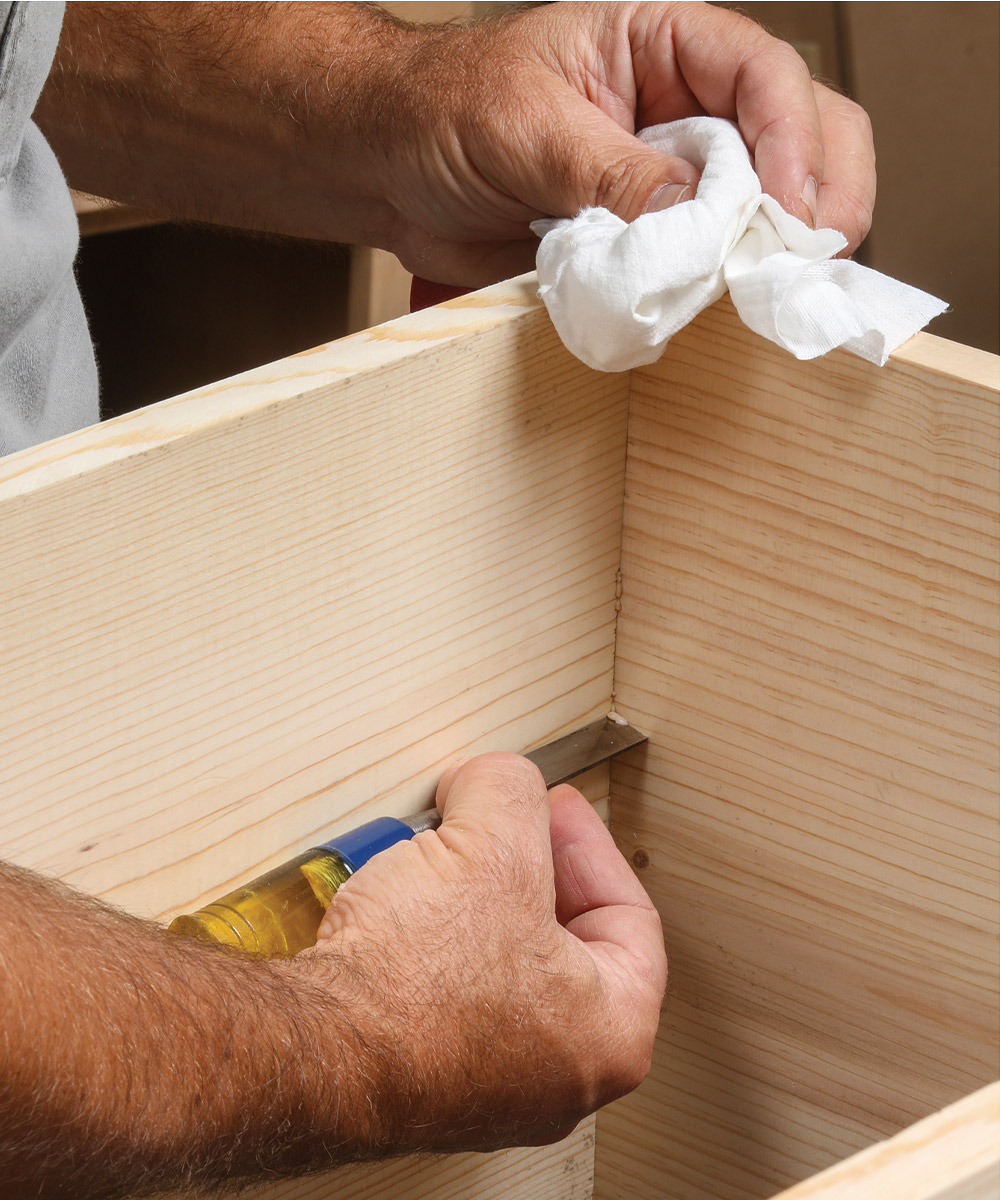
4. One last touch. Before putting the table aside to dry for a few hours, take a minute to remove the glue squeeze-out in the inside corners while it’s still soft. Use a chisel as a scraper, cleaning it off between swipes.
Level all the joints
The dowels, tenons, and wedges are all sticking out. Here’s how to cut them off cleanly and level them with the surrounding wood for a beautiful result.
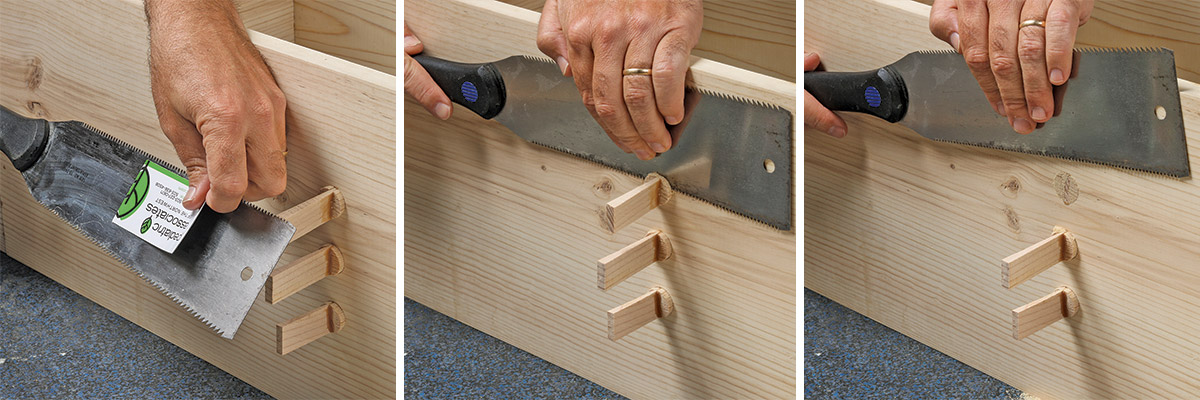
1. The fridge magnet trick. Put a large flat refrigerator magnet on the inside face of the saw. That will keep it off the surface so you can saw off the protruding joinery without damaging the wood below.
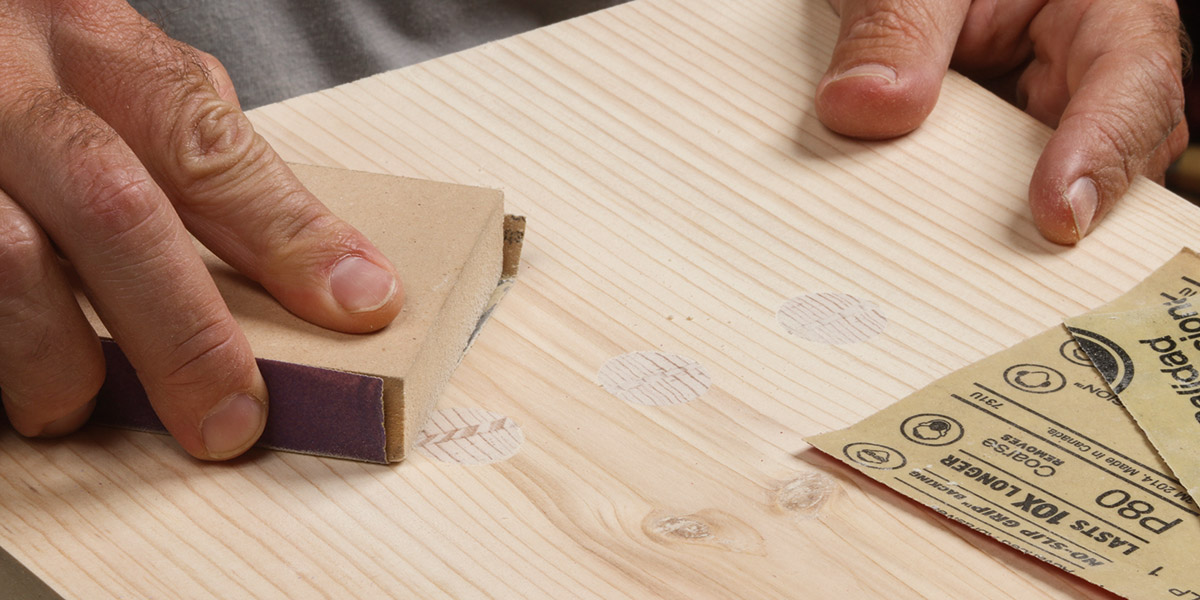
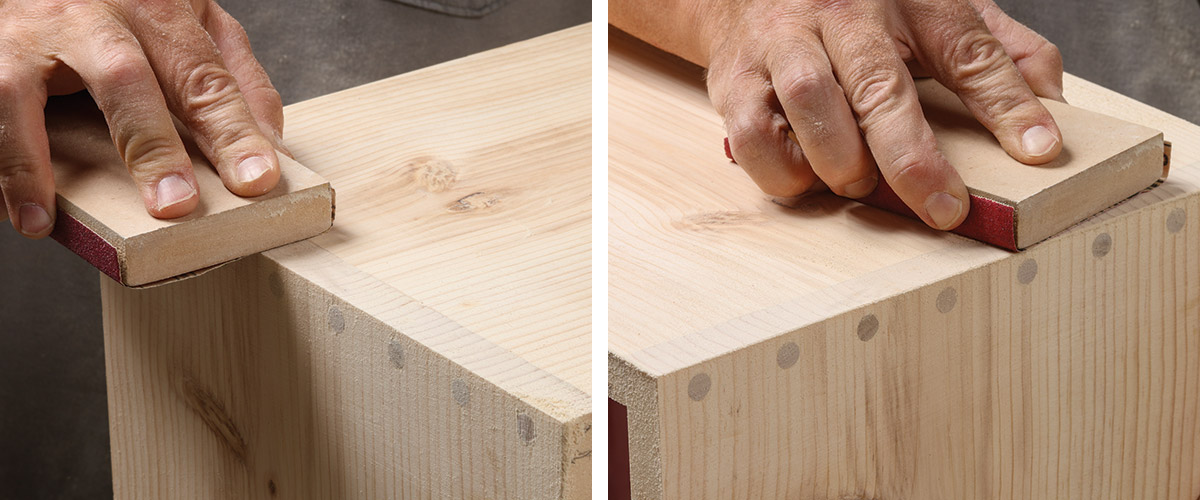
2. Sanding block finishes the job. Use your sandpaper block with 80-grit paper to finish leveling the joints, and then work up through the grits to bring the surface back to 220-grit. (A sharp block plane would also do the trick.)
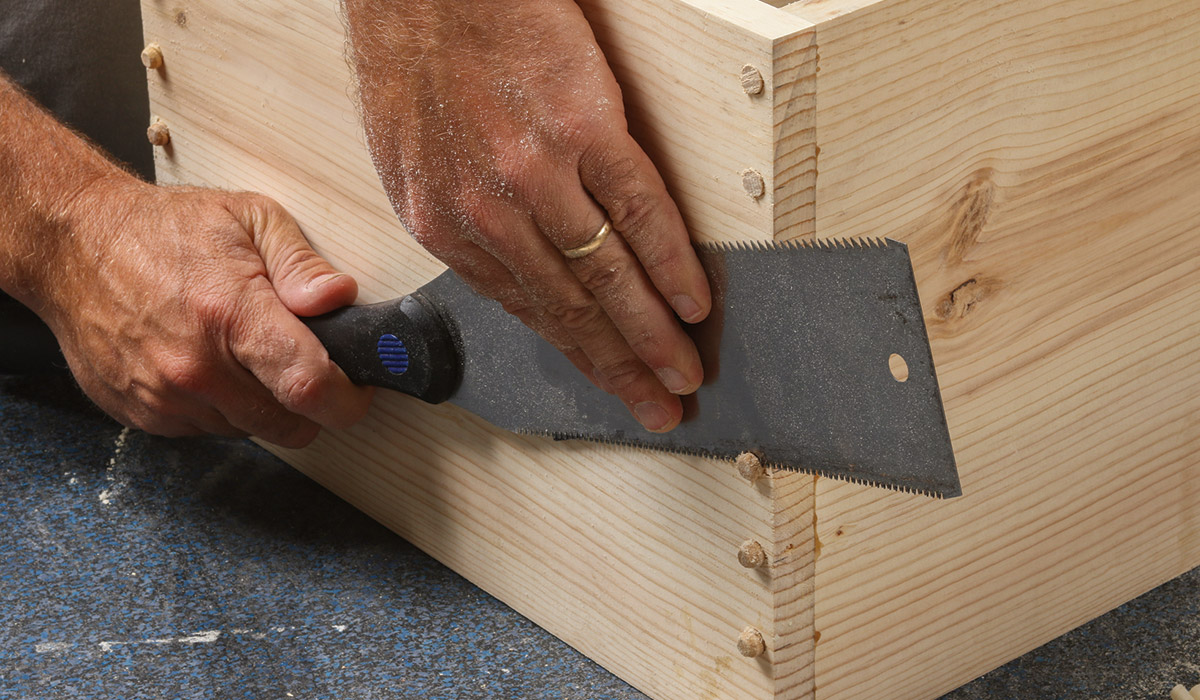
3. Same thing on the top. Flip the table over on its side to saw off the excess dowels and use the sanding block to make them flush and smooth.
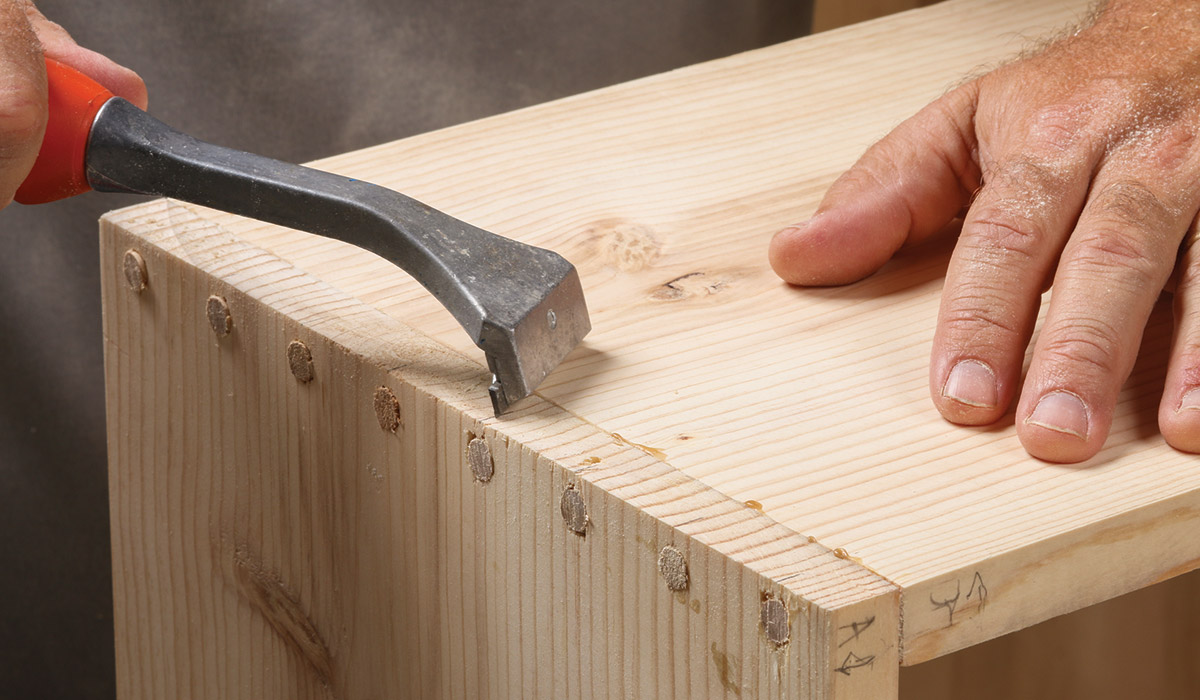
4. Another scraper. This one is a paint scraper with a carbide blade, great for removing dried glue from flat surfaces.
5. Level all the joints. Despite your best efforts, there will be some misalignment between the sides and top. Sand them flush, starting with 80-grit paper again. Go across the grain at first for faster wood removal, and then sand with the grain, working up through all the grits for a scratch-free surface.
Smooth finish
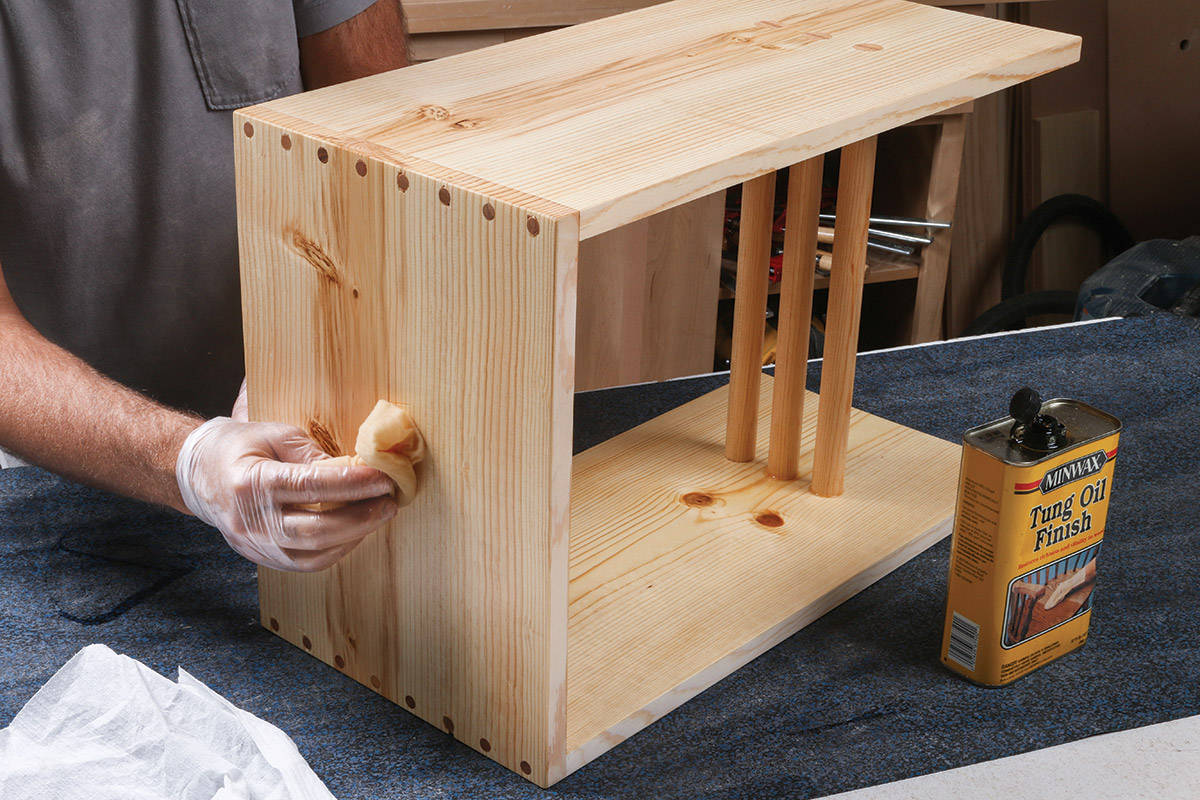
I recommend an oil finish here. Pine is soft and dents easily (which just adds to the charm of the piece) and the oil finish is easy to repair by simply wiping more on.
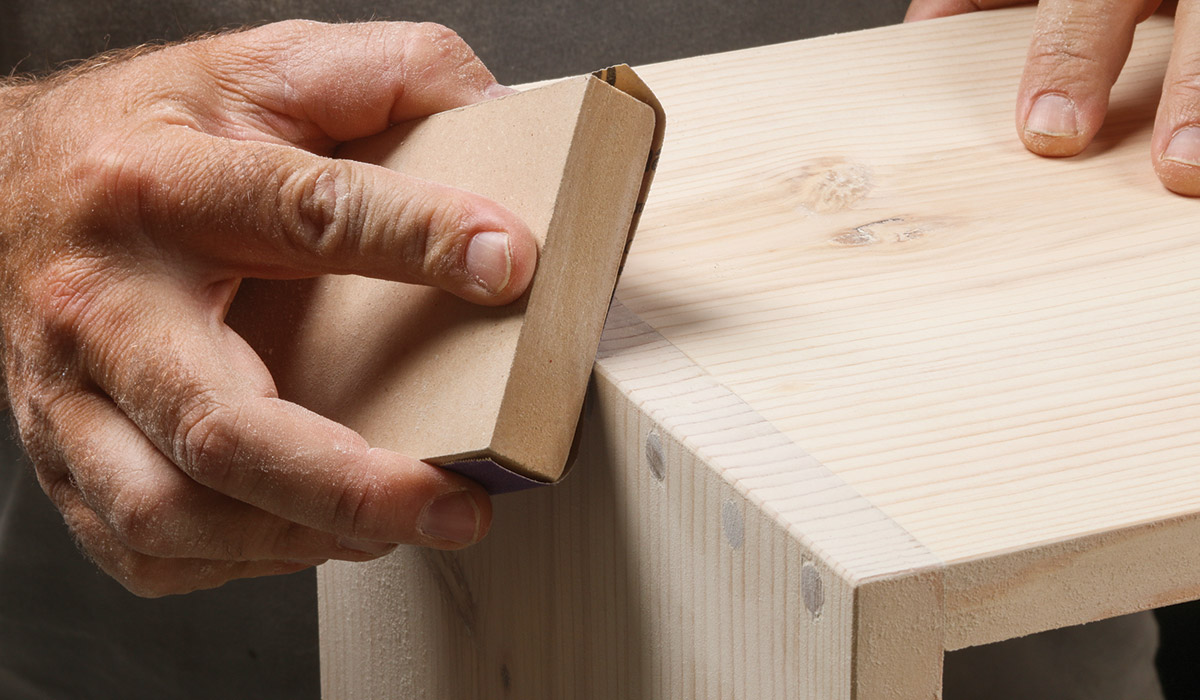
1. Break the edges. Use your block with 150-grit paper to put a light bevel (chamfer) on all the edges. Soft edges feel better and look better, too, but don’t overdo it.
2. So pretty. Grab some disposable vinyl gloves again and pour on the oil in a small puddle where you can, spreading it with paper towels and wiping off the excess. Let the first coat dry, sand lightly by hand with 220-grit paper, and then put on one more coat.



Log in or create an account to post a comment.
Sign up Log in