Build a Lift-Lid Box, Part 2
Doug Stowe shows how to assemble the mitered box, reinforce the corners, and make the lid.
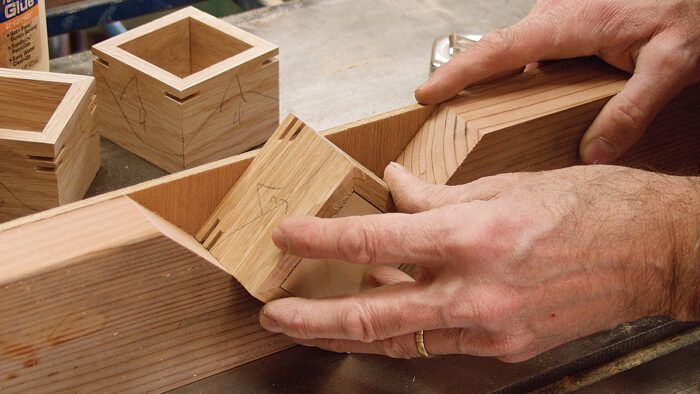
After preparing the parts for the body of the box, the next steps are to assemble the box, add keys at the corners for decorative reinforcement, and make the lift lid. The final step is to apply the finish.
Assembling the box
Care must be taken during assembly to keep the parts in order and the grain patterns continuous around the corners. This is where the pencil squiggle line comes in handy, particularly for woods with a subtle grain pattern.
1. Begin by laying out the parts in the order of assembly, with their outer faces up on the bench. You’ll flip the pieces over as the glue is applied.
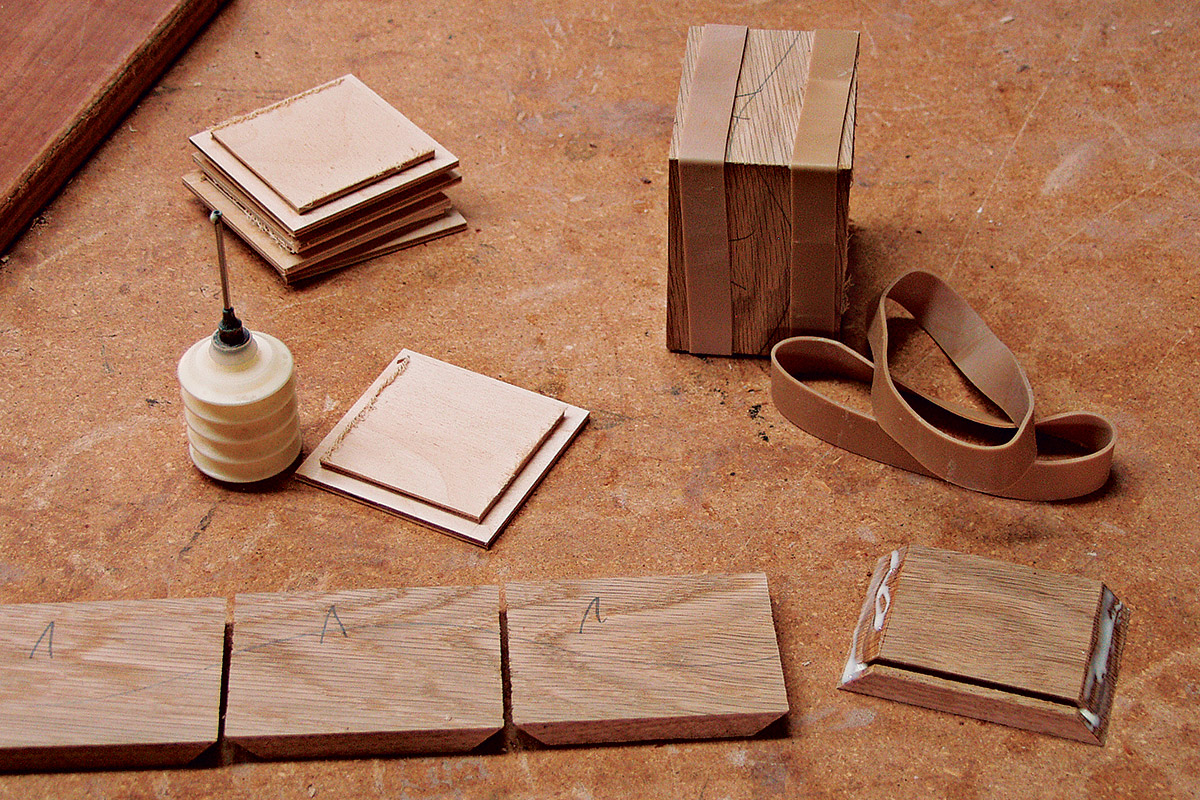
2. Spread glue carefully onto each mitered surface. Also, place a dab of glue in the groove used to house the bottom. If you are using a hardwood bottom this glue should be avoided, but in this box the plywood bottom reinforces the joint and makes miter keys unnecessary in the lower sides of the box.
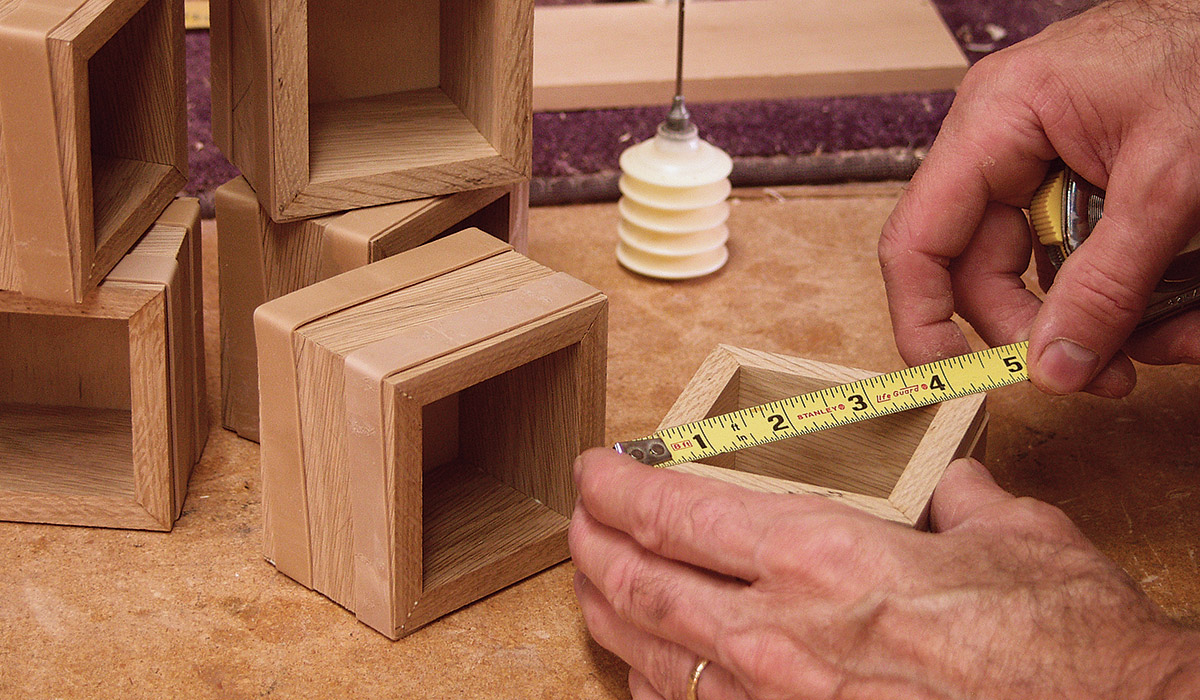
3. On mitered boxes as small as these there is no better way to clamp parts together than to use rubber bands. The amount of clamping pressure is less important than keeping the parts held firmly in position while the glue sets. The rubber bands are easy to adjust, allowing you to tweak the alignment of the joints before the glue begins to set. You can add more rubber bands if needed, each layer overlapping previous ones until you’ve built up enough pressure to close the joints. For an alternative assembly method, see “Assembling with Tape.”
4. Measure from corner to corner to check that the box is square. Measurements across both directions should be exactly the same. If not, a light squeeze on the long dimension is usually enough to bring the parts into alignment.
Assembling with Tape
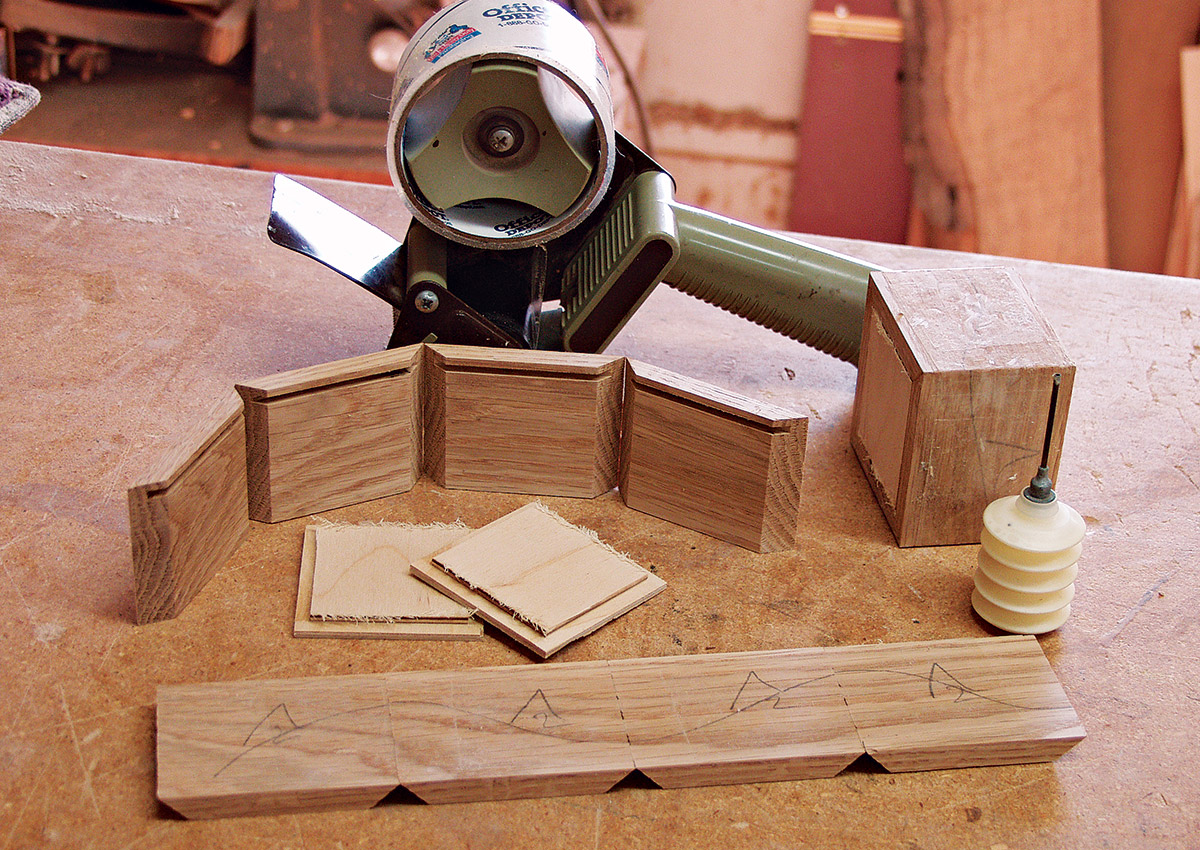
An alternate method of assembly that is equally effective is to use tape. This is a favorite technique among my students. Simply lay the parts out in order and put tape where the sides meet. Apply glue to all the mitered surfaces, roll the box around the bottom, and apply tape to the last corner. Additional layers of tape increase the pressure on the joints, holding them securely as the glue dries. One advantage of using clear tape is that you can see marks on the box during assembly, and it’s easy to check the alignment of the grain. If any adhesive is left on the wood once the tape is removed, a light sanding prior to finishing will remove it.
Add keys to the corners
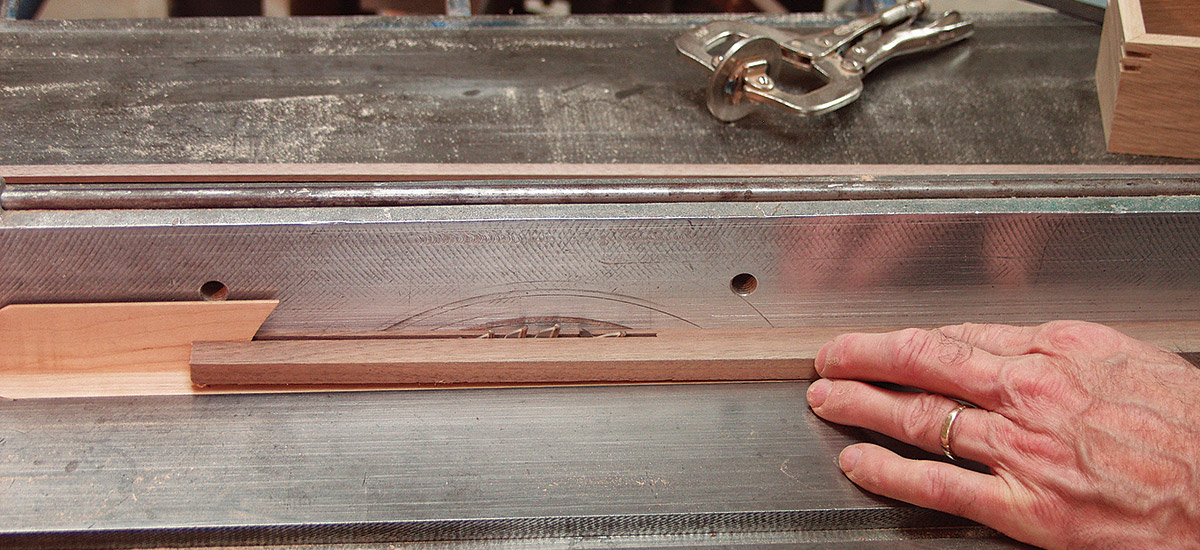
Inserting keys in the miter joints of this box not only strengthens the corners, but also adds a decorative element and draws your eye toward the top of the box. I used black walnut keys to contrast with the oak sides, but using keys of the same species would lend the box a more subtle look. To cut the slots for the keys, you’ll need to make a simple key-slot jig (see “Quick Jig for Key Slots”) that rides against your tablesaw fence. This easily made jig is very useful and effective for small boxes.
1. After you’ve assembled the box and made the key-slot jig, you’re ready to start cutting key slots on the box corners. Begin by raising the tablesaw blade to about 1/2 in. above the table.
2. Nest the box into place in the jig, using the fence to control the position of the cut.
3. Make a cut at each corner, rotating the box between cuts. Care should be taken to hold the box and jig tightly to the fence throughout the cuts. Letting the box slip slightly can cause a wider cut and lead to a poor-fitting key slot.
4. Move the fence 1/4 in. farther from the blade to cut the second set of slots. To give the design a more interesting decorative effect, these slots aren’t as deep as the first ones. To make shallower cuts, lower the blade slightly, about 1/8 in.
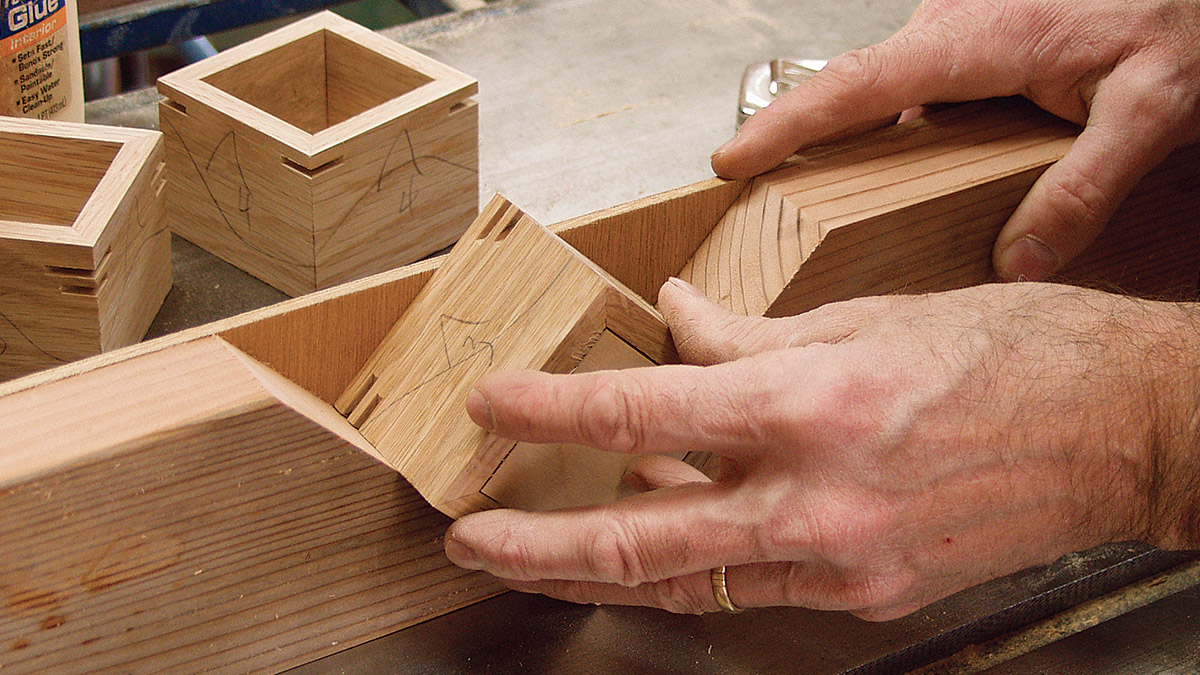
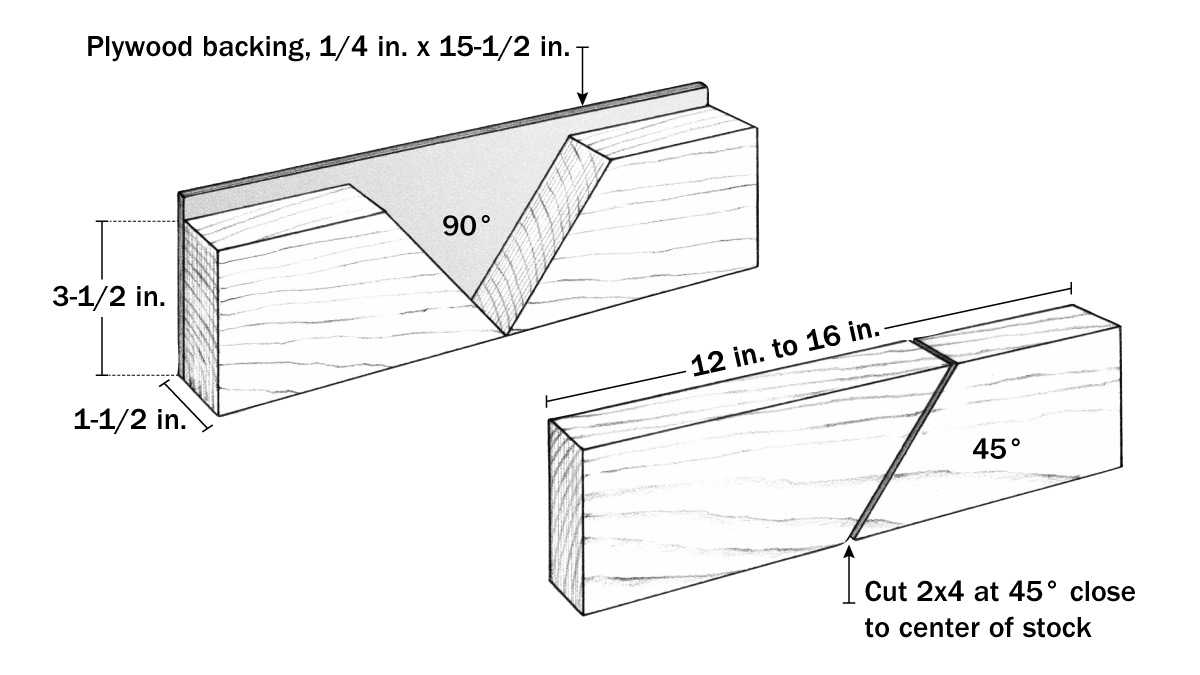
Quick Jig for Key Slots
Cutting the miter key slots for small boxes requires a simple and effective jig that should take under five minutes to make. You’ll only need a scrap piece of 1/4-in. plywood or MDF (about 3-1/2 in. wide and 16 in. long) and a 12-in. length of 2×4.
1. Use the tablesaw to cut the 2×4 at a 45-degree angle somewhere near the middle of the board. Accuracy of the angle is important but the exact placement of the cut is not.
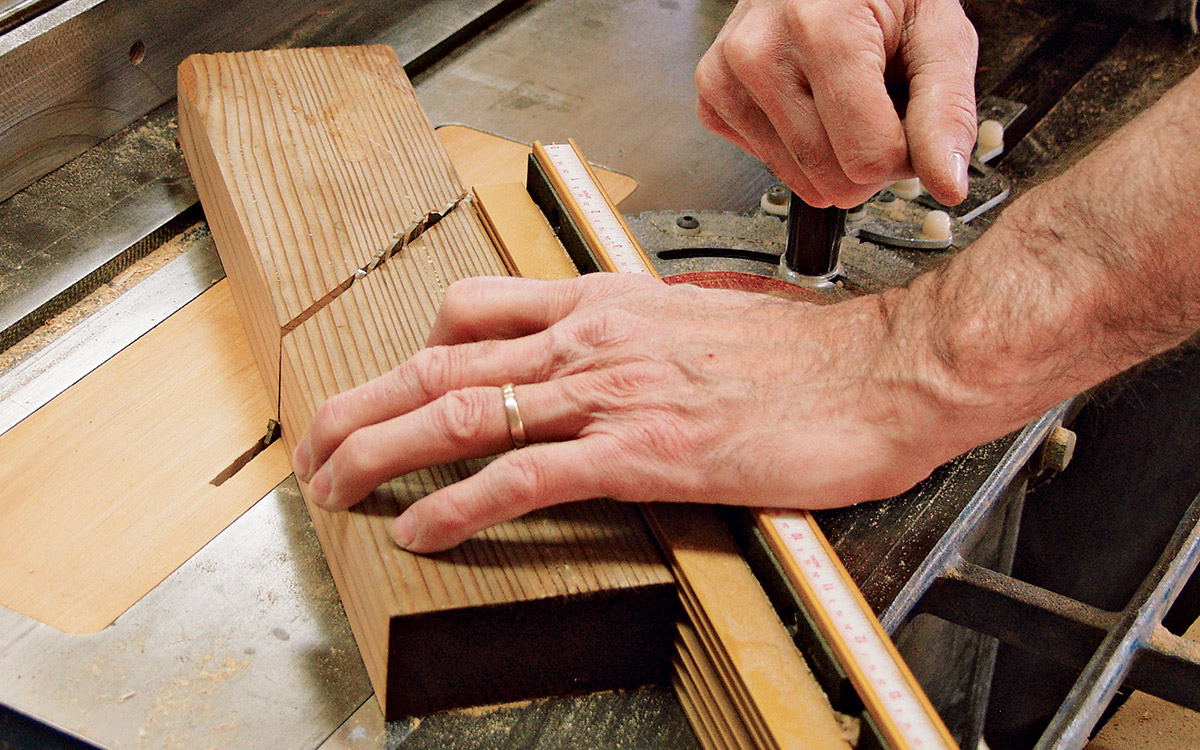
2. Cut a piece of 1/4-in. plywood to the same width as the 2×4 and approximately the same length as the 2×4 laid out.
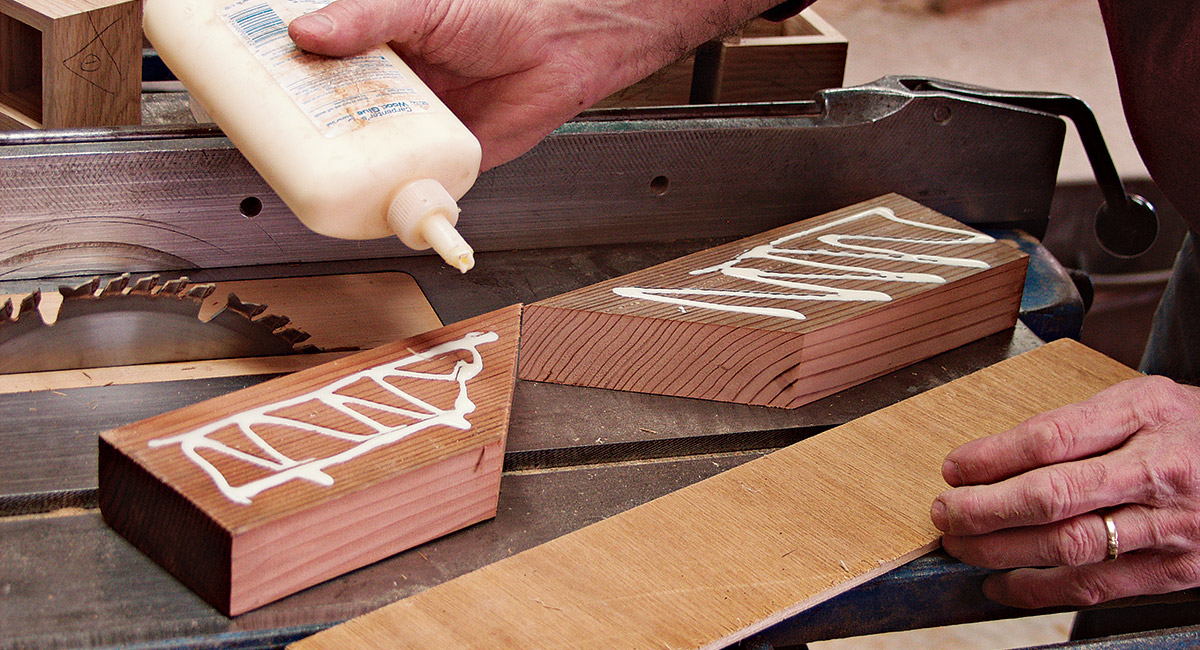
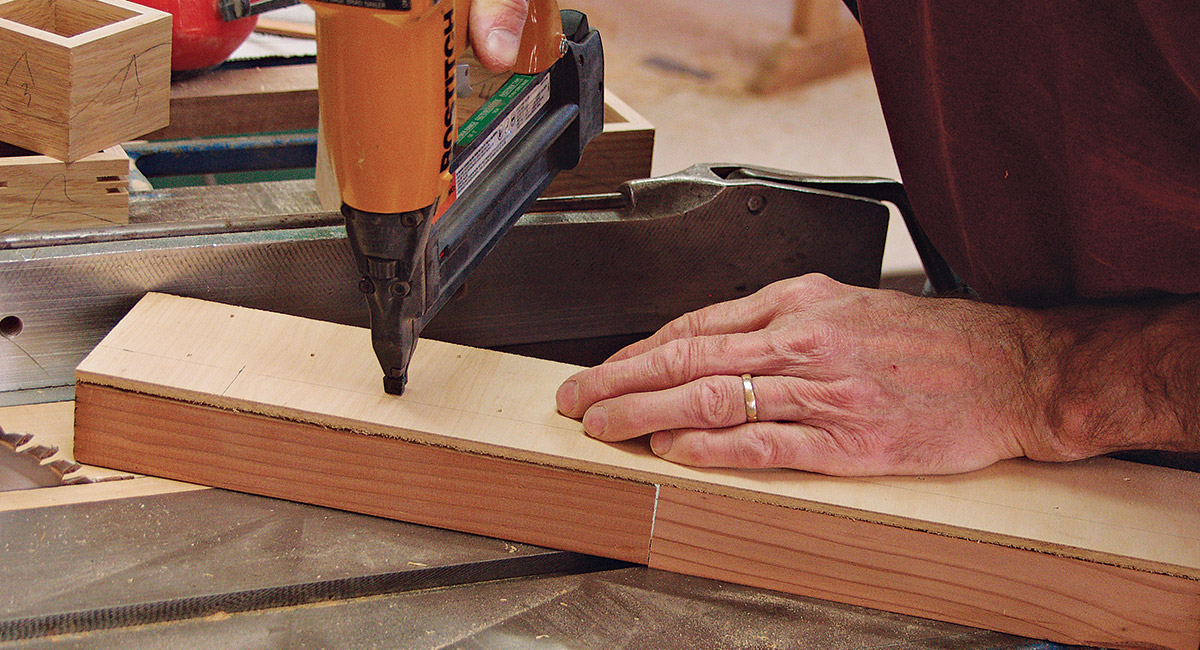
3. Spread glue on one face of each 2×4. Carefully align the plywood and attach it with brad nails. Keep the nails outside of the area that is to be cut.
To use the jig, place the box within the “V.” Hold the box and jig tightly against the fence, then push them through the blade. After making multiple cuts in multiple spots on this jig, the underside will get a little worn out—take five minutes to make another.
Key Slot Jig
This easy-to-build jig makes cutting key slots fast work at the tablesaw. To make one, you’ll need only a scrap of 2×4 and a little plywood or medium density fiberboard (MDF).
Cutting the keys
1. To make the keys, start with stock that is 1/8 in. wider than the deepest key slot. At the tablesaw, rip thin strips from that stock. Use a splitter to help control the thin stock through the cut, and have a push stick ready to finish the cut. Check the fit of your strips as they come off the saw and discard strips that are too loose. I prefer keys that fit slightly tight, but if you have to use more than finger pressure or a slight tap to fit them into the kerf, you risk breaking the joint open.
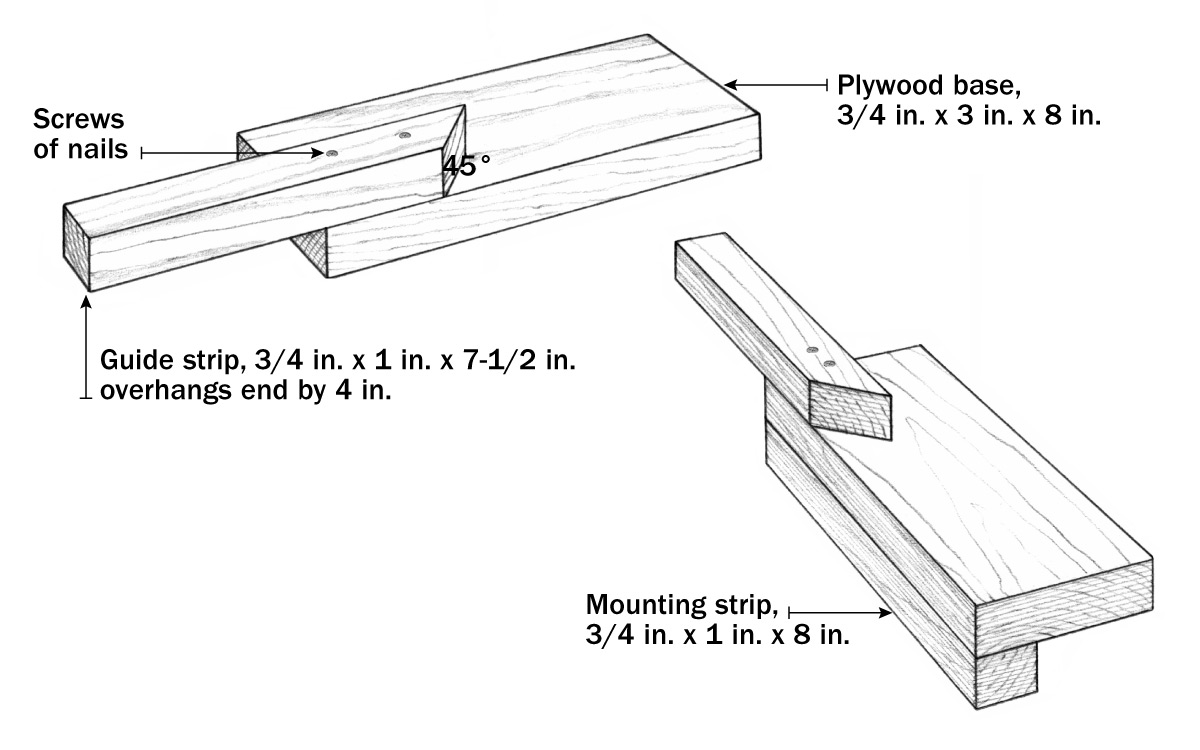
2. One of the easiest ways to cut the strips into triangular keys is to use a quick-sawing jig like the one shown below, but they could also be cut using a miter gauge on the tablesaw or bandsaw. I use a Japanese dozuki saw for a smooth quick cut with the jig. Clamp the jig in the vise or to your benchtop and make the first cut. To form the triangular keys, slide the stock down, flip it over, and make another cut.
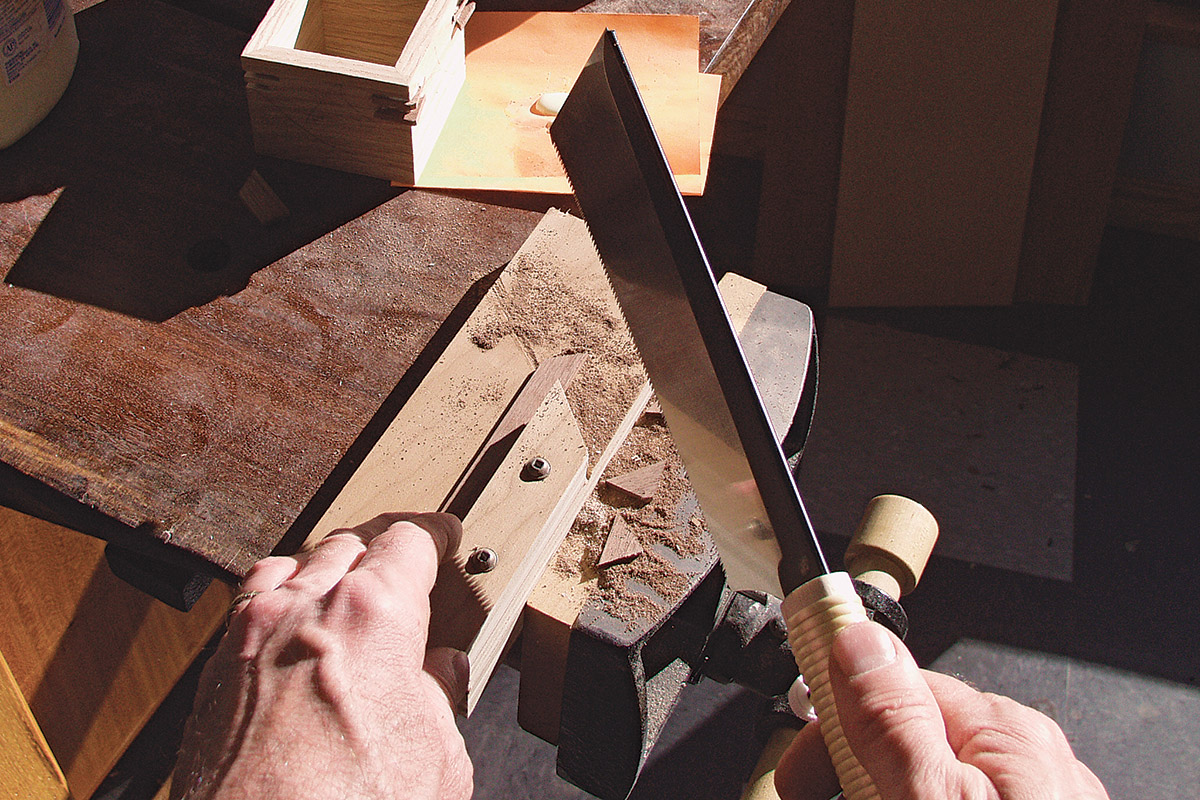
Miter Key Jig
When building this miter jig, use a wide board for the base so that you can clamp the jig to the bench top. Alternately, nail a strip onto the underside so you can clamp the whole assembly into a vise.
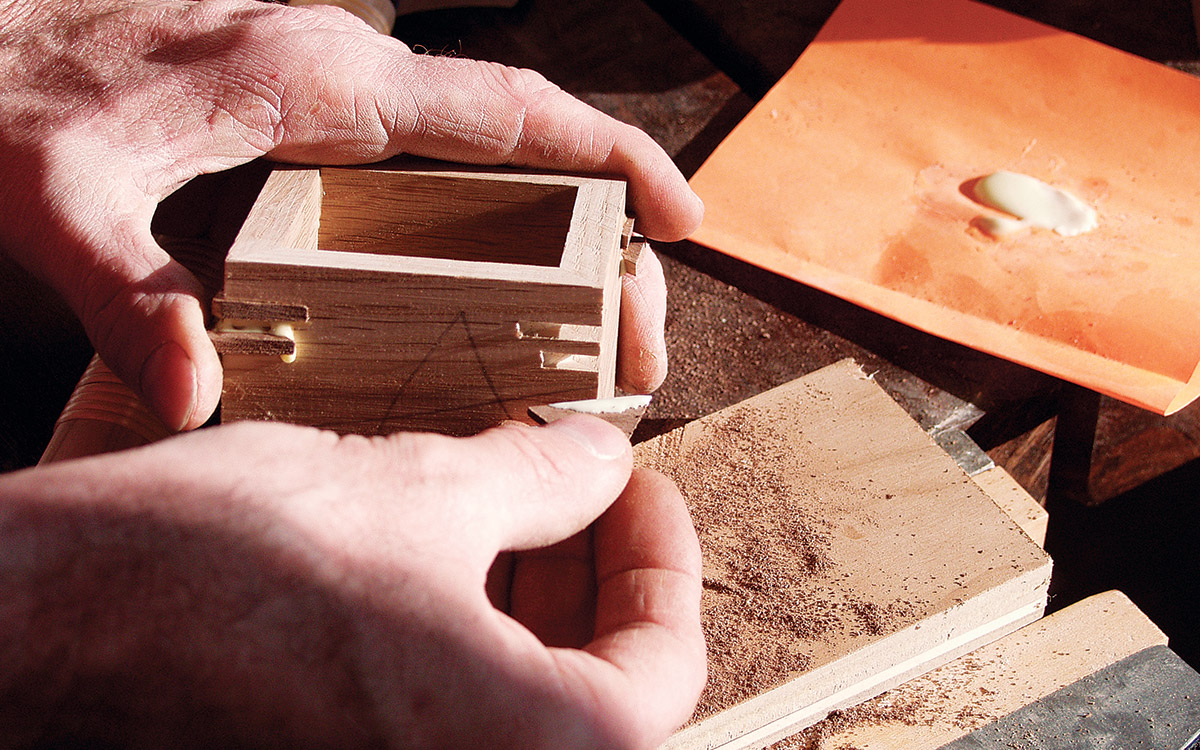
3. To install the keys, spread glue on the top, bottom, and long flat edge of each, then press them into place. If a key is too tight to press in place with your fingers, give it a tap with a small hammer. If it takes more than a slight tap, however, you run the risk of breaking the glued joint. It may also be helpful to hammer the keys slightly on a flat surface, compressing them before fitting. Moisture in the glue will cause the keys to swell to their original thickness once they’re installed.
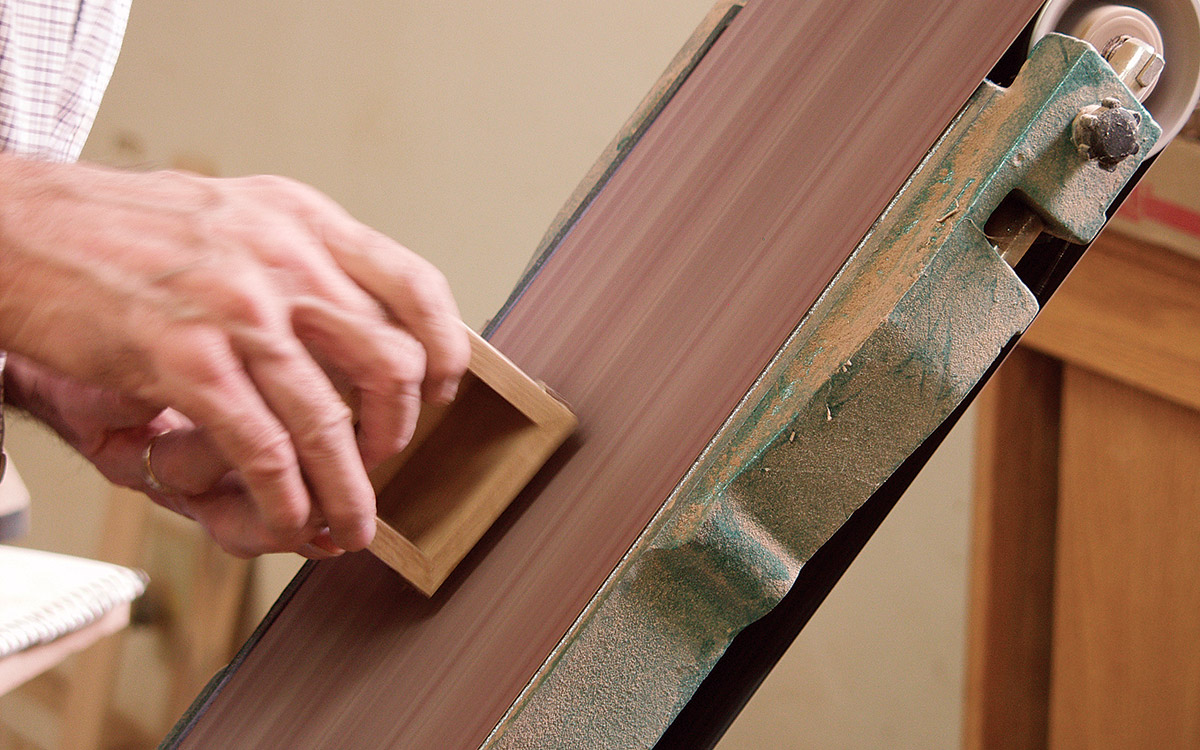
4. Use a stationary belt sander to sand the keys flush with the box sides. This job can also easily be done by hand with a sanding block, or by working the box across a flat piece of coarse sandpaper affixed to the surface of a workbench.
Make a lift lid
Lid details are one of the many ways to personalize this box. To make the lid, you can choose between various woods, selected for their beauty and character. For this type of box, I’ve cut lids from curly maple, figured walnut, spalted maple, and coarsely textured walnut with an extremely rough-sawn side that shows signs of exposure to wind, rain, and sun during the process of air drying.
1. To make the 3/4-in.-thick lid, begin by cutting it to size using the same tablesaw methods you used to cut the bottom. Rip the planed stock to width and then use either the tablesaw miter gauge or a crosscut sled to cut it to length. Even if you are making only one lid, ripping longer stock is safer than trying to cut a single lid from a small board.
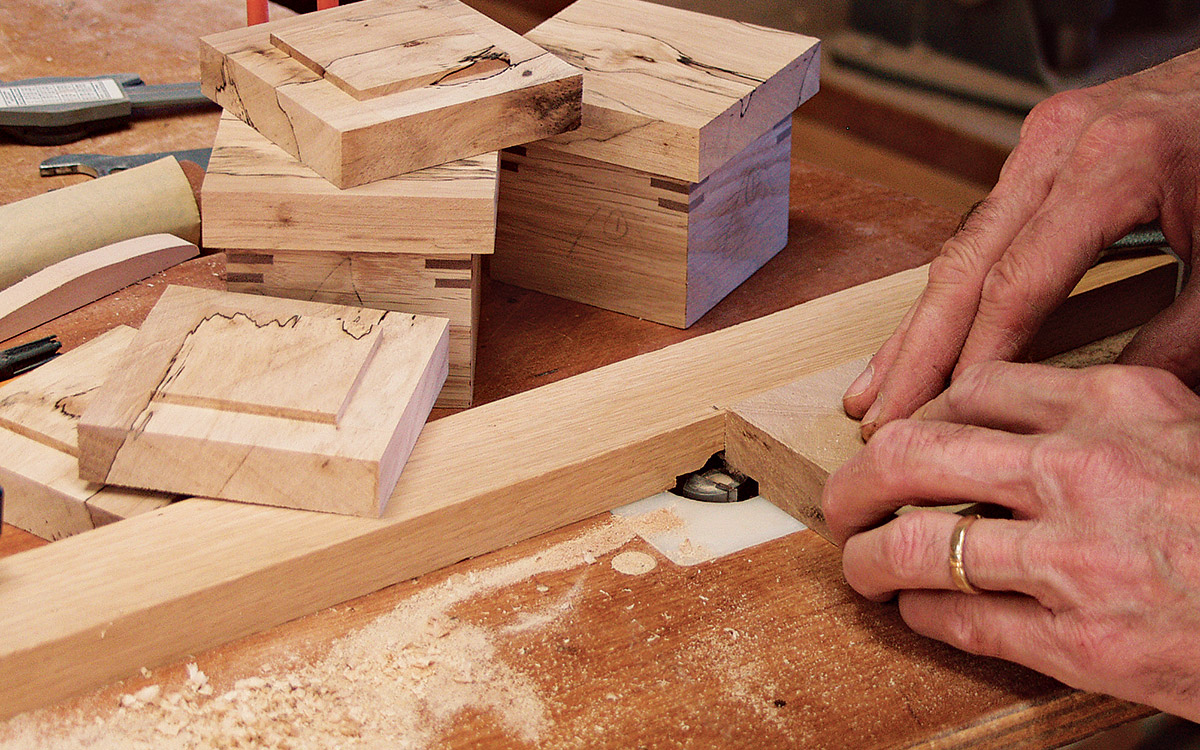
2. Cut a lip along the underside of the top using a router table and straight-cut router bit. Using the router table allows you to adjust the fence (and the width of the lip) in small increments until the base of the top fits snugly inside the box. For the best results, use the widest straight-cut router bit you have. My preferred bit is 1-1/4 in. in diameter, but a 3/4-in. or 1-in. diameter bit would work also.
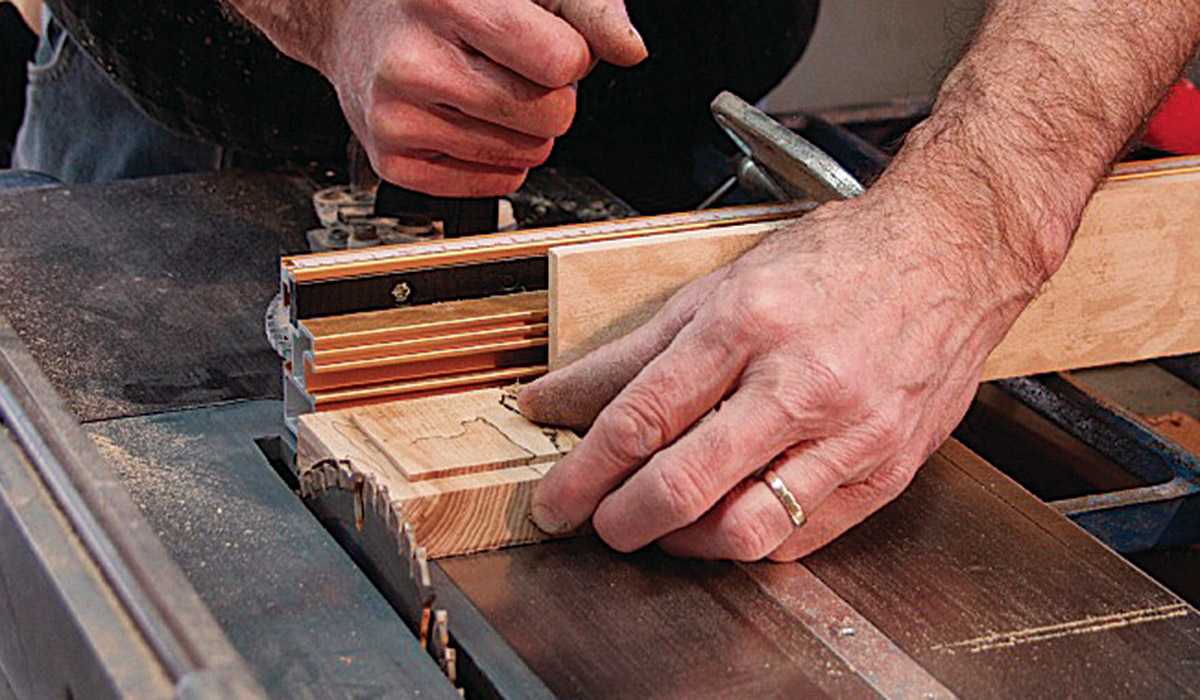
3. There are an infinite variety of attractive ways to shape the lid for this box. As an example, use the tablesaw with the blade tilted to 8 or 9 degrees and cut the lid to shape by passing it between the blade and the fence.
Final touches
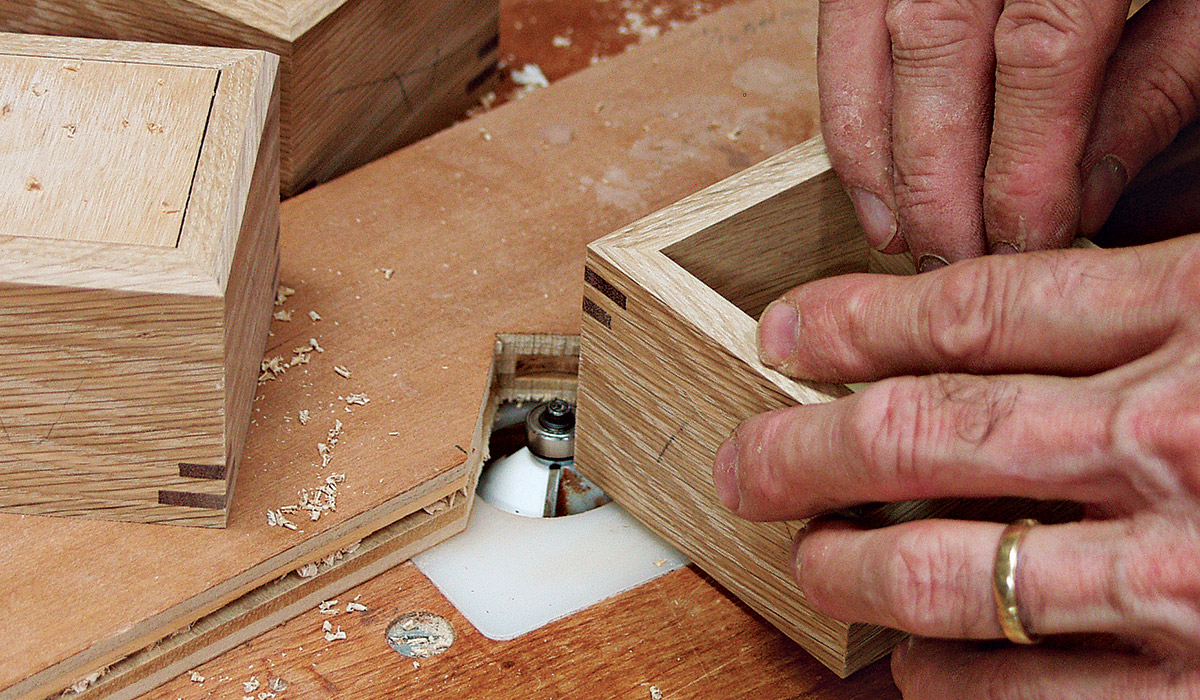
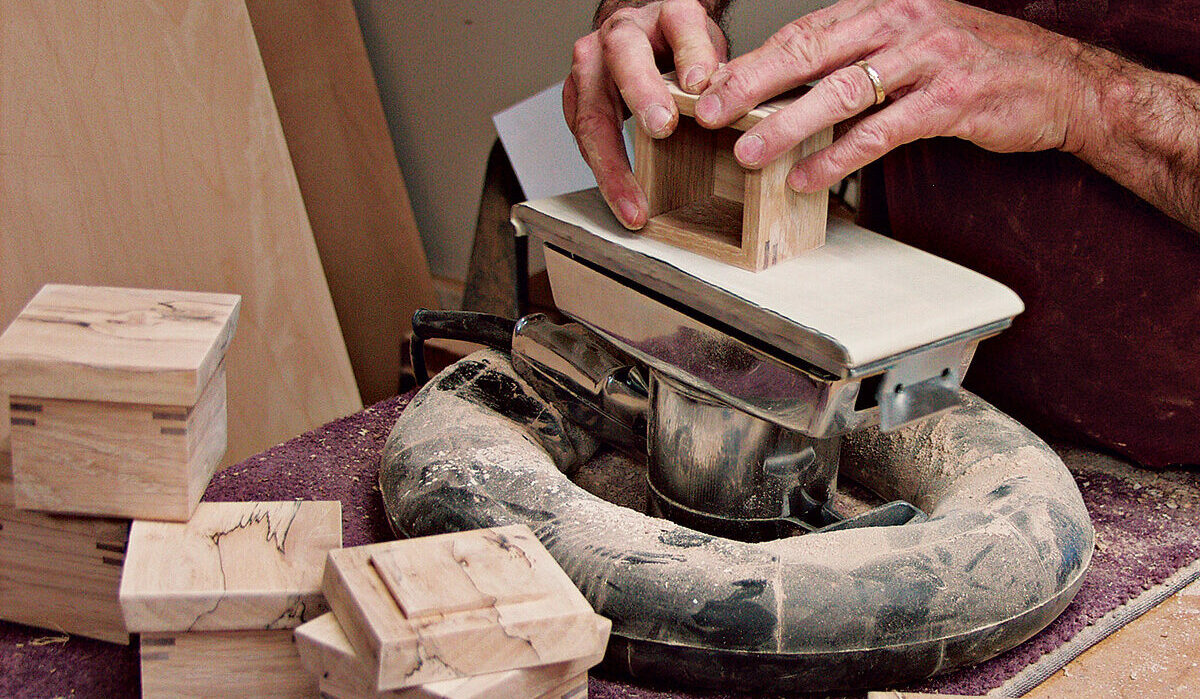
Once the box is assembled, it’s worth taking a few extra steps to give it a more refined look. I use a 45-degree chamfering bit in the router table to rout the bottom edge of the box, but the same effect could be achieved with a block plane or a coarse sanding block. I prefer to do most of the final sanding on an inverted half-sheet sander—it’s a lot less work than sanding by hand. I begin sanding with a stationary belt sander using 100 and 150 grits. For the final sanding, I use an inverted half-sheet sander progressing through 180, 240, and 320 grit. Hand-sanding would also work.
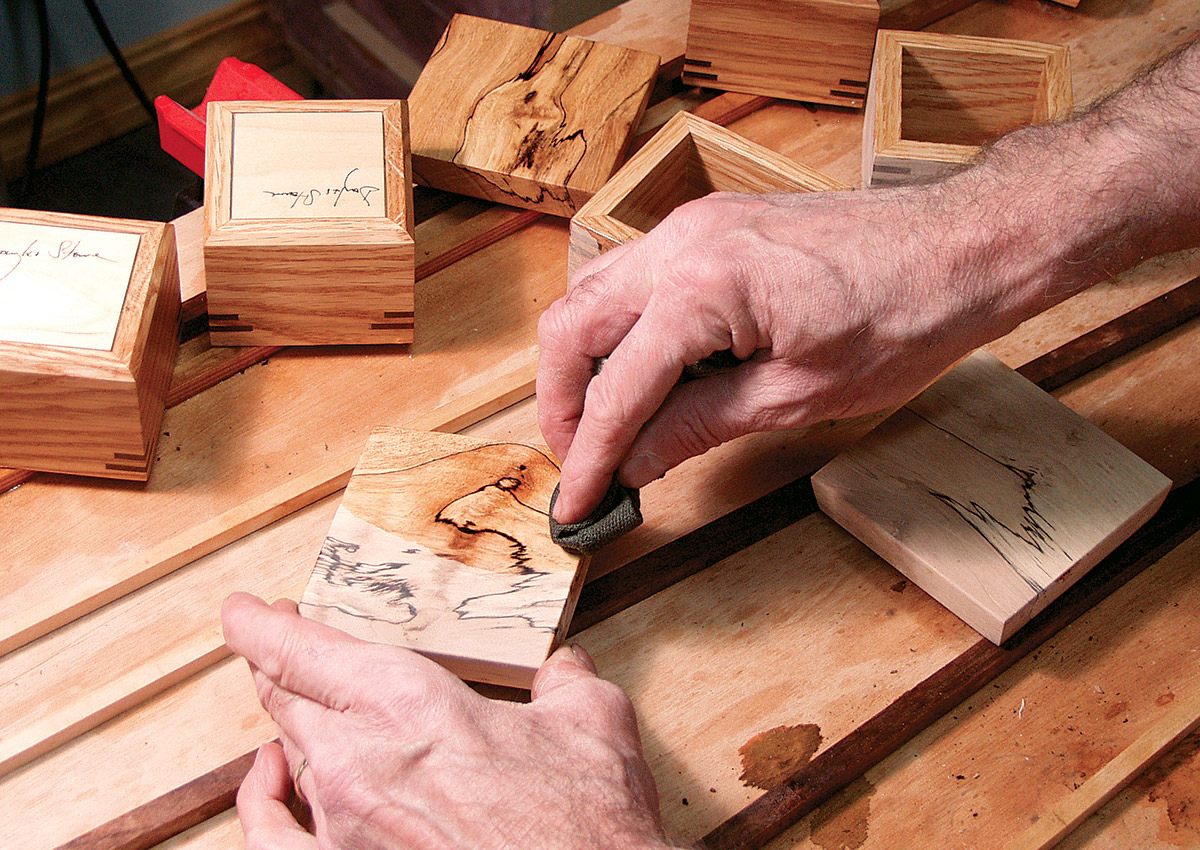
On this box I used a Danish oil finish because I love the way it brings well-sanded wood to life. Pay close attention to the directions on the can. As a general rule, I flood the surface of the wood with a generous first application. I use a brush to reach the inside corners of the box and then use a bit of rag to wipe the sides and lid. I keep the surface wet for about an hour before rubbing it out. Torn up cloth from an old cotton shirt is an excellent material for wiping down the oil before it is fully dried. In rubbing out the finish, the objective is to keep spreading the finish around evenly into the pores of the wood. The second application builds to a higher gloss, but dries more quickly. Be watchful on the second and third coats and make sure that you don’t let the finish become tacky before rubbing it out. Usually, the second and third coats need only half the time of the first coat before rubbing out.
 Excerpted from Doug Stowe’s book, Basic Box Making.
Browse the Taunton Store for more books and plans for making boxes.
Fine Woodworking Recommended Products

Suizan Japanese Pull Saw



Log in or create an account to post a comment.
Sign up Log in