How to Assemble a Dovetailed Box
Tips and tricks for assembling a dovetailed box and installing surface-mount hinges.
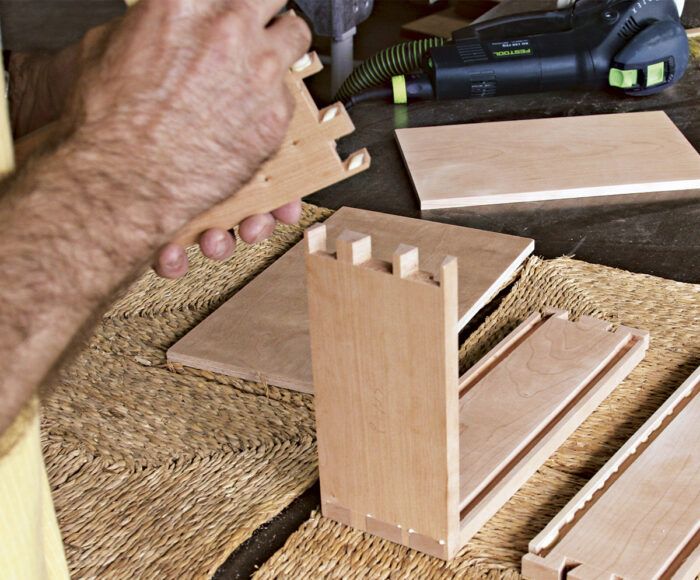
This is the third of three articles on making a simple dovetailed box. The first two articles explained how to mill the cherry stock for the box and lay out and cut the dovetails. Here, we show how to put the box together and install the hardware; but first you need to cut the grooves for the box’s top and bottom.
Grooves for Captured Top and Bottom
The simplest way to cut the grooves for the top and bottom is on a tablesaw, as shown in the Shaker Candle Box project. The only problem is that the ends of tablesawn grooves will show at the ends of the dovetails. Making a stopped cut, however, is tricky and dangerous on a tablesaw (and I don’t recommend experimentation). The best way to groove is with a router table, though it can be done with a handheld router if you’re extremely careful.
1. Assemble the box sides (without glue). If the joints are a little loose, secure the box with a band clamp or small clamps.
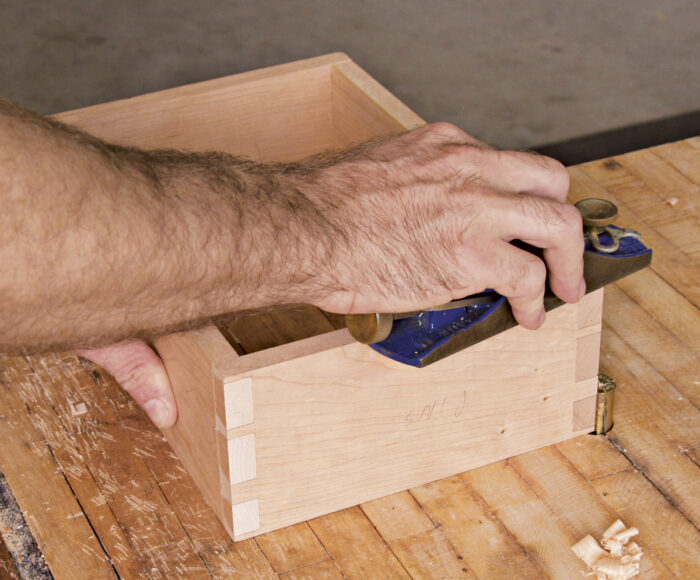
2. Plane the edges even with one another. The edges are the reference for the router table, so an uneven joint at a corner will show up in the groove. A
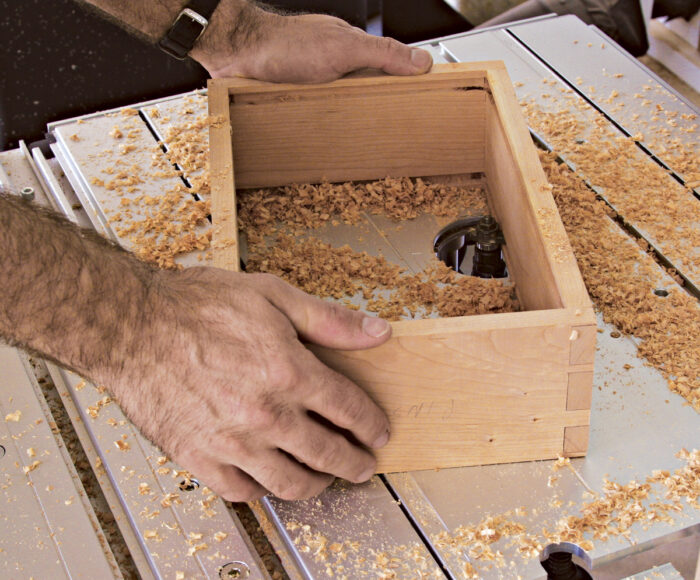
3. With a 1/4-in. or 3/8-in. rabbeting bit set 3/16 in. above the edge of the table, cut the groove on the interior of the top and bottom of the box. Grooving while the box is assembled gives each piece stability. Just pay attention to the direction of the bit, so you don’t engage a climb cut heavily, which can tear the workpiece from your hands. With a 1/4-in. bit, you must make two passes to cut the full 3/8-in. width. B
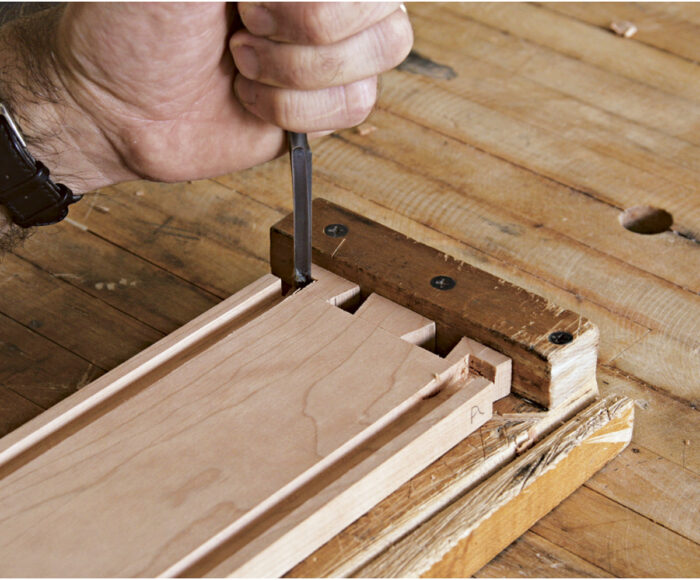
4. This technique leaves rounded grooves in each corner. Take the box apart and chop out the corners with a small chisel. An alternative is to round the corners of the top and bottom. However, I always round too much and little gaps show in the corners of the assembled box. C
5. Double-check that the top and bottom fit the groove. If they don’t, you have the option of sanding the top and bottom down, or widening the groove.
A
 |
B
 |
C
 |
Assembly
A dry-fit assembly is important. When the glue begins to set is not the time to discover the top is too long. But don’t dry fit the top and bottom at the same time: Getting the box apart can be really difficult.
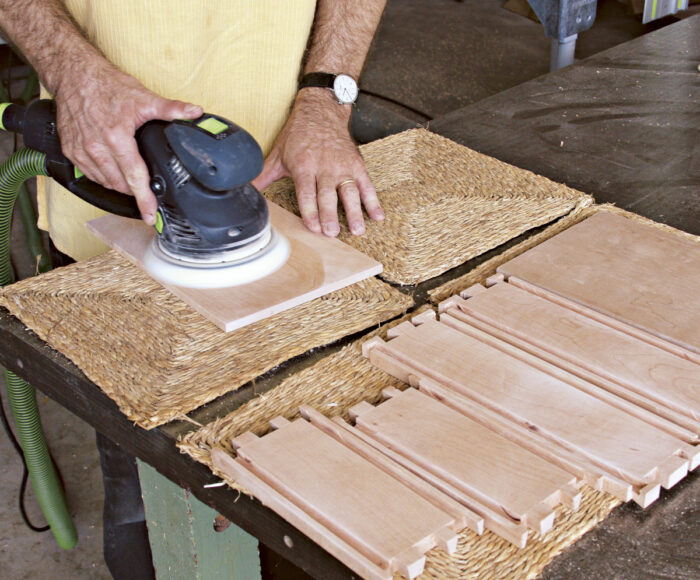
1. Sand both sides of the top and bottom up through 220 grit. Also sand the inside faces of the sides, front, and back. Don’t bother sanding the outside faces of these parts, as you’ll just have to sand them again after assembly. A
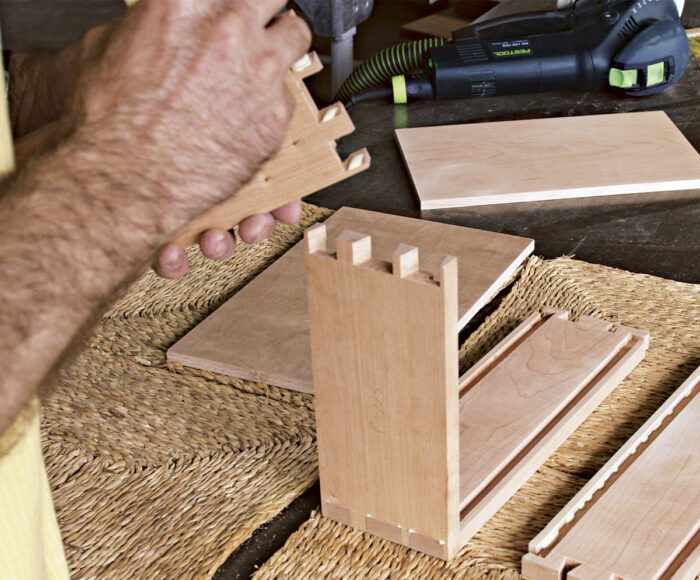
2. Dry-fit the box with just the top captured to make sure everything goes together as planned. Then do the same with just the bottom captured.
3. When you’re really sure the box will go together easily, spread glue on the faces of the pins and in between the tails. Spread a little glue in the bottom groove (only if you’re using a plywood bottom). B
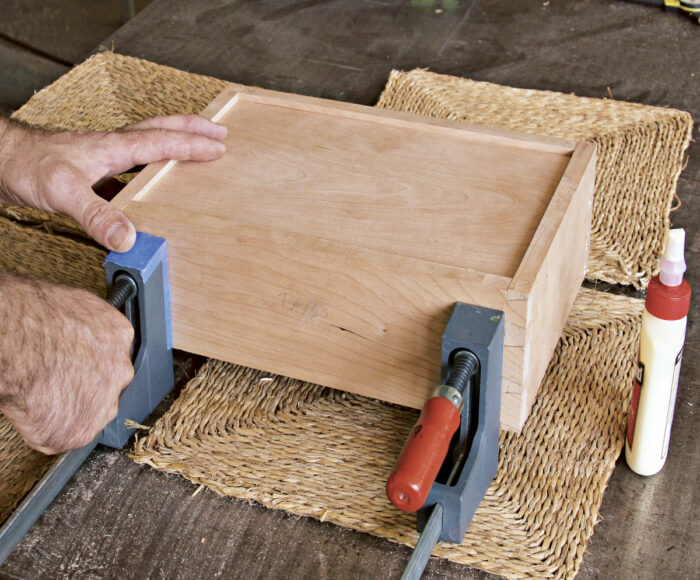
4. Clamp the box together across the faces of the tail boards. The clamps should be slightly offset from the joints. This is because pins can sometimes be a bit too long and will prevent the clamps from bringing the joint together. With this in mind, never clamp so tightly that you distort the shape of the box. If the joints aren’t going together at this point, force won’t help. Go back to the section on fitting. C
5. Let the glue cure for at least 24 hours before doing anything else. If you have glue squeeze-out on the inside, use a chisel to cut it out before it hardens.
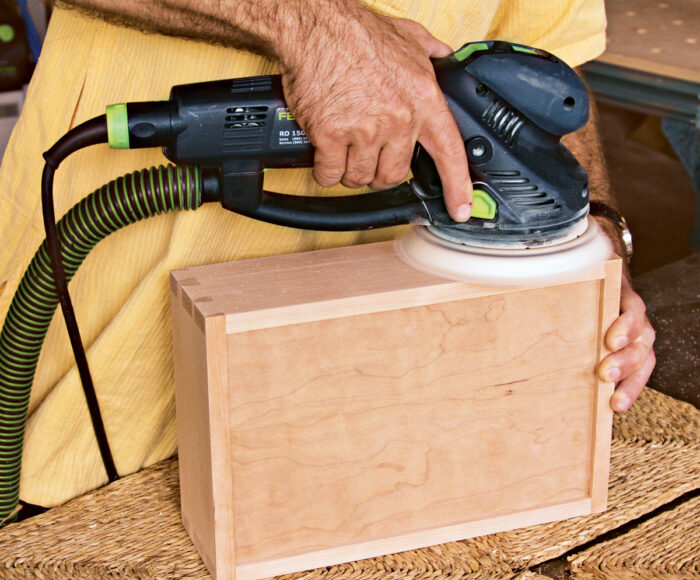
6. Rough sand the exterior flat and smooth. You may note some imperfections in your joinery, most probably small gaps. I used to fix these with sawdust, shims, and glue, but I don’t any more unless it’s a really big gap and my customer is fussy. Small imperfections are an honest part of the handmade process. D
A
 |
B
 |
C
 |
D
 |
Splitting the Box
You have your choice of how to cut the box apart: large handsaw, bandsaw, or tablesaw. I feel like a magician when I use a handsaw, imagining a trapped assistant inside the box. The bandsaw is faster, but you have to be careful about the blade wandering. I’ve gotten the best results on the tablesaw, though it’s certainly not foolproof.
1. If the grain is plain, mark “front” and “back” on your box on both sides of the cut line. Otherwise it can be hard to tell which way the lid sits after you make the cut.
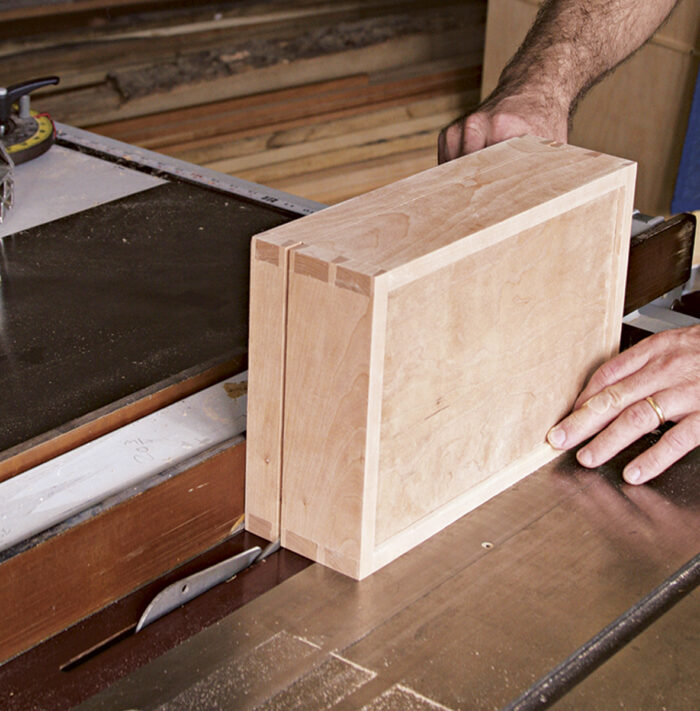
2. With the blade raised just 9/16 in., cut through the two shorter ends first, sawing just between the marks you scribed before you cut the joinery. Try to keep the box flat against the table and firmly against the rip fence.
3. Cut through the long sides last. The fourth cut will free the top. Try to keep either side from wobbling as you cut. A
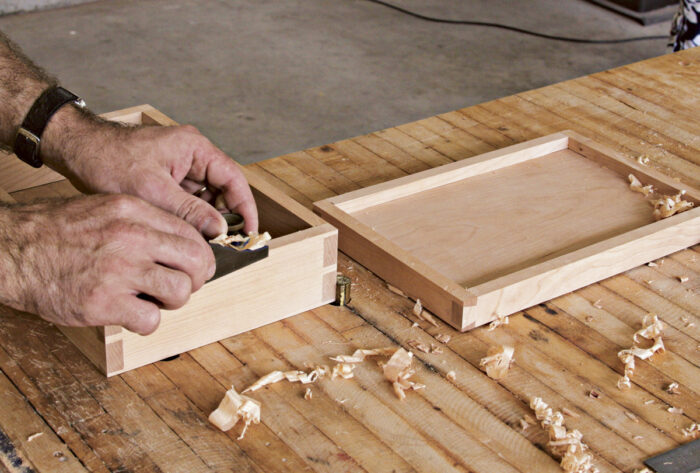
4. Plane and sand the edges until top and bottom fit back together seamlessly. This can be a slow process depending on the accuracy of your cut. The plane is better at first because it doesn’t round the edges as much as sanders. But if you get tearout, use a sander. B
A
B
Handle, Hinges, and Finishing
Surface-mount hinges are easy to fit and can be very attractive. They simply screw across the joint. Instead of a handle, I simply cut a recess in the top that allows a finger or two to get hold. It’s elegant, minimalist, and it works.
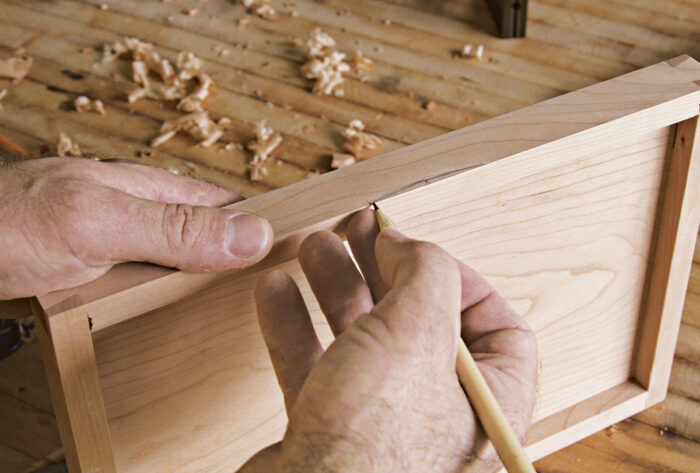
1. Lay out the recess on the edge of the top with a pencil. I made this one about 1/4-in. wide and 2-in. long, but suit yourself. A
2. Use a file to cut down to your lines. Don’t cut all the way in, but at an angle so the seam between top and bottom isn’t opened. Sand the recess smooth.
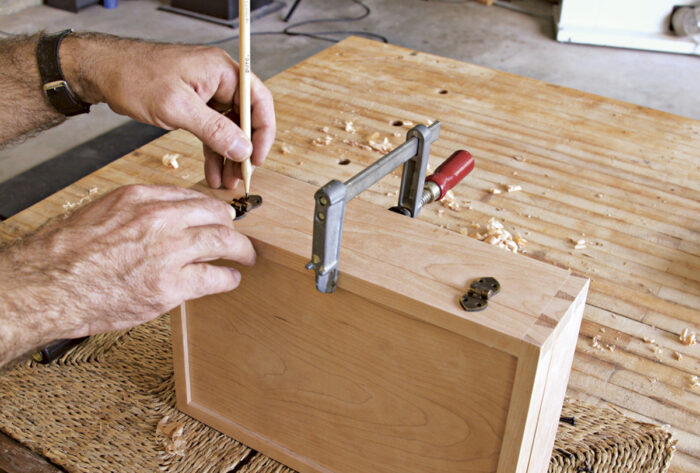
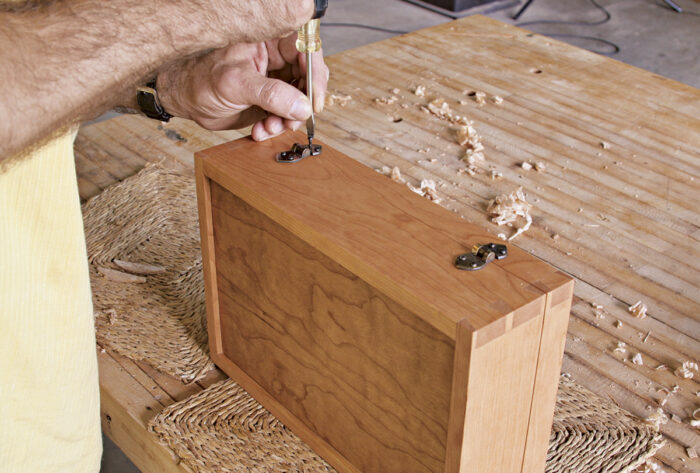
3. For the hinges, clamp the box together and lay the hinges about 2 in. in from the ends. Center the pivot pin over the seam and mark the pilot holes for the screws. Use a drill bit slightly smaller in diameter than the screws. Before you drill the holes, wrap a piece of tape around the drill bit 3/8 in. from the tip to make sure you don’t drill through the box. B
4. Finish the box with a light coat of Danish oil. If the instructions on the can tell you to replenish dry areas, ignore them. Cherry has a propensity to blotch, even with an oil finish.
5. When the finish dries, screw the hinges in place and you’re done. C
A
B
C
 Excerpted from Strother Purdy’s book, Traditional Box Projects.
Browse the Taunton Store for more books and plans for making boxes.
Fine Woodworking Recommended Products

Suizan Japanese Pull Saw

Starrett 12-in. combination square

Jorgensen 6 inch Bar Clamp Set, 4 Pack


Log in or create an account to post a comment.
Sign up Log in