Make a Veneered Box with Contrasting Miter Keys, Part 1
In the first part of this box project, learn how to cut the parts and veneer the top panel.
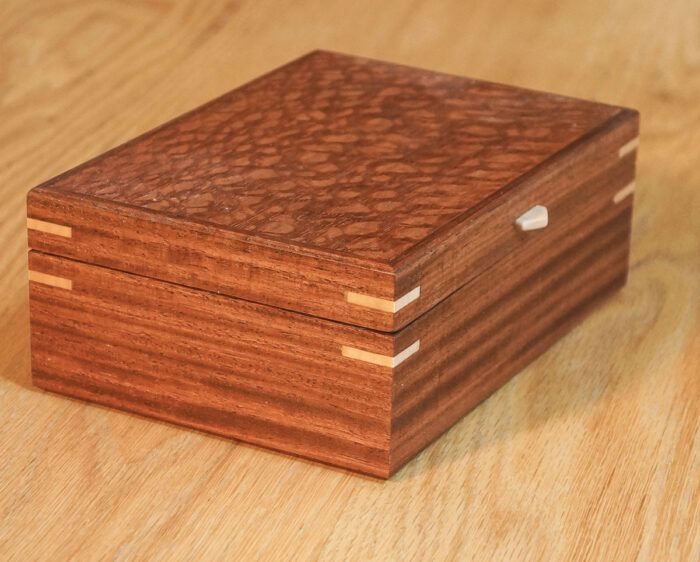
Color is one of the woodworker’s most useful design tools, and woods from around the world, or even those in our own backyards, can come in an amazing array of colors. One smart way to incorporate color into your work is with veneers, which are thin-sliced pieces of wood, hardly thicker in some cases than a piece of paper. When mounted on MDF or plywood, veneers are strong enough to offer lasting beauty. With veneers, a very small amount of wood of special pattern and color can be made to stretch a very long way. Veneers are inexpensive in comparison to solid woods of the same species, so using veneers is thrifty, both for the boxmaker and for the environment.
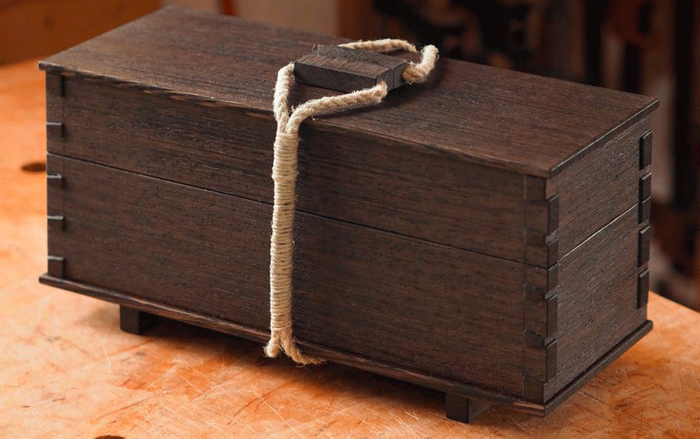
This simple box is made with machiche, a tropical hardwood, with contrasting maple keys and a top panel veneered with lacewood. The lacewood contains many of the same color tones found in the darker machiche. The contrasting use of maple helps to accentuate the miter keys that lock the corners together. The maple lift tab also invites the user to place a finger in just the right place to open the box.
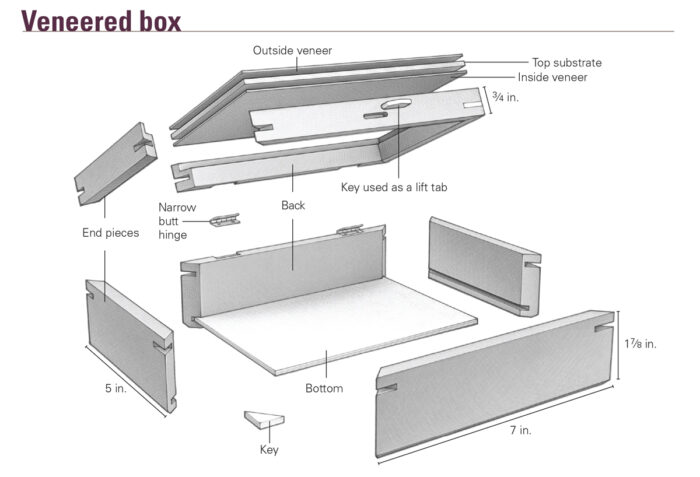
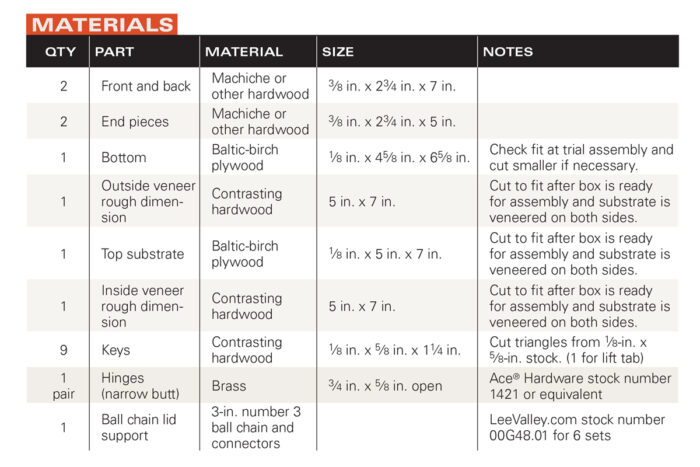
Resaw and Plane the Materials Flat
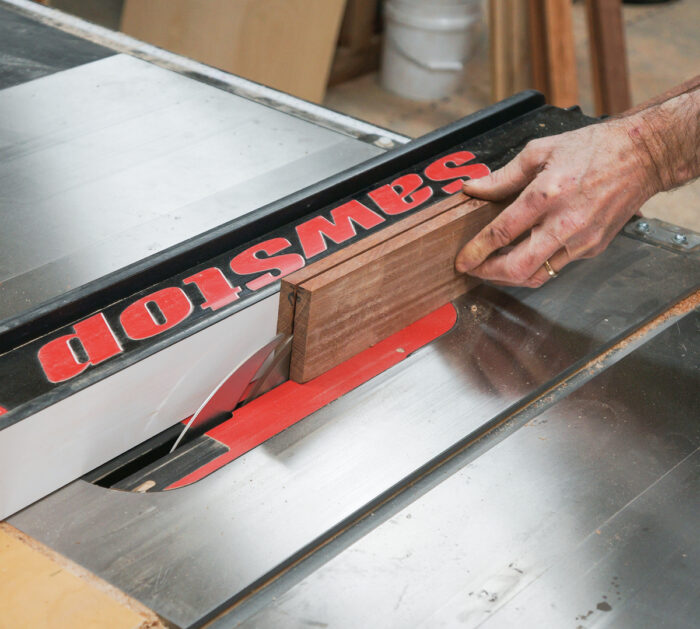
1. Use the tablesaw or bandsaw to resaw thicker stock. If you use the tablesaw, the safest technique is to keep the blade low and cut only halfway through the stock.
2. Flip the wood end for end, keeping the same side against the fence, and finish the cut (photo below). Then plane the wood to its final thickness; 3/8 in. thick is ideal for making the sides of this box, but slightly thicker or thinner will not have more than a minor effect.
Miter the Corners
There is no easier way to make a box with matching grain in the corners than by using a spacer block to alternate the lengths of cut. For this box, cut a spacer 2 in. long.
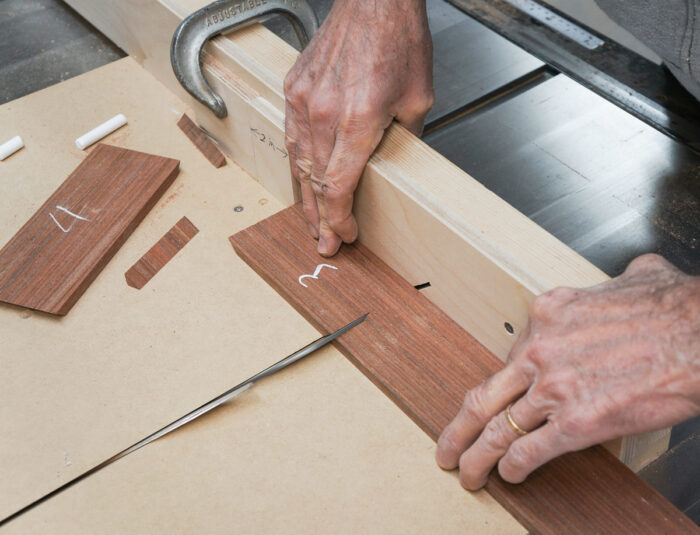
1. Mark and sequentially number the parts either before or after they are cut. The first cut is made on each part outside face down. Cut the long parts with the end against the stop block and the matching short parts with the end against the spacer, which will in turn rest against the stop block.
2. The second cut is made on each piece outside face up and with the first cut end against the stop block. This instruction applies to both left-tilt saws and right-tilt saws, the only difference being that the stop block will be clamped to the fence on the side opposite the tilt of the blade (photo below).
Rabbet and Groove the Sides for the Top and Bottom
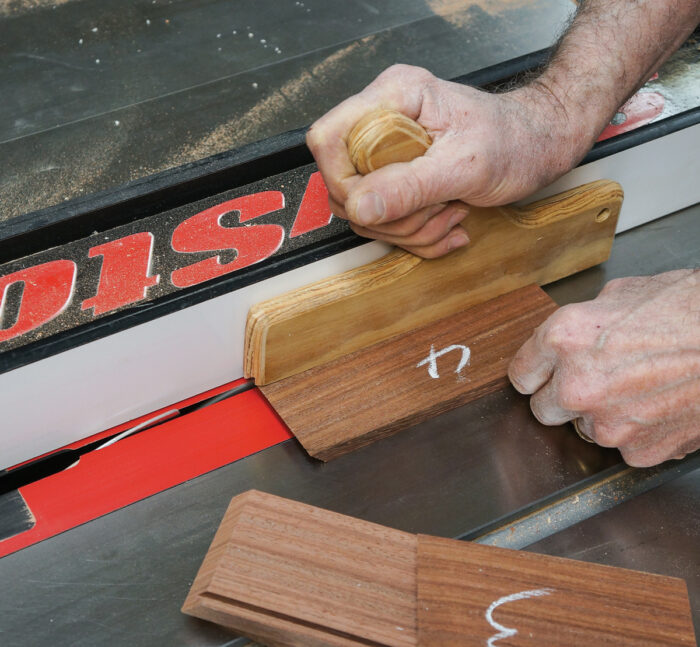
After the parts are mitered, cut the grooves in the sides for the bottom to fit. Use a notched push stick to apply pressure, pull the workpiece safely through the cut, and keep your hands at a safe distance from the blade (photo A).
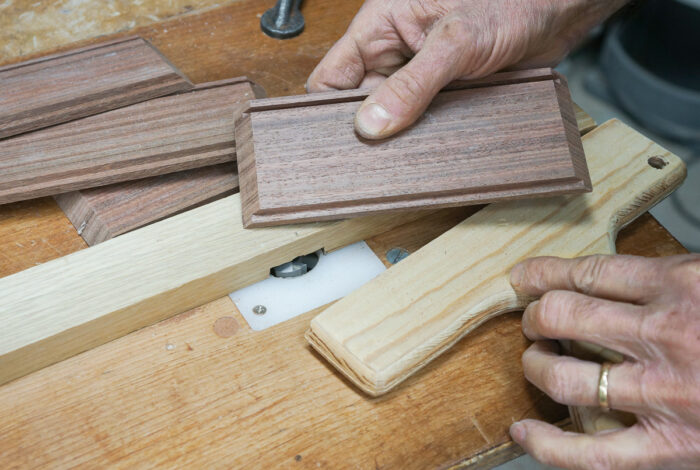
Forming the rabbet on the top edge of each piece can easily be done on the router table or the tablesaw. On the router table, use a large-diameter straight-cut router bit, buried in the fence with only 1/4 in. protruding. Raise the height of the router bit enough to equal the thickness of the Baltic-birch plywood top plus the thickness of the veneers to be used (photo B). It is better to go just a bit deeper than absolutely necessary so that when the box is assembled with the top panel in place, a bit of edge remains to be sanded down flush to the veneer rather than the other way around
Work SmartWhile some woodworkers cut the groove and rabbet prior to mitering the ends of each piece, I find cutting rabbets and miters on short stock increases the accuracy of each cut. |
This same step can be done on the tablesaw in the following manner: Set the blade height to equal the thickness of the Baltic-birch plywood top plus the two thicknesses of veneer, and set the fence so that the distance to the outside of the cut is 1/4 in. Pass the workpieces through the cut with the top edges of their face sides against the fence. Then lower the blade height to 1/4 in. and, with the inside faces of each part down, make second cuts to form the rabbets. You will need to set the fence so that the distance between it and the outside of the cut equals the thickness of the Baltic-birch plywood plus the thicknesses of the veneer.
A
 |
B
 |
Veneer the Top Panel
Vacuum veneering used to be more of a professional technique, out of the reach of many amateur woodworkers due to the cost of equipment. These days, simple vacuum kits designed for making skateboards can also be used for making boxes; for example, the Roarockit vacuum veneer kit can allow you to get started for much less expense than a professional kit.
Work SmartWhen installing veneered surfaces flush to surrounding wood, leave the surrounding wood slightly proud to minimize sanding on the veneer which could lead to sanding through the veneer. |
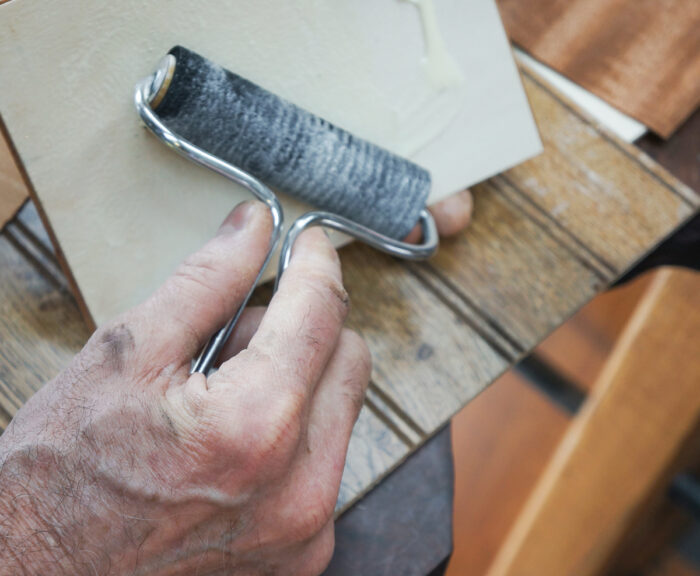
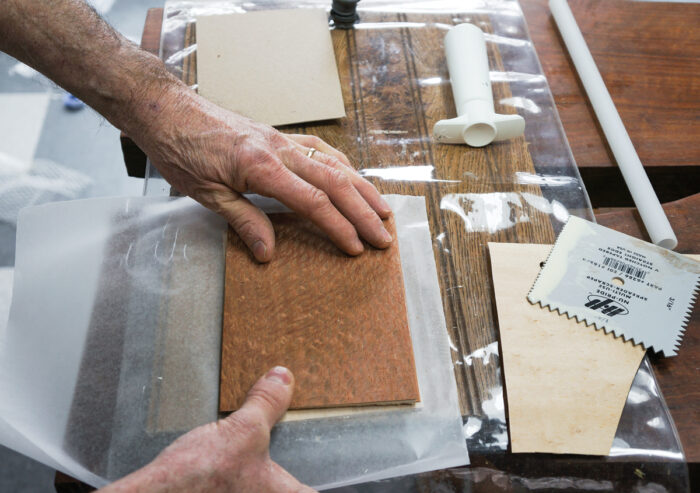
1. The veneer and plywood top panel should be 1/4 in. to 3/8 in. oversize in both directions to allow it to be trimmed perfectly to fit just prior to assembly. Apply glue to the Baltic-birch plywood (photo A).
2. Apply veneer to both sides at the same time. Then press the veneer in place (photo B).
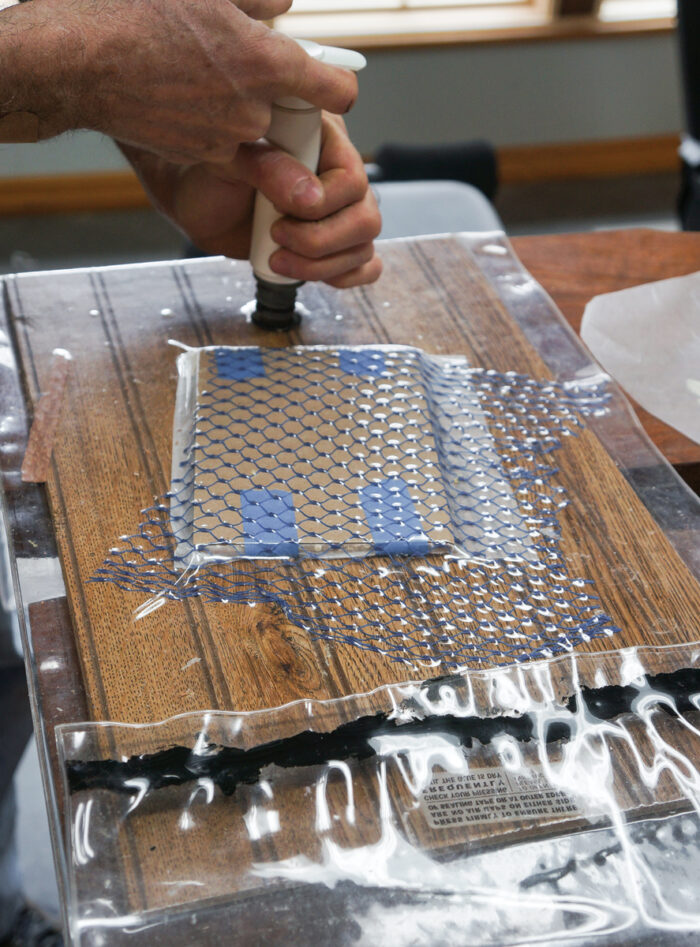
3. Seal the vacuum bag and use the pump to remove the air from the bag. An expanded plastic mesh helps to provide passage for the air to be pulled from the surface of the veneer (photo C).
4. Leave the panel in the bag for about 45 minutes for the glue to dry. I check frequently during those minutes to see that the vacuum has held. You can tell by attempting to pump more air from the bag. If the pump operates easily, air is leaking into the bag and you must pump again to maintain clamping pressure.
A
 |
B
 |
C
 |
Cut the top panel to size
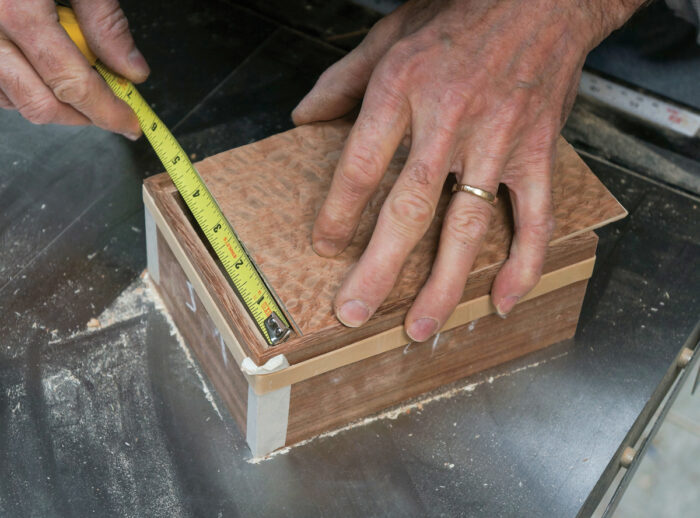
1. After the glue has set, cut the veneered top panel to size. To determine the proper size and get the best possible fit, tape the sides of the box together at the corners with masking tape, and then apply rubber bands to hold the box tight as you measure the space available in the rabbet for the veneered panel (photo A).
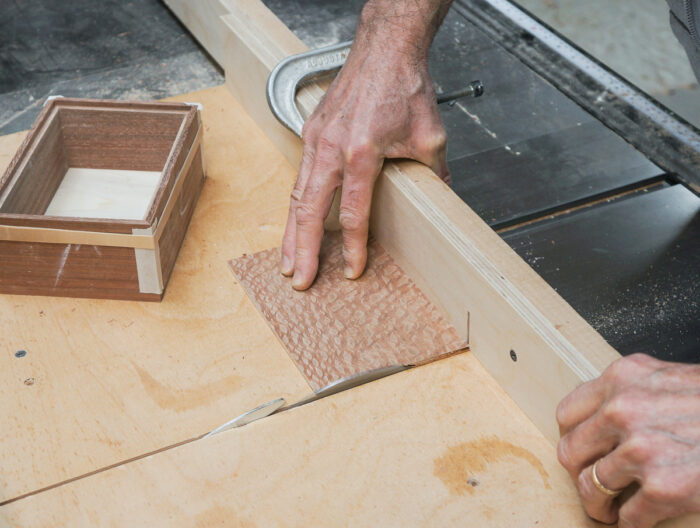
2. Your first cut along one edge of the veneered panel will align the veneers with one long edge of the Baltic-birch substrate. This will give you the first flat edge along one side. From there, cut one end square and then the other using the stop block to control the exact length (photo B). My preference in making this box is to set the stop block slightly too far from the cut, so that I can work my way to a perfect fit.
3. Reset the stop block location on the sled and, with one square corner held tightly to the sled and against the stop block, cut the final side to finished width. Again, it works best to start wide and work your way to a perfect cut, checking to see that it fits neatly into the top of your trial-assembled box.
A
 |
B
 |
 Excerpted from Doug Stowe’s book, Beautiful Boxes.
Browse the Taunton Store for more books and plans for making boxes.


Comments
Wouldn't it be easier, and safer, to cut the bottom slot and the top rabbet before cutting top, bottom, and sides?
As this is such a small box, it would be easier, if you have a piece of stock that is 5-5/8" wide. Then, cut a groove on either side for the bottoms, a wide groove through the middle. This, when you cut the stock in half, will become the rabbets for the tops.
Log in or create an account to post a comment.
Sign up Log in