Make a Veneered Box with Contrasting Miter Keys, Part 2
Boxmaker Doug Stowe shows how to assemble the box and install the keys that reinforce the corners.
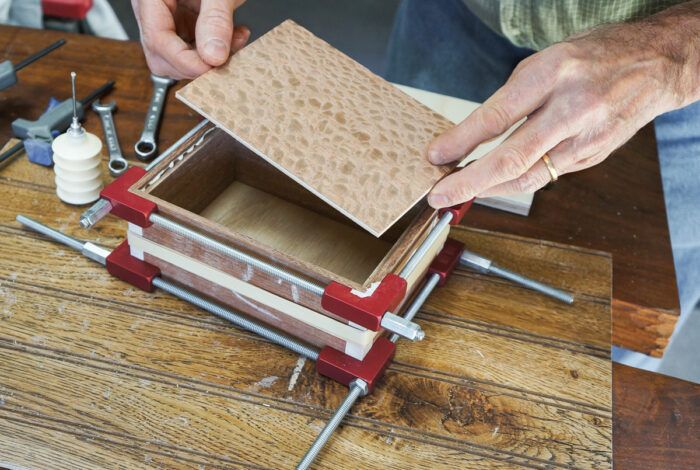
This is the second of three articles on making a veneered box. The first article explained how to prepare the parts: cutting miters, rabbets, and grooves and veneering the top panel. Here, we show how to assemble the box, cut the miter key slots, and cut the lid from the body of the box.
Assemble the Box
1. Remove the rubber bands and open the box up to apply glue to the corners. Because this box is made with a Baltic-birch plywood bottom panel, you can also apply a bit of glue in the grooves at each end of each part so that the bottom will help to provide strength to the corner joints. Photo A
A
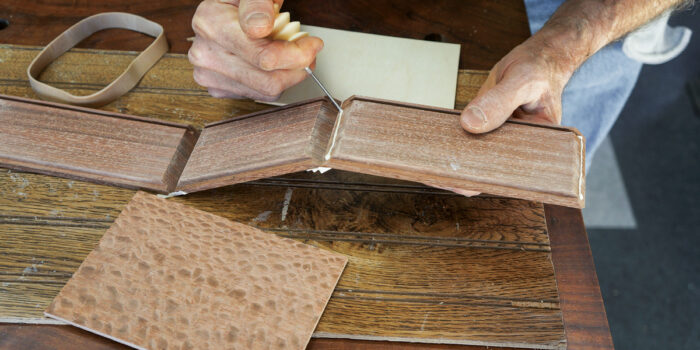
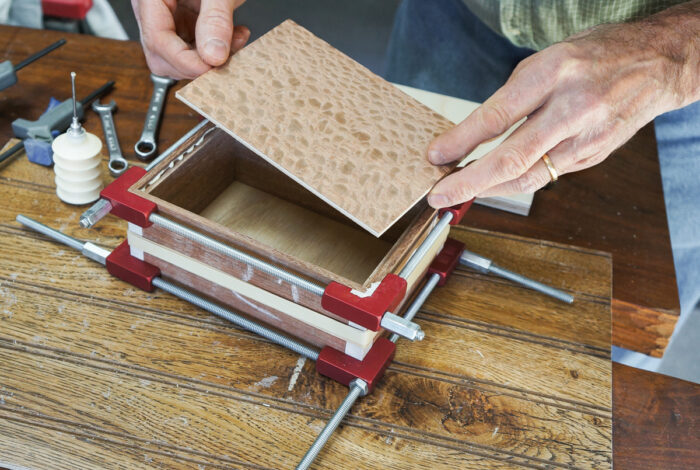
2. Roll the box sides around the bottom panel and apply rubber bands to hold the corners tight. Be prepared with additional clamps. The clamps that work best for mitered corner boxes are those that pull evenly from all four corners of the box at the same time. The picture-frame clamps shown in the top photo on the facing page are ideal. But have them set up almost to size before you apply glue so that no time will be wasted before the glue sets. Other clamping options are shown in the “Clamping Mitered Corners” sidebar.
3. When the sides are glued tightly together, spread a bead of glue in the rabbet and press the veneered top panel into position. Photo B
B
4. Use small clamps and a plywood or particleboard caul to hold the top panel tightly in place as the glue sets. Photo C. Make the caul only slightly smaller than the veneered panel so that it applies pressure and holds the panel flat as clamping pressure is applied at the corners.
C
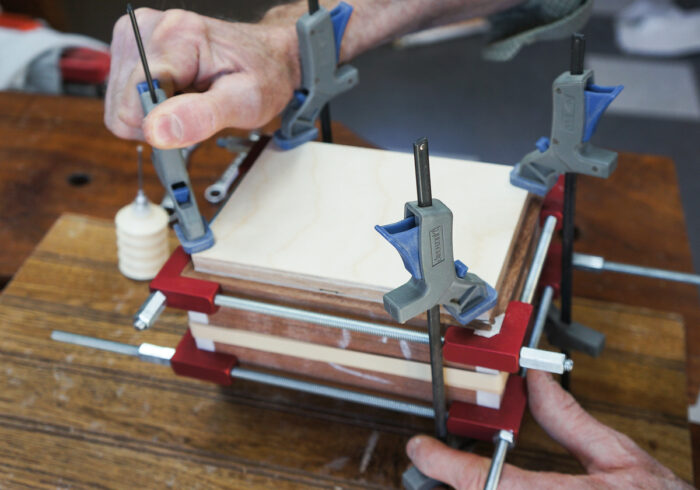
Work SmartDuring glue-up, apply a coat of paste wax to the bottom of your caul to keep it from sticking in case extra glue seeps out. An alternate technique is to put wax paper between the caul and top panel |
Clamping Mitered CornersClamping mitered corners requires a strategy that’s different from that used for other common woodworking joints. As you apply pressure from a clamp on one side of a box made with mitered corners, it forces the miter to slide in the direction pressure is applied, forcing the corners out of alignment. Mitered corners need pressure applied equally from all four corners at the same time. A variety of clamp types are designed to do this. Band clamps and picture-frame clamps pull joints together evenly, ensuring that the corners are perfectly aligned at the points of the miters. 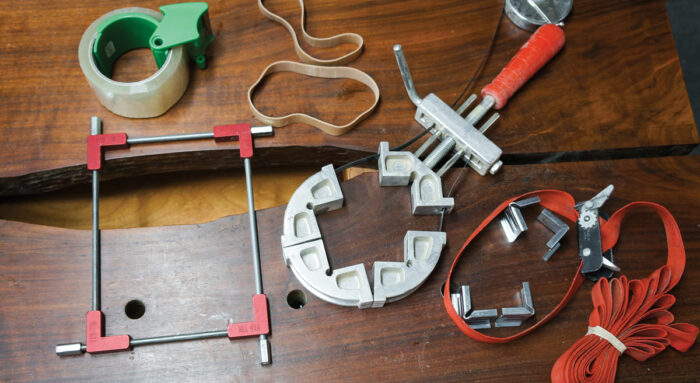 I often use even simpler techniques. Large rubber bands or package tape are each capable of applying enough pressure to hold a well-cut mitered joint together long enough for the glue to dry. You can add as many layers of tape or as many rubber bands as needed to pull the joints tight. As important as applying sufficient clamping pressure is the woodworker’s careful observation of each corner before the box is set aside for the glue to dry. Using clear tape will help you to see what you’ve done. Check for miters that meet very precisely at the corners and that close tight at both the top and bottom of the box. Once the glue has set, it is too late to make adjustments. |
Cut the Miter Key Slots
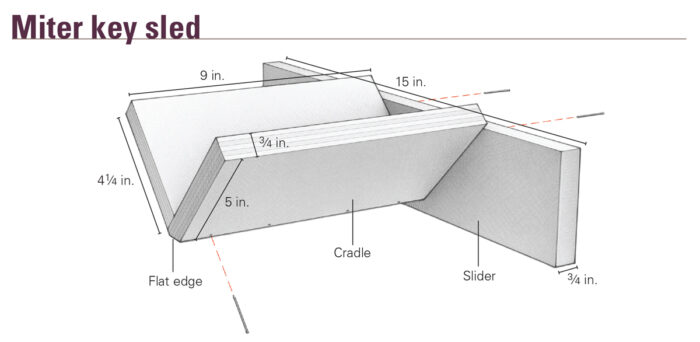
Because of the depth of this box, I made a jig that gives greater support for guiding the box across the tablesaw to cut the slots (see “Making a Miter Key Sled”).
1. The jig holds the box at a 45-degree angle as it passes over the saw and allows for the key slots to be cut at any position along the full height of the box. Filler pieces of various lengths cut to fit in the space between the box and the slide portion of the jig allow the box to be positioned exactly where you want for each cut. Photo A
A
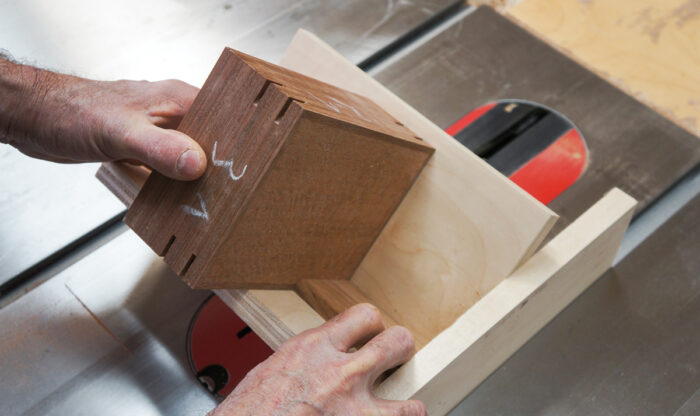
2. To figure out how long to make the spacer blocks, make your first cut into the body of the jig and then measure the distance from the slide portion of the jig to the saw’s cut in the “V.” For my saw, that distance is about 5 in., so if I mark the desired location of my key on the box and align the 5-in. mark of my steel ruler or tape measure on that key, and subtract what remains from the top of the box to the end of the rule, I’ve determined how long to cut the first block. For a second or third key, I do the same thing.
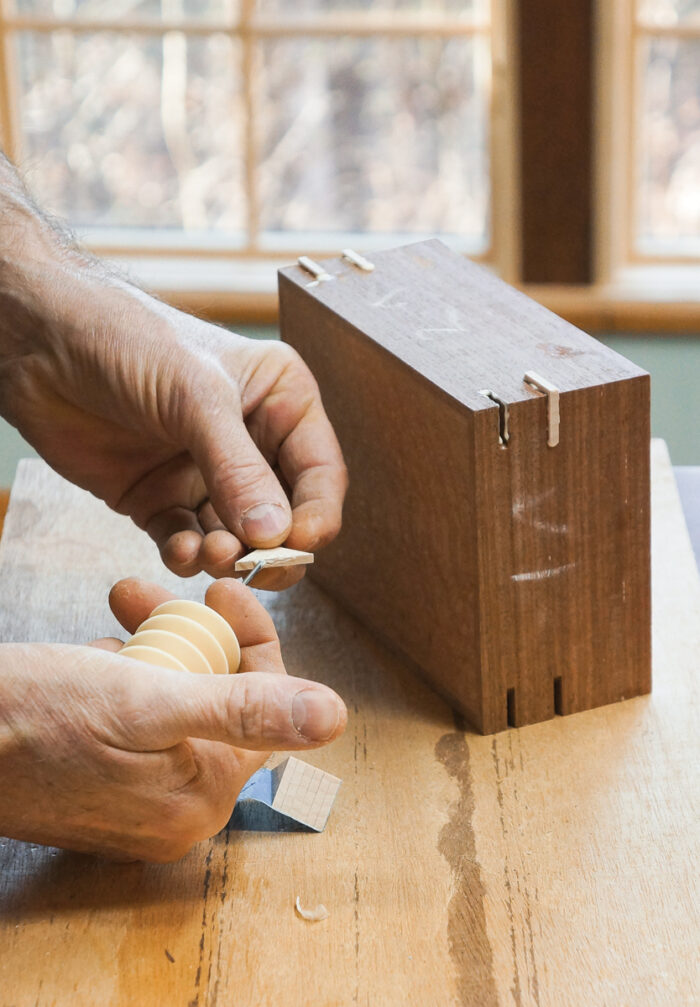
3. Spread glue inside the grooves and a bit on each key as you put them in place at the corners of the box. Photo B
B
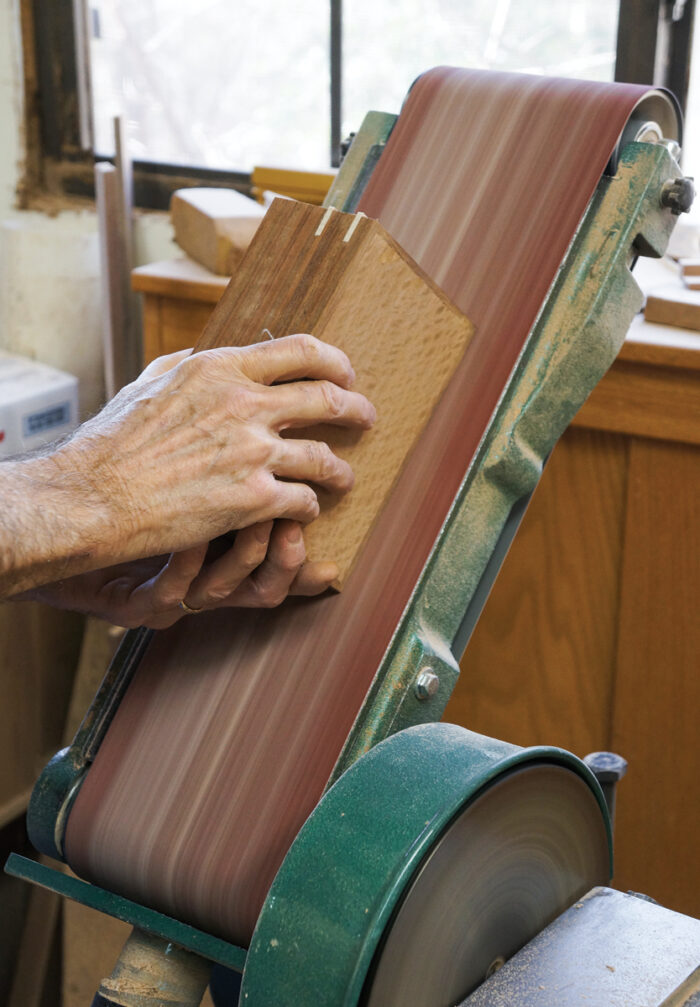
4. Sand the flat sides of the box on a belt sander. Photo C. I turn the box end for end as I work, keeping it in one place for only a very short time, so that I can continually monitor my results and avoid sanding too heavily in one spot.
C
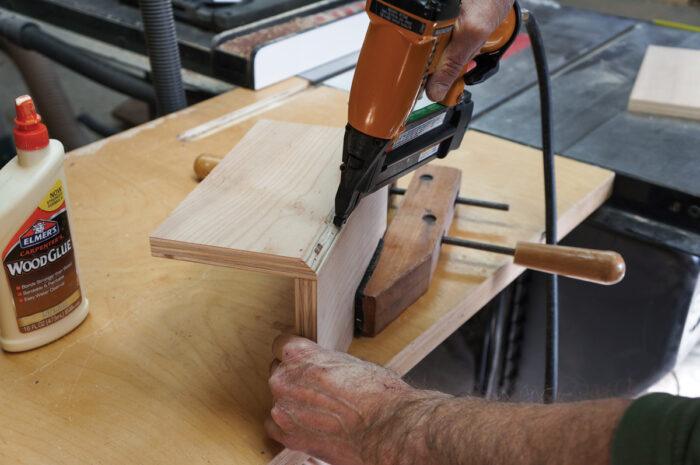
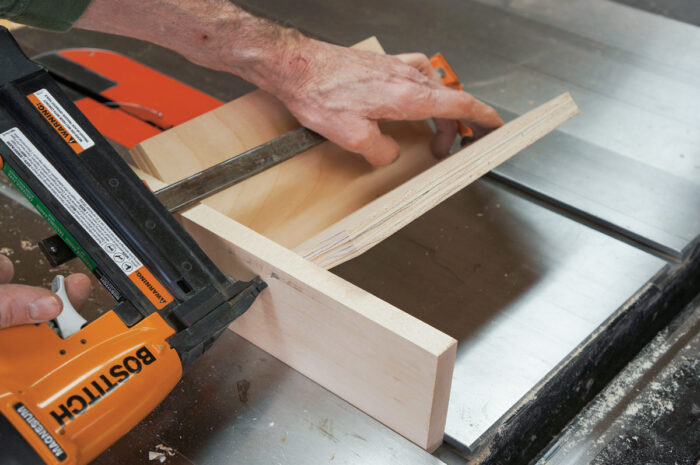
Making a Miter Key SledOver the years, I’ve made many versions of this sled and I’ve continually refined my design. I like this version because it is not only easy to use but also very simple to make. Form the cradle from two pieces of ¾-in. plywood or MDF, one 5 in. wide by 9 in. long and the other 4¼ in. wide by 9 in long. Use clear plastic tape and glue to hold the two parts together to form a 90-degree angle with the edges carefully aligned. When the glue has set, make a trimming cut with the saw set at 45 degrees to form a flat edge that will allow the two parts to stand up on the tablesaw without falling. Then use a pin or brad nailer to drive nails into the joint, being careful not to put them near the area where the blade will cut. Make the slider from a piece of hardwood planed to fit into the miter gauge slots on the top of your tablesaw. Getting just the right fit is important. It should slide without force, but not be loose enough to wiggle. While the dimensions of these parts are not critical to the use of the jig, I make mine from stock about 3-1/2 in. wide and 15 in. long for smooth travel. To assemble, place the slider into the miter gauge slot on the right side of the saw and clamp the cradle to it as it rests squarely on the flat surface. Then use the brad nailer to connect the slider to the “V”-shaped cradle.
|
|
Cut the Lid from the Body of the Box
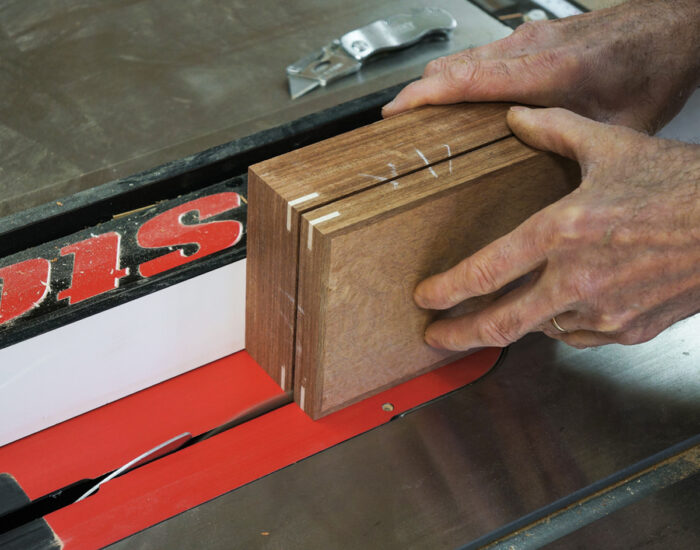
1. Use the tablesaw to cut the lid from the body of the box. Keep the blade height low so that it does not pass all the way through the stock. Photo A
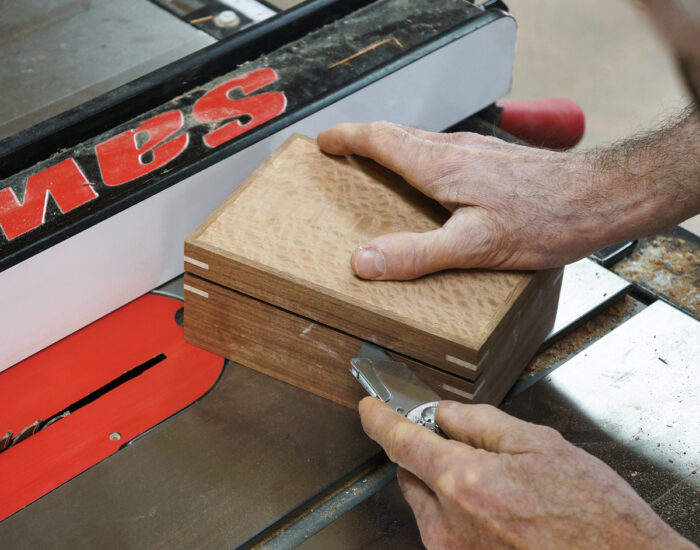
2. I have a knife at the ready to check my first cut. The knife should pass through the remaining stock with only a small amount of effort (Photo B). After all the sides are cut on the tablesaw use the knife to finish the cut.
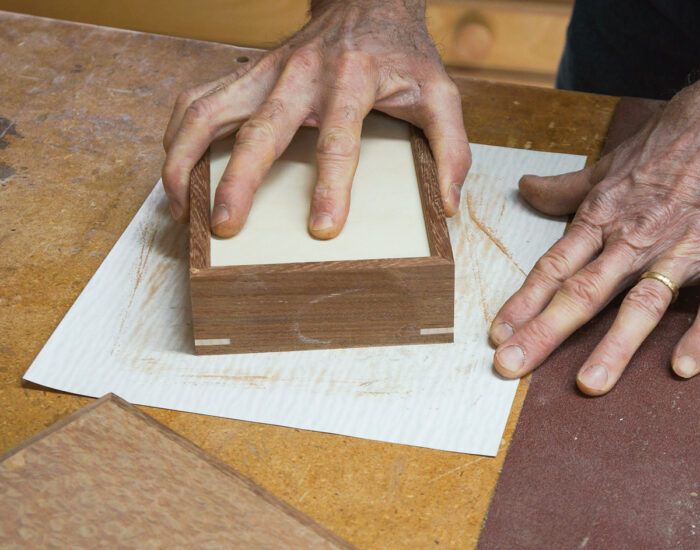
3. After the lid is cut free of the sides, place it on a large sheet of sandpaper and smooth the cut. Photo C
A
 |
B
 |
C
 |
 Excerpted from Doug Stowe’s book, Beautiful Boxes.
Browse the Taunton Store for more books and plans for making boxes.



Log in or create an account to post a comment.
Sign up Log in