Make a Veneered Box with Contrasting Miter Keys, Part 3
In the final part of this box project, learn how to install the hinges and hardware.
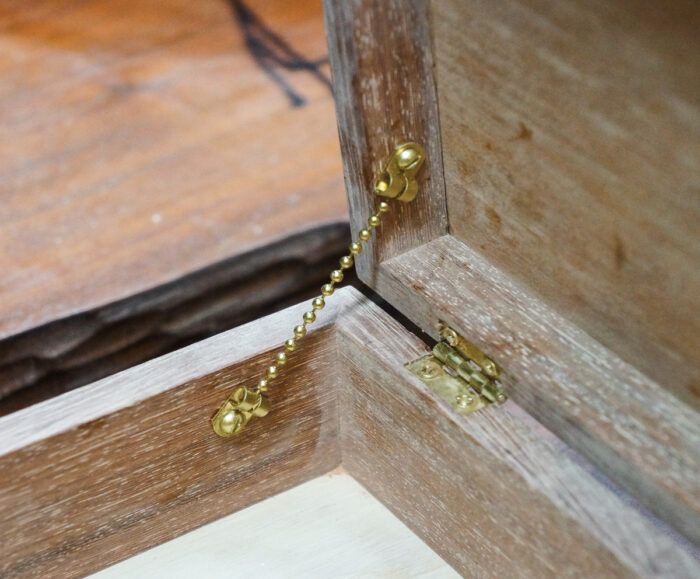
This is the third of three articles on making a veneered box. The first two articles explained how to prepare the parts, veneer the top panel, and assemble the box. [add LINK] Now we’re ready to install the butt hinges and the lift tab.
Rout the Hinge Mortises
I use a simple story-stick technique for routing mortises for butt hinges on the router table. This is a technique I’ve taught woodworkers in classes throughout the United States, and while it may seem a bit complicated at first, it really simplifies getting an exact fit.
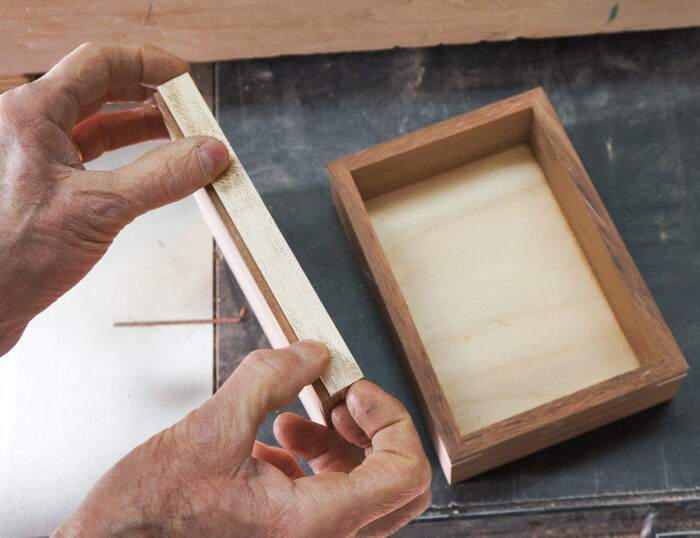
1. Make a story stick of thin wood cut to the exact same length as the back edge of the box. Use your sense of touch as well as your eyes to compare and make certain that it is the same length. (Photo A) Any variance in length will lead to either a bit of extra chiseling or a gap.
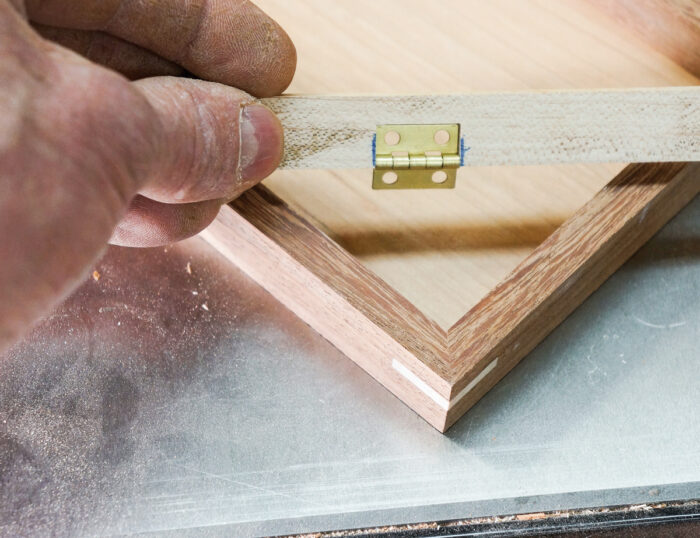
2. Cut a slot in the edge of the story stick using the crosscut sled on the tablesaw. Hold the stick on edge against the fence and set the blade so that it cuts only part way through; widen the slot with more cuts until it holds the hinge just so. (Photo B) On this box, I set the hinge at 1 in. from the end of the story stick, but on wider or narrower boxes the distance can be changed as necessary. In a perfect fit, the hinge will hang in the slot as shown in the photo but slide in easily without force.
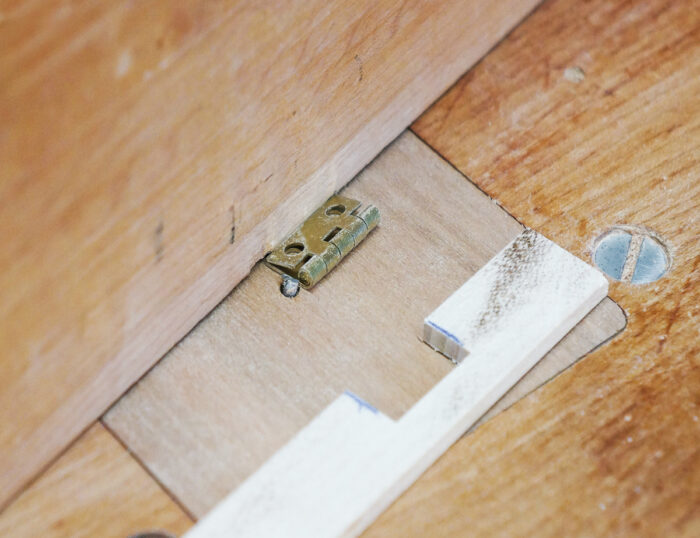
3. Install a zero-clearance router table insert to help set up the height and fence position for the router table cut. With a 1/8-in. spiral router bit in the router table, raise the height to equal just less than half the thickness of the hinge. (Photo C) Then set the fence so that the hinge will fit into the mortise with at least half the barrel of the hinge protruding. The exact amount of inset of the hinge is also related to other factors like the thickness of the stock used. In all cases, butt hinges are easier to install accurately if three sides are confined within the mortise.
A
 |
B
 |
C
 |
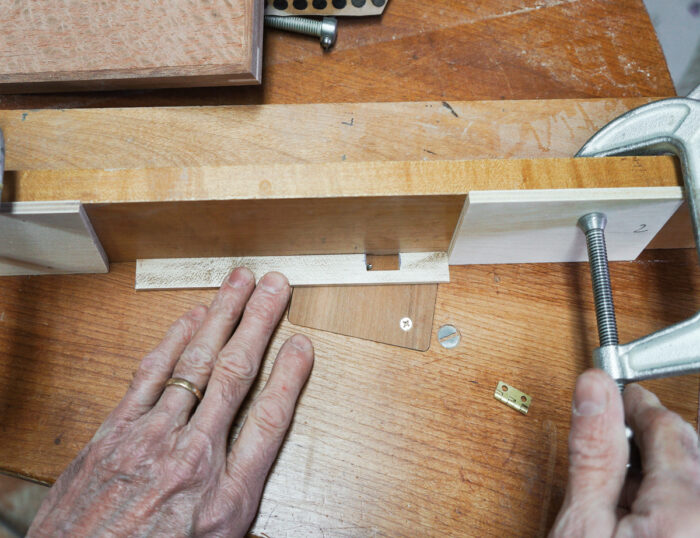
4. Use the story stick to set up stop blocks, left and right. I use a spiral bit that makes aligning the story stick with the full width of cut easy. If you use a router bit with straight flutes, make certain that the flutes are aligned to their widest points against the stick. Move the stick as far as it can go to the right to set up the right stop block, and then to the left to set up the left block. (Photo D)
Work SmartWhen selecting hinges for small boxes, choose narrow butt hinges as they will not protrude as far from the back of the box and will allow for more material to be left surrounding the hinge on the inside surface of the box |
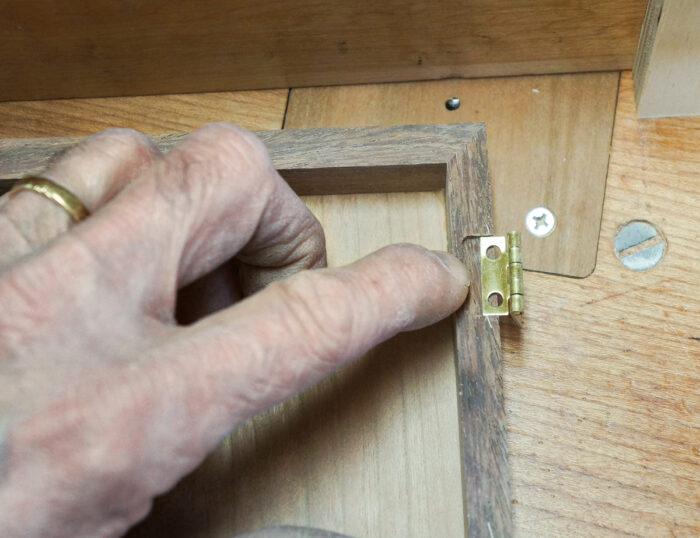
5. Lower the top or bottom of the box onto the router table and move the back edge along the fence to rout the space on the edge for the hinge to fit. Then do the other part, being certain in each case that the back surface of the box is against the fence.
6. You will notice that this first operation will rout only one hinge mortise of each part (Photo E). In order to rout the matching mortises, remove the stop blocks and flip the story stick to orient the other direction along the fence. Follow the same sequence to rout the matching hinge mortises in the top and bottom.
D
 |
E
 |
Rout to Fit the Lift Tab
You’re not done yet with the story stick; it can still be used to fit the lift tab at the exact center of the front of the lid.
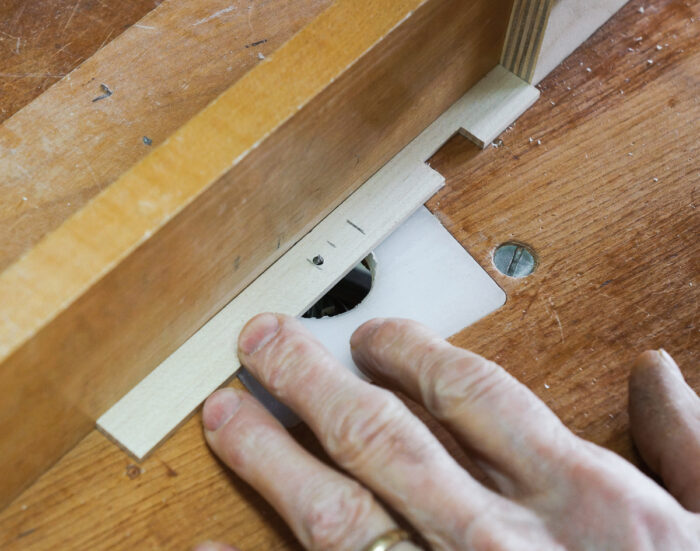
1. Align the stop block on the right to position the left side of the tab, and lower it onto the spinning router until it cuts through. (Photo A)
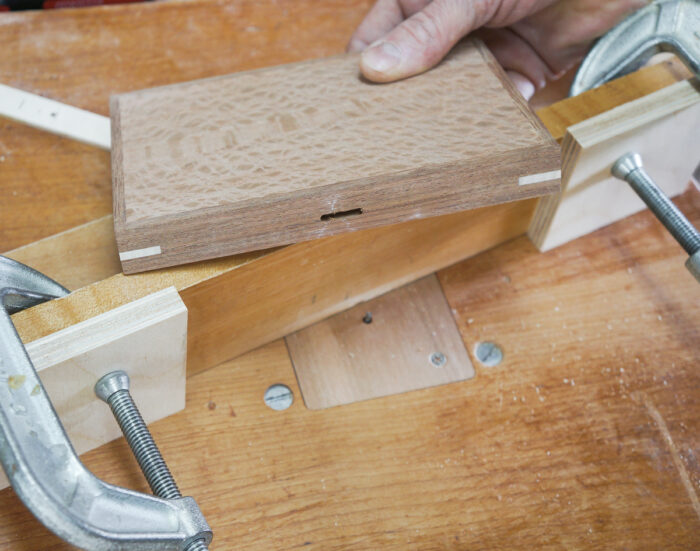
2. After the router is turned off and stops, flip the story stick over with the same side against the fence to position the stop block on the left. This setup, with two stop blocks, left and right, will enable you to rout a precisely centered groove to fit your lift tab. (Photo B)
A
 |
B
 |
Cutting the tab
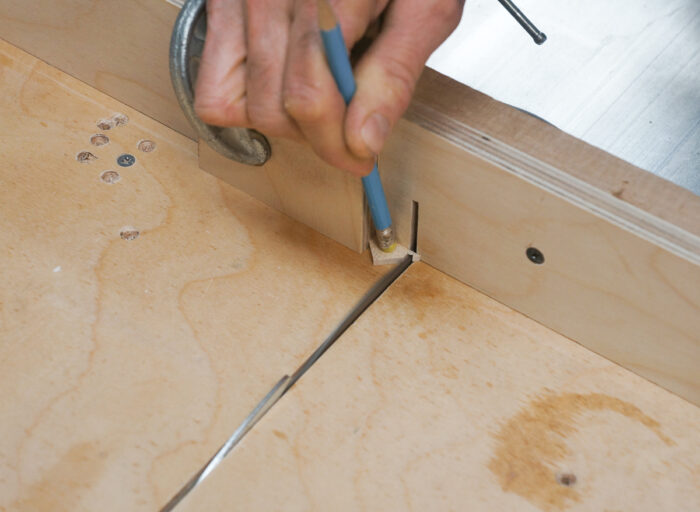
1. Making a tiny lift tab takes some rather close cutting with the saw. Use the eraser end of a pencil to hold down a piece of 1/8-in.-thick maple as you cut it to length to fit the groove in the front of the box (Photo C). I use a stop block on the crosscut sled to control the length of the cut. I used a left-over miter key for this as it was already the right thickness to fit the groove. As an alternate approach, this cut can be made easily and accurately with a fine-toothed handsaw.
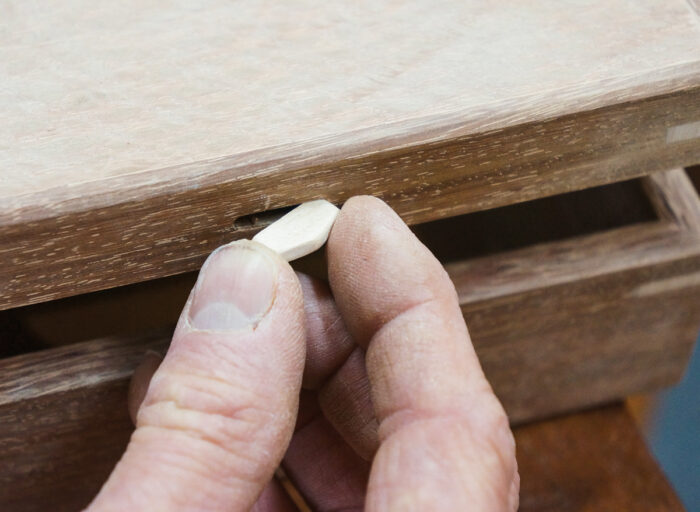
2. To shape the edges of the tab to fit the groove drag it along on a sheet of sandpaper as you gradually raise the angle and round it to fit. Surprisingly, this takes only a few strokes on each edge. After fitting it to the length of the groove, continue to sand on the front edges to achieve a pleasing shape. Moving gradually from coarse to fine sandpaper will give the best results. Once shaped, glue the lift tab into the slot. (Photo D)
C
 |
D
 |
Install the Hinges and Hardware
Tiny butt hinges like these are difficult to install. First, the screw holes must be accurately located in order to nest the hinges tightly into their mortises to guarantee that the edges of the box will be aligned. Second, tiny screws are difficult to drive into hardwood and must be predrilled.
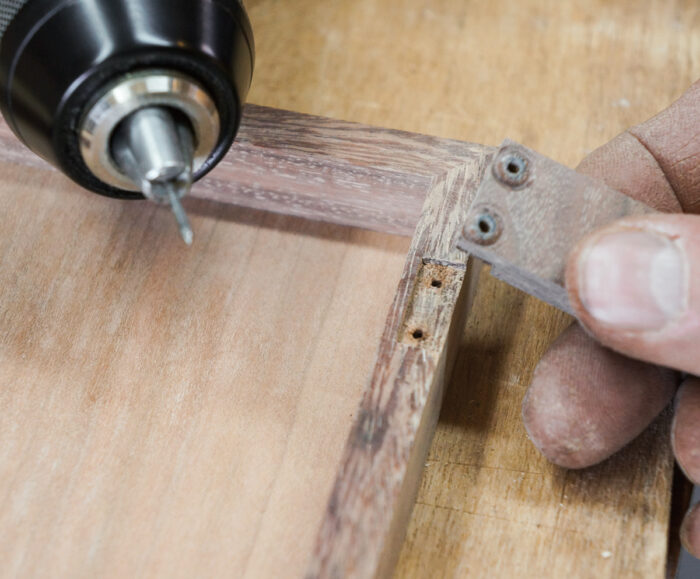
1. I make simple drilling guides like the one shown in photo A in order to simplify the exact drilling of pilot holes for the screws to get proper hinge placement (Photo A). The great thing about making this small drilling jig is that I can mess up the making of it without messing up the box.
Work SmartWhen making a guide for drilling screw holes, use the drill press and fence for greater accuracy when drilling the guide holes. |
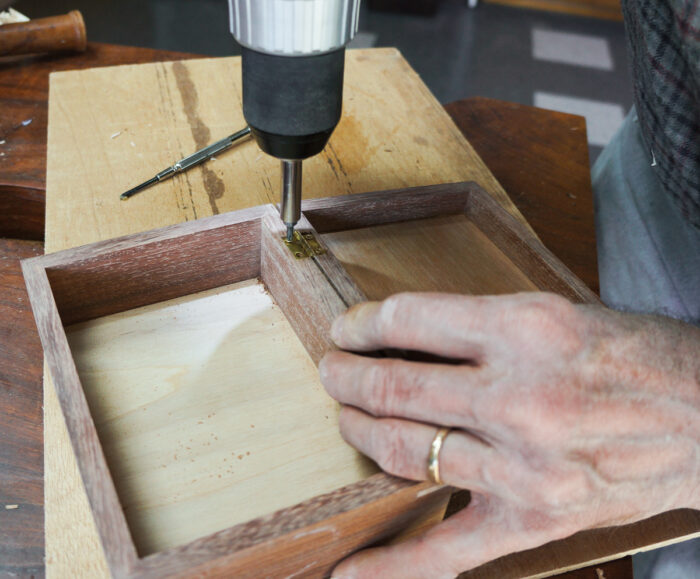
2. After drilling the pilot holes, drive the screws in place. The screws that came with the brass hinges used with this box are brass-plated steel, and a power drill can be used to drive them in place. The clutch on the drill that allows it to slip as the screw tightens should be set at the lowest level. I install the screws in the lid first and then hold the lid in place as I drive the screws into the body of the box. (Photo B)
Work SmartScrew threads should be waxed to ease their passage into hardwood. Some woodworkers use a steel screw of the same size first, and then remove it to install the brass screw with less risk of it breaking |
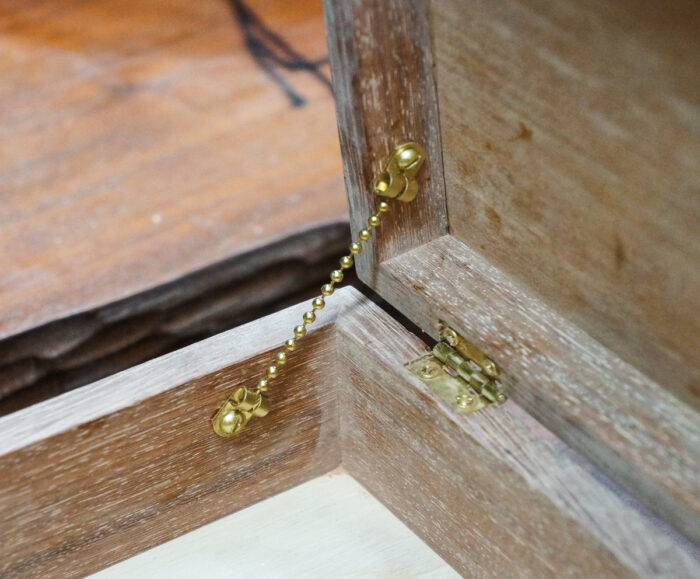
3. One of the best ways to support a lid on a small box and keep it from falling open too far is with a beaded chain. Check the materials list to find a source for parts. (Photo C)
A
 |
B
 |
C
 |
 Excerpted from Doug Stowe’s book, Beautiful Boxes.
Browse the Taunton Store for more books and plans for making boxes.


Log in or create an account to post a comment.
Sign up Log in