How To Build a Bow-Arm Stickley Morris Chair
Lamination puts beautiful grain and a graceful curve within arm's reach.

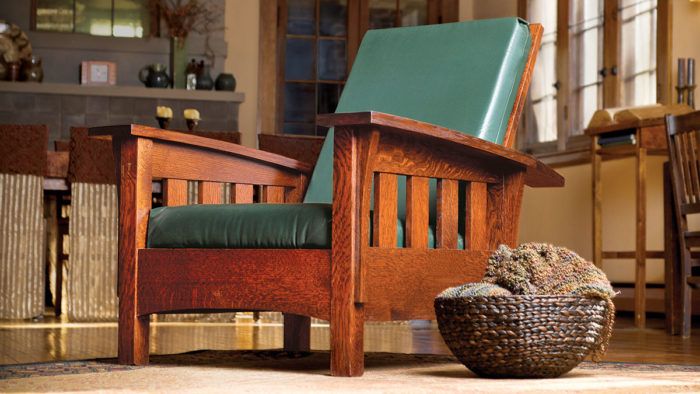
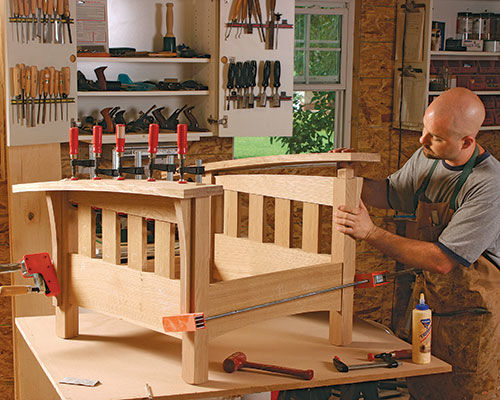
Synopsis: This chair, with its large, square legs and wide arms of quartersawn white oak, says “Craftsman” with every feature. It should, since it was based on a design by Gustav Stickley. The bowed arms and reclining back add comfort and style, yet the construction is not difficult. The two greatest challenges are making the bowed arms and cutting the mortise-and-tenon joinery in the curved parts. Woodworker Greg Paolini takes you through the construction step by step, adding tips for cutting accurate joints, laminating the arms, assembling the base, cutting the joinery and shaping the curved back slats, creating a seat-cushion frame, and finishing.
Craftsman furniture is known for its straight lines, quartersawn oak, and sense of earthen mass and solidity. No piece displays those features better than a Morris chair, with its large, square legs and wide arms decked out in beautiful ray-fleck figure. The gracefully bowed arms of this version, designed by Brian Murphy of American Furniture Design and related to a design by Gustav Stickley, lighten the mass just enough to give it the feel of irresistible comfort. Throw in a reclining back and firm, but giving, cushions, and you have a chair that you’ll never want to leave.
For the most part, the construction is straightforward. But the most distinctive part of the chair—its arms—presents two big challenges: making bowed arms with attractive grain, and cutting a mortise-and-tenon joint on the curved arms and side frame. I’ll show you how laminating the arms gets you around those challenges. And I’ll show you how to get striking quartersawn grain everywhere it counts, including a simple and authentic method for making a leg with four quartersawn faces.

Legs that look good from every angle
The legs of a traditional Morris chair have four quartersawn faces. Lumber like that doesn’t grow on trees, but it can be made in the shop. There are several different methods to achieve the look, but the one Stickley used, which is the easiest by far, is to glue up a core of quartersawn lumber and then laminate two quartersawn veneers over the flatsawn edges of the core.
After the glue is dry, trim the veneers flush to the core with a router and flush-trimming bit. Then crosscut the bottom of each leg to square it up. Don’t worry about the tops right now.
Mortises, then tenons
When making a mortise-and-tenon joint, I usually start with the mortises. It’s much easier to fit a tenon to a mortise than the other way around. You can cut all of the mortises now, except the four in the arms. They’re laid out and cut after you make the tenons on the tops of the legs.
Remain consistent with your reference edges. When cutting the mortises on the legs, for example, reference the same fence against the outside face of each one. Otherwise, the position of the mortises will vary, resulting in sloppy joints and possibly a chair that’s out of square.
Now cut all of the tenons, except those on top of the legs, at the tablesaw. Cut a full tenon on the back of the upper rail; you’ll just saw away part of it later.
Router-cut mortises have round ends, so I round the tenons with the rasp portion of a Nicholson 4-in-hand file. Its smooth edges won’t mar the tenon shoulders, and its aggressive teeth make quick work of the rounding.
Watch Paolini demonstrate how to build the chair, step by step, in a 12-part video workshop.
From Fine Woodworking #205
For the full article, download the PDF below:


Comments
First off, the full size plan is only for the curvature of the arm, the rest is a scaled drawing. The lengths of the side rails, front and back stretchers are wrong in the cut list that comes in the booklet with written instructions. All of the errors that I found with the cut list was also shown in the article that was in Fine Woodworking Magazine in 2012. I have made many projects from the magazine and and usually the measurements for a cut list are spot on. Not too impressed with the plans from American Furniture Design.
I too ordered the plan, but it is for a completely different Morris Chair. The design features are quite different...not even close. To say that it is a similar chair is a misrepresentation.
I'm confused now if I should buy these palnes or not. GW52 says they are the right plans, but with mistakes. 6145997 says they are totally different (which looks like the case by the picture). All I need is the arm curvature layout since the exploded view in the article can give me just about everything else.
Did the plans palns change between these 2 previous posts?
I made a bed using QSWO. My legs were oak sawn at 45 degrees and glued to give rays a flecks on all sides. This left me with a hole about one inch square in the center of the leg. I cut a piece of the correct size and glued it altogether. Heavy and solid.
Thinking to build 4 Morris style chairs for outdoor use - outdoor cushions and cyprus instead of the white oak...any thoughts?
Very nice and clear instructions – both the videos and the pdf.
Here are a few things I have learned so far which aren’t mentioned:
1. The full-sized plans can no longer be ordered from the Fine Woodworking website. However, with the few exceptions noted below, the pdf should suffice.
2. There is one error in the dimensions given in the pdf: the leg tenons are inset 1” (as noted in the video; not ½” as shown on the pdf) from the inside side of the arms.
3. Various curves can be drawn as segments of circles. The radii vary: 39” for the back slats; 71” for the curve cut into the front stretcher; and 250” for the arms. Use a tape measure which has a loop at the end to fix the center, hold a pencil to the tape measure at the desired radius, then swing an arc and draw the segment of desired length on a piece of paper.
4. When planing the 1/8” veneer for the legs, there is a greater risk of snipe on the ends. You can adjust your planer to reduce the snipe, however, if it is an option, you might want to plane veneer that is longer than needed so that you can cut off one or both ends.
5. It helps for the veneer to be 1/8” wider than the glued up leg assembly to which it is attached. This way, the veneer can be glued on with a slight overhang which can be cut away with a router flush trimming bit having a bearing wheel on the top – using the same technique employed to make identical layers of the form used to make the bow arms.
6. As of January 2023, DAP plastic resin glue is hard to come by. Cascamite, another powdered urea formaldehyde glue, is available. A number of negative reviews suggest that the manufacturer had some problems with quality control. Hopefully these issues have been addressed.
Log in or create an account to post a comment.
Sign up Log in