Capturing Ancient Furniture in SketchUp
After an inspiring trip to London, Tim Killen imported a museum photo into SketchUp to replicate a remarkable Egyptian stool dating back to antiquity.
Recently in London, UK we visited the British Museum particularly to review Roman, Greek, and Egyptian antiquities including furniture. One Egyptian piece caught my eye, a stool from Thebes – probably several thousand years old. To me, this piece could have been made in recent centuries – it did not look ancient. I took a picture but found a better one on the British Museum website, shown below.
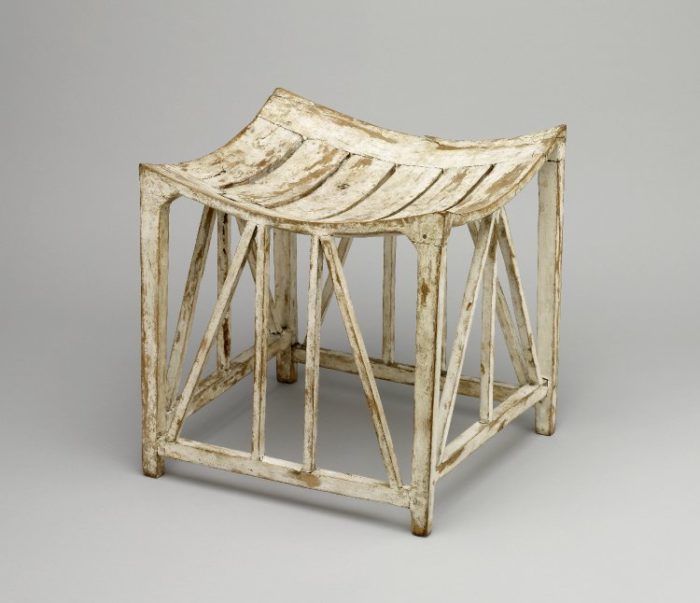
I was immediately fascinated by the structure, shapes, joinery, and angles. How would you make this remarkable piece? I can see they accommodated seasonal wood movement in the gaps of the seat. Looks to me that they used pinned mortise and tenon joints. Also the lower stretchers are staggered at the leg joint to allow non-interfering tenons. The spindles are arranged in two designs – one for the sides and another for the front & back. Those diagonal or oblique spindles are providing much stability and strength and greatly limit any racking.
So I decided I would build this stool. On the return flight, I opened SketchUp and began to capture this design. In the next few steps, I’ll show the major steps in SketchUp to develop an acceptable drawing package. There is also a video of this process.
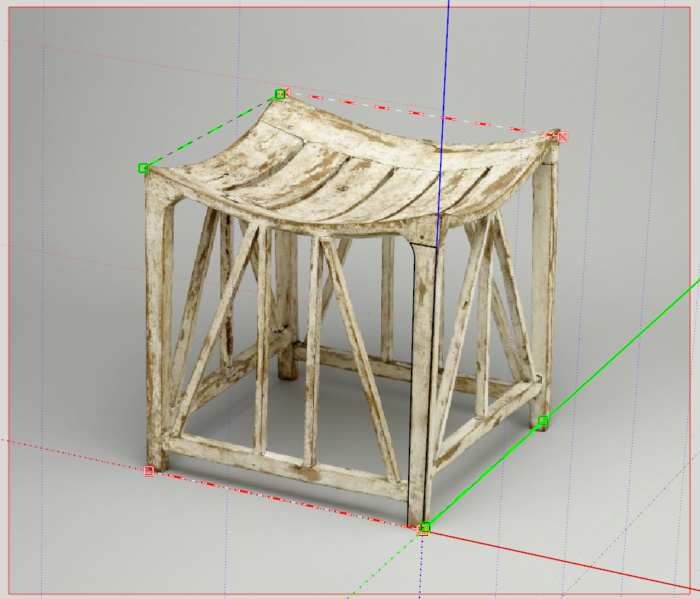
Step 1: I imported the museum photo into SketchUp as a New Matched Photo. I was pleased to find that the photo aligned well with the Perspective Bars. (Sometimes photos are cropped or fiddled with and don’t line up well when importing as a New Matched Photo.) In the image below, you can see how I lined up the Perspective Bars.
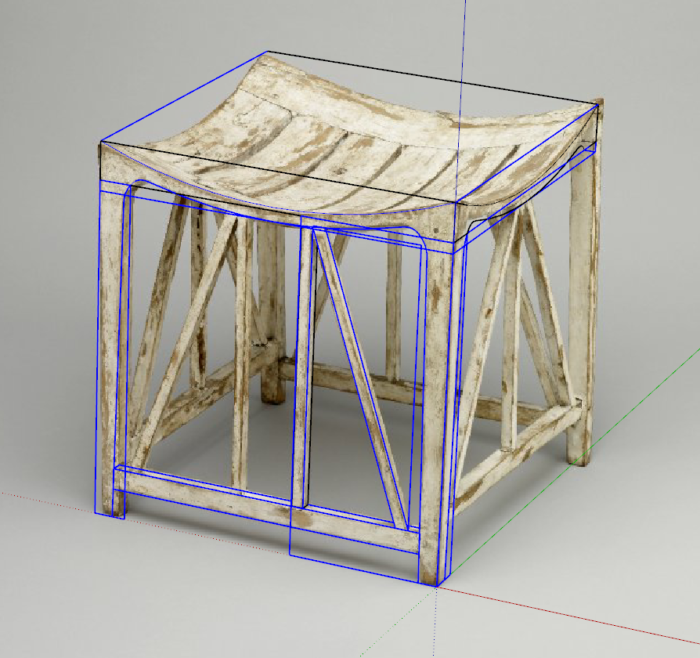
Step 2: With the Line Tool I began to traceover the component shapes, making them Groups at this stage. Note that I don’t bother sizing the photo at this stage. I know that it is several times larger than the actual piece, and this will be beneficial in doing some Intersection processes later. I’ll resize the model after working the design details. In the image below, I’ve selected (shown in blue) the resulting groups made in the traceover.
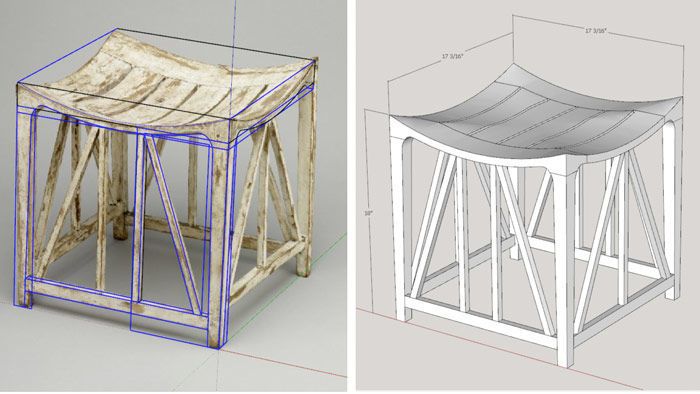
Step 3: In the next image I’ve shown the resultant traced-over groups. I made the Seat one Group at this stage, rotated a copy, then combined them to do an intersection. You can see the resultant full shape of the Seat on the left. I’ll make the individual slats later in the process.
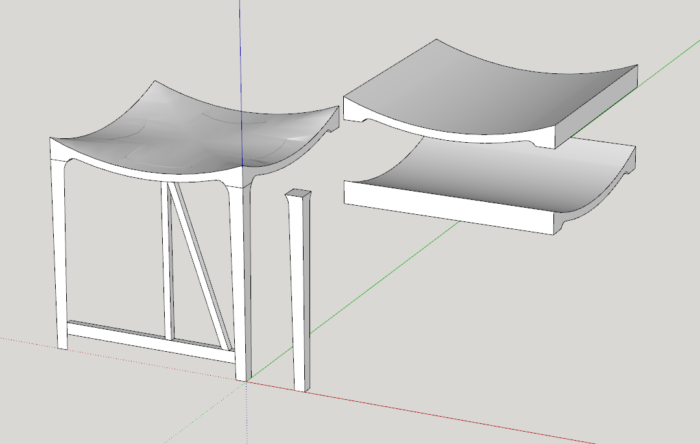
Step 4: In the upper right hand corner of the following image, I show a method to convert that overall Seat shape into its individual slats. The rectangles are cutting planes and with intersections, the slats are created. However at this stage the Slats are not separated by gaps for expansion/contraction. That will be done later by cutting off small slivers on each side (again using rectangular cutting planes).
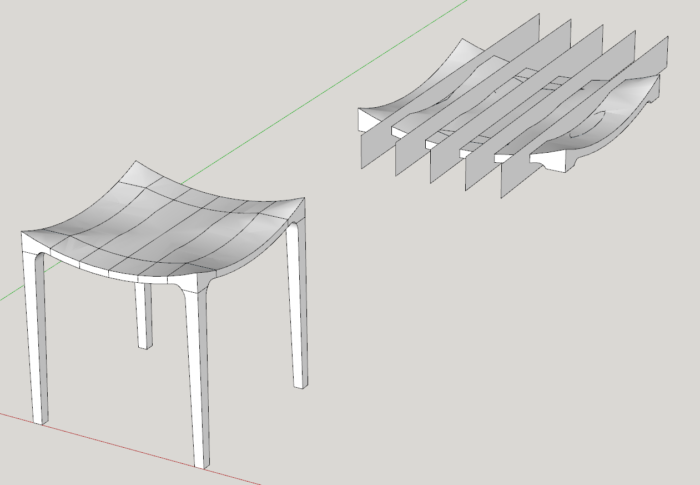
Stage 5: This step shows how I used cutting planes again for creating the Upper Apron components.
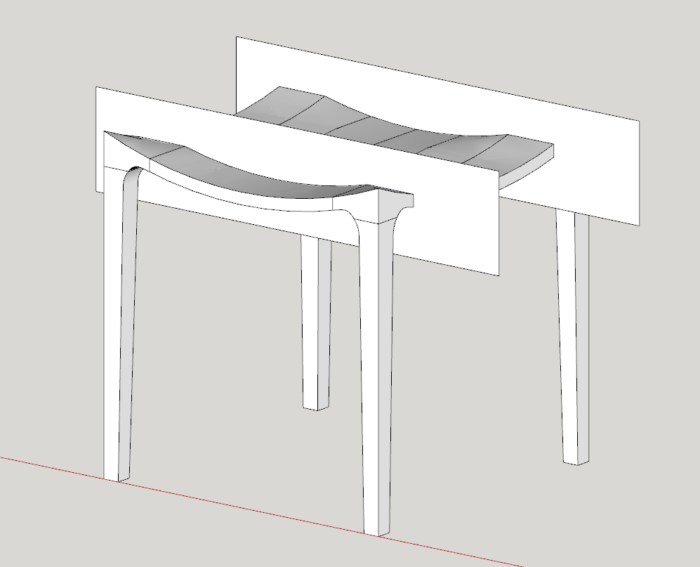
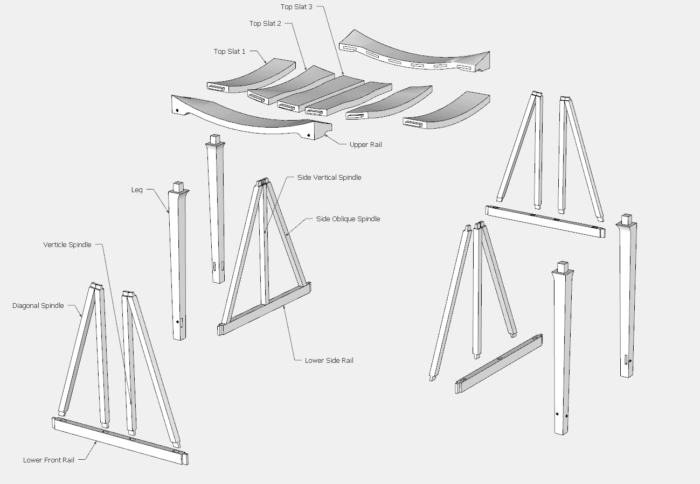
Step 6: I’ve shown here how the Seat is pieced together. Although there are 8 pieces, there are only 4 Components in SketchUp.
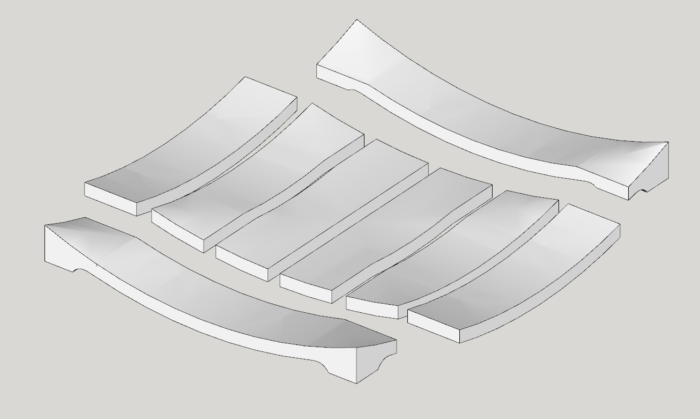
Step 7: I now have all the components in place in the overall structure, and ready to resize to actual dimensions. As I review my photo at the museum, I’ve estimated the height at 18 inches, and this is about a normal dimension for chairs. I use the Tape Measure and click on the vertical leg dimension. It shows about 79 inches, and I type 18. SketchUp shows me a message – “Do you want to re-size the model”. And I answer Yes. Now the model and all the parts are at the desired dimensions.
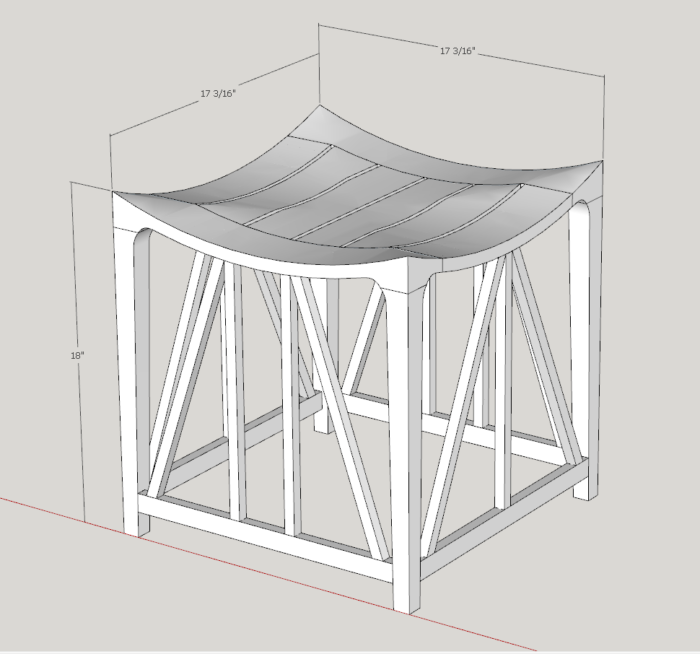
Step 8: At this stage, I work individually on each component to add joinery. So that means including mortise and tenon joints on Stretchers, Seat Slats, and Legs. This is probably the most time consuming step. I don’t know how the original stool was joined and assembled, but assume my choices are possible.
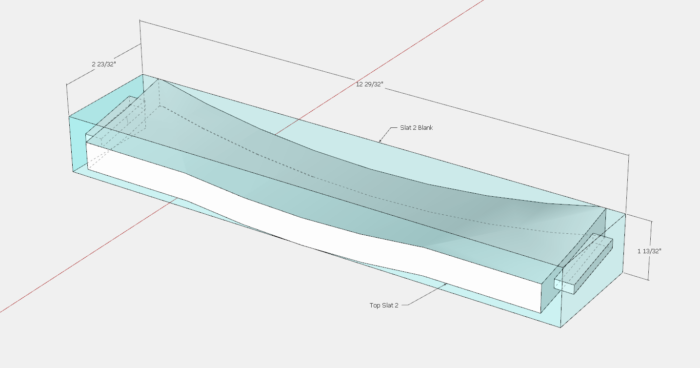
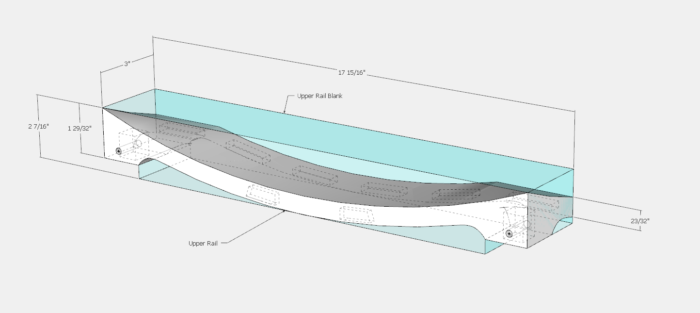
Step 9: The most difficult part of the construction will be the Seat. The complex shapes make it difficult to have accurate mortise and tenon joints in those Slats. So I’m planning for the joinery to be made while the Slats are rectangular in shape. In SketchUp I’ve shown the full size of rectangular planks required to make the slats. The following images show a couple slat rectangular planks in a translucent color over the final shaped version.

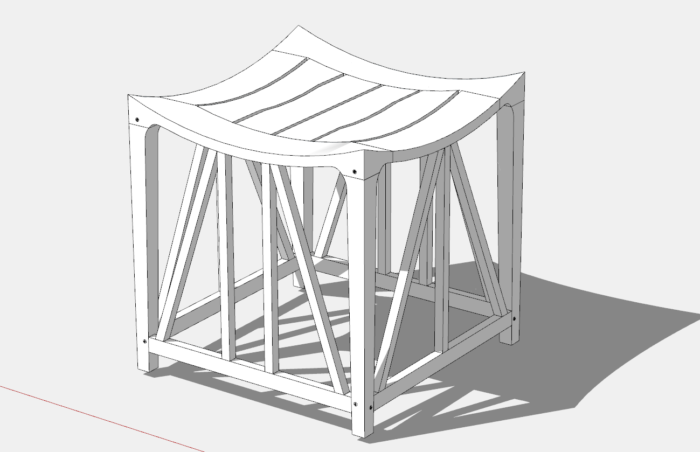
Here is the final SketchUp model.
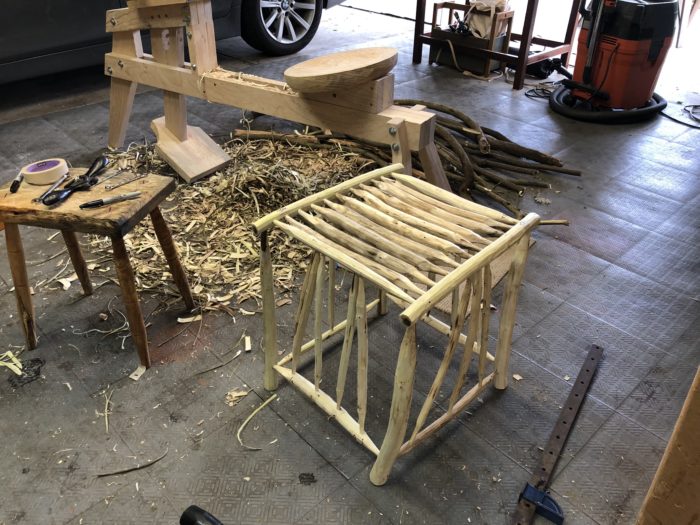
I recently built a Shaving Horse and made a rough representation of the Stool in green wood (fresh-cut Scotch Broom). Here is a picture of that Stool. Nevertheless, I intend to make a much closer reproduction of this ancient piece in normal lumber.
Tim
Killenwood.com


Comments
Nicely done!!!
One comment I have would be that the original seating surface shape is that of a pure toroid or torus shape. This shape is derived from two different radii 90 degrees apart. Your model has a different treatment at the corners.
Still, a wonderful job and the original piece is fascinating.
DDB
DDB, you are right and I will be following up with a revised design that more reliably represents the shaping in the original.
Hello Tim,
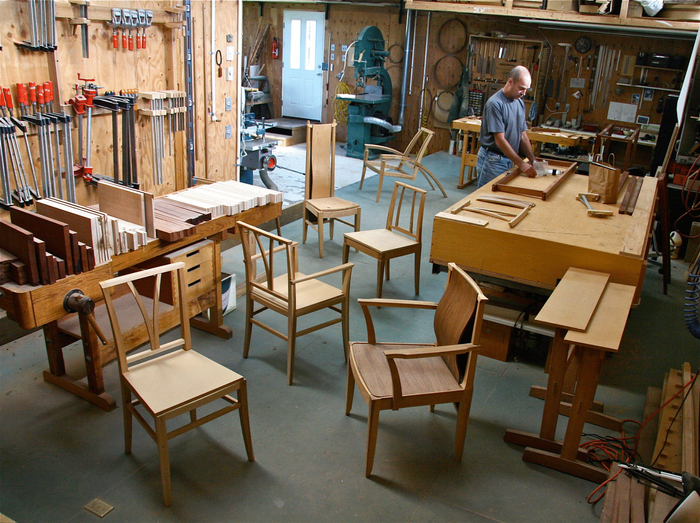
My father has been making those stools, and many other designs, since the 60's. Much before sketchUp! He would take measurements from photos of the original stool still in the tomb. I had a carpenter make some more after my dad passed away, but I wasn't very happy with the outcome. Will try with another carpenter. I attach a few photos.
HIramAbi, wow that is very interesting. I'm assuming the left photo was of stools made by your father, and the right photo, by a hired carpenter.
Tim
Hi Tim,
My father was an interior architect and furniture designer and worked with a very gifted carpenter.
The top red one and the 2 brown ones are his work, and 10 multicolored ones are what I had produced.
I’ll try and get some more made.
I think your work above will be helpful!
Hiram Naman
Log in or create an account to post a comment.
Sign up Log in