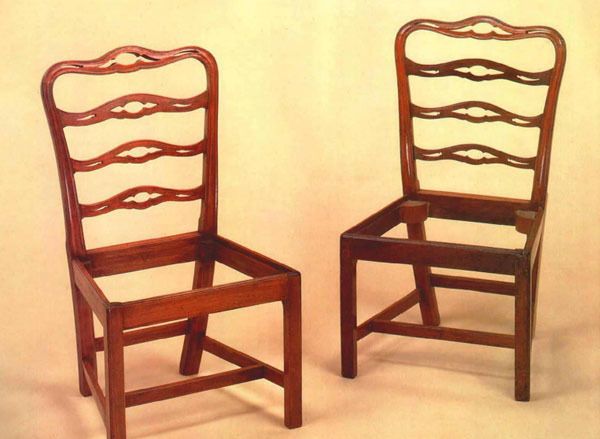
Making the Chippendale Chair
Breaking down this complex chair into small steps makes this build easier.

Synopsis: Eugene E. Landon says all the variations of Chippendale chairs hang on a common framework. Landon explains in this article how to build a chair, tackling challenges like angled mortises and tenons, curves, and fitting shoulder joints. You’ll need some handtools, and the back-post templates shown in the article. Determine the angles you’re dealing with and then start with the back posts, he advises. He explains how to shape the tenons with a chisel and lay out the mortises. He details the elements involved in measuring and scribing the angles in the back seat rail and crest rail. After instructions on assembly, he advises that you build these chairs in batches. Extensive drawings and photos illustrate the article.
Chippendale chairs come in a profusion of designs: ladderbacks, Gothic backs, pretzel backs, some with ball-andclaw feet, some with intricate carving and detailing. The list could go on and on. Yet there’s really only one Chippendale chair, because all the variations hang on a common framework. If you can master the chair in this article—it’s not really difficult—you should be able to see your way clear to building any of the others. This particular design can be found in The Philadelphia and Chair-Maker’s Book of Prices, second edition, 1795 (no copy of the first edition has yet been found).
The apparent problem in building a chair is that the seat is trapezoidal and the back posts not only curve, they splay out from the floor upward. This means that most of the chair’s mortise-andtenon joints are not at 90°. To compound the situation, it would seem that all those curves must make it very difficult to cut and fit shoulder joints. Well, the problems look a lot worse than they are. In making this chair we will start with the back posts, then cut each subsequent part to fit in a logical order.
I should say at the outset that you will need some common handtools to build this chair. If you are mostly a machine woodworker, you may never have been taught the virtues of handtools. I remember visiting a woodworking shop at a nearby school. I could hardly believe it, but there wasn’t a marking gauge in sight, let alone a mortising gauge. I wouldn’t know how to work without gauges, yet they are forgotten tools. You see them for sale in junk shops, garage sales, anywhere there’s useless clutter. If you think about it for a moment, there must be millions of them out there. It makes you suspect that they might have been used for something, doesn’t it?
I could make this chair very easily without electricity, but I could not make it at all without a bevel gauge, my marking gauges, a few sharp chisels, a plane or two, some scrapers, and some rasps and files. If you shy away from such tools, you are not alone, yet trying to duplicate their functions with a machine can be frustrating. For this project at least, I think I can show you that handtools are the right way to go.
The key angle—In building this chair, you would start by scaling up the templates shown on the next page.
From Fine Woodworking #60
For the full article, download the PDF below:
Fine Woodworking Recommended Products

Estwing Dead-Blow Mallet

Stanley Powerlock 16-ft. tape measure


Log in or create an account to post a comment.
Sign up Log in