Windsor Rocker Without Special Tools: Part 2
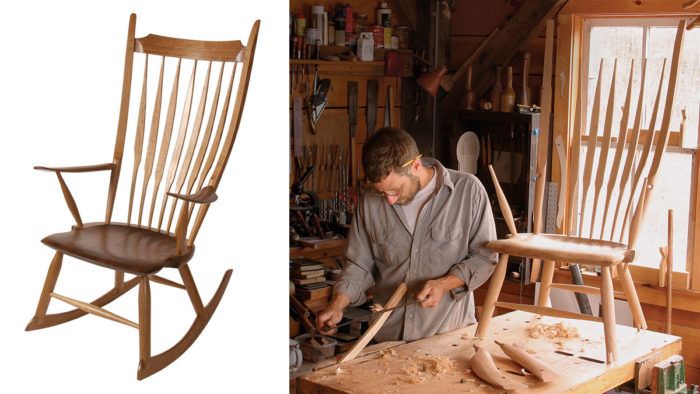
Complete the top half of the chair, including the arms and the back, then make and add the rockers.

Synopsis: In this second in a two-part series on making a Windsor rocking chair, most of the hard work is done. What remains is the fun stuff. In part one (FWW #218), we steam-bent the back posts, the spindles, and the crest rail. These parts remain rough-turned or shaped but the back post tenons have been finish-turned and fitted to the seat. Then we sculpted the seat, and drilled and reamed the tapered holes in it. We also turned the legs and stretchers, cut slots for the rockers, and then glued and wedged the legs into the seat. The only major parts still to be made are the two arms made from blanks with matching grain, and the rockers, which are cut from quartersawn stock.
You are halfway through the construction of this beautiful rocking chair, which combines Windsor chair joinery with contemporary design. After all the hard work shaping and steam-bending the parts, drilling and sculpting the seat, and completing the leg joinery, the squat, four-legged stool you have at this point in the project may not seem worth the effort. But most of the hard work is behind you, and what lies ahead is the fun part.
Join the arms to the seat and back posts

The two frames formed by the seat, arms, arm posts, and back posts form a very strong connection between the chair’s seat and back. Finish shaping the lower half of the back posts with a spokeshave, but leave the top portion until after you have chopped the mortises for the crest rail. Mark the location of the arm’s mortise on each back post.
Select dry stock with matching grain for the arms. Transfer the pattern to the top and inside of each rectangular arm blank. Extend the center line down both ends of the arm and scribe a horizontal line 5⁄8 in. from the top face all the way around the blank to create centers for turning. This is offset turning, so make sure that the piece doesn’t strike the tool rest. Turn the tenon until the line on the inside of the curve nearly vanishes.
Dry-fit the arm and back post
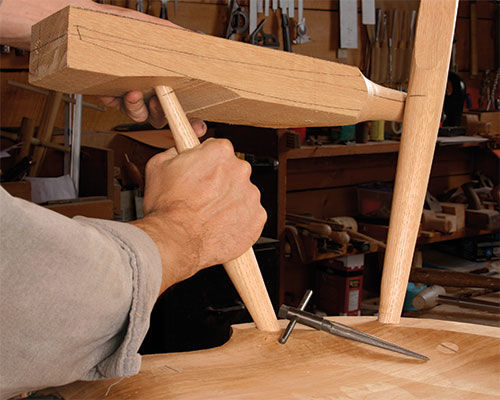
Cut a test block roughly matching the length and thickness of the arm and drill a 1⁄2-in.-dia. hole at 62° for the arm post. Ream the test block until the underside of the block is aligned with the baseline of the arm tenon on the arm post. The reamer used for the seat mortises may not fit this smaller hole, but a plumber’s 6° reamer used to de-burr pipes (available at hardware stores) works fine. Now see if the other end of the test block centers on the location of the mortise in the back post. If you’re close, you can tweak the angle when you drill the arm. If not, make another test block and try again.
Drill the mortise at 62° (or whatever angle worked on the test block), using the centerline as a sightline. Cut away a section of the underside of the arm down to the layout line on either side of the arm-post hole. This will enable you to ream the hole until the bottom of the arm just touches the arm post’s baseline. Ream both arms at the same time to ensure matching angles. Once both arms are seated, note the actual height of the mortises on the back posts.
For the full article, download the PDF below:
From Fine Woodworking #219
To learn how to ream Windsor chair mortises, check out this video.
Windsor Rocker Without Special Tools: Part 1.
Get the plan.
Fine Woodworking Recommended Products

Stanley Powerlock 16-ft. tape measure

Dubuque Clamp Works Bar Clamps - 4 pack

Dividers


Log in or create an account to post a comment.
Sign up Log in