All about Sealers
Understand the purpose of sealers, which ones to use, and when to use them.
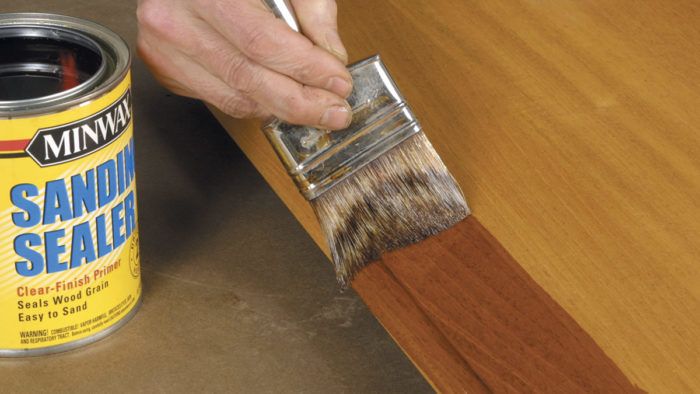
Sealers perform a number of tasks in finishing, including splotch control. However, one of the primary purposes of a sealer is to prepare the surface of the wood for subsequent coats of finish. In the process, it may also perform a variety of other functions, such as promoting adhesion, accelerating dry time, minimizing grain raising, and preventing contamination or migration from underlying substances.
In this section, I’ll discuss the various purposes for sealers and help you decide which ones to use and when.
Simplifying Sanding
The initial base coat of any finish is the one that penetrates into the wood. After it hardens, it normally leaves behind a slightly rough or irregular surface, caused by the finish encapsulating any raised grain. This hardened raised grain can now be effectively sanded flat, creating a smooth surface that promotes good “layout” when the next coat of finish is applied. (Because subsequent coats don’t penetrate the wood, they don’t require nearly the sanding effort that the first coat involves.)
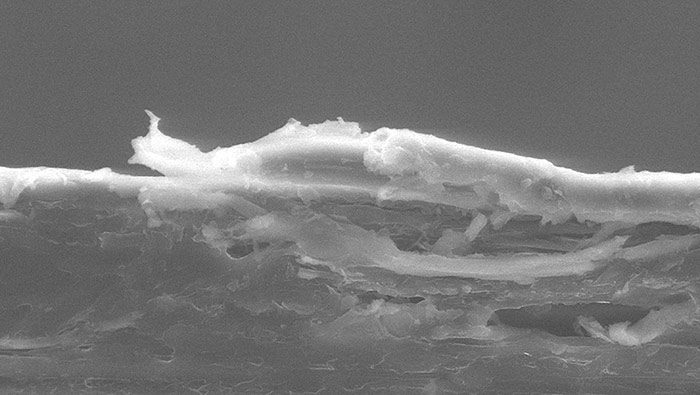
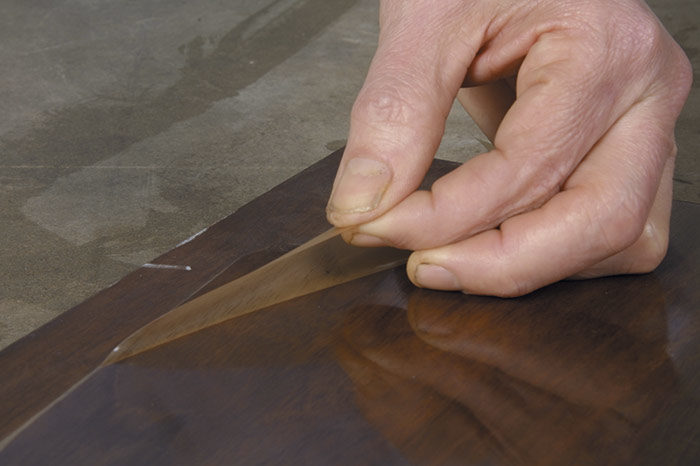
This finish separation shows the result of poor adhesion caused by applying a water-based finish over an oil-based glaze. Dewaxed shellac would have “tied” the two dissimilar materials together.
Sealing with FinishThere’s a common misconception that wood must be “primed” with a special sealer before you apply a finish. The truth is that the first coat of any finish will serve as a “sealer.” However, it’s important that this first coat can be sanded easily to provide a smooth surface for subsequent finish coats. Because some finishes don’t sand easily, they don’t serve as a great seal coat. This is why manufacturers have developed special sealers that expedite the sanding process. |
Many water-based finishes and oil-based polyurethanes sand out perfectly well, so you don’t need a special sealer for them. For the first coat, simply thin the finish itself for better penetration and quicker drying. However, most varnishes and lacquers tend to gum up when you sand them. In these cases, using the appropriate sanding sealer for the first coat will speed up the job. Your finish manufacturer or dealer can recommend a sealer compatible with your finish.
Preventing Adhesion Problems
Adhesion problems can arise from chemical incompatibility between a finish and resins in the wood or between different finishing products. For example, the chemicals in aromatic red cedar will soften lacquers and varnishes. In other cases, oil-based paste wood fillers and glazes used between coats of water-based finish may not adhere properly. Mechanical adhesion can also be a problem with modern, high-solids conversion finishes that aren’t thin enough to grab onto a well-sanded wood surface. In these cases, sealers are routinely used to promote adhesion.
Promoting Dry Time and Preventing Grain Raising
Fast-dry sealers can take the place of an initial coat of thinned polyurethane or varnish that would normally take a long time to dry hard enough for proper sanding. These fast-dry sealers allow for same-day application of the sealer and at least one top coat.
Grain raising can be a problem when using water-based finishes, which also don’t penetrate wood very well. To solve these problems, many manufacturers offer a neutral-pH sealer that minimizes grain raising and increases penetration.
Preventing Stain Migration and Contamination
Stain migration occurs when the stain and finish share a similar thinner. In these circumstances, a sealer can prevent the stain color from migrating into the finish coats. This typically happens when water-based finishes are applied over water-soluble dye stains.
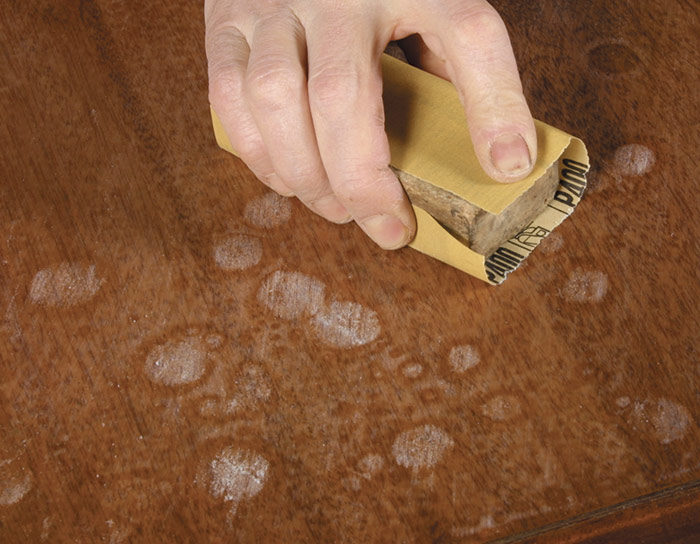
Contamination from wax, silicone, and spilled machine lubricant can result in “fisheye” on a finished surface. This is often encountered when you’re refinishing furniture. A barrier coat of sealer applied before the finish coats will usually prevent this.
Types of Sealers
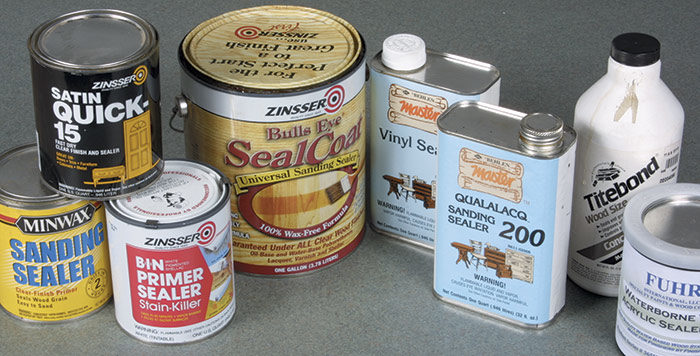
Various types of sealers are available to suit your particular chosen finish and sealing requirements. If you’re unsure of a sealer’s compatibility with your finish, check with the finish manufacturer.
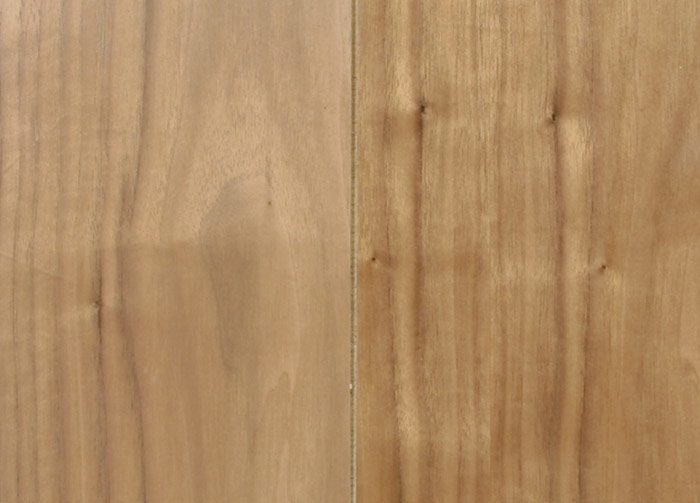
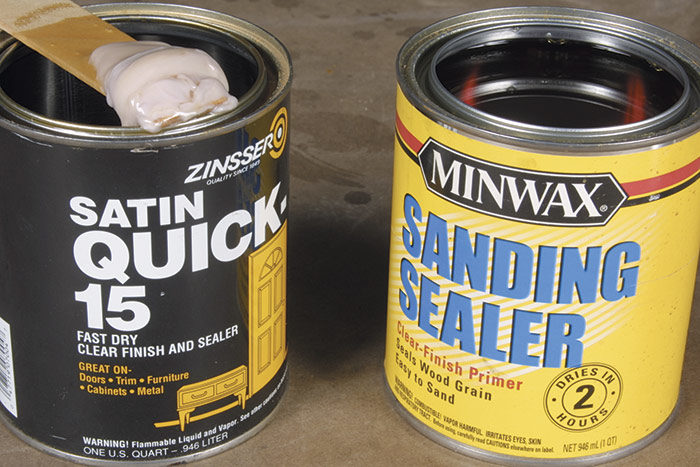
Though both are “fast-dry” varnish sealers, the one on the left includes zinc stearate (seen on the stick), making it unsuitable for use with polyurethane. The one at right has no zinc stearate and is suitable for polyurethane.
Sanding Sealer
A sanding sealer is simply a thinned version of a lacquer- or varnish-based finish that has been modified with zinc stearate or a resin (usually vinyl). These additives make the finish easier to sand and give it better “holdout,” which is the ability to make subsequent coats lay out smooth.
The downside of sanding sealers made with zinc stearate is that they decrease adhesion and are softer and less durable than the unmodified finish. Because of this, they should be used with discretion in situations where moisture resistance is an issue, as on kitchen and bath cabinets. And they should never be used to “build” a base. Ideally, they should be applied thinly, then sanded to leave only a thin layer behind.
Vinyl Sealer
Vinyl sealer is used in cases where finishes will react adversely to the zinc stearate in the sanding sealers discussed above. Polyurethane varnish, for example, will not bond to stearated sealer, nor will high-performance lacquers and varnishes.
Vinyl sealers provide excellent holdout and are very moisture-resistant. They also have excellent adhesion qualities to help “tie,” or adhere, different finishing products together. In fact, professionals routinely use vinyl sealers when using oil-based glazes or paste wood fillers with solvent-based lacquers and conversion varnishes. Vinyl sealers will also stop the natural oils in woods like teak and rosewood from preventing oil-based finishes from curing.
Vinyl sealers are available only in commercial, fast-drying spray formulations, although it is possible to apply them by brush or rag if you work quickly. Vinyl sealers should not be confused with the vinyl/alkyd-based varnishes sometimes sold as “one-step sealer/finishes.” Unfortunately, vinyl doesn’t sand well, so vinyl sealers usually include other resins like nitrocellulose to make them sand better.
Shellac
Shellac is a natural resin that is commonly available and easy to apply. Of all the sealers, shellac is perhaps the most universal in its ability to prevent finishing problems. For the best results, only dewaxed shellac should be used in conjunction with water-based finishes and polyurethanes.
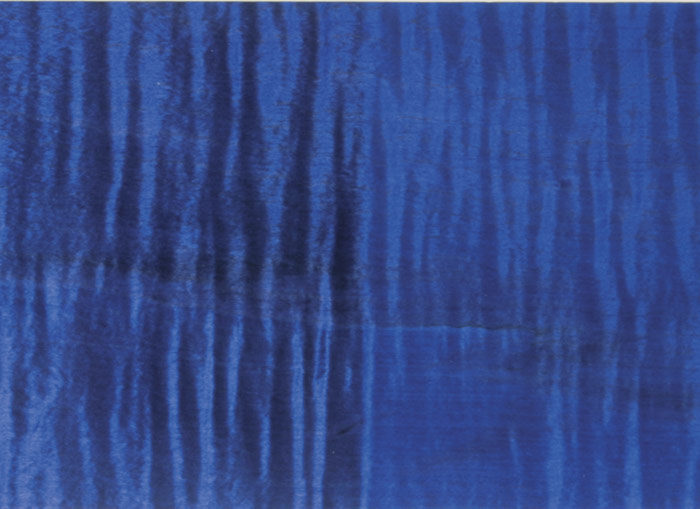
Shellac sands fairly well and provides good holdout for subsequent coats of finish. It prevents grain raising from water-based finishes and imbues their normally “cool” color with a warm, amber hue. And dewaxed shellac will keep water-based dye from migrating into a water-based finish coat.
As a barrier coat, shellac can perform wonders. It will block off the natural oils in rosewoods and the chemicals in aromatic red cedar, which can stop the curing of oil-based top coats. Applying a coat of shellac over oil-based pore fillers or glazes will prevent potential adhesion problems with water-based top coats.
Of course, shellac isn’t perfect. It’s a less durable finish than lacquer or varnish, and it is not very resistant to heat or alcohol. Because of this, it may not be appropriate in applications where durability and moisture resistance are important.
Glue Size
Glue size serves several purposes as a sealer. For one, it can be used to “lock down” wood grain—stiffening and strengthening the fibers to make them easier to sand. It can also be used to seal the extremely porous edges of medium density fiberboard (MDF). When you use oil-based finishes over rosewoods, glue size will block off the natural oils in the wood, allowing proper curing of the finish.
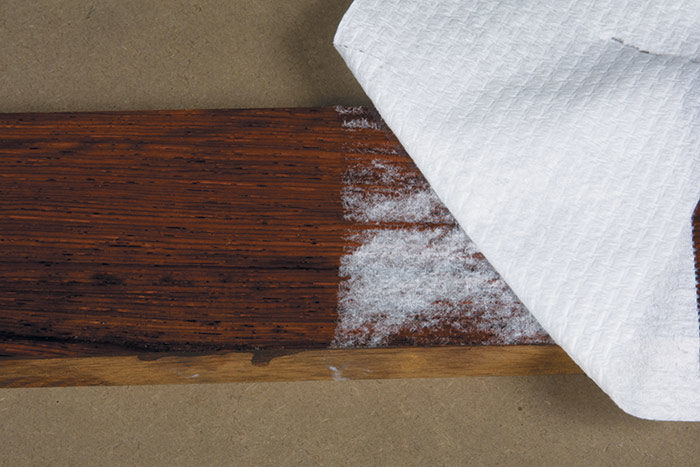
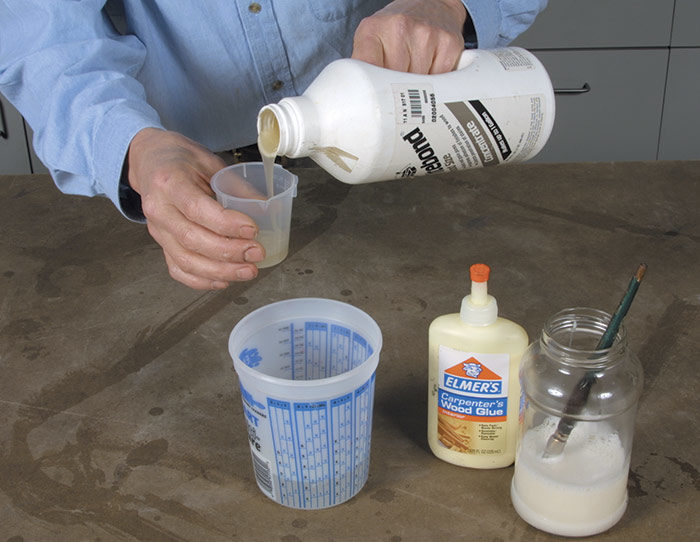
Glue size is available as a concentrate that you mix with water to make a sealer for porous woods and MDF. A homemade version can be made by mixing 1 part PVA glue with 10 parts water.In the past, finishers made their own glue size by thinning hide glue or polyvinyl acetate (PVA) glues with water. However, commercially prepared glue size is now sold based on a water-soluble resin called polyvinyl alcohol. My opinion is that it performs better than homemade versions. If you make your own size, try 10 parts water to 1 part PVA glue (the commonly available yellow or white wood glue).
Brushing Sealers
As the name implies, a “brushing sealer” is intended for hand application. This type of sanding sealer is a clear vinyl/alkyd and can be used with oil-based polyurethane or varnish. It should be used unthinned straight from the can. Using any kind of brush, apply the sealer to the wood with even strokes (A). Let the sealer dry thoroughly before sanding. It’s ready to dry when the sandpaper causes it to easily “powder up” like chalk.
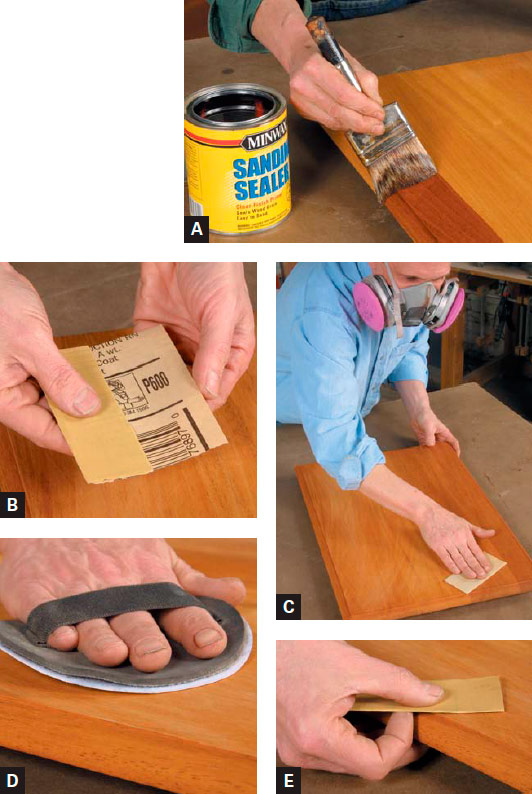
I sand flat parts using 600-grit stearated sandpaper folded into thirds (B). Using my hand as a backup pad, I scuff the surface lightly with the sandpaper, being careful not to round over any sharp edges. Wear a respirator as you would for any sanding application (C). A hook-and-loop hand-sanding pad can be used with round disks (D). To avoid cutting through edges, use your index finger to back up the pad of sandpaper and keep it level (E).
Spraying Sanding Sealer
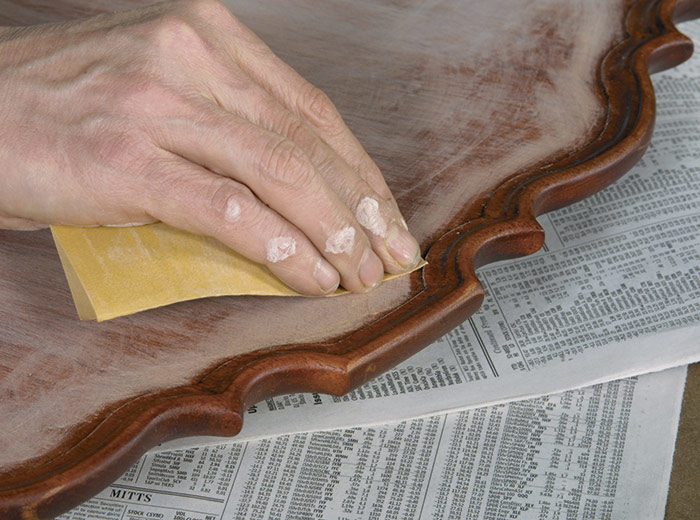
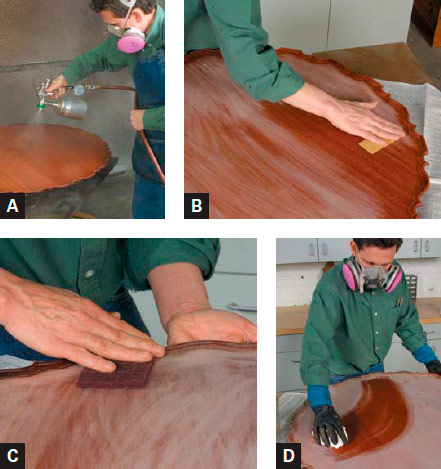
If using a sanding sealer that includes zinc stearate, make sure you stir it well before application. Spray it on (A), then let it dry at least one hour before sanding. To sand complicated forms like the piecrust tabletop shown here, I fold a quarter sheet of P-grade 600-grit sandpaper into thirds, and sand right up the raised molded edge (B). To sand the molded profile itself, I use synthetic steel wool instead of sandpaper (C). Wipe all the dust off completely, using naphtha or mineral spirits before applying more finish (D).
Scuff-Sanding Complex Surfaces
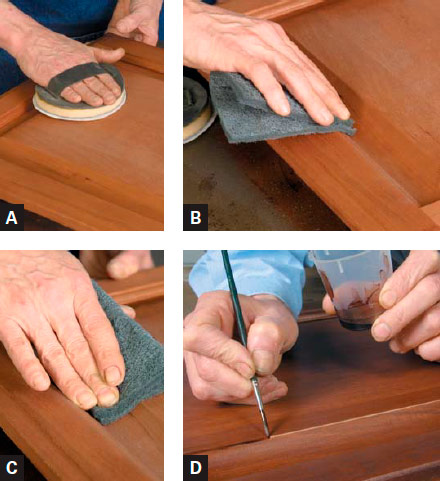
To sand a complex surface like this frame-and-panel door, I use a cushioned interface pad mounted between a round hand-sanding pad and the sandpaper disk (A). Use a piece of synthetic steel wool to smooth the molded edge (B) as well as the gentle cove of the raised panel (C).
If you happen to rub through the sealer and stain, touch up the affected area using your original stain. Alternatively, you can use shellac tinted with touchup powders (D).
Making and Using One-Pound-Cut Shellac
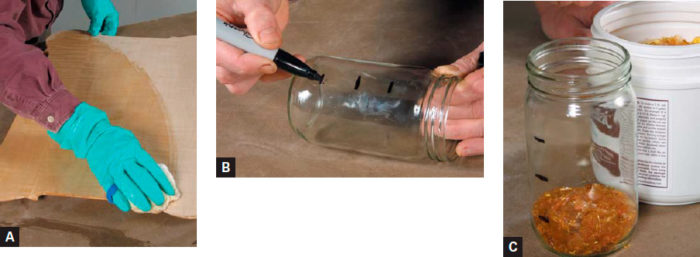
Because it serves as such a good general-purpose sealer, 1-lb.-cut shellac is very popular in my shop. It solves a lot of finishing problems and is easily wiped on with an absorbent cloth (A).
I go through so much of this stuff that I just mix it up quickly using the following method: Take any size clean glass jar and mark lines on it to divide into four equal parts (B). Fill up the first quarter with dewaxed shellac flakes (C). Then fill the rest of the jar with denatured alcohol and shake it every 10 minutes for about 2 hours.
 Fixing Fisheye
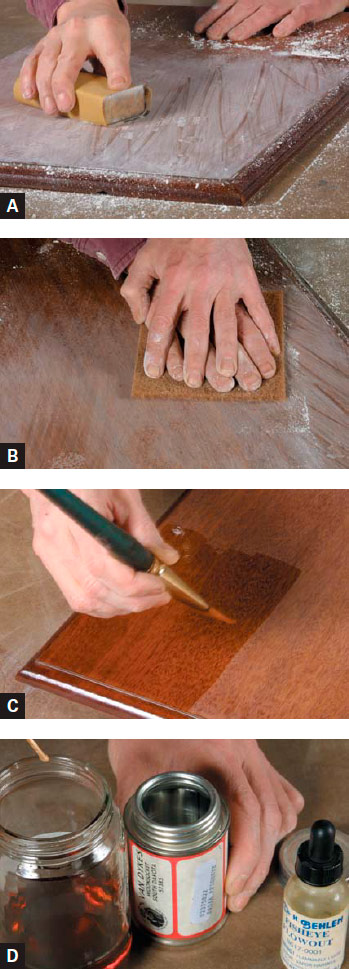
If fisheye turns up when you’re applying a finish, the best solution is to remove the finish before it sets up. This may work with slow-drying finishes like varnish or polyurethane, but other finishes may dry too fast for this approach, or you may risk removing an underlying stain in the process. And sometimes fisheye doesn’t show up until after the finish has hardened. In these cases, you’ll have to sand the fisheyes out after the finish has cured.
Using a piece of 400-grit sandpaper wrapped around a sanding block, sand the surface until the outlines of the fisheyes disappear (A). Be careful not to sand through the finish to the stain or bare wood. If this is a danger, switch to an ultrafine synthetic steel wool pad that has a bit more deflection and cushion to it (B). Afterward, remove the dust and selectively apply several coats of dewaxed shellac to the affected areas (C). In minor cases, this will seal in the contamination that is causing the fisheye. However, if the problem is extensive, you may be better off adding a fisheye additive to your finish. Only several drops per cup are needed. If you don’t have a small dropper, you can dispense drops off the end of a small wooden stir stick (D).
Fine Woodworking Recommended Products
Odie's Oil
Osmo Polyx-Oil
Foam Brushes




Log in or create an account to post a comment.
Sign up Log in